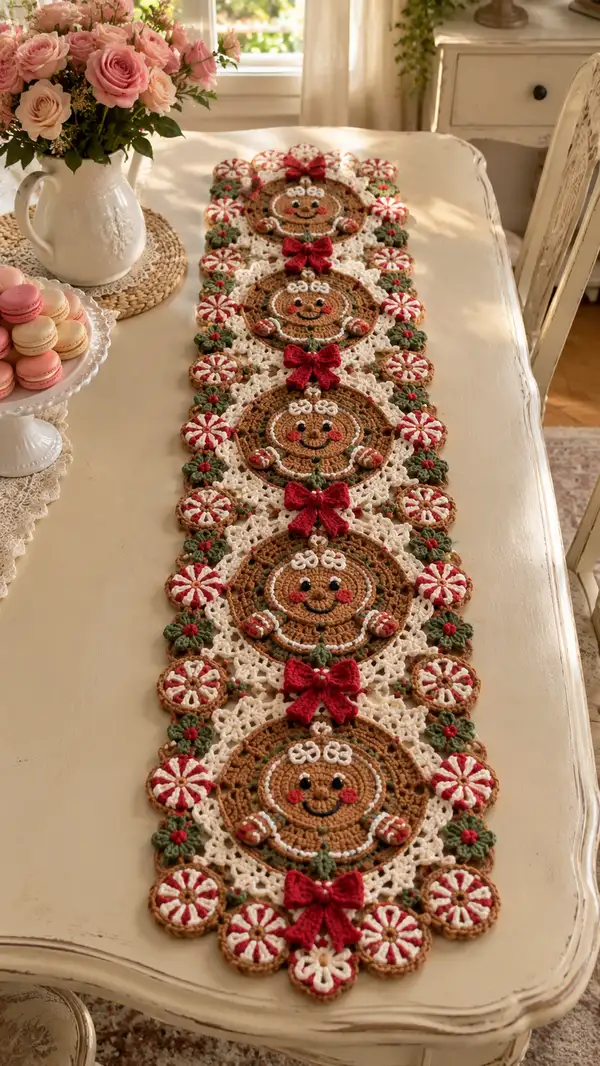
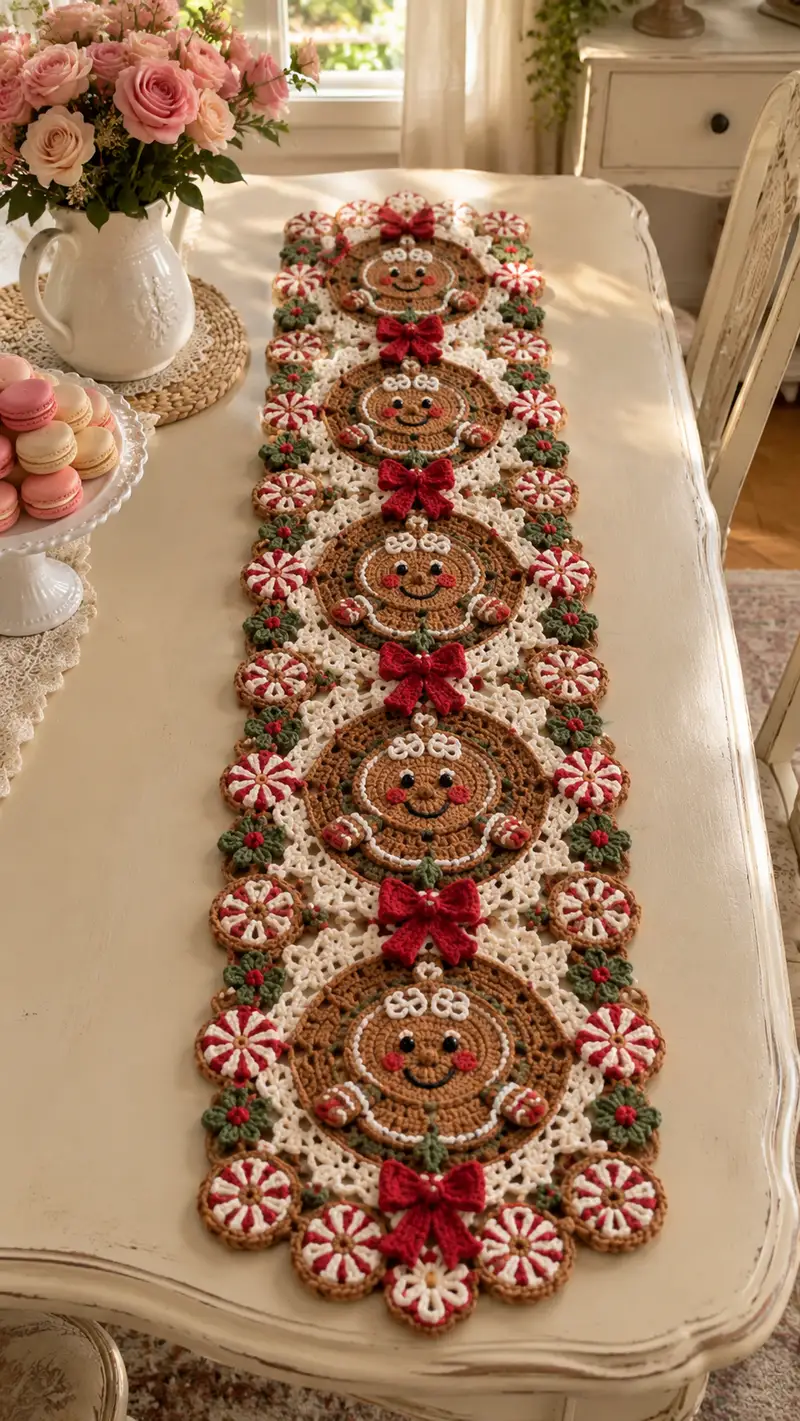
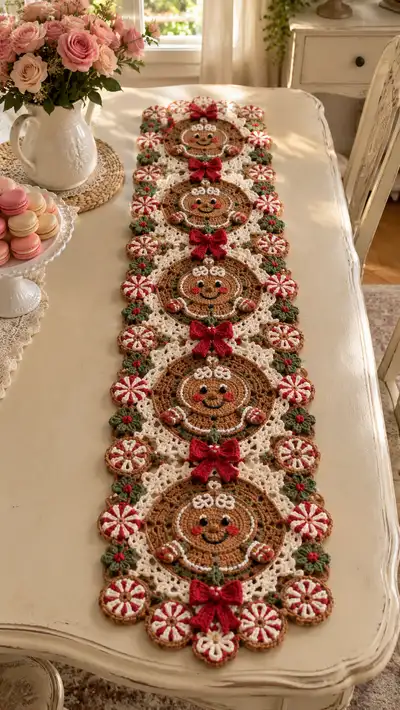
Create a festive, vintage-inspired table runner featuring charming gingerbread face medallions, peppermint discs, holly clusters, and bright red bows. This pattern combines motif crochet, delicate lace connectors, and layered appliques to produce a beautiful holiday centerpiece. Worked in worsted/aran weight yarn and joined with a 'join-as-you-go' approach, it is perfect for seasonal decor or a handmade gift. Clear, step-by-step rounds and assembly notes guide you through every color change and joining point.
Progress Tracker
0% Complete
— Gingerbread Medallion (make 4 identical) :
Info :
Each medallion is worked flat in rounds using brown yarn for the cookie base. We begin with a small circular center and build out with textured rounds to create a raised face area, then add icing, cheeks, eyes and little mitten appliques. Use a 3.5mm hook and keep tension even. No stuffing is required; these are flat motifs. Place stitch marker at round start and move each round.
Round 1 :
6 sc in magic ring (6)
Round 3 :
(1 sc, 1 inc) x 6 (18)
Round 4 :
(2 sc, 1 inc) x 6 (24)
Round 5 :
(3 sc, 1 inc) x 6 (30)
Round 6 :
(4 sc, 1 inc) x 6 (36)
Round 7 :
(5 sc, 1 inc) x 6 (42)
Round 8 :
(6 sc, 1 inc) x 6 (48)
Info :
Rounds 1-8 form a solid circular base. Keep stitches tight enough so the motifs lie flat when blocked. If your circle cups, block flat with pins and steam lightly.
Round 9 :
1 sc in each st (48)
Round 10 :
1 sc in each st BLO (48)
Round 11 :
(6 sc, 1 inc) x 6 (54)
Round 12 :
1 sc in each st (54)
Round 13 :
(7 sc, 1 inc) x 6 (60)
Round 14 :
1 sc in each st (60)
Info :
Round 9-14 add a subtle raised face area by working a row in BLO and then expanding. This creates a shallow ridge that reads like the face plane. Light blocking will help this flatten evenly.
Round 15 :
(8 sc, 1 inc) x 6 (66)
Round 16 :
1 sc in each st (66)
Round 17 :
(9 sc, 1 inc) x 6 (72)
Round 18 :
1 sc in each st (72)
Info :
At rounds 15-18 the medallion is approaching full size. If you prefer a slightly smaller medallion, stop increases at round 15 and continue even rounds; the counts in later rounds will adjust proportionally.
Round 19 :
Switch to cream yarn. *ch3 (counts as dc), skip next st, dc in next st, ch1, skip next st, dc in next st* repeat around to create an open decorative ring (72 dc clusters will align with pairs). Adjust final sl st to join. (72)
Info :
Change to cream yarn at the back loop of round 18 and carry brown or fasten off and weave in later. The cream ring will form the first icing ring; keep tension loose in lace rounds so the medallion lays flat.
Round 20 :
In cream: slip into ch-3 space, *(ch2, 3 dc) in same ch-sp, ch2, sl st into next ch-3 space* repeat around to form small shells. Join with sl st. (24 shells)
Round 21 :
Switch back to brown. 1 sc in each st and around shells to create a defined edge: *sc in next 3 dc, sc in ch-2 sp, sc in shell top* repeat (72)
Round 22 :
(8 sc, 1 dec) x 8 (64)
Round 23 :
(7 sc, 1 dec) x 8 (56)
Info :
Rounds 22-23 bring the medallion slightly inward creating a gentle border for appliques. These rounds are subtle decreases to make the icing sit nicely on the surface without too much flare.
Round 24 :
1 sc in each st (56)
Round 25 :
Switch to cream yarn. *(ch4, sl st at base forming a small picot loop), sl st into next 2 sts* repeat around to create delicate looped icing (56 loops)
Round 26 :
In cream: *sl st into loop, ch3, 3 dc in loop, ch3, sl st* repeat in every loop to form decorative scallops. Join. (56 scallops)
Round 27 :
Switch to brown. 1 sc around scallop bases to tidy the edge. (56)
Round 28 :
In brown: *sc in next 6 sts, picot (ch3, sl st in 3rd ch)* repeat around to create tiny icing dips. (56 picots)
Info :
Now is a good time to block this medallion flat. Pin firmly on a blocking board and spray lightly with water or steam; leave to dry. Blocking ensures medallions sit flat and join evenly.
Round 29 :
Add facial base: with brown, mark center visually then using surface slip stitch, outline a round nose area inside central 20 sts. This is worked as surface decoration rather than counted stitches.
Round 30 :
Using cream yarn, pipe icing eyebrows and top-swirls: work small 3-loop picot clusters by making (sl st, ch3, sl st) three times in selected stitches across top of face to create three white swirls. Secure ends. (decorative only)
Round 31 :
Embroider smile and cheeks: Use red yarn to stitch two small round cheeks (French knot or small sewn circles) at opposite sides of center. Use black yarn or attach 4mm bead eyes between rounds 12-13 (approx). Face embroidery is freeform to match photo placement. (decorative)
Round 32 :
Make two small mitten appliques (see separate applique section) and sew them onto the medallion edge at positions around rounds 22-24. Secure firmly. (applique)
Round 33 :
Make a small green leaf cluster at the lower center (see holly cluster section) and attach directly beneath the face center to read as a collar or holly accent. (attachment)
Round 34 :
Sew a red bow (see bow section) above the medallion at the top edge between the cream scallops. Sew center tightly and tack ends to lie flat. (decoration)
Round 35 :
Fasten off and weave in ends. Trim any visible tails. Repeat entire medallion sequence to make 4 matching medallions for the runner.
Info :
Make all medallions identical by counting rounds and placing appliques at the same relative stitch counts. Use pins to temporarily position eyes, bows and mittens before sewing.
— Body Lace Connector (join-as-you-go; make 3 strips to join 4 medallions) :
Info :
The lace connector sits between medallions and also forms the runner's background panel in cream. These are worked as rectangular lace rounds that attach to adjacent medallions using join-as-you-go. Work with cream yarn using 3.5mm hook and join into each medallion at designated sl st points.
Round 1 :
With cream yarn, ch6, join to first medallion outer loops at a chosen sl st point with sl st to form a bridge; ch1, sc back along ch to make a small chain-bridge (5 sc across). Fasten to medallion with sl st. (5)
Round 2 :
Work outward from join: ch3 (counts as dc), *ch2, skip pair, dc into next bridge sp* around to create airy lattice. Join with sl st. (approx 20 lattice dcs across full strip, adjust to medallion spacing)
Round 3 :
In the same round, work shells into lattice: *(3 dc, ch2, 3 dc) in each ch-2 space, sl st into next dc* repeat across connecting length. This forms a row of shells that will be a base for scalloped edges. (10 shells)
Round 4 :
Turn and work back across connecting strip with *ch5, sl st into space between shells* to create open lacy chains. Repeat across to the next medallion and join with sl st into corresponding outer loop of the next medallion. (linking)
Info :
When joining to the next medallion, align the join points so the cream scallops match medallion scallops. Use pins to hold medallions and the connecting strips in place before final sl st joins. The join-as-you-go method produces a neat edge without bulky sewing.
Round 5 :
Work 1 sc around every shell base on both sides to stabilize (approx 40 sc total across double width). Fasten off and weave in ends where necessary. Repeat for each gap between medallions until 3 connecting strips are joined and the four medallions are linked in a long row.
Round 6 :
Edge the entire connected runner in cream: Attach cream to an outer loop, *sc in next 4 sts, picot, sc in next 4 sts* repeat around outside edge of assembled row to unify motifs and create scalloped perimeter. (counts depend on final assembly perimeter; average 200 sc around)
Round 7 :
Work decorative open fans between the picots: *skip 2, 5 dc in next, skip 2, sl st* repeat to form airy fans along edge. Join last st to first with sl st. (approx 40 fans)
Info :
Keep track of how many stitches you create along each medallion edge so that the final outer border lines up symmetrically. If you have extra fans at ends, reduce by omitting one repeat in the center.
Round 8 :
In cream, work a final tidy round of sc around the very edge to even out any shell points and finish off edge (final sc count variable; maintain even tension).
Round 9 :
Optional: Add small decorative picots in brown along inner join lines to simulate cookie edge detailing: *sc in next 2 sts, picot* repeat. Fasten off and weave ends.
Info :
Blocking the entire assembled runner after joining gives the cleanest, flat look. Use generous pins and steam lightly; shape scallops to the same depth on both sides for symmetry.
— Peppermint Disc Motif (make 8-12 for border) :
Info :
Small round discs that alternate along the outer edge. Worked starting with a brown base ring then striped in white and red using raised slip stitch or post stitch for a candy swirl appearance. Each disc is about 1.25-1.75 in diameter depending on tension.
Round 1 :
6 sc in magic ring with brown (6)
Round 3 :
*(1 sc, 1 inc) x 6* (18)
Round 4 :
Change to white. 1 sc in each st (18)
Round 5 :
Using white, create slip-stitch radial stripes: with white, surface sl st from center to edge dividing the disc into 6 equal wedges; these will be foundation lines for red stripes. Work lightly so disc remains flat.
Round 6 :
Switch to red. In each wedge, work 2 sc along the radial sl st to create raised stripe, then sl st to next wedge start. Repeat around (12 red raised stripes). Fasten off and weave ends.
Round 7 :
Attach brown edging for contrast: sc around outer edge in brown to cover joins (18 sc). Fasten off.
Info :
Sew peppermint discs evenly spaced into the outer scalloped border between medallions. If you used join-as-you-go, add peppermint joins during outer border rounds by sl st into edge picots then sew disc. Pin placement before sewing.
— Holly Cluster (make 6-12) :
Round 1 :
With green yarn, ch4, sl st to form ring (or mr), ch1, 6 sc in ring (6)
Round 2 :
*ch5, sl st into next st* repeat 3 times to form 3 leaf loops positioned every other st. (3 leaves)
Round 3 :
In each ch-5 loop: *(sc, hdc, 3 dc, hdc, sc) into loop* to shape leaf. Repeat for all 3 leaves. Fasten off and weave ends. Attach with red bead center or a small French knot in red yarn. (decorative)
Info :
Holly clusters are small, flat and sewn to the lace connector at alternate points between peppermint discs. Use two clusters per medallion gap for the look in the photo. Add one tiny red bead or french knot as the berry center.
— Little Mitten Applique (make 8 – 2 per medallion) :
Round 1 :
With brown yarn, ch4, join to form ring, 6 sc in ring (6)
Round 2 :
(1 sc, inc) x 3 (9)
Round 3 :
Work an oval shape: sc in next 5 sts, 3 sc in next st, sc in remaining sts to round the thumb, finish with invisible decrease as needed to create mitten curve. (9)
Round 4 :
Edge with cream: sc around outer edge, add one cream picot at cuff (decorative). Fasten off leaving tail to sew. (9)
Info :
Sew mittens to medallion side positions, aligning with round counts 22-24. Mittens are flat and should be secured with small hidden stitches to the medallion surface.
— Red Bow (make 4) :
Info :
Bow is a small layered applique with a looped center and two tails. Use red yarn; work back-and-forth to create a rectangular fan then cinch the center to form a bow. Make four identical bows to match the photo spacing.
Round 1 :
Ch12, sc in 2nd ch from hook and across (11)
Round 2 :
Ch1, turn, hdc across (11)
Round 3 :
Repeat Round 2 two more rows (11)
Round 4 :
Fold rectangle in half narrow-wise and sew edges to make a loop; cinch center tightly with yarn and wrap several times to form bow knot, leaving ends long to sew tails. Trim tails at desired angle if desired. (finished bow)
Info :
Pin bow onto medallion top edge before sewing to ensure placement and orientation uniformity across all medallions. Tuck center wrap tail under bow for clean finish.
— Assembly (Join all motifs and add edge trim) :
Info :
Layout all medallions in a straight line with equal spacing between centers. Arrange peppermint discs and holly clusters alternating along both sides. Use blocking and pins to hold everything flat during final join-as-you-go rounds.
Step 1 :
Join medallions with lace connector strips using the join-as-you-go instructions in the Body Lace Connector section. Attach by sl st at predetermined outer picot points so the cream scallops nest evenly between medallions.
Step 2 :
Sew peppermint discs into picot spaces between scallops using matching cream thread; tack each disc in the center and around the back edge with small invisible stitches so the front looks smooth.
Step 3 :
Sew holly clusters in pairs adjacent to peppermint discs using green yarn; add red bead or small knots for berries and secure tightly. Place clusters symmetrically so visual balance is even on both sides.
Step 4 :
Attach red bows at the top center of each medallion with several back-and-forth stitches through the bow center and the medallion scallop base. Tie off at back and weave ends securely.
Step 5 :
Add final brown decorative edge along the runner outer perimeter making sure to cover any exposed join tails. Work small round of sc or crab stitch for a neat edge if desired.
Info :
After final assembly, lay the runner on a flat surface then gently steam-block. Use pins to set scallops evenly. Allow to dry fully before use. If you used beads for eyes or berries, consider securing with a small spot of fabric glue on the back for durability.
Final :
Weave in all ends securely. Trim stray fibers. Optionally gently starch the runner for a slightly stiffer table centerpiece that holds shape.
This festive runner is a joyful mix of motif work and careful assembly, resulting in a heirloom-style centerpiece that brightens any holiday table. Each smiling gingerbread face, tiny peppermint disc, and holly cluster adds personality and charm — every stitch tells a part of the story. I hope you enjoy making this as much as I enjoyed designing its little details — the bows are my favorite touch! 🎀🧶