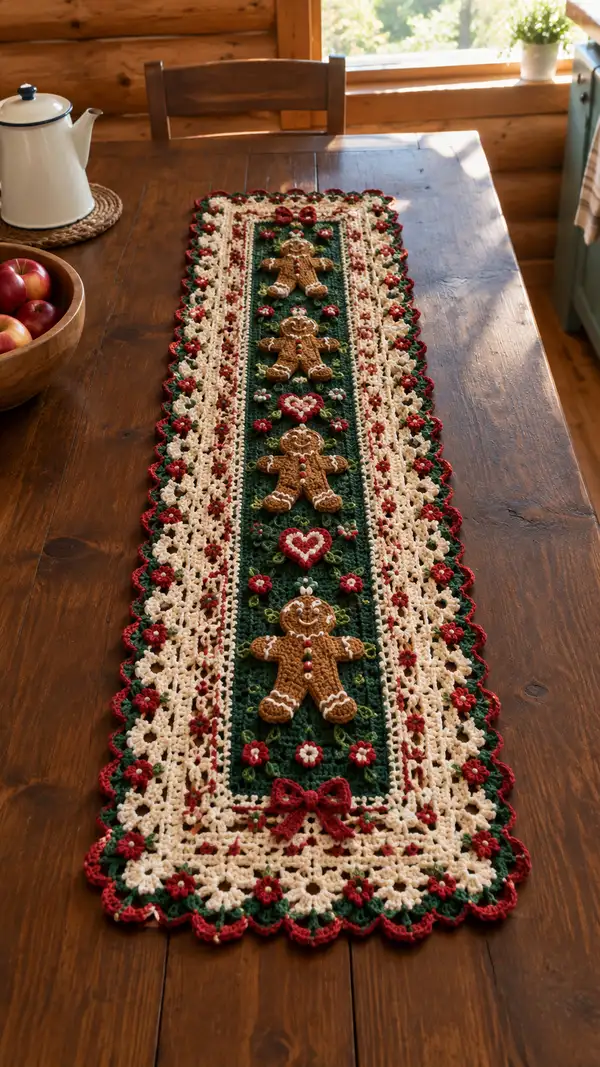
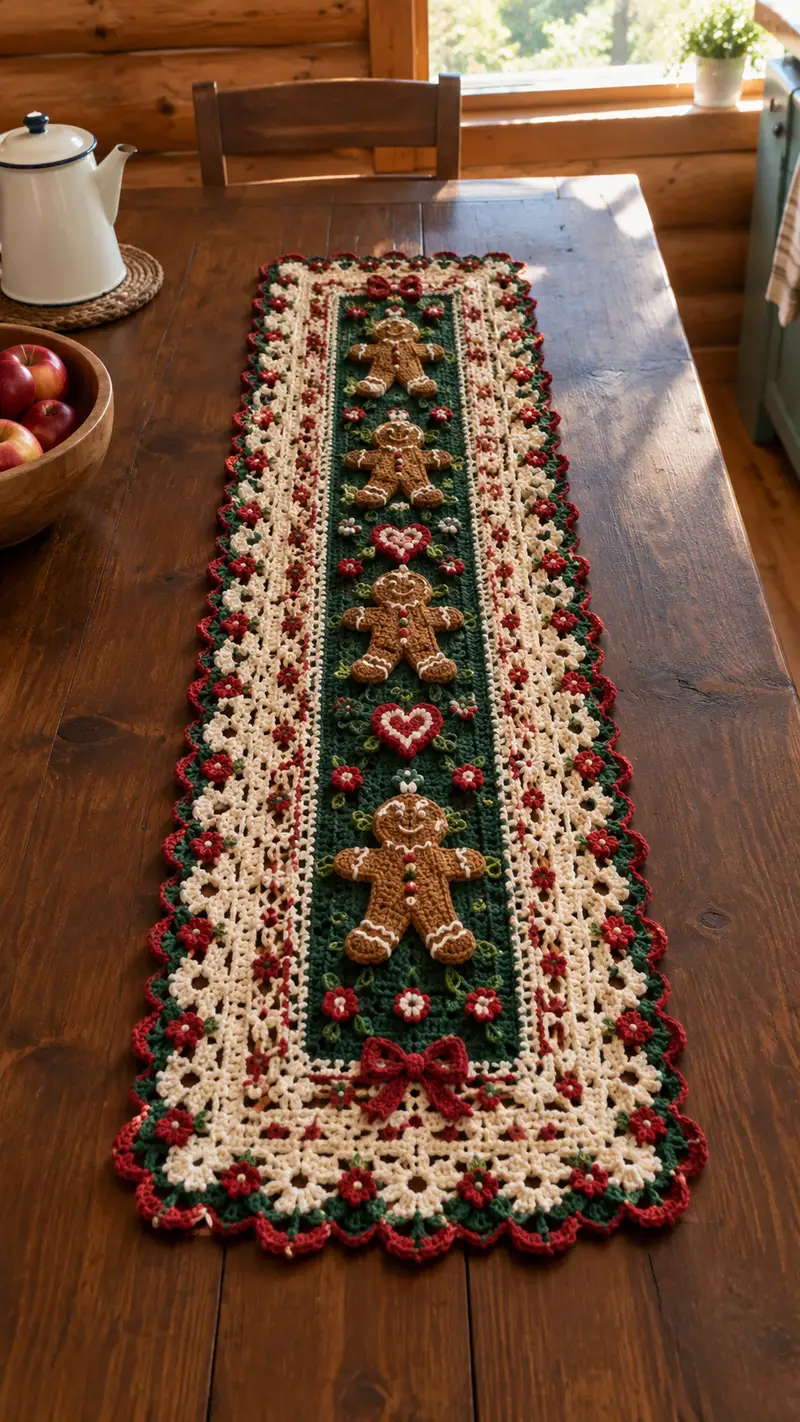
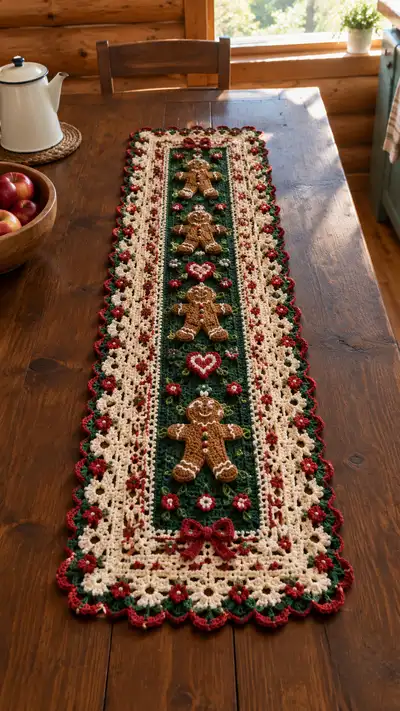
A festive rectangular table runner featuring three dimensional gingerbread appliques set on a deep green center panel with cream lace panels and a scalloped red edge. Warm browns, holly greens, and cranberry red combine with tiny hearts, bows and floral clusters for a charming holiday centerpiece. This pattern includes detailed motif instructions for gingerbread figures, hearts, flowers and layered border work to assemble into a long runner. Perfect for holiday tables, mantel displays, or as a seasonal gift.
Progress Tracker
0% Complete
— Center Panel (Base Strip) :
Round 1 :
With deep green yarn and 4.0mm hook, ch 84, join with sl st to first ch to work in rounds or work rows and join later. For this pattern we will work in joined rounds to keep edges neat (84 ch foundation).
Round 2 :
Ch 1 (does not count as st), 1 sc in each ch across (84). Join with sl st to first sc. (84)
Round 3 :
Ch 2 (counts as hdc), 1 hdc in next st and in each st around, join with sl st to top of ch-2. (84)
Round 4 :
Ch 1, 1 sc in each st around working in BLO to create a subtle ridge on the next round. Join. (84)
Info :
We will build a textured field for appliques using alternating clusters and post stitches; place stitch markers at 21, 42 and 63 to divide the panel into four equal sections for motif alignment.
Round 6 :
Ch 3 (counts as dc), *sk 1, (dc, ch 1, dc) in next st (v-st), sk 1, 1 dc in next 2 sts; rep from * to end. Join. (84 approx; patterning works across panel width)
Round 7 :
Ch 1, 1 sc in each dc and ch-1 sp around to stabilize v-sts; where ch-1 sp appears work 1 sc into sp. Join. (84)
Round 8 :
Ch 2, *2 hdc in next st, 1 hdc in next st; rep from * around to create a lightly padded base. Join. (84)
Info :
Mark centerline of panel with temporary removable marker. The three gingerbread appliques will be centered along this line at even intervals. The panel length is built by the number of rounds; you may lengthen by repeating rounds 6-8 until reaching desired runner length.
Round 10 :
Ch 1, 1 sc in each st around (84). Join. (84)
Round 11 :
Ch 3, 1 tr in next 2 sts, *ch 1, sk 1, 1 tr in next 3 sts; rep from * around to create a raised lattice; join. Adjust last repeat to end evenly. (84)
Round 12 :
Ch 1, 1 sc in each st and ch-sp around to tidy lattice. Join. (84)
Round 13 :
Ch 2, *(1 hdc, ch 1, 1 hdc) cluster in next ch-1 sp to create small pockets for tiny flowers, 1 hdc in each of next 2 sts; rep from * around. Join. (84)
Info :
Place a stitch marker on the row where you want the center of each gingerbread to sit: approximately rows 14, 22 and 30 from the start (adjust spacing if you lengthened the center). These marks will guide applique placement.
Round 15 :
Ch 1, 1 sc in each st around. Join. (84)
Round 16 :
Ch 3, *1 tr in next 2 sts, ch 1, sk 1; rep from * around to deepen texture. Join. (84)
Round 17 :
Ch 1, 1 sc in each st and ch-sp around. (84)
Round 18 :
Ch 2, 1 hdc in each st around working in FLO to create a subtle ridge toward the inside where appliques will be sewn. Join. (84)
Info :
If your runner length is set, begin placing small motif anchor stitches (tiny star or single sc clusters) where flowers and hearts will attach. Use contrasting light-colored yarn tail to mark positions temporarily.
Round 20 :
Ch 1, 1 sc in each st around. Join. (84)
Round 21 :
Ch 2, *(1 hdc, ch 2, 1 hdc) in next st (create small elongated v), 1 hdc in next 3 sts; rep from * around. Join. (84)
Round 22 :
Ch 1, 1 sc in each st and ch-sp to tidy. Join. (84)
Round 23 :
Ch 3, 1 dc in next 6 sts, *(ch 1, sk 1, 1 dc in next 3 sts), rep to end. Join and weave in any running threads from markers. (84)
Info :
Reinforce the center field with an additional round of sc (Round 25) before attaching appliques to provide a firm base. If you prefer a softer look, omit that reinforcement round.
Round 25 :
Ch 1, 1 sc in each st around. Join. (84)
Round 26 :
Ch 1, 1 sc in next 10 sts, *(sk 1, 3 dc cluster in next st, sk 1, 1 sc in next 10 sts) to create a subtle rhythm; rep across. Join. (84)
Round 27 :
Ch 1, 1 sc in each st around to even edge. Join. (84)
Info :
Block the center strip lightly now to flatten and align stitchwork before applique. Use steam blocking or wet block to measurements: width measured across should be approximately 15-18 cm (6-7in) depending on yarn and tension.
Round 29 :
Ch 1, 1 sc in each st around. Join. (84)
Round 30 :
Fasten off and weave in ends. Center panel is complete and ready for applique placement.
— Gingerbread Applique (Make 3) :
Round 1 :
With brown yarn and 3.5mm hook, mr, 6 sc in mr (6) — this creates a small circular head center for the gingerbread's head/face detail.
Round 2 :
Inc around (12). (6 inc) (12)
Round 3 :
(1 sc, inc) x 6 (18). Shape a slightly oval head by adding extra increases at the top two stitches of head if desired (optional adjustment described in Info).
Round 4 :
1 sc in each st around (18)
Info :
We will form a small head disc, then attach a slightly larger body worked from the same round-up technique to avoid a visible seam. Place a marker at the first stitch — the head top — to orient facial embroidery later.
Round 6 :
(2 sc, inc) x 6 (24) — continue to expand the head disc slightly for a flat but raised face. (24)
Round 7 :
1 sc in each st around (24)
Round 8 :
Change to brown and ch 1, 1 sc in next 8 sts to begin neck/shoulder shaping, leaving remaining sts to be used in join to body. (24)
Info :
To create a gingerbread body shape, we will crochet downwards in a flat spiral attached into a small oval body. We use short increases and decreases to create arms and legs. Use a scrap of polyfill to give slight puff to head and top of body only; do not overstuff.
Round 10 :
Work in rows for body: Ch 1, turn, 1 sc in next 6 sts (working across top half of round), ch 1, turn. (6) This begins flattening for torso.
Round 11 :
Row 2: 1 sc in each of 6 sts; ch 1, turn. (6)
Round 12 :
Row 3: 1 sc, inc, 2 sc, inc, 1 sc (8). This widens the torso slightly. (8)
Round 13 :
Row 4: 1 sc in each of 8 sts. (8)
Info :
Arms and legs are worked separately as small paddles then sewn to the torso. Work the arm and leg paddles flat and leave long tails for sewing. Tiny amounts of fiberfill pressed into the center of paddles create subtle dimension.
Round 15 :
Arm (make 2): With brown, mr, 6 sc in mr (6), (1 sc, inc) x 2, 2 sc (8) — flatten slightly to create a stub arm; fasten off leaving tail (8).
Round 16 :
Leg (make 2): With brown, mr, 8 sc in mr (8), ch 1, 1 sc in each st for 2 rows to elongate leg stub (8). Fasten off leaving tail for sewing.
Round 17 :
Return to torso: With body piece still attached, 1 sc in each of 8 sts across (8), fold slightly and sc across edge to close a small rounded bottom (use 4 sc across folding edge) — this forms the hip line. Leave opening for slight stuffing. (approx 12)
Round 18 :
Stuff head very lightly through the neck opening so the face remains slightly raised but flat. Use small amounts of fiberfill and a stuffing tool for precision. Close body opening with sc decreases: (1 sc, dec) x 3 — adjust to close evenly. Fasten off leaving sewing tail.
Info :
Embroider icing details using white yarn: small smiling mouth, two dots for eyes or use tiny seed beads. Add white zigzag on arms and legs by surface slip-stitching or chain embroidery. Add three small cranberry buttons sewn down the torso using red yarn.
Round 20 :
Using white yarn and yarn needle, embroider a smiling mouth: run a short curved backstitch across two stitches, secure ends on the back. Add two French knot-style tiny dots for eyes using bead or stitched knot. Secure all ends.
Round 21 :
Sew arms and legs to body: Position arms at the shoulder line (approx even with round 7 of torso) and legs at hip line; sew with mattress stitch or whip stitch from inside to avoid visible knots. Hide ends by weaving through several stitches.
Round 22 :
Optionally, with a tiny bit of white embroidery add zigzags at cuff and foot: 3 small V-shaped lines each secured with tiny backstitches. Trim all ends. Repeat to make total of 3 gingerbread appliques.
Info :
For slightly puffier gingerbread, add two thin layers of batting between back and front pieces before final sewing; this gives a soft 3D look without excessive bulk. Keep puffing minimal so appliques lay flat on the runner.
Round 24 :
Fasten off and weave tails. Set the three gingerbread appliques aside for placement on the center panel.
— Heart Motif (Make 3) :
Round 1 :
With cranberry red and 3.5mm hook, ch 5, sl st to form ring, ch 1, 10 sc in ring. (10)
Round 2 :
(1 sc, inc) x 5 (15) — shape into a heart base by leaving two small lobes near the top using extra scs in next round.
Round 3 :
Work shaping: ch 1, 1 sc in next 3 sts, 2 sc in next 2 sts, 1 sc in next 3 sts, 2 sc in next 2 sts, 1 sc in last 3 sts. (19) Form a pointed bottom by closing a few stitches with sl st at the tip.
Round 4 :
Turn heart and with cream color add a contrasting small heart on top: with cream, ch 4, 1 sc in 2nd ch from hook, 1 sc in next, sl st back into base creating tiny applique heart. Fasten off and sew onto red heart center. Make 3 hearts total.
Info :
Hearts will be centered between gingerbread figures, alternate orientation (point up and point down) to create visual rhythm. Use small running stitches to anchor to center panel.
Round 6 :
Optional: embroider a tiny white border around the heart with slip stitches worked through both layers for added definition.
— Small Flower Motif (Make 24) :
Round 1 :
With cream yarn and 3.5mm hook, mr, 6 sc in mr (6). (6)
Round 2 :
Inc around (12). (12)
Round 3 :
Change to cranberry, *(ch 2, 3 dc in same st, ch 2, sl st in next st) x 6 to create 6 small petals; fasten off leaving tail for sewing. Flower diameter approx 1.5 cm.
Info :
Sew a tiny olive green leaf (see leaf instruction below) next to about half of the flowers to create clusters; alternate clusters along center panel edges for a natural arrangement.
Round 5 :
Leaf (make many): With olive yarn, ch 6, sl st in 2nd ch from hook, sc, hdc, 2 dc, sl st to finish leaf. Make 24 leaves roughly matching flower count.
— Side Lace Panel (Make 2 identical panels) :
Round 1 :
With cream yarn and 4.0mm hook, ch 36, join to form a loop, ch 1, 1 sc in each ch (36). Join. (36)
Round 2 :
Ch 3, *sk 2, (3 dc, ch 1, 3 dc) in next st (shell), sk 2, 1 sc in next st; rep across to form open lace. Join. (36)
Round 3 :
Ch 1, 1 sc in each st and ch-sp across to tidy. Join. (36)
Round 4 :
Ch 4 (counts as tr+ch1), 1 tr in next sc, *ch 1, sk 1, 1 tr in next sc; rep to end; this creates a lightly open lattice for the border to weave into when joining to center. Join. (36)
Info :
Make two long side panels matching the center length. If your center panel was lengthened or shortened, adjust the starting ch count to match center panel height so panels align when seamed.
Round 6 :
Ch 1, 1 sc in each st around. Repeat Rounds 2-4 until panel height equals center panel height. Fasten off leaving long tail for seaming. Block panels flat.
— Assembly Prep :
Info :
Before sewing, block the center panel and both cream side panels lightly to final measurements. Pin center panel and side panels on a flat surface with right sides facing up. Measure equal spacing for appliques: center one at panel midpoint, others equally spaced above and below at approximately equal distances (example: for 30 rows, place at rows 8, 15, 22).
Round 2 :
Lay out small flowers and leaves around center motif area to preview placement. Use straight pins to temporarily hold positions; remove one at a time to sew so other pins do not distort edges.
Round 3 :
Sew the three gingerbread appliques in place: align center of back of applique with marked stitch on center panel and sew with mattress stitch through back loops only to keep front neat. Use long brown tail for sewing and weave in on back.
Round 4 :
Sew hearts centered between gingerbreads: secure with small whip stitches, then add tiny white embroidered dots to centers if desired. Sew small flowers around each applique in clusters of 3-5 using cream and cranberry flowers with olive leaves tucked under as accents.
Info :
When sewing motifs, go slowly and stitch through both the applique and the center panel base to ensure durability. For an invisible join, use small stitches placed close together and avoid bulky knots. Weave tails through several stitches at the back and secure with a dab of fabric glue for extra stability if the runner will be used frequently.
— Joining Side Panels to Center :
Round 1 :
With cream yarn and mattress stitch through adjacent edges, align side panel edge with center panel edge. Use a T-pinned alignment, then sew along entire length using matched tension. Keep stitches small and hidden to create neat seam. Repeat for other side.
Round 2 :
Once both side panels are attached, work a single round of sc around the entire runner using cream yarn to create a uniform edge: 1 sc in each st along sides and across ends; place 3 sc in each corner to ensure smooth turn. (Edge count will match runner perimeter; adjust stitch distribution to avoid puckering.)
Info :
If you see small gaps at seam joins, use a contrasting tiny bar of slipstitch in cranberry to dot across join for decorative coverage. Otherwise continue to border scallop step.
— Scalloped Outer Border and Bow Accents :
Round 1 :
With cranberry yarn, ch 1, *(5 dc in next st (scallop), skip 2, sl st in next st) repeat around entire perimeter to create scallops. Adjust number of dc in each scallop to fit edge uniformly. Join and fasten off. This creates a decorative cranberry scalloped edge.
Round 2 :
With green yarn, in every other scallop create a small picot leaf: sl st into scallop center, ch 3, sl st back in same st to form a tiny leaf. Alternate to form a scallop-leaf rhythm along edge. Fasten off and weave in ends.
Round 3 :
Bow (make 2): With cranberry, ch 12, sc in 2nd ch from hook and each across (11), ch 1, turn and repeat for 3 rows total; fold lengthwise and stitch middle tightly with matching yarn to form a bow. Sew bows to short ends of runner centered on scallop edge. Add tiny cream stitch center for bow knot.
Info :
Alternate finished bows and small flower clusters at ends for a balanced look. Press bows lightly with steam if needed to set shape; avoid over-steaming crocheted pieces that contain synthetic fibers.
Round 5 :
Optional bead/pearl centers: Sew a tiny pearl bead into each center of the cream flowers and the scallop tips for a subtle shimmer. Secure knot on back and hide with woven tails.
Round 6 :
Final blocking: lay runner flat and pin edges to true measurements. Use steam or wet-block method to set scallops and flatten motifs. Allow to dry completely before use. Trim any stray threads.
— Finishing Details and Tips :
Info :
If you plan to launder the runner, use a gentle hand-wash cycle and lay flat to dry. Remove beads prior to washing. Consider stitching a small fabric backing if you want added protection for tabletops.
Round 2 :
Secure all loose ends by weaving at least 6 cm through multiple stitches on the wrong side. Trim close to the fabric. Optionally apply a tiny dot of Fray Check to very small knots for extra security.
Round 3 :
Label your completed piece with yarn used and date if giving as a gift. Store flat in a drawer or rolled with acid-free tissue to prevent creasing. Avoid direct sunlight for long periods to preserve colors.
Round 4 :
Congratulations! Your runner is complete. Enjoy placing it on your table and swapping colors or motif spacing to make unique versions.
This festive table runner brings nostalgia and handcrafted charm to your holiday table. Every little gingerbread, heart and flower adds personality and warmth to family gatherings. The modular construction allows you to customize length, color and embellishments to match your decor. Enjoy the meditative process of stitching small motifs and assembling them into a beautiful centerpiece — and delight in the smiles it brings when placed on the table! 🧶🎄🍪