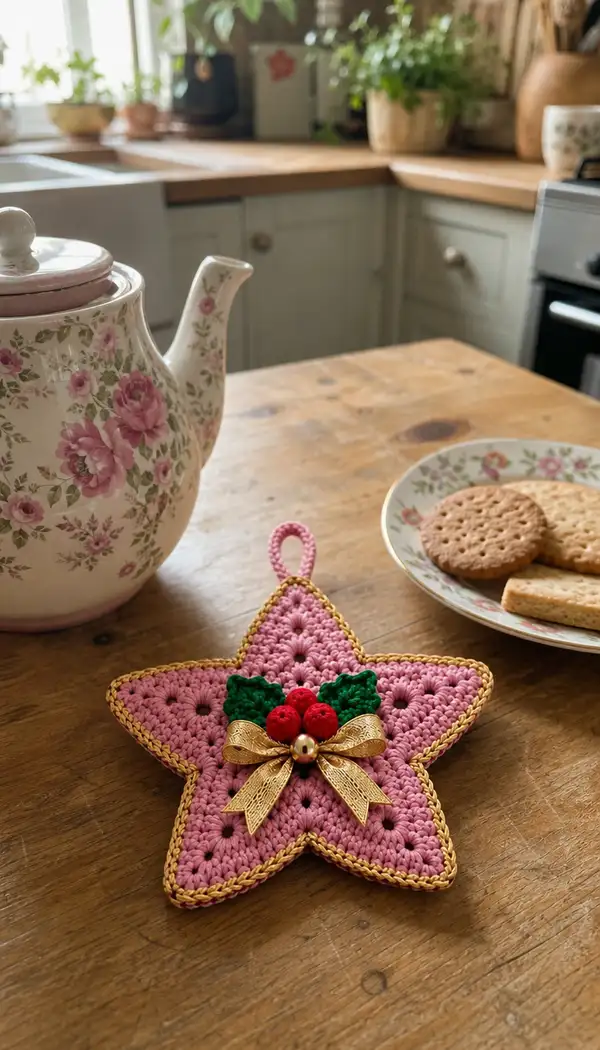
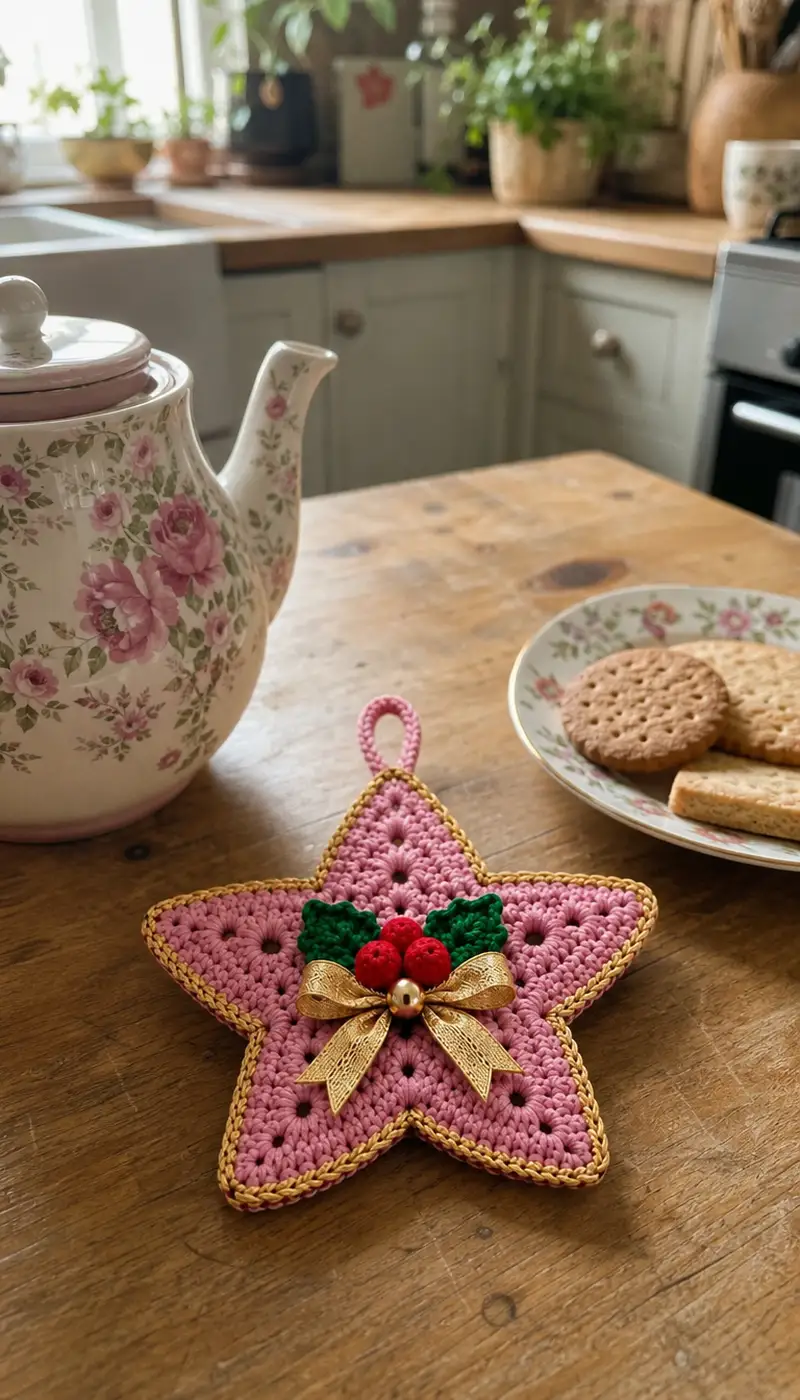
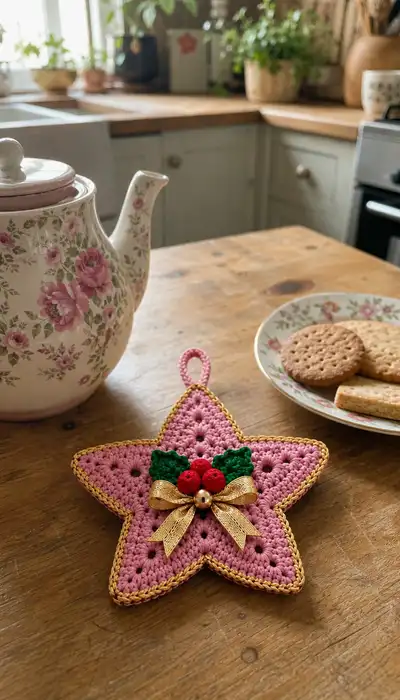
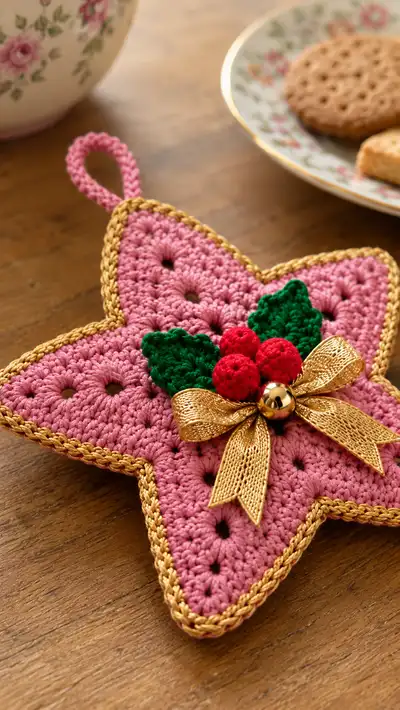
A charming pink star ornament with a metallic gold braided edging, three tiny red berries and two green holly leaves — perfect for hanging on a tree or tucking onto a gift. This lightly padded star is made from two identical crochet star panels, joined and stuffed for gentle puffiness. Finished with a sturdy crocheted loop and a decorative gold ribbon, it makes a beautiful seasonal accent or thoughtful handmade gift.
Progress Tracker
0% Complete
— Front Star Panel :
Round 1 :
6 dc in magic ring (6)
Round 2 :
Inc in each st around (12) (work 2 dc in each stitch)
Round 3 :
(1 dc, inc) x 6 (18)
Round 4 :
(2 dc, inc) x 6 (24)
Info :
Change to a stitch marker to mark the start of each round. Use same color throughout front panel. Keep a consistent tension to keep the fabric flat.
Round 5 :
(3 dc, inc) x 6 (30)
Round 6 :
(4 dc, inc) x 6 (36)
Round 7 :
(5 dc, inc) x 6 (42)
Round 8 :
(6 dc, inc) x 6 (48)
Info :
Rounds 1-8 establish an even circular base divided into six increase points. From here we will reshape into a five-point star by creating larger grouped increases where points will form. Place five additional stitch markers roughly evenly to mark the five star sections; you will use these as reference when forming points.
Round 9 :
1 dc in each st around (48)
Round 10 :
1 dc in each st around (48)
Round 11 :
1 dc in each st around (48)
Round 12 :
1 dc in each st around (48)
Info :
At the end of Round 12, you have a stable circular disc. The five star points will be formed over the next series of rounds by creating five radial wedges. Use the additional five markers placed earlier to visualize where each point should grow outward. Each wedge will receive worked increases and chain-spaces to create the hollow decorative holes seen in the photo.
Round 13 :
Work *[in next 6 sts: (1 dc, ch2, skip next st) then 1 dc in next 2 sts]* repeat from * to * five times to form five wedge separators (50 sts including ch spaces counted as stitches for placement)
Round 14 :
*At each wedge: (2 dc, ch1, 2 dc) in ch2 space; then 1 dc in each of the 2 separating stitches* repeat around (60 dc plus 5 ch1 spaces)
Info :
The ch2 spaces will become the little open holes in each star arm visible in the finished piece. Keep these spaces neat by pulling tension even on the chain. Place markers at the center of each wedge to track point centers.
Round 15 :
At each wedge center work: (1 dc, ch3, 1 dc) in the ch1 space from last round to extend the hole; then 1 dc in each remaining dc between wedges (total approx 70 counts including chains)
Round 16 :
Work shell increases at wedge centers to begin points: *In ch3 space work (2 dc, ch2, 2 dc) as point base; then dc in each separating dc between wedges* repeat 5 times (approx 80 stitch-equivalents)
Round 17 :
*At each point tip work (3 dc, ch2, 3 dc) into the ch2 space to push the point outward; then dc in each separating dc between points* repeat 5 times (approx 100)
Info :
These larger shells drive the fabric outward to form the triangular points. If your star is curving or buckling, check tension and adjust by working one less dc in between point shells on the next round.
Round 18 :
1 dc in each st and ch-space around, treating ch-spaces as single positions (maintain overall shape, approx 100)
Round 19 :
At each point, add a final flare: (1 dc, 1 tr, ch1, 1 tr, 1 dc) into the center ch2 of each point; then continue 1 dc between points (approx 110)
Round 20 :
1 dc in each st around to firm the point shapes (approx 110)
Info :
If you prefer a flatter star, omit the tr stitches in Round 19 and instead do 3 dc across the point centers. The tr variant makes a taller point with the visible ridge and hole detail clearer.
Round 21 :
Work 1 sc in each dc and 1 sc in each chain-space around (use sc to begin tightening the fabric slightly) (approx 110)
Round 22 :
Work 1 sc in each st around (110)
Round 23 :
Work 1 sc BLO in each st around to create a subtle ridge that will nestle into the gold braid later (110)
Info :
Try the panel on a flat surface and check that each of the five points is roughly equal — if one point looks short, add one extra dc in the point center on the next round to balance them.
Round 24 :
1 sc in each st around (110)
Round 25 :
Slip stitch evenly around (110). Fasten off leaving a long tail for joining later.
Info :
Block or steam-press lightly on low setting if needed to flatten points — use a damp cloth barrier and avoid direct heat on cotton blended metallic yarns.
— Back Star Panel :
Round 1 :
6 dc in magic ring (6)
Round 2 :
Inc in each st around (12)
Round 3 :
(1 dc, inc) x 6 (18)
Round 4 :
(2 dc, inc) x 6 (24)
Round 5 :
(3 dc, inc) x 6 (30)
Round 6 :
(4 dc, inc) x 6 (36)
Round 7 :
(5 dc, inc) x 6 (42)
Info :
The back panel mirrors the front to make a neat sandwich. For a slightly firmer back, you can use a hook half a size smaller for the last three rounds to tighten the fabric.
Round 8 :
(6 dc, inc) x 6 (48)
Round 9 :
1 dc in each st around (48)
Round 10 :
1 dc in each st around (48)
Round 11 :
1 dc in each st around (48)
Round 12 :
1 dc in each st around (48)
Info :
To keep the back panel slightly less textured, avoid treble variations — keep rounds mainly dc and sc to create a smoother reverse surface.
Round 13 :
Replicate Rounds 13-16 from Front Panel to approximate wedge markings for symmetry (treat ch spaces as before) (approx 80-100)
Round 14 :
1 dc in each st around to stabilize (approx 100)
Round 15 :
1 sc in each st around (approx 100)
Round 16 :
Work 1 sc BLO around (approx 100)
Round 17 :
1 sc in each st around (100)
Round 18 :
Slip stitch around and fasten off leaving a long tail for joining (100)
Info :
Both panels should lay together with points aligned. Use pins to match exact stitch locations on each point before joining — five pins at the apexes and five at the inner valleys is a good starting arrangement.
— Joining Star Panels and Creating the Padded Edge :
Info :
We will join the two star panels together by a narrow joining round that creates a small tunnel which is lightly stuffed. Use the long tails left from both panels and the same color pink yarn to seam or use an additional strand if you prefer a stronger join.
Round 1 :
Hold front and back panels with right sides facing outward. Insert hook into first available pair of adjacent edge loops across both layers, pull up a loop with pink yarn and ch1 (this counts as join start). Work sc evenly around joining the two layers through both loops at once. Work approximately 1 sc in each 2 dc edge points around to produce about 55 sc around (55)
Round 2 :
1 sc in each sc around (55)
Info :
Before closing this round, leave a 6-8 cm gap for stuffing. Stuff lightly through this opening — the star should be puffy but not rigid. Add fiberfill in small increments and pat to distribute evenly into points.
Round 3 :
1 sc in each sc around, add a slight increase of 5 evenly spaced sc (work inc in five evenly spaced places) to allow the seam to bulge slightly and accommodate stuffing (60)
Round 4 :
1 sc in each sc around (60)
Round 5 :
Work 1 sc BLO around to create a flat inner ridge that helps the outer braid sit neatly (60)
Info :
Continue stuffing if needed and close the remaining gap by working the final scs and pulling yarn tight. Fasten off and weave in the tail securely.
— Hanging Loop :
Round 1 :
With pink yarn and 3.0mm hook, attach at top star apex seam. Ch 20 (or longer if you want a larger loop)
Round 2 :
Working back down the chain: sl st into 2nd ch from hook and each ch to end to create a corded loop (19 sl st)
Round 3 :
Fold loop to the back and insert hook through both base layers at the apex. Work 6 sc through both layers and loop to anchor (6)
Info :
Secure by weaving the tail through the inside of the seam and knot securely. Reinforce with a few extra stitches if the loop will carry weight.
Round 4 :
Fasten off and hide tails inside the star by threading through the edge seam and trimming close (no visible stitch count)
— Gold Braided Edge (Rounded Braid Effect) :
Info :
The metallic gold border in the photos looks like a narrow braided slip-stitch or front-post slip-stitch worked over several rounds to build a bold shiny ridge. Use a slightly thinner metallic yarn and a smaller hook to keep the braid neat and flat.
Round 1 :
Join gold yarn at any valley between two star points. Ch1, work 1 sc in each joining round st around the entire star seam (work approx 60 sc) (60)
Round 2 :
Switch to smaller hook if needed. Work 1 sl st BLO in each sc around to pull the gold slightly under and create a braided line (60)
Round 3 :
Work 1 sl st in each st around (60)
Info :
For extra depth, work two or three rounds of sl st and BLO as above until you have a thick braid that matches the pictured profile. Keep the tension firm so the metallic yarn sits as a crisp border.
Round 4 :
Work *1 sl st, 1 sl st BLO* across to continue braid texture (60)
Round 5 :
Work 1 sc around the outermost loops to finish edge and secure braid (60). Fasten off and weave ends neatly into the braid and under the seam.
— Holly Leaf (Make 2) :
Round 1 :
With green yarn, ch6. Into 2nd ch from hook: (sc, hdc, 2 dc, hdc, sc) across remaining chains. Turn to work along opposite side of foundation ch: sc into base of chain, hdc, 2 dc, hdc, sc into last chain; sl st to first sc to join (total count: 12 sts around leaf)
Round 2 :
Ch1, *sc in next 2 sts, hdc in next 2, dc2tog over next two dc, hdc in next 2, sc in next 2* — work across to the end and sl st to join (create a slight point at tip) (12)
Info :
Pin your leaf flat and use a light steam to shape the tip upward if desired. Use a yarn needle to add a ridge by stitching a line down the center to mimic the leaf midrib.
Round 3 :
Ch1, sl st into first st and work buttonhole picot edge: *sc, picot (ch3, sl st into first ch), sc, hdc, dc in next two sts* repeat until leaf tip then mirror back on opposite side and sl st to join. Fasten off leaving a tail for sewing (approx 14-16 sts counting picots)
Info :
You can vary leaf size by changing chain foundation length — the photo shows medium leaves roughly 3-4 cm long when made in worsted cotton. Make two for the cluster.
— Holly Berries (Make 3) :
Round 1 :
With red yarn, 6 sc in magic ring (6)
Round 2 :
Inc in each st around (12)
Round 3 :
1 sc in each st around (12)
Round 4 :
(1 sc, dec) x 4 (8)
Round 5 :
1 sc in each st around (8). Stuff lightly to round shape.
Round 6 :
4 dec (4). Fasten off leaving a long tail for sewing. Pull tail to close small opening and secure inside the berry. Make three berries.
Info :
Use small amounts of stuffing — berries should be firm and round but not so tightly stuffed that the stitches distort. You can sew two berries together and then attach the third for the cluster as pictured.
— Decorative Finishing Touches :
Round 1 :
Position two holly leaves centrally near the top third of the star (on the front panel). Pin them so the tips point slightly outward and downwards as in the photo.
Round 2 :
Sew leaves in place using green yarn and an invisible whip stitch along the base of each leaf; anchor with several passes through the seam to prevent rotation.
Round 3 :
Sew the three berries into a tight triangular cluster at the center front of the leaves. Sew through the bases of berries and into star fabric several times to secure them; hide tails inside the star.
Round 4 :
Add a small gold bead and fold a small wired ribbon into a bow. Anchor the bow with a few sturdy stitches of matching gold thread/yarn behind the bead and secure everything through the star center to the inside to make sure it will not detach easily.
Info :
All embellishments should be light and sewn through multiple layers to prevent them coming loose. If this is a child’s toy or expected to be handled a lot, consider using embroidered berries instead of small beads and ribbons.
— Optional Surface Embellishment & Quilting :
Round 1 :
To imitate the small centered holes visible on each arm, use a tapestry needle and matching yarn to stitch three tiny straight stitches radiating from each ch-space hole; this creates the subtle sunburst look in the photos.
Round 2 :
For a quilted look: with a contrasting color thread, use a running stitch from the center of the star out to each valley between points, passing through both layers and gathering very slightly to create a shallow dimple on each point. Tie off inside and secure.
Info :
This subtle quilting helps the star hold its shape and accentuates the five-point geometry without changing stitchwork.
— Extra Decorative Gold Cord (Optional) :
Round 1 :
If you want a stronger visual braid as in the image, create a thin cord by chaining 50 and sl st back along the chain to form a cord. Coil it along the gold border and sew through both the cord and the braid several times to anchor it neatly (no stitch count)
Info :
Work slowly when stitching on metallic cord — the metallic thread can snag. Use a large-eye needle and strong thread to avoid breakage.
This pink star ornament is a delightful seasonal accent — soft, tactile, and joyful to make. The combination of rosy pink panels with a metallic gold braid and a tiny holly cluster adds elegant detail and festive cheer. Whether hung on a tree, tied to a present, or displayed on a shelf, it invites compliments and cozy smiles. Enjoy making it and be proud of the little handmade sparkle you bring to someone's day! 🎀🧶