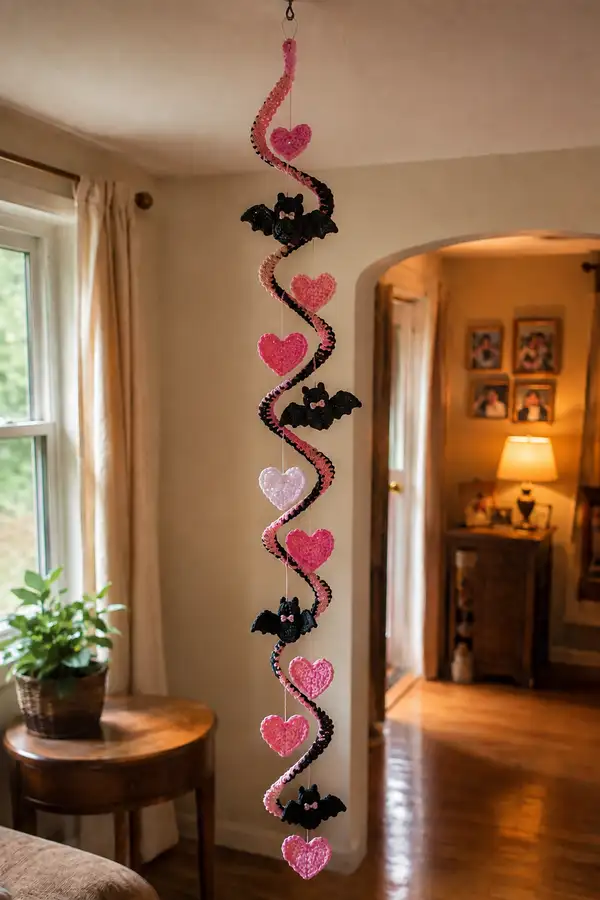
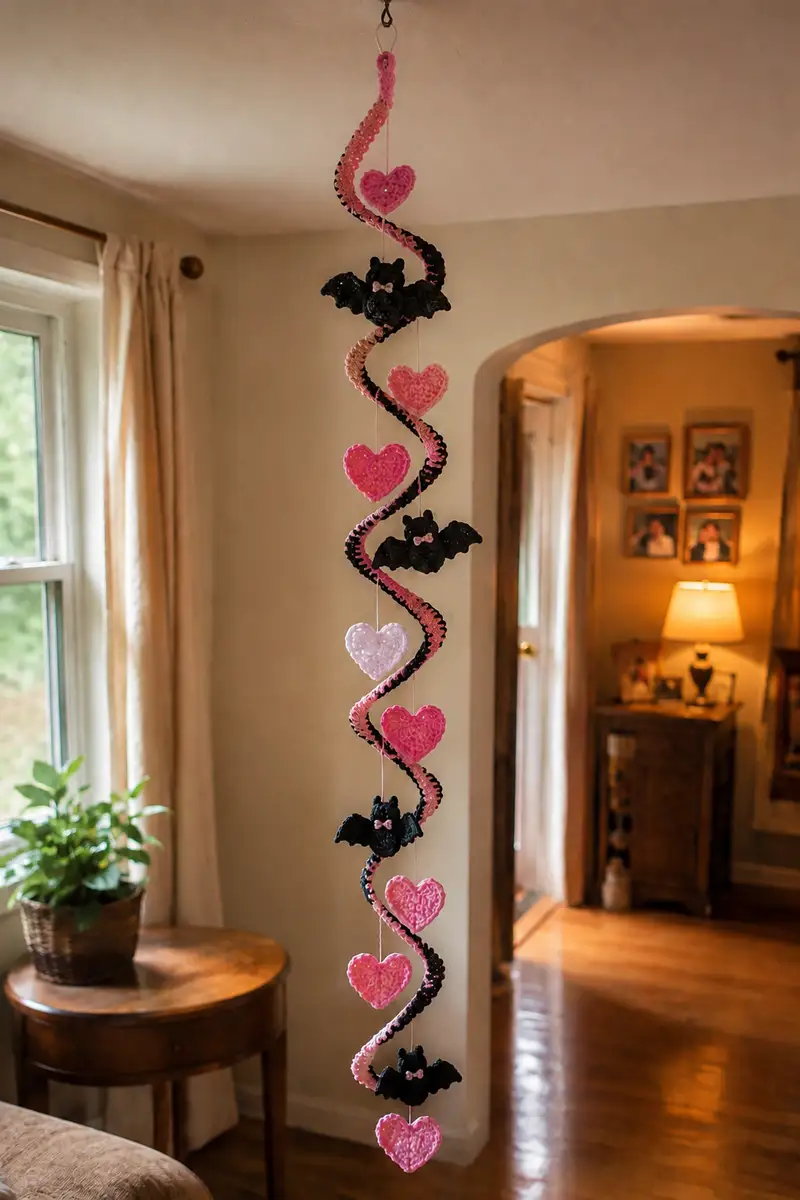
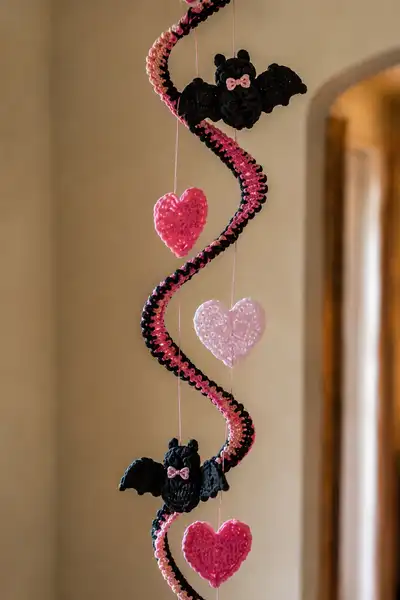
A sweet, slightly spooky hanging spiral garland that combines candy-pink hearts with tiny black baby bats for a playful girly-goth vibe. The design features a long spiraled tube in alternating pink and black, suspended hearts and stuffed bat motifs accented with tiny bows. This decorative mobile is perfect for a doorway, porch roof, or bedroom nook and makes a charming handmade gift or seasonal decor piece.
Progress Tracker
0% Complete
— Materials & Gauge :
Info :
Gauge is not critical for this decorative mobile but using a 3.5mm hook with worsted-weight yarn will yield tight stitches so stuffing does not show. One full spiral (as shown) is approximately 60-70cm long unstretched; you can lengthen or shorten by adding or removing even rounds from the spiral section.
— Spiral Tube (Make 1) :
Info :
This long spiral tube creates the central spine for the garland. We crochet a small round tube in continuous rounds, increase to the desired width, then work many even rounds. Alternate colors every 2-4 rounds to create candy-striped effect. The example uses black and hot pink alternation every 2 rounds with a light pink accent edge. Work continuously in spiral (no joining) and use a stitch marker to mark round start.
Round 1 :
6 sc in magic ring (6)
Round 3 :
(1 sc, 1 inc) x 6 (18)
Round 4 :
(2 sc, 1 inc) x 6 (24)
Round 5 :
(3 sc, 1 inc) x 6 (30)
Info :
At this point the tube is about 6-7mm across depending on yarn. If you want a narrower spiral, stop increasing at 24 sts. For a chunkier spiral continue one more increase round to 36 sts using (4 sc, inc) x 6.
Round 6 :
1 sc in each st (30)
Round 7 :
1 sc in each st (30)
Info :
Change to contrast color (hot pink) at the end of round 7 by dropping black and picking up pink in the last pull-through of the final sc. Carry unused yarn along the inside of tube if you don't want long tails; otherwise weave in later.
Round 8 :
1 sc in each st (30) - hot pink (30)
Round 9 :
1 sc in each st (30) - hot pink (30)
Round 10 :
Change back to black at the end of this round. 1 sc in each st (30) - black (30)
Round 11-60 :
1 sc in each st (30) - alternate black and hot pink every 2 rounds. Work rounds 11-60 to create a long tube (~50 rounds of length after increase stage). This gives a long flexible tube that will spiral naturally when hung. (30)
Info :
If you want a more pronounced candy-edge, on every 6th round switch to light pink and work 1 sc in each st BLO to create a ridge. Carry contrasting thread inside the tube or weave in tails at the end. For the sample spiral, alternate black (2 rounds) / hot pink (2 rounds) for a striped effect and add a thin light-pink ridge every 12 rounds.
Round 61 :
1 sc in each st (30) - finish in hot pink and prepare for shaping (30)
Info :
Fasten off leaving a long tail for sewing to hanging ring. If you plan to add internal wire for structure, slide a thin floral wire or pipe cleaner into the tube before closing the last few rounds; then continue with final rounds to enclose wire ends.
— Bats (Make 4 identical bats) :
Info :
Each bat is small and composed of a round body/head (worked as one oval), two wings (flat motifs), two tiny ears, and a tiny bow. Work in black for main bat and make bows in light pink. Use tight tension so stuffing stays inside and small safety eyes can be used if desired (8mm). You can alternatively embroider eyes for younger recipients.
— Bat Body & Head (worked as one egg-shape) :
Round 1 :
6 sc in magic ring (6)
Round 3 :
(1 sc, 1 inc) x 6 (18)
Round 4 :
(2 sc, 1 inc) x 6 (24)
Round 5 :
(3 sc, 1 inc) x 6 (30)
Info :
These increase rounds form the rounded head. Place safety eyes between rounds 7-8 about 6 stitches apart for the sample bat—this creates a cute, squat face. If using embroidering eyes, mark placement now.
Round 6 :
1 sc in each st (30)
Round 7 :
1 sc in each st (30)
Round 8 :
1 sc in each st (30)
Round 9 :
(3 sc, 1 dec) x 6 (24)
Round 10 :
(2 sc, 1 dec) x 6 (18)
Info :
Begin stuffing head/upper body now—stuff fairly firmly to give a plush rounded shape. Continue stuffing lightly as you close the lower body to keep a compact look for the bat.
Round 11 :
(1 sc, 1 dec) x 6 (12)
Round 12 :
6 dec (6) - finish off leaving long tail for sewing onto spiral or hanging string.
Info :
Fasten off leaving 20-30cm tail for sewing. Stuff more if needed through the opening before final closure. For a slightly elongated body, add 1-3 rounds of even sc (12-18 sts) prior to decreases; adjust counts accordingly.
— Bat Ears (Make 2 per bat) :
Round 1 :
4 sc in magic ring (4)
Round 2 :
1 sc in each st (4)
Round 3 :
(1 sc, inc) x 2 (6)
Round 4 :
1 sc in each st (6)
Info :
Shape ear by flattening and slip-stitching base edge if needed. Fasten off leaving tail for sewing. Attach ears to top of bat head, spaced evenly about 6-8 stitches apart depending on desired expression.
— Bat Wings (Make 2 per bat) :
Round 1 :
ch 6, sc in 2nd ch from hook and across to last ch, 3 sc in last ch, rotate and sc along opposite chain to first ch, sl st to join - makes a small oval base (10-12 sts depending on ch) (12)
Round 2 :
(1 sc, 1 inc) across to tip to create width; aim for 18 sts total (18)
Round 3 :
Work scalloped edge: *sk 1, 5 dc in next st, sk 1, sl st into next st* around to create wing scallops (counts will vary; keep even scallops across edge)
Round 4 :
1 sc around wing base to tidy edge and create a seam for sewing (approx 24 sc)
Info :
Flatten wings along center and sew a center seam (two or three neat whip stitches) to give a shallow V bend so wings curve slightly when attached. Fasten off leaving long tail for sewing to body sides.
— Bat Bow (Make 1 per bat) :
Round 1 :
ch 6, sl st to form a ring, work 6 sc into ring (6)
Round 2 :
1 sc in each st (6)
Info :
Finish bow by cinching center with a short piece of light-pink yarn and wrapping several times, then sew bow over cinch to secure and trim tail. Sew bow to center front of bat under the eyes or around neck area.
Assembly for Bat :
Sew ears to top of head between rounds 5-7, sew wings on each side of the body along round 8-10 so wings look attached at mid-body. Sew bow at center front between eyes. If using eyes, attach them between rounds 7-8 before stuffing fully. Weave ends securely and trim.
— Candy Hearts (Make 7 hearts total; colors: hot pink x4, light pink x2, blush x1) :
Info :
Hearts are padded slightly to give a candy-like plumpness. Each heart is made as two identical halves worked flat and sewn together with a small amount of stuffing inside. This method ensures identical, symmetrical hearts and a neat edge for hanging.
Heart Half - Round 1 :
6 sc in magic ring (6)
Round 3 :
(1 sc, 1 inc) x 6 (18)
Round 4 :
Work half-heart shaping: ch 1, turn, sc in next 9 sts (9) leaving remaining 9 sts unworked. This creates one lobe of the heart; fasten off. Make a matching half for the other lobe following the same steps, then sew lobes together with sc along the outer edge to form bottom point.
Alt Heart Method (Single Piece) - Round 4 :
If you prefer a single-piece flat heart, after Round 3 do shaping rounds: ch 1, sc 6, (3 sc in next st for top lobe), sc 6, (3 sc in next st) to form two top lobes, then continue around shaping point with decs to form heart point. This works as a single flat heart but requires careful stitch counting.
Round 5 :
Sew two halves together using sl st or sc, leaving a 2 cm gap for stuffing (counts will vary; maintain symmetry). Fill lightly with fiberfill then continue sewing closed. After closing, work a neat sc round around entire heart edge if desired for a finished look (approx 40 sc round if two halves sewn).
Info :
For the sample garland, each heart finishes at approx 6-7cm wide. Use slightly more stuffing for a candy-like plump heart, but not so much that seams bulge. Add a tiny loop of thread at the top center seam for hanging the heart on the vertical thread.
— Small Accent Heart (Single-piece quick version) :
Round 1 :
ch 4, sl st to first ch to form ring, ch 1, work 12 sc into ring (12)
Round 2 :
(1 sc, inc) x 6 (18)
Round 3 :
ch 1, sc 6, (3 dc, ch 2, 3 dc) into next st for heart upper lobe, sc 6, (3 dc, ch 2, 3 dc) into next st for second lobe, sc to close and sl st (approx 36)
Round 4 :
Work one neat sc round around heart edge to tidy and refine shape (approx 36)
Info :
Finish by weaving tail and adding a hanging loop at top. This quick version makes a flatter heart ideal for lighter, dangling placements.
— Hanging Threads and Placement :
Info :
Cut seven lengths of thin embroidery thread (or matching yarn tail) for hearts at equal spacing along the spiral. Sample spacing: place hearts at approximate tube rounds 10, 20, 30, 40, 50, 60, and 70 positions along the finished tube—adjust based on final spiral length. For bats, use slightly shorter hangers so bats tuck into spiral curves (sample attach at rounds 15, 35, 55, 75 along the tube). Balance left/right by alternating which side of tube each suspended piece hangs from to keep spiral visually appealing.
Info :
To attach hanging threads, use a small sewn loop at the top of each heart or bat. Secure loop through tube by inserting needle through tube and knotting on inside securely, or tie around tube and tack stitches to keep from sliding. You can also slip a small bead over the thread and knot above bead to lock placement.
— Finishing Touches & Decorative Edge :
Round 1 :
With light pink yarn, sc along outer edge of the spiral tube where you want a scalloped trim: insert hook under both loops at tube edge and sc evenly along length to create a decorative edge (work approx 1 sc per 2 rounds of tube, adjust spacing visually).
Round 2 :
Optional scallop: *ch 3, 3 dc in same st, skip 1 sc, sl st into next st* repeat along edge for scallops (counts vary by length)
Info :
If you plan to hang under a roof or on a porch, consider adding a small dab of clear fabric glue to the tops of knots for extra security. Alternatively, reinforce with a few extra whip stitches hidden inside tube to hold heavy ornaments in place.
— Decorative Variations and Color Notes :
Info :
Alternate heart colors for a tonal gradient. Add a few sequins or carry metallic thread along sc rounds on the hearts for a shimmery candy look. For a more gothic palette swap hot pink for deep magenta or purple. The spiral length can be shortened by removing even rounds in the Spiral Tube section (keeping striping rhythm intact).
— Full Parts Recap (Counts & Make Notes) :
Info :
Spiral tube: ~61 rounds total (increasing rounds 1-5 then even rounds 6-61) at 30 sts per round after increases. Makes one long central spiral. Bats: body/head 12 rounds (6 to close), wings 3-4 shaping rounds each, ears 4 rounds each; make 4 bats. Hearts: standard two-half method about 5 rounds per half plus seaming, or single-piece 3-4 rounds method; make 7 hearts. Bows and small accents: 2 rounds each; make 4 bows for bats. Hanging string placements: 11 hanging threads total (7 hearts + 4 bats). Adjust counts to suit personal aesthetic.
Info :
Remember to weave in ends as you go and to pin items in place on the spiral to preview final placement before sewing. Balance heavier items (stuffed bats) by positioning them in opposite curves of the spiral so the mobile hangs evenly.
This girly spiral garland is such a joy to finish — each candy heart and little bat adds personality and charm. The alternating stripes and tiny bows create a hand-crafted heirloom feel that hangs with delightful movement. I hope this pattern brings a smile and becomes a favorite decorative accent in your home. 🧶💕🦇