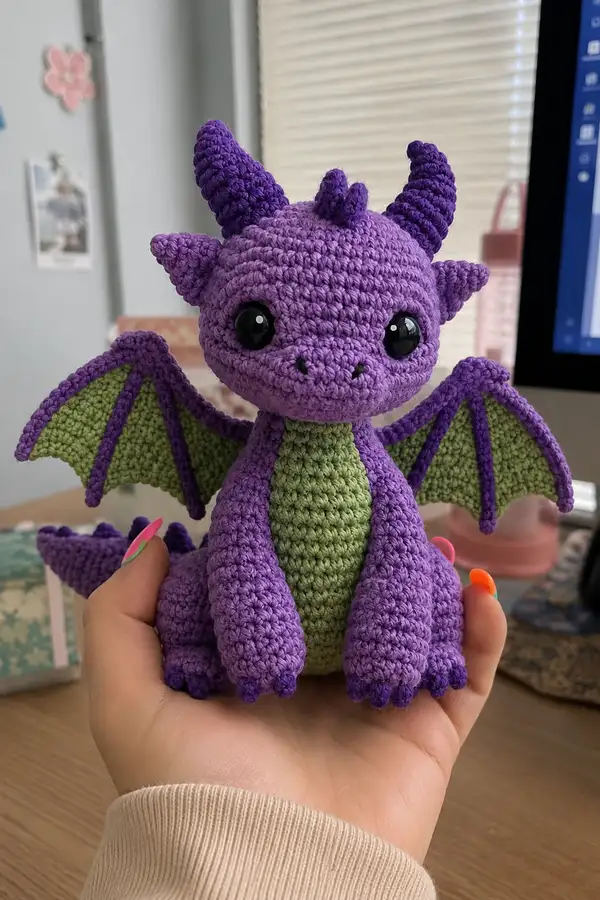
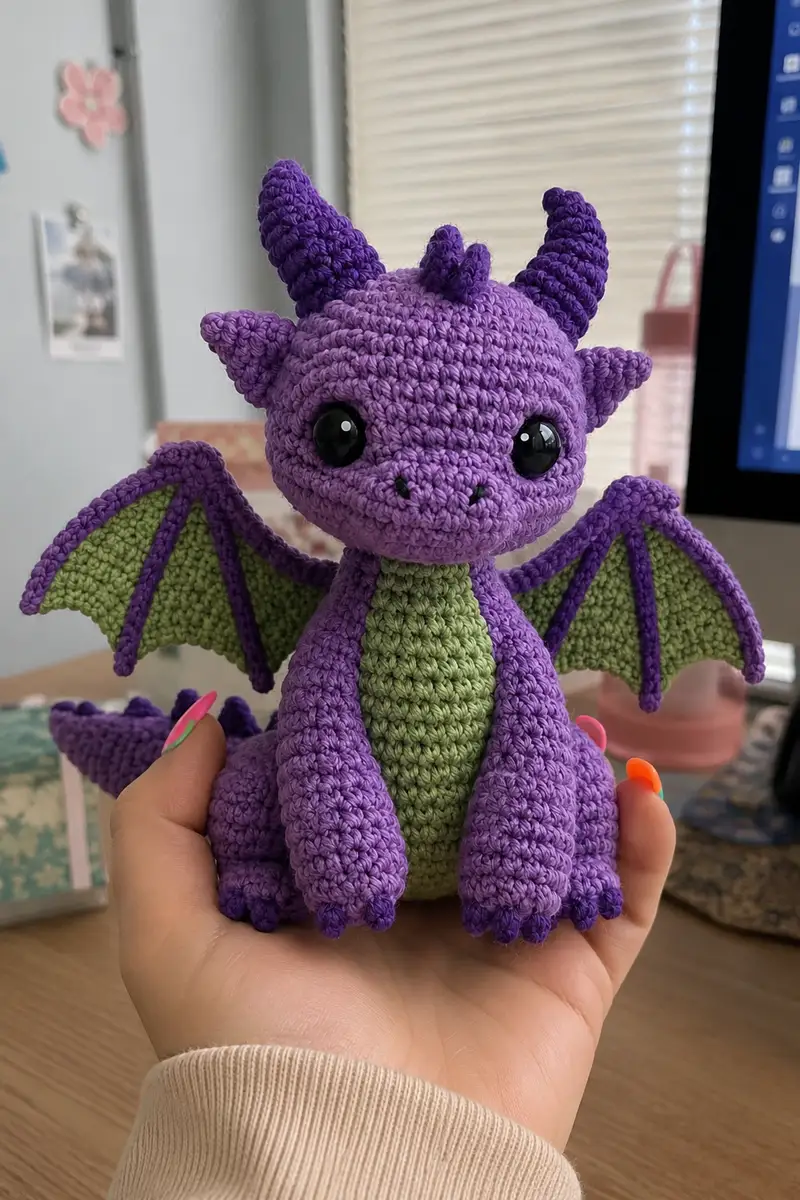
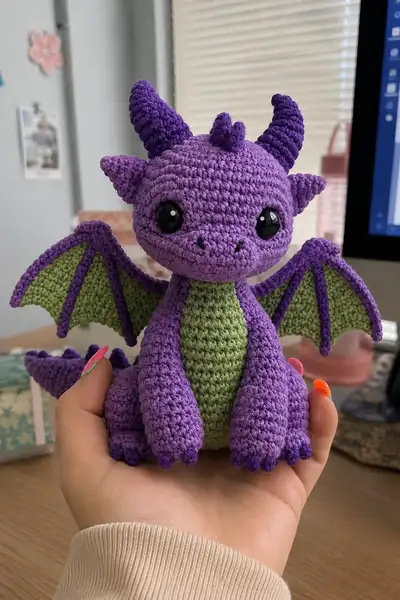
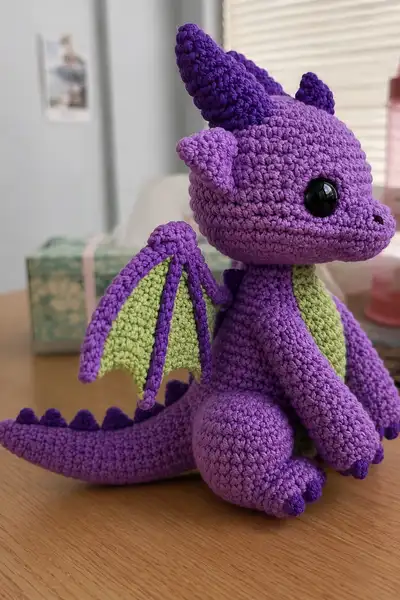
Create a cuddly purple demon dragon with contrasting lime-green belly, bat-style wings, curled tail, and dark purple horns. This charming amigurumi features big glossy safety eyes, tiny claws, decorative spikes down the tail, and ribbed wing details. The pattern is carefully written with clear round-by-round instructions, helpful Info tips, and assembly guidance to recreate the plush character shown.
Progress Tracker
0% Complete
— Head :
Round 1 :
6 sc in magic ring (6)
Round 3 :
(1 sc, inc) x 6 (18)
Round 4 :
(2 sc, inc) x 6 (24)
Round 5 :
(3 sc, inc) x 6 (30)
Round 6 :
(4 sc, inc) x 6 (36)
Round 7 :
(5 sc, inc) x 6 (42)
Round 8 :
(6 sc, inc) x 6 (48)
Round 9 :
(7 sc, inc) x 6 (54)
Round 10 :
(8 sc, inc) x 6 (60)
Info :
Switch to main purple yarn if you began with the same. Work in continuous spiral for smooth amigurumi surface. Place a stitch marker at the start of Round 1 and move it each round.
Round 11-14 :
1 sc in each st (60)
Info :
Insert 12mm safety eyes between rounds 13 and 14, about 10-12 stitches apart center-to-center for the wide, cute look shown. Pin eyes and check placement before locking washers. For a slightly sleepy look place eyes one round lower.
Round 15-18 :
1 sc in each st (60)
Round 19 :
(8 sc, dec) x 6 (54)
Round 20 :
(7 sc, dec) x 6 (48)
Info :
Begin stuffing head firmly now. Use small bits of fiberfill and work them into contours to keep the face smooth. Stuff around eyes evenly so they sit flush with the fabric.
Round 21 :
(6 sc, dec) x 6 (42)
Round 22 :
(5 sc, dec) x 6 (36)
Round 23 :
(4 sc, dec) x 6 (30)
Round 24 :
(3 sc, dec) x 6 (24)
Info :
Use stuffing to maintain round facial shape. Don't overstuff the snout area to allow a slight protuberance for the nose and mouth. This is a good point to embroider nostrils with black yarn: use a short stitch or single short satin stitch between rounds 14-16 centered on the nose area.
Round 25 :
(2 sc, dec) x 6 (18)
Round 26 :
(1 sc, dec) x 6 (12)
Info :
Fasten off leaving a long tail for sewing head to body later. Finish stuffing completely and close opening using a yarn needle and ladder stitch for a neat finish. Make sure the top of the head remains rounded and not flat when closed.
Round 28 :
Optional small bump: Pick up yarn at top center and make 6 sc in a short magic ring for a small crest bump. FO and leave tail for sewing.
Info :
We will sew horns and small ears separately to control position precisely. Mark horn positions with pins before stitching: place them symmetrically above the eyes, slightly to the back of the head curve.
— Horn (Make 2, darker purple) :
Round 1 :
6 sc in magic ring (6)
Round 2 :
Inc in each st (12)
Round 3 :
(1 sc, inc) x 6 (18)
Round 4 :
(2 sc, inc) x 6 (24)
Round 5 :
Work 6 rounds even 1 sc in each st (24) — rounds 5-10
Round 11 :
(2 sc, dec) x 6 (18)
Round 12 :
(1 sc, dec) x 6 (12)
Info :
Work horns in spiral (no joining) to get a more organic ridged look. Stuff lightly—they should be firm but not overly dense so they taper naturally. Sew the base of each horn securely to the head in the positions you pinned earlier.
— Small Ear/Side Horns (Make 2, main purple) :
Round 1 :
6 sc in magic ring (6)
Round 2 :
Inc in each st (12)
Round 3 :
(1 sc, inc) x 6 (18)
Round 4 :
Work 2 rounds even (18)
Round 5 :
Shape edge with 1 sc in next 8 sts, FO leaving tail for sewing; flatten slightly to create triangular ear
Info :
Sew these to the sides of the head slightly behind and above the eyes. Slightly curve them forward when stitching to mimic the look in the image.
— Body :
Round 1 :
6 sc in magic ring (6)
Round 3 :
(1 sc, inc) x 6 (18)
Round 4 :
(2 sc, inc) x 6 (24)
Round 5 :
(3 sc, inc) x 6 (30)
Round 6 :
(4 sc, inc) x 6 (36)
Round 7 :
(5 sc, inc) x 6 (42)
Round 8-12 :
1 sc in each st (42)
Info :
Change to lime green yarn at the front center for belly panels later; for now continue in main purple and we will add belly as a separate oval panel to sew on for neat color change.
Round 13 :
(5 sc, dec) x 6 (36)
Round 14-18 :
1 sc in each st (36)
Info :
Begin stuffing body lightly from the bottom up around round 16. Leave top opening wide enough to insert neck and sew head later. Stuff firmly enough to keep upright but not rock-hard to maintain softness.
Round 19 :
(4 sc, dec) x 6 (30)
Round 20 :
(3 sc, dec) x 6 (24)
Round 21 :
(2 sc, dec) x 6 (18)
Round 22 :
1 sc in each st (18) — form neck tube
Round 23-26 :
1 sc in each st (18)
Info :
Do not close body now. We will leave an opening at the top to sew the head on: stop at the last round and leave long tail for sewing. If you prefer, create a short neck by decreasing 1-2 rounds to 14 sts before fastening off.
— Belly Panel (Lime Green) :
Round 1 :
6 sc in magic ring (6)
Round 3 :
(1 sc, inc) x 6 (18)
Round 4 :
(2 sc, inc) x 6 (24)
Round 5 :
(3 sc, inc) x 6 (30)
Round 6-9 :
1 sc in each st (30)
Info :
Make a slightly elongated oval by working a few additional rows even (30 sts) and then shaping edges by decreasing 6 sts across the short ends to produce an oval. This panel is sewn to the front center of the body from the chin down to hip area.
Round 10 :
(3 sc, dec) x 6 (24)
Round 11 :
1 sc in each st FO leaving long tail for sewing to body
Info :
Block or steam gently if your panel is slightly warped before sewing. Center it on the front of the body and baste with pins before sewing for even placement.
— Arm (Make 2) :
Round 1 :
6 sc in magic ring (6)
Round 2 :
Inc in each st (12)
Round 3 :
(1 sc, inc) x 6 (18)
Round 4-6 :
1 sc in each st (18) — palm/hand base
Info :
Shape claws by adding darker purple tips later. Stuff the palm fairly firm, then continue to the wrist and arm tubular shape.
Round 7 :
(2 sc, dec) x 6 (12)
Round 8-13 :
1 sc in each st (12) — lower arm
Round 14 :
(1 sc, inc) x 6 (18) — upper arm increase
Round 15-18 :
1 sc in each st (18) — upper arm shaping
Round 19 :
(2 sc, dec) x 6 (12) — shoulder taper
Round 20 :
1 sc in each st (12) FO leaving long tail for sewing
Info :
Stuff hands firmly and arms lightly to keep elbows soft. Leave longer tail so you can sew the arms into the body securely across several rounds to avoid floppy arms.
— Hand Claws (Make 6 small tips for each hand with darker purple) :
Round 1 :
3 sc in magic ring (3)
Round 2 :
Inc in each st (6)
Round 3 :
1 sc in each st FO leaving tail for sewing
Info :
Sew three claw tips to the end of each palm spaced evenly. Use darker purple to match the image and stitch securely through the palm stitches.
— Leg (Make 2) :
Round 1 :
6 sc in magic ring (6)
Round 2 :
Inc in each st (12)
Round 3 :
(1 sc, inc) x 6 (18)
Round 4 :
(2 sc, inc) x 6 (24)
Round 5-8 :
1 sc in each st (24) — foot shaping
Round 9 :
(2 sc, dec) x 6 (18)
Round 10-14 :
1 sc in each st (18) — lower leg
Round 15 :
(1 sc, dec) x 6 (12)
Round 16-20 :
1 sc in each st (12) — upper leg, fill firmly
Round 21 :
(1 sc, inc) x 6 (18) — join seam area for hip
Round 22 :
1 sc in each st FO leaving long tail for sewing to body
Info :
Stuff feet very firmly so the dragon sits upright. When sewing to the body, position legs slightly forward of center so the character sits like the pictured pose.
— Tail :
Round 1 :
6 sc in magic ring (6)
Round 2 :
Inc in each st (12)
Round 3 :
(1 sc, inc) x 6 (18)
Round 4-20 :
1 sc in each st (18) — work length for long tapered tail
Round 21 :
(1 sc, dec) x 6 (12)
Round 22-26 :
1 sc in each st (12)
Round 27 :
(1 sc, dec) x 4 then dec x 2 to taper (6)
Round 28 :
FO leaving long tail for sewing
Info :
Sew small spikes (see next section) along the top of the tail at even intervals. Slightly curve the tail when stuffing by packing more fiberfill near the base and less toward the tip.
— Tail Spikes (Make 8-10, darker purple) :
Round 1 :
4 sc in magic ring (4)
Round 2 :
Inc around to 8 sts (8)
Round 3 :
1 sc in each st FO leaving tail for sewing
Info :
Sew spikes evenly spaced along top of tail; alternate sizes (some slightly smaller) to mimic the natural pattern pictured. Use pins to arrange before sewing.
— Wing Membrane (Make 2, lime green) :
Round 1 :
6 sc in magic ring (6)
Round 2 :
Inc in each st (12)
Round 3 :
(1 sc, inc) x 6 (18)
Round 4 :
(2 sc, inc) x 6 (24)
Round 5 :
(3 sc, inc) x 6 (30)
Round 6-8 :
1 sc in each st (30)
Round 9 :
(3 sc, dec) x 6 (24)
Round 10 :
(2 sc, dec) x 6 (18)
Round 11-14 :
1 sc in each st (18)
Info :
Shape wing membrane to a roughly triangular curved shape by adding a few slip stitch edging rounds and selectively decreasing on one side if you want a pointed tip. Make mirror images for left and right side. Block flat and pin to dry if you want a crisp membrane.
Round 15 :
Sl st around edge to neaten FO leaving long tail for sewing
— Wing Bone Ribs (Make 4-6 per wing in darker purple) :
Round 1 :
Ch 21, sc in 2nd ch from hook and across (20)
Round 2 :
Ch 1, turn, 1 sc across (20)
Round 3-4 :
Repeat 1 sc across to create a flat rib. FO leaving tail for sewing
Info :
Sew ribs across the wing membrane in evenly spaced diagonal lines from the base to the outer edge to create the bat-wing ribbed effect. Slightly curve ribs while sewing to shape the final wing contour.
Round 5 :
Optional: use a chain and single crochet backbone to create a thicker bone edge and wrap around the wing perimeter.
— Wing Edge & Assembly :
Round 1 :
Sew the membrane to a long narrow wing edge tube (ch 3 and join, sc in rounds to form tube length) matching image proportions and sew to body at shoulder area
Info :
Attach the wing to the back just below the neck joint and slightly behind the arm seam. Use small, invisible stitches and secure the inner wing edge to the inside of the body for a clean look. Consider inserting a thin wire into the wing edge tube before sewing to make wings poseable.
— Back Spikes (Make 6 small bumps, darker purple) :
Round 1 :
6 sc in magic ring (6)
Round 2 :
(Inc, 1 sc) x 3 (9)
Round 3 :
1 sc in each st FO leaving tail for sewing
Info :
Sew these along the spine from base of neck toward tail. Alternate spacing to follow photograph; larger spikes near the base and smaller near the tail tip will look natural.
— Assembly Instructions & Final Details :
Info :
Weave in all loose ends but leave enough tail yarn from major parts (head, arms, legs, tail) for secure sewing attachments. Use matching yarn for joining to make seams less visible.
Round 1 :
Sew belly panel to the front of body from neck to hips. Start at top and use whip stitch or ladder stitch to hide seam (see assembly section below)
Round 2 :
Sew head to body at neck opening by aligning center-front (chin) with center of belly panel; stitch evenly around neck until secure and smooth
Round 3 :
Attach arms symmetrically at body rounds 12-14 area or where shoulders appear natural when pinned
Round 4 :
Sew legs to bottom of body; ensure the feet are level so the toy sits stable
Round 5 :
Sew tail to lower back center and attach spikes along top; shape tail curve by adding more stuffing at base
Info :
When sewing wings, attach inner wing edge to the back across three to five stitches for strength and use extra reinforcement stitches where movement will stress the seam.
Round 6 :
Embroider small nostrils and a smile with black yarn. Add tiny white yarn stitch on each safety eye for a catchlight if desired
Info :
Brush surface lightly with a soft brush or steam gently for a polished finish. Add small blush with fabric-safe chalk for extra character if desired.
This adorable purple demon dragon brings together sculpted shaping and cute detailing to create a lovable handmade friend. From its curved horns to ribbed wings and lime-green belly, every stitch adds personality and charm. The steps guide you through a satisfying multi-part assembly to produce a durable, huggable toy you'll adore. 🐉🧶 Enjoy every stitch and share your finished dragon with pride! ✨