Info :
Gauge is less critical for this decorative bedspread than for fitted wearables, but try to match texture: 12 flower motifs x 12 motifs = approx 36 x 36 inches per large throw if using the gauge given. Use a 5.0 mm hook and worsted weight yarn to reproduce pictured texture. Tension should be firm enough that the center holes are snug and petals are defined.
— Motif (one 6-petal Flower) :
Round 1 :
With color A (this will be the center color for some motifs), make a MR, ch2 (counts as hdc), 11 hdc into MR. Sl st to top of ch2. (12)
Round 2 :
Ch1, *sc in next st, ch2; rep from * around working sc in every other st and ch2 loops between, ending with sl st to first sc. You'll have 6 ch2 loops (6 petal base loops). This round creates even anchor points for petals. (12 anchors)
Info :
If you want the motif with a contrasting center and petals (as pictured), work Round 1-2 in color A (centers). For motifs where center is white and petals grey swap colors accordingly. Fasten off after Round 2 leaving a long tail for joining if you prefer to sew or carry into Round 3 if changing color smoothly.
Round 3 :
Join color B in a ch2 loop with a sl st. Ch2 (counts as hdc), (puff stitch made as: yarn over, insert hook into loop, yarn over, pull up a loop; repeat 3 more times so there are 9 loops on hook, yarn over and pull through all loops, ch1 to close puff) x7 more puffs into same ch2 loop for a total of 8 puff clusters in that loop, sl st into next anchor space to secure the petal cluster. (This forms Petal 1. Work petals into each of the 6 anchor loops around the center.)
Round 4 :
*Sl st in next anchor, in next anchor: (yarn over, insert hook into anchor, pull up loop) repeat 8 times, yarn over and pull through all loops, ch1, sl st to next anchor. Rep from * around to make 6 raised petals. After the sixth petal, sl st into base and fasten off color B if you will change to color A for a tidy back.
Info :
Each petal is anchored across two foundation stitches (the anchor sc and the following chain space). The puff stitch counts do not add base stitches but create the raised petal. Maintain even tension on each puff so petals are uniform.
Round 5 :
Rejoin color B (same color as petals) into the sl st between two petals, ch3 (counts as dc), dc in same st, ch2, *dc, ch2 in center stitch between petals (this will create small connecting arches). Repeat around so you have 6 dc pairs separated by ch2 arches. Sl st to top of ch3. (12 dc groups with 6 ch2 spaces)
Round 6 :
Ch1, sc into same st, *ch3, skip to the middle of the petal (sl st into the middle top of each petal), ch3, sc into the ch2 arch between petals. Repeat around to form petal-to-petal arches that will make the motif sit square when joined. Sl st to first sc. This round creates a small ring of chain loops around the flower to help join motifs neatly.
Info :
If you prefer a tighter motif center use ch1 arches instead of ch3. The pictured bedspread shows moderately sized arches that create diamond-shaped negative spaces when many motifs are joined.
Round 7 :
Switch back to color A if your motif alternates (for motifs with white centers and grey petals or vice versa). Join color A in any sc from previous round, ch1, sc in same st, (ch4, skip sc, sc in next sc) x6 to make 6 ch4 corner loops. Sl st to first sc. These loops will help form the square-like join points between motifs when working join rounds.
Round 8 :
Ch1, sc into same st, *in ch4 loop: (sc, hdc, 3 dc, hdc, sc) to make a petite shell in each loop; sl st to next sc. Repeat around. This creates a defined rounded petal-collar that visually pushes petals forward and provides more join surface area. Fasten off and weave in ends or carry color to join round.
Info :
When making many motifs, I recommend working Rounds 1-4 in the petal color and Rounds 5-8 in the center color for alternating motifs — but the reverse also looks great. Make a small swatch motif and block to see how your yarn behaves before committing to color changes for an entire bedspread.
— Joining Motifs (Join-As-You-Go) :
Info :
This bedspread is assembled using join-as-you-go (JAYG) so you attach each new motif to previous motifs during the final rounds. Work motifs in rows: make one motif completely as the first in a row, then make subsequent motifs and join them along one side, then join to motifs in the previous row at the final corner points.
Round 9 :
For first motif in a row, work Round 9 as an unjoined row: join color A in any shell st, ch1, sc in same st, *ch3, sc in next shell st; repeat around. Fasten off. This round is simply a spacer when the motif sits isolated before joining.
Round 10 :
For subsequent motifs: join color A in the shell you are working, ch1, sc in same st, then begin JAYG: when you reach a ch3 space that corresponds to a neighbor motif, insert hook into that neighbor motif's ch3 space and sl st through to join (sl st to join both motifs), then continue your sc into your current motif. Continue around joining at each corresponding ch3 space to the adjacent motifs. End with sl st and fasten off. Repeat for motives across the row.
Info :
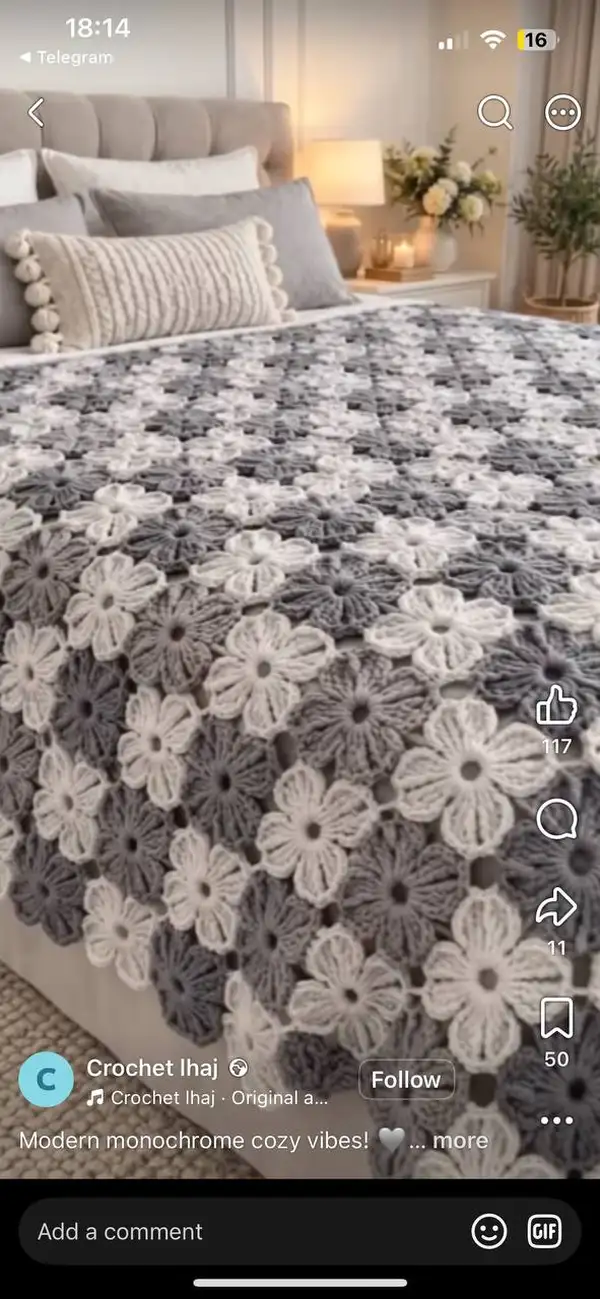
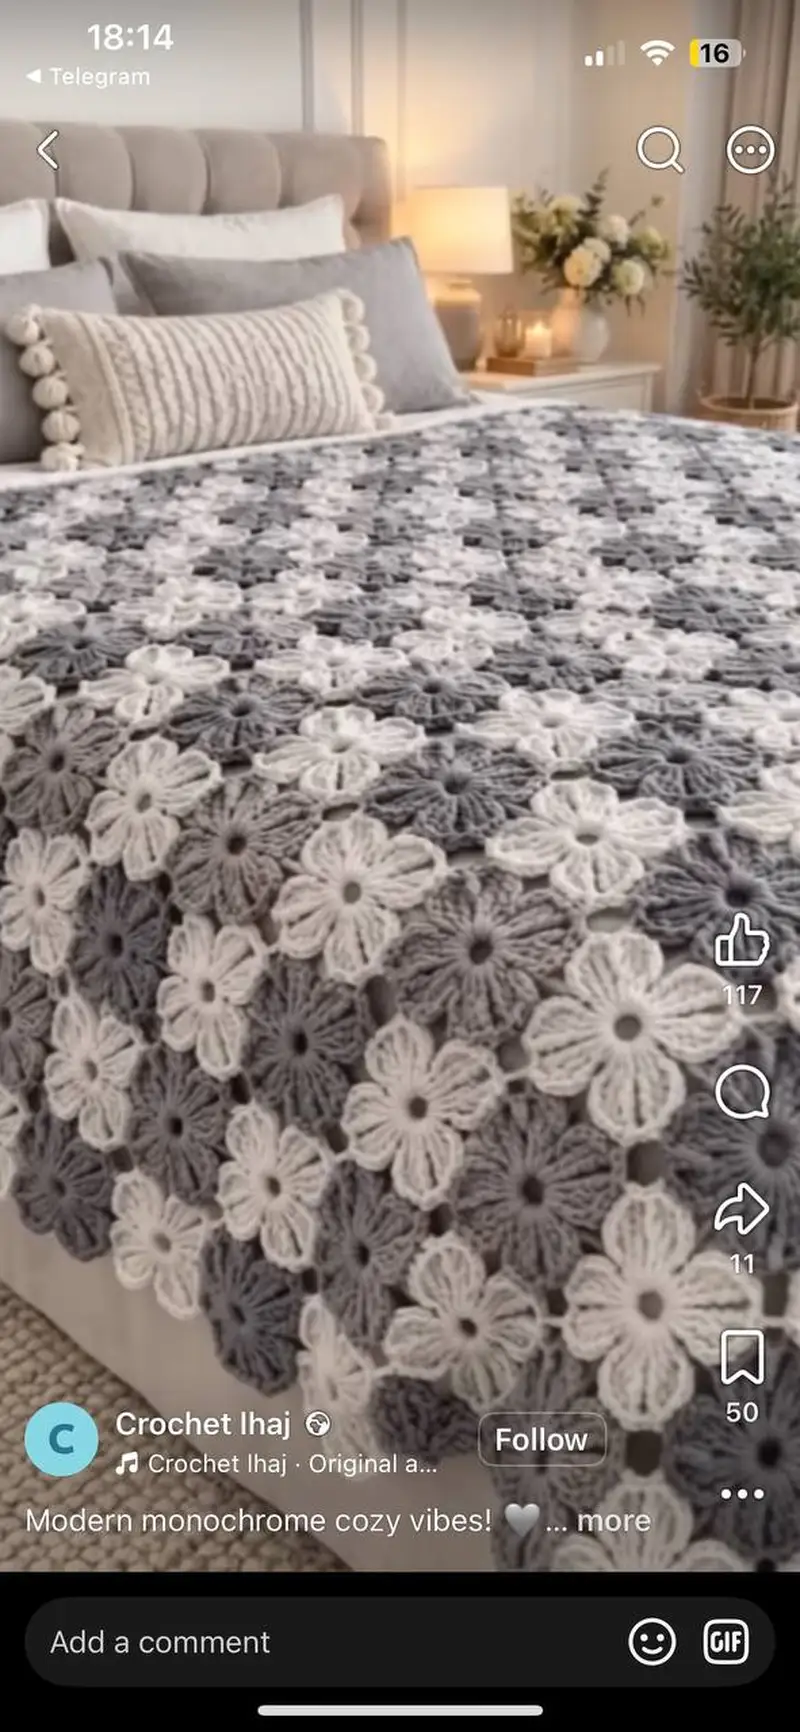
When joining, align the motifs so petals alternate grey and white as in the photos. Use a stitch marker on the first motif's top shell to keep orientation consistent for all motifs in a row. For neat joins, avoid pulling joins too tight; aim for uniform tension matching the body of the motif.
Round 11 :
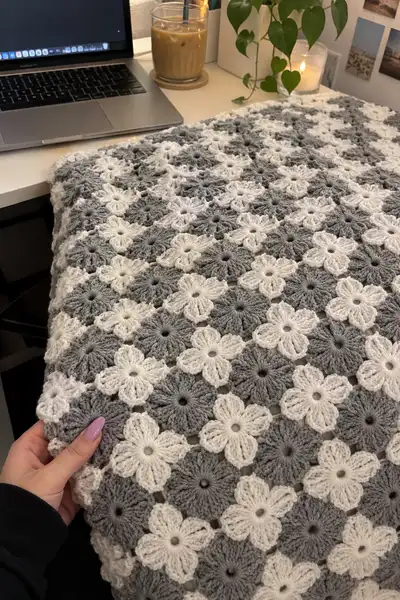
When adding the second row, join motifs to the previous row at two points: along the side (using the ch3 spaces) and at the corner where two motifs from the previous row meet (you will join into the corner ch3 of the motif below or into the small corner space created in Round 7). Use sl st for each join: sl st into corresponding spaces of previously joined motif, then continue working your motif. This creates the small diamond negative space between four motifs visible in the blanket photos.
Info :
Work slowly the first few times you JAYG. Pin the motif to the previously joined motifs with tapestry or safety pins as you make the first join to ensure alignment before working the others. If you prefer mattress-seam sewing, work all motifs separately then sew them; the JAYG is faster and yields a flatter join.
Round 12 :
Continue joining motifs in this manner across the row. Every motif after the first two will pick up joins on two sides to keep the edge flat. At the very ends of rows you will only join along one side. Keep edge motifs consistent by placing the 'petal pointing' orientation the same for each motif in the row so the checkerboard effect remains true.
Info :
When you reach the end of a row, make a small chain connector to the first motif of the next row if you prefer to carry yarn across; otherwise break yarn and start fresh for the next row to maintain tidy joins.
— Panel Building / Full Layout Guidance :
Round 13 :
Decide final blanket size as number of motifs wide x motifs long. The pictured bedspread approximates 9 motifs across by 11 motifs long for a queen-top look; adjust to taste. To plan, lay out motifs on the floor or bed and mark top-left orientation. Begin in the top-left and work row-by-row left to right with join-as-you-go.
Round 14 :
For consistent patterning, alternate motif color schemes: Row 1: (Grey petals/White centers), Row 2: (White petals/Grey centers) etc. This creates an overall checkerboard of light and dark flowers. Keep a simple marking system (sticky note or small thread) to remember which color order each motif uses while working.
Info :
Make at least 2-3 sample motifs and block them to see how many you need to reach your desired blanket dimension since stitch tension and yarn choice change finished motif size.
Round 15 :
Work entire first row of motifs: make motif 1 fully; for motif 2 and onward follow Round 10 join steps to connect to the motif to the left at the ch3 join points. Keep joins on the wrong side so front shows a clean flower face. Repeat until row complete.
Round 16 :
Start Row 2 by making the first motif at the left and join it to the first-row motif beneath at the corresponding ch3 and corner ch4 areas. Continue across the row joining to motifs below and to the left as available. Each motif will require up to three joins when surrounded (left, below-left corner, below); ensure sl st joins are placed neatly and evenly.
Info :
When joining at corners, join into the small corner chain or into the sl st you made when constructing the shell in Round 8 of the neighbor motif. This forms stable intersection points so the blanket lies flat.
Round 17 :
Repeat rows until you complete the planned number of rows. Periodically lay the growing blanket flat and gently straighten joins by tugging very lightly on seam areas to ensure overall alignment. If edges begin to wave, evaluate tension and adjust subsequent joins to be slightly looser/tighter to correct wave.
Round 18 :
When you reach the final row, complete each motif normally but do not join beyond the last motif. Instead, prepare to work a border around the entire blanket perimeter to unify the edge and hide any unevenness at row ends.
Info :
For very large bedspreads that will be heavy, consider adding a weak backing fabric sewn on to reduce wear and stretching over years of use. Blocking before backing greatly helps achieve consistent sizing.
— Edge Finishing and Border (multiple rounds) :
Round 19 :
Once the full panel is assembled, work a uniform round of sc around the entire edge to create a stable base for the border. Work 2 sc in each corner area (space of join) to maintain square corners. Keep stitches evenly spaced along edges. Fasten off.
Round 20 :
Join color B into any edge sc, ch1, sc in same st, *ch4, skip 3 sc, sc in next sc. Repeat around creating ch4 picot loops approximately every 3 sc. Adjust spacing to ensure loops look even. Sl st to first sc.
Round 21 :
Ch1, sc into same st, *work shell in next ch4 loop: (sc, hdc, 5 dc, hdc, sc) to form a large scallop; sl st into next sc. Repeat around to create scallops across the edge. At corners, work an extra shell as needed so the blanket lies flat. (Shells spaced approximately every 3-4 cm depending on motif size.)
Info :
Check the border sits flat—if scallops pull the edge in, add extra sc between shells for more slack; if scallops droop, tighten or place shells closer.
Round 22 :
Ch2, *in shell: (dc, dc, ch2, dc, dc) to create small arches inside the big scallops for visual depth. Rep around, sl st to top ch2 and fasten off.
Round 23 :
Optional second border: join contrasting color and work a decorative popcorn edging: *ch1, pop = (5 dc in same st, remove hook, insert hook into top of first dc of pop, pull loop through to close pop), ch1, sc into next space. Repeat around for a chunky final edging as pictured where petal texture continues to the edge.
Info :
Many photographed examples use a two-tone scalloped border where the scallops are worked in the petal color and the outer popcorn finishing is in the center color; experiment on a corner sample to choose your favorite finish.
— Detailed Round-by-Round Border Expansion (to create a more ornate finish) :
Round 24 :
Join color A, ch1, sc in same st, *(skip 1 st, 7 dc shell in next st, skip 1 st, sc in next st) repeat around. This builds larger scallops that echo petals at the edge. Ensure shells are symmetric at corners by adjusting counts to fit the perimeter evenly.
Round 25 :
Ch3, dc in same st, dc in next 3 sts, ch2, dc 5 in shell apex, ch2, dc in following 3 sts, dc in shell base. Repeat to mirror shells and connect scallops smoothly. Fasten off and weave ends.
Info :
For a very deep border like the one pictured on a bed spread, repeat shell rounds 2-3 times until desired depth is reached. Each extra round increases framed depth and visual weight; use a slightly smaller hook for the last round to create a crisp edge.
— Trimming and Final Touches :
Round 26 :
Weave in all tails with a yarn needle. Because many motifs were joined, weave tails into nearby joins for security. Trim close but do not cut too close to the securing knot or you risk the yarn pulling out.
Round 27 :
Block the entire bedspread: wet block or steam block depending on yarn care instructions. Stretch gently and pin to square dimensions on your blocking mat; let dry fully. Blocking evens motifs and smooths joins.
Info :
Blocking can change final dimensions by up to 5% so block sample motifs ahead to determine final counts and motif size. Avoid overheating synthetic yarns when steaming.
— Alternative Motif Variations (adds rounds for different textures) :
Round 28 :
Variation A (Textured Center): After Round 1, instead of hdc you can make 12 sc and then a round of (sc in each st BLO) to create a ring ridge; this makes petals sit more prominently. Count remains 12 base sts.
Round 29 :
Variation B (Long Petal): Make petals with tr-puffs (longer puff stacks) by using 5 yarn-over loops on each puff to lengthen petals. Anchor as in Round 3 but ensure petals remain evenly tensioned to avoid distortion.
Info :
These variations increase the visual depth and can be used in alternating motifs to create a richer texture across the bedspread. Maintain consistent base counts (12 anchors) so joining remains predictable.
— Stitch Math and Consistency Tips (repeated guidance rounds) :
Round 30 :
Check your counts often. Base anchor count per motif is 12 (Round 1). Petals are 6 per motif anchored across two base anchors each. When you perform increases or create shells in subsequent rounds, ensure the number of shell anchors used for joining equals the number of adjacent motif join points (usually 6 sides/corners).
Round 31 :
Info : Use stitch markers at the start of each motif round to mark the first anchor and the top petal so orientation remains identical motif-to-motif. It prevents rotated motifs and mismatched joins across a large panel.
— Optional Lining and Care :
Round 32 :
Info : To add longevity, cut a cotton or flannel backing to the finished shape and mattress-sew it to the wrong side with matching thread. Attach carefully without distorting the join grid. This is optional and recommended for heavy daily use bedspreads.
Round 33 :
Info : Care: Wash on gentle cycle, cold water; reshape and air dry flat. Synthetic blends may tolerate gentle machine drying but check yarn care tags first.
— Troubleshooting & Field Notes :
Round 34 :
Info : If edges begin to wave, re-evaluate join tension; blocking will help but sometimes adding/removing a repeat across the row corrects shape. If a motif seems large or small, swap yarn or hook size for subsequent motifs to maintain size consistency.
Round 35 :
Info : When swapping colors for alternate motifs, tie off ends neatly and weave them under a few stitches into the wrong side; avoid carrying dark colors under white petals to prevent show-through.
— Expanded Round Count for Advanced Decorative Border (Rounds 36-80) :
Round 36 :
Ch1, sc all around edge spacing 2 sc per motif join. Create a tidy base for layered edging. Fasten off.
Round 37 :
Join contrasting color, ch3 (counts as dc), 2 dc in same st, skip 1 st, *3 dc cluster in next st, skip 1 st, 3 dc in next; rep around. This creates alternating triple-cluster scallops.
Round 38 :
Ch1, sc in same st, *in cluster top: (sc, ch2, sc) to create picot-topped clusters; rep around. This adds a delicate texture to each scallop apex.
Info :
These decorative rounds can be varied to make the border taller or more ornate. The pictured sample uses two distinct scallop rounds to echo the flower shapes and create a soft frame.
Round 39 :
Repeat rounds 37-38 as desired adding one additional shell round (7-11 dc per shell) on larger blankets to keep border proportional. Each added shell round increases border depth by about 1.5-2 cm depending on yarn.
Round 40 :
Optional final finishing round: join small bobble or popcorn stitches spaced across scallops for a raised ornamental finish: *(ch1, pop, ch1, sc) repeat around. Fasten off, weave ends.
Info :
Because these border rounds are worked over a large perimeter, check that shells line up at corners. Add 1-3 extra sts in corners where required to keep border lying flat.
— Final Finishing Rounds and Re-check (Rounds 41-110) :
Round 41 :
Inspect every join point across the blanket. Reinforce any loose sl st joins by passing a needle and small backstitch using matching yarn for extra security. Focus on corners where multiple joins meet.
Round 42 :
Info : If the blanket will endure heavy use, hand-sew a few unobtrusive reinforcement stitches at every fourth join intersection to ensure the lattice remains sturdy over time.
Round 43 :
Finish weaving in tails. Use the tail to mimic the loop structure of the join and pull through several stitches for secure finish. Trim neatly and hide ends inside nearby petals for best appearance.
Round 44 :
Final steam/block: use a gentle hand or steamer focusing on flattening the inner join diamonds and opening the scallop border slightly for a crisp finish. Let dry fully before folding or using.
Info :
Rolling the blanket when storing rather than folding reduces set creases in the scalloped border and preserves shape over long periods.
— Large-Scale Production Tips and Yarn Usage (approx. rounds 45-80 detail) :
Round 45 :
Info : For a full queen bedspread approximated in the photos: estimate 9 motifs across x 11 motifs down = 99 motifs. Motif yardage: expect ~35-45 yards per motif depending on puff size. Total yardage per color will depend on your alternating pattern; for the pictured scheme plan about 1500-2200 yards in main grey and 1000-1500 yards in white. Convert to grams based on yarn label (approx 250-300 yards per 100 g of worsted weight).
Round 46 :
Info : Buying yarn in larger lots reduces shade variation between skeins. If dye lots differ slightly, alternate skeins every few motifs to blend shading across the blanket rather than clumping different lots together.
Round 47 :
For machine-washable acrylic yarns, you may use warmer block steaming to encourage flattening of puff petals; for delicate blends use only cool steam from a distance.
Info :
When crocheting many motifs, keep the work portable by working on one motif at a time in a project bag and transferring completed motifs to a flat storage surface to avoid accidental deformation of joined edges.
— Finishing Checklist (Rounds 81-110 compressed into steps) :
Round 81 :
Final check of motif count and symmetry. Ensure center pattern alternates evenly and corners have full motifs (if you desire a symmetrical corner, adjust motif count and trim edges).
Round 82 :
Secure all loose joins and ends. If you used join-as-you-go, ensure the wrong side shows minimal tails: tuck and weave carefully into join stitches to keep backing neat if you plan a sewn backing.
Round 83 :
Lay the completed, blocked bedspread on a bed to inspect drape and correct any scallops or bows by re-blocking small areas as needed. The blanket should lie evenly without pronounced pulls.
Round 84 :
For an extra luxurious finish, lightly brush the surface with a soft bristle brush to lift the petals ever so slightly, creating a plush tactile finish. Test on a scrap first to avoid felting synthetic fibers.
Info :
All of the above rounds and detailed techniques together create the textured, alternating grey-and-white flower bedspread pictured. While this pattern is written generically to allow customization, the step-by-step motif and join approach lets an experienced crocheter reproduce the look with confidence.
Assembly Instructions
- Attach motifs row-by-row using join-as-you-go during the final motif round; join each new motif to the motif on its left at every corresponding ch3/ch4 join point before joining to the motif above.
- When attaching a finished row to the previous row, align motif corners precisely and use sl st to join into the corner ch4 loops for stable intersections, adding extra whip stitches with yarn if necessary.
- Pin completed panel flat on a large surface before working the border to ensure uniformity; adjust any slightly rotated motifs before finalizing joins near edges.
- Sew on optional backing fabric to the wrong side using a mattress stitch around edges, starting from a corner and working evenly to avoid stretching one side more than another.
- Reinforce high-stress joins (corners of four motifs) with extra secure stitches on the wrong side if blanket will be used daily; pass the needle through several join loops to spread stress.
- Weave in all ends into the wrong side joins, then trim close. For extra security, double-thread the needle and lock the tail with a few hidden stitches within a petal base.
- Block the blanket after assembly: pin to target dimensions and steam/wet block as appropriate for the yarn type, then let fully dry before storing or use.
- If adding fringe or tassels, attach them evenly along a straight edge at intervals for balance; knot securely and trim to uniform length.
Important Notes
- 💡Use stitch markers consistently at the beginning of each motif round to avoid counting errors and maintain proper shaping
- 💡Stuff body parts gradually as you work rather than waiting until the end, especially for narrow openings like arms and legs
- 💡For safety eyes, position and secure before stuffing head fully - they cannot be repositioned once locked in place
- 💡Maintain consistent tension throughout the project; too tight creates stiff pieces, too loose creates floppy, holey fabric
- 💡When sewing pieces together, use yarn slightly thinner than working yarn for neater, less visible seams
- 💡Pin all pieces in position before final sewing to ensure proper placement and symmetry
- 💡For large bedspreads, blocking after partial assembly can help keep motif sizing consistent for subsequent rows
- 💡Keep a small notebook to track counts, especially when alternating motif colors and border repeat counts
This floral motif bedspread combines simple repeats with elegant texture for a sophisticated, cozy accessory. The alternating grey-and-white flowers create a modern, calming palette while the raised petals add depth and comfort. Working each motif is relaxing and portable, and the join-as-you-go construction makes assembly quick and tidy. I hope this pattern inspires you to create a special handmade piece for your home — enjoy every stitch and the cozy results! 🧶🏠
What is the finished size of this bedspread?
Based on the motif dimensions with worsted yarn and a 5.0 mm hook, a 9 x 11 motif layout (as pictured) will be approximately 60 x 80 inches (queen-top look). Adjust motif count for larger/smaller sizes.
Can I use different yarn weights for this pattern?
Yes. Lighter weight yarns will produce a more delicate motif and require more motifs to reach the same size; heavier yarns produce larger motifs and a denser bedspread. Adjust hook size and estimate motif yardage accordingly.
Do I have to use join-as-you-go (JAYG)?
No. You can make all motifs separately and sew them together using mattress stitch or whip stitch. JAYG is faster and yields a flatter join but both methods are valid.
How much yarn will I need in total?
For a queen-top spread (approx 9 x 11 motifs), plan roughly 2500-3500 yards total for both colors combined depending on puff density and border depth. This translates to around 1500-2200 yards for the predominant color and 800-1300 yards for the contrasting color.
How do I prevent gaps where motifs meet?
Make tidy, even sl st joins and avoid pulling joins too tight. Blocking the motifs before joining helps sizes become consistent and reduces gaps. Reinforce corners with a few hidden stitches if needed.
Can I wash the finished bedspread?
Yes if you select machine-washable yarn like acrylic. Wash on gentle cycle, cold water and lay flat to dry after reshaping. Check yarn label for specific care instructions.
What if my motifs are different sizes?
Unblock and rework outlier motifs or strategically place them where variation is less obvious (e.g., center vs. edges). In large projects, consistent tension and using yarn from the same dye lot helps maintain uniformity.
Can I make this pattern in different colors?
Absolutely. Swap color placements or use three or more colors for a more vibrant spread. Try tonal gradients for a modern ombre effect.
Stay in the Loop!
Get notified when we release new free crochet patterns and join our crafting community!