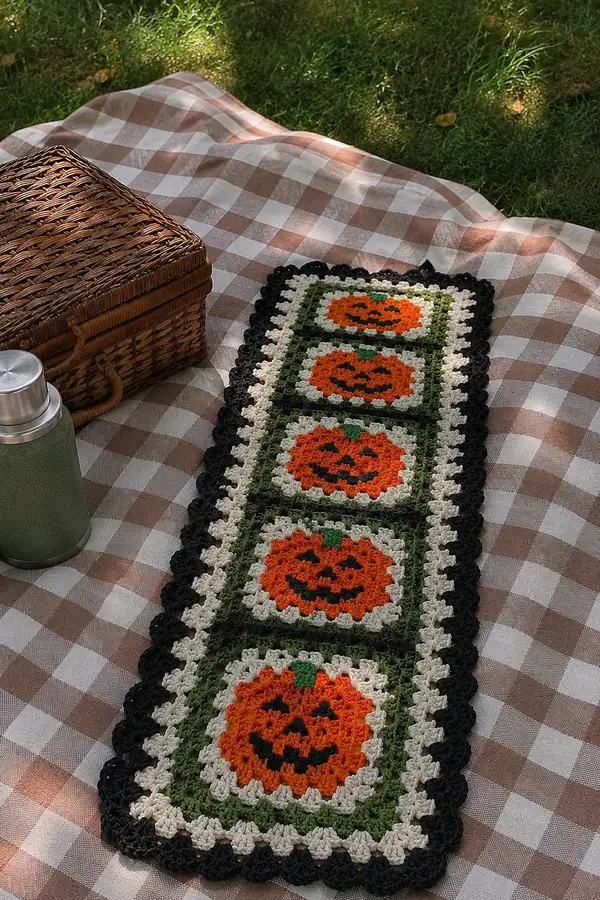
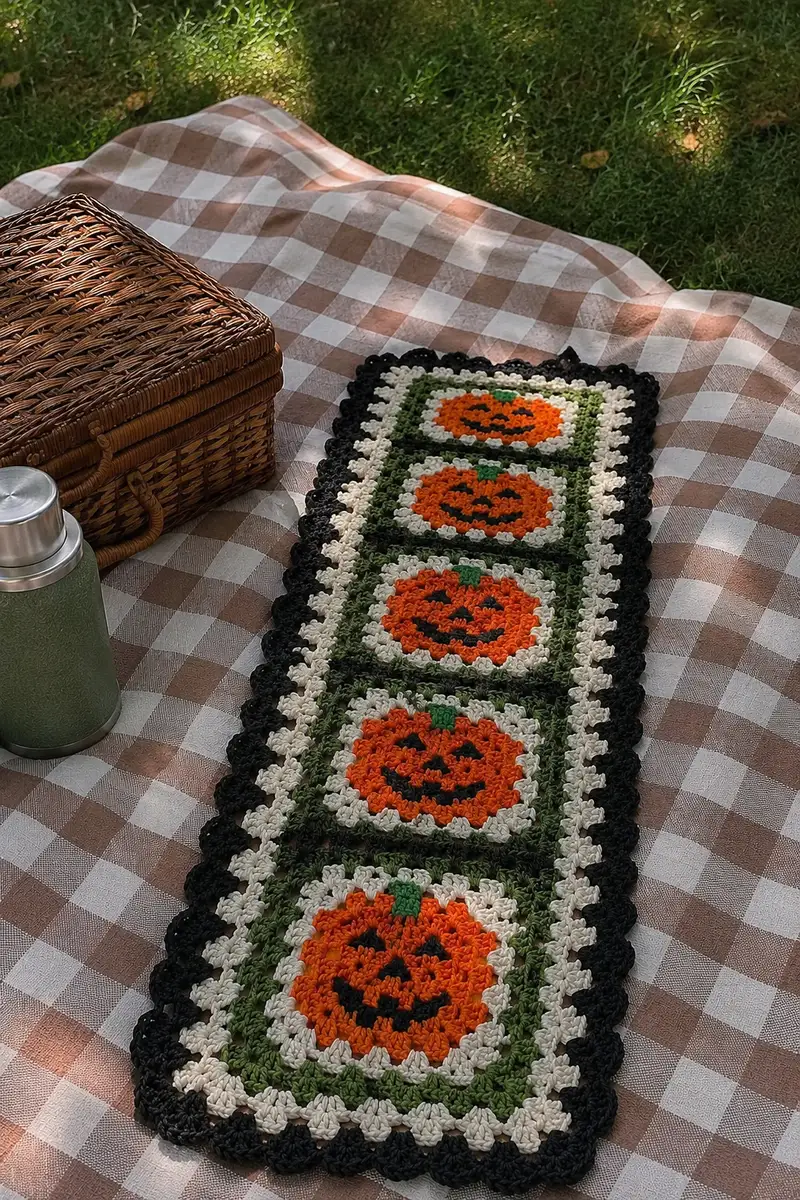
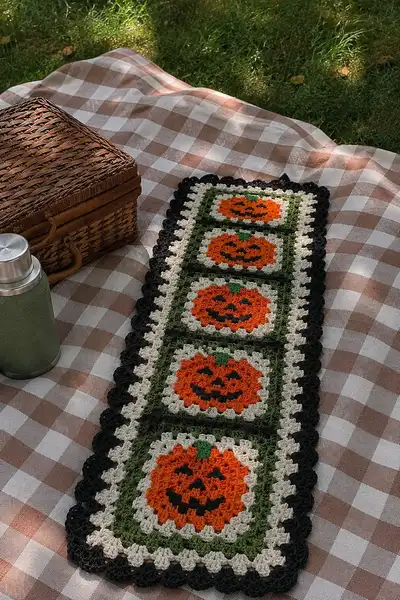
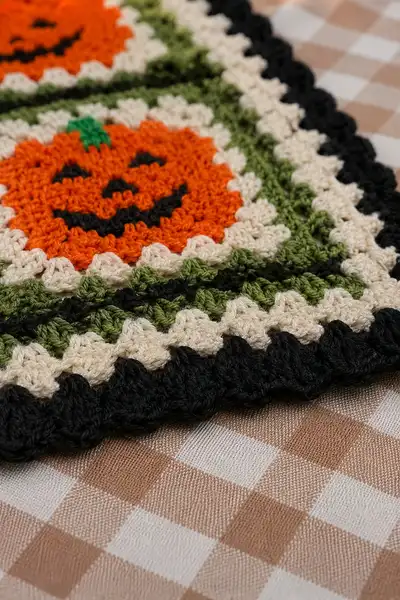
This Halloween table runner features five pumpkin-centered granny squares joined into a long, festive runner with layered cream and green frames and a bold black scalloped edge. Each square showcases a bright orange jack-o-lantern motif, a small green stem, and a creamy border for contrast. The finished piece is perfect for autumn displays, picnic tables, or cozy mantels. Clear round-by-round instructions guide you through motif construction, joining, and edging for a polished seasonal accent.
Progress Tracker
0% Complete
— Pumpkin Granny Square (Make 5) :
Info :
This motif creates the pumpkin center as a flat circle using single crochet rounds with regular increases, then transitions into a cream and green framed square with a small stem attached later. Work tightly for dense stitches so the face embroidery stands out. Use 4.00mm hook unless you need a tighter fabric—switch to 3.75mm for the last rounds if you prefer a firmer edge.
Round 1 :
In orange yarn, 6 sc in magic ring (6)
Round 3 :
(1 sc, inc) x 6 (18)
Round 4 :
(2 sc, inc) x 6 (24)
Round 5 :
(3 sc, inc) x 6 (30)
Round 6 :
(4 sc, inc) x 6 (36)
Round 7 :
(5 sc, inc) x 6 (42)
Round 8 :
(6 sc, inc) x 6 (48)
Info :
Keep stitches even and place a marker at the first stitch of each round to maintain orientation for later face placement. The pumpkin face will be stitched later between rounds 11-15.
Round 9 :
(7 sc, inc) x 6 (54)
Round 10 :
(8 sc, inc) x 6 (60)
Round 11 :
(9 sc, inc) x 6 (66)
Round 12 :
(10 sc, inc) x 6 (72)
Info :
At this stage you have a round pumpkin disc approximately the size of the central motif area. If you prefer a slightly smaller or larger pumpkin, stop or continue increases two rounds earlier/later. Fasten off a short tail if you will embroider the face now, or leave yarn attached if you plan to carry color into the framing rounds.
Round 13 :
1 sc in each st (72)
Round 14 :
1 sc in each st (72)
Info :
Embroider jack-o-lantern features now using black yarn and duplicate stitch or surface slip stitch. Place eyes roughly centered vertically across round 10-12 area; eyes are approximately 6-8 stitches wide and separated by 8-10 stitches depending on desired expression. A smiling mouth can be curved across rounds 12-13. Use a tapestry needle and work gently to avoid distorting the stitches.
Round 15 :
1 sc in each st (72)
Round 16 :
1 sc in each st (72)
Round 17 :
Change to cream/ivory yarn. (11 sc, inc) x 6 (78)
Round 18 :
1 sc in each st (78)
Round 19 :
1 sc in each st (78)
Info :
Switching to a lighter cream now gives a halo effect around the pumpkin. Carry unused orange inside the work if you prefer fewer ends to weave in, but carry neatly and catch every 3-4 stitches so floats are not visible on the right side.
Round 20 :
Change to moss/olive green yarn. (12 sc, inc) x 6 (84)
Round 21 :
1 sc in each st (84)
Round 22 :
1 sc in each st (84)
Info :
These green rounds act as the frame between the cream halo and the outer border. For a more distinct square shape later, keep tension slightly firmer on these rounds to allow corner shaping in the next section.
Round 23 :
Change to cream/ivory yarn. Create visual corner shaping: *(6 sc, ch2, 6 sc) in same spot to form a corner, then 12 sc across the side*; repeat * to make 4 corners and sides (this will create a square-like shaping). Approx total sts vary by spacing; ensure even side counts.
Info :
Round 23 transitions the round motif into a soft square by creating four corner spaces. Work the corner (6 sc, ch2, 6 sc) at four evenly spaced points; if you kept stitch counts consistent, place corners after every ~21 stitches to form even sides. Use stitch markers to mark corner placement before working the round if needed.
Round 24 :
1 sc in each st and in each ch2 corner space around (approx 96-104 sc depending on placement)
Round 25 :
Change to moss/olive green yarn. Work granny-cluster inspired frame: *in corner ch2 space work (3 dc, ch2, 3 dc). On each side between corners work 3 dc clusters separated by 1 ch.* Repeat for 4 sides creating a clear square frame. Total cluster count per side: 6 clusters (approx overall dc clusters 24 plus 4 corner clusters).
Info :
Technique :
To keep counts consistent, count how many 3-dc clusters fit comfortably between corners and increase or decrease by one cluster so each side looks symmetrical. This round is crocheted in dc clusters to create a textured framed square around the pumpkin.
Round 26 :
Change to cream/ivory yarn. Work one round of 1 sc in each cluster and in ch spaces to create an even joining base for the outer scallop (use 1 sc per dc cluster and 3 sc in corner ch2 spaces). Approx total sc 120-130.
Round 27 :
Change to black yarn. Work a decorative scallop base: *skip 2 sc, 5 dc in next st, skip 2 sc, sl st in next sc* across each side and into corners creating scallops; repeat around (approx 16-20 scallops depending on counts)
Info :
The black scallop will be the outer edge of each square; keep scallops even and count repeats. If you find the scallops pulling, switch to 3.75mm for one round before scallops to firm up edge.
Round 28 :
Finish scallop round: where necessary work 1 sc between scallops to even spacing. Fasten off and weave in ends. Block square lightly to settle stitches and shape corners into a true square.
Info :
Make five identical squares following Rounds 1-28. Label each with a removable stitch marker so orientation is consistent when joining—the pumpkin face should point the same direction on all squares for a cohesive runner.
— Stem (Make 5) :
Info :
The stem is a small rectangular tab worked in bright green and sewn to the top center of each pumpkin motif. It's tiny but makes a big visual difference.
Round 1 :
With bright green yarn, ch 6, join to form a small loop or work flat: 6 sc across (6)
Round 2 :
Turn, ch1, 1 sc in each st across (6)
Round 3 :
Repeat Round 2 (6)
Round 4 :
Fold stem and sc through both layers along one short edge to create a small tab (approx 6 sc). Fasten off leaving long tail for sewing.
Info :
Sew stem to the top center of the orange pumpkin disc using the long tail. Secure with several passes, then weave tail back through stitches to hide. If desired, make stems slightly taller by adding more rows before folding.
— Joining Motifs into Runner :
Info :
Arrange your five completed squares in a single row with pumpkins facing the same direction. You will join them using join-as-you-go single crochet seams or by whipstitching with matching yarn; instructions below show a join-as-you-go method that keeps the seam tidy and stable.
Round 29 :
With right sides together, attach cream yarn at a corner of the first square and work 1 sc in each st across the side edge; when you reach a corner, work sc through the corner of the adjacent square to join, continue across the seam and finish the side. Repeat joining for each adjacent square, creating a long strip of five squares. Total seam length equals combined side stitches (approx 5 x 28-32 sc depending on your square counts).
Info :
Pin squares together before joining to ensure even alignment. Use plenty of pins, especially at corner points and the centers of sides, to prevent slipping. If your stitch counts vary slightly, ease slightly during joining to match rows.
Round 30 :
Once all five squares are joined in a row, with runner laying flat and wrong side up, work a round of 1 sc around the entire outside edge to even out joins and create a base for the next decorative rounds. Work 3 sc in each corner to keep corners turning nicely. Approx total sc depends on combined stitches across the long runner (expect 520-560 sc).
Info :
When working this long round, keep even tension especially along seams so the runner lies flat. If you see waves, block the runner and rework the sc round if necessary, making minor increases or decreases evenly spaced to flatten the runner.
Round 31 :
Change to moss/olive green yarn. Work 1 sc in each st around (approx same total as previous round). This creates a green frame around the entire runner tying squares together visually.
Round 32 :
Change to cream/ivory yarn. Work a textured popcorn/granny-style round: *3 dc cluster separated by 1 ch across sides, (3 dc, ch2, 3 dc) in each corner*. Repeat around for consistent texture (total cluster count depends on perimeter).
Info :
Use stitch markers at junctions between squares to ensure that clusters line up across the seam lines for a neat, continuous appearance. The goal is symmetry so the cream rounds read as a consistent stripe across the runner.
Round 33 :
Change to black yarn. Work scalloped outer edge round: *skip 2 sc, 5 dc in next st, skip 2 sc, sl st* across, working 5 dc scallops across long sides and rounding corners with 7 dc scallops. Approx scallop count 40-48 depending on perimeter.
Round 34 :
Adjust scallop spacing by working 1 sc between scallops where needed to keep spacing even. Fasten off and weave in ends neatly at the wrong side. Block the entire runner to even out stitches, pinning corners square and spacing scallops evenly while damp or steam-blocking lightly.
Info :
For a firmer runner, consider adding a fabric backing or thin interfacing glued to the wrong side after blocking. This is optional but helps protect surfaces and keeps the runner from shifting on tables.
— Alternate Join and Finishing Options :
Round 35 :
If you prefer a more decorative join, work a 2-row join: first row 1 sc join-as-you-go, second row work 1 hdc in each st to create a raised seam. This will replace Round 30 if desired.
Info :
Alternate border ideas: use reverse single crochet (crab stitch) for a twisted edge in black, or add a final picot round for a delicate finish. If making a wider runner, add more squares to the row or create two rows and join them with a green strip using the same techniques.
— Final Blocking and Care :
Info :
Gently block the runner to the exact shape desired. Pin scallops evenly and allow to dry completely. Hand wash gently with cool water and lay flat to dry to preserve shape. Avoid bleach and harsh agitation.
Round 36 :
End notes: Trim all tails after weaving in, store flat or roll carefully to avoid creasing, and enjoy your seasonal decor!
This Halloween runner brings a playful, handcrafted charm to any autumn table. Each pumpkin square is a small piece of seasonal cheer that, when joined together, creates a cozy, eye-catching accent. The layered cream and green frames add balance and the black scalloped edge gives the runner a polished finish. I hope you enjoy making this runner as much as I enjoyed designing it — happy stitching and show off your spooky, handmade style! 🎃🧶