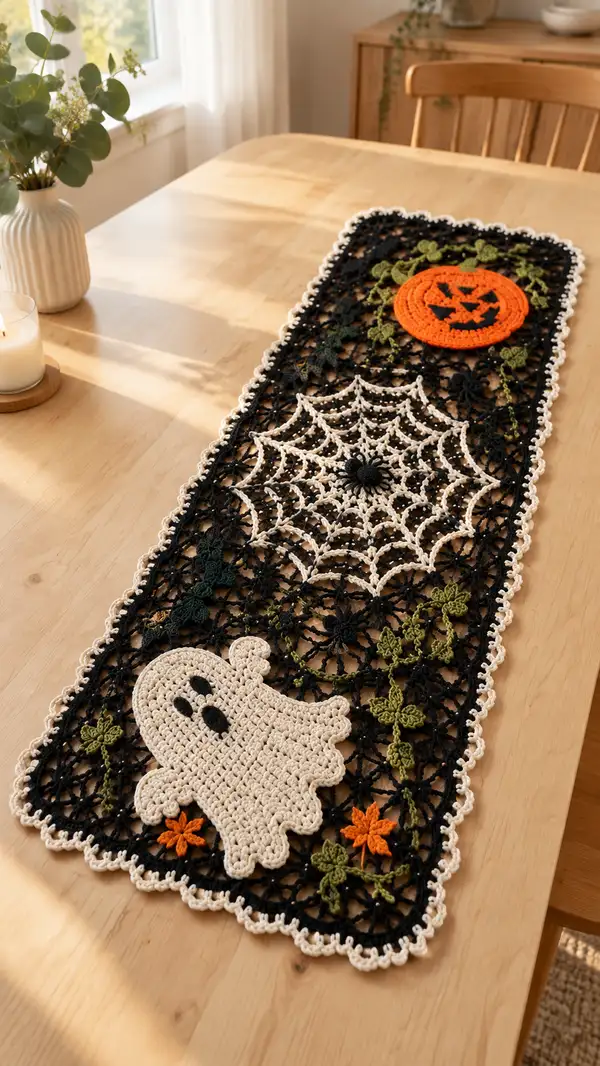
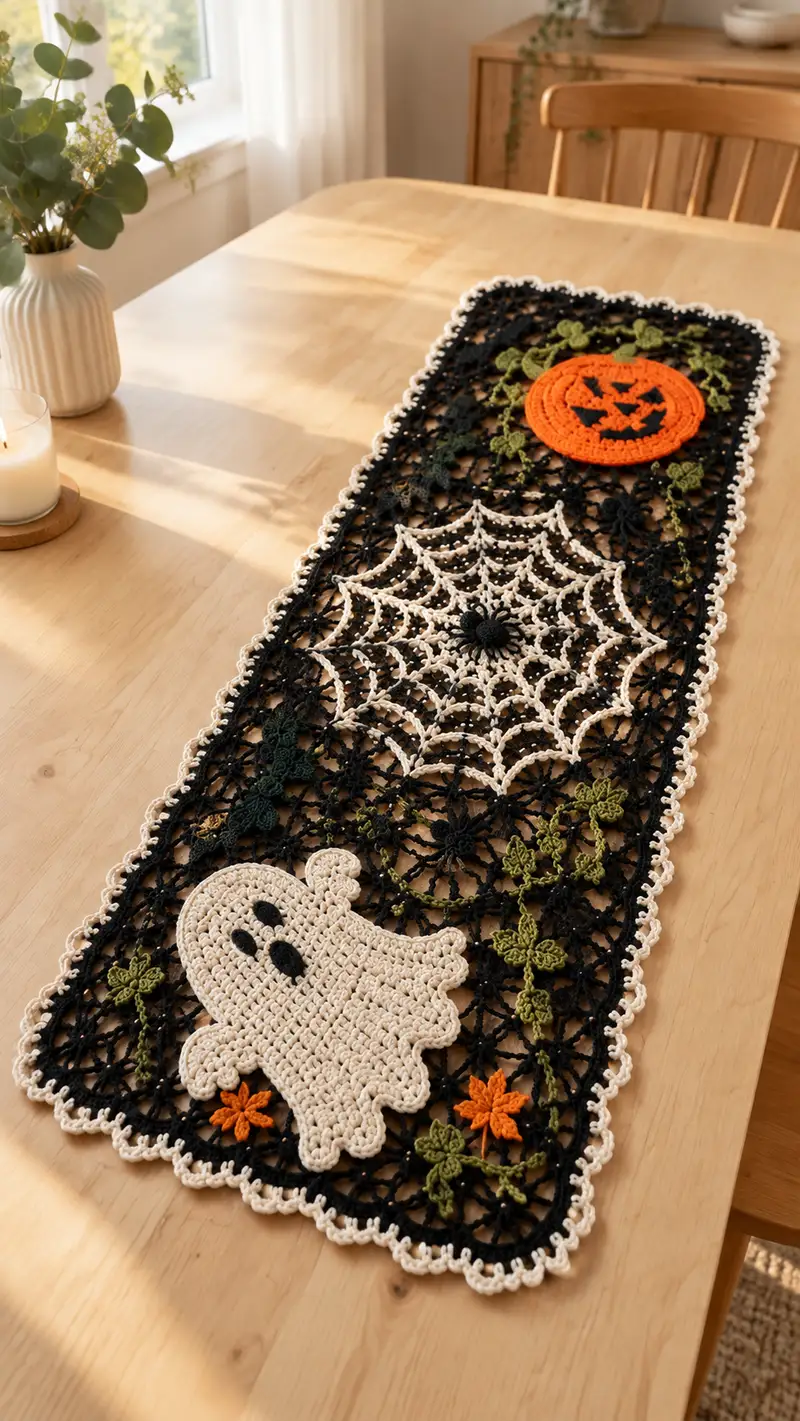
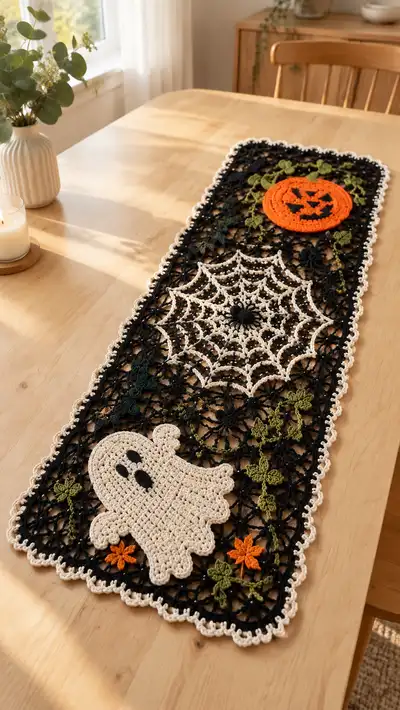
This elegant Halloween lace table runner combines openwork lattice with playful appliques — a ghost, a spiderweb and a jack-o-lantern — in striking black, cream, orange and olive tones. The runner is built from modular lace motifs joined into a long rectangle, then finished with a scalloped cream border and delicate vine motifs. Perfect for autumn and Halloween décor, it lays flat on your dining table to add seasonal charm.
Progress Tracker
0% Complete
— Materials & Gauge :
Info :
Gauge is not critical for overall look, but work tightly enough for lace definition. Approximately 12 motifs across and 4 motifs down yields a runner ~12 x 42 inches depending on yarn and hook. Adjust hook size to achieve desired drape.
— Overview of Construction :
Info :
This runner is constructed from repeating floral-lace modules (called Lace Motif). Modules are joined as you go into strips, then strips are joined together. Three large appliques (Spiderweb motif, Ghost applique, Pumpkin applique) are worked separately and sewn to the lace ground after blocking. Leaves and vine chains are crocheted and attached during assembly or sewn on afterwards for dimension. Finally, a cream scalloped border is worked around the entire rectangle.
— Lace Motif (Make 48 motifs for a standard runner - adjust quantity to desired length) :
Round 1 :
6 sc in magic ring (6)
Round 3 :
(1 sc, inc) x 6 (18)
Round 4 :
(2 sc, inc) x 6 (24)
Round 5 :
(3 sc, inc) x 6 (30)
Info :
Switch to lace stitch sequence. Keep counts accurate; motifs will be joined later at round 8 and round 10 intersection points.
Round 6 :
*ch 5, sl st into next st to make elongated loop*, rep around 6 times, join with sl st to first ch-5 sp (6 loop sps)
Round 7 :
In each ch-5 loop: (sc, ch3, 3 dc, ch3, sc) making a petal; join with sl st to next loop (6 petals total) (approx 36 sts)
Round 8 :
Between petals: ch6, sl st into top of next petal to create connecting chain arches; around creating 6 chain arches (6 arches)
Round 9 :
Work into each chain-6 arch: (sc, ch3, 5 dc, ch3, sc) to enlarge petal points (6 expanded petals) (approx 66 sts)
Info :
Use stitch markers at the top of each petal if making joining rows later. When joining motifs, slip stitch through both motif chain arches to join edges invisibly.
Round 10 :
Working around, create small picot connectors at the base of each petal: *sc, ch2, picot, ch2, sc* between petals. This creates 6 picot connectors (approx 72 sts)
Round 11 :
In each petal top: (sc, ch3, dc, tr, dc, ch3, sc) to create a taller petal shell (6 shells) (approx 84 sts)
Round 12 :
Work 1 sc in each visible stitch and 2 sc in each ch-3 sp around to create an even round (approx 96 sts)
Round 13 :
*ch4, sl st into next sc to make a small arch*, rep around forming 12 small arches (12 arches)
Round 14 :
Into each small arch: (sc, ch3, 3 dc, ch3, sc) to create secondary loops; join with sl st to the next arch (approx 120 sts)
Info :
At round 14 stop and block motif before joining to ensure perfect shape. When joining motifs side-by-side, align the round-10 picots with adjacent motif arches and sl st through both loops to create an open grid.
Round 15 :
Round of decorative chain arches: *ch6, sl st into sc 6 sts ahead*, rep around to create 12 external arches (12 arches)
Round 16 :
Into each external arch: sc, (2 dc, ch2, 2 dc), sc to create star-lace points; finish with sl st to starting point. (Approx 144 sts)
Round 17 :
Close with single crochet round: 1 sc in each st around to stabilize (144)
Info :
If joining motifs to make a strip, after Round 17 work join-as-you-go method: on final round of one motif, when you reach the joining point, sl st through corresponding st on adjacent finished motif before completing the round on the working motif.
Round 18 :
Edge tidy: *sc, ch3, sc in next 3 sts*, rep around for delicate lacy edge (approx 144 tidy points)
Round 19 :
Finish with sl st, weave in ends. Block motif flat to measurement before assembly.
— Joining Lace Motifs into Runner Ground :
Info :
Layout motifs in strips (for our sample runner: 12 motifs long by 4 motifs wide = 48 motifs). Join-as-you-go by slip-stitching through corresponding chain arches or picot connectors at rounds 10 and 15. Keep orientation consistent so petals face same direction across the runner.
Round 1 (Join Step) :
With motif A on hook, when you reach the first joining arch on final round, insert hook through the corresponding arch on motif B and sl st through both, continue to complete current motif round. Repeat at each join point to create a seamless join (no count).
Info :
Join rows horizontally first to form strips, then join strips together. Use pins to hold motifs exactly before making the join; small misalignments will result in a crooked runner edge.
— Spiderweb Applique (Center Focal, Make 1) :
Round 1 :
6 sc in magic ring (6)
Round 3 :
(1 sc, inc) x 6 (18)
Round 4 :
(2 sc, inc) x 6 (24)
Round 5 :
(3 sc, inc) x 6 (30)
Info :
Work flat and even. The spiderweb will be built using alternating rounds of chain arches and connecting rounds that create web spokes.
Round 6 :
Ch5, sl st into next st, *ch5, sl st into next st*, rep around to create 12 ch-5 spokes (12 spokes)
Round 7 :
Round of connecting rounds: *sl st into ch-5 sp, ch4, sl st into next ch-5 sp*, around forming small arches between spokes (12 arches)
Round 8 :
Work into each small arch: (sc, ch3, 5 dc, ch3, sc) forming first concentric ring of web (12 rings pieces) (approx 72 sts)
Round 9 :
Between dc groups: ch6, sl st into next arch to create spacing for next ring; rep around (12 spaces)
Round 10 :
Into each ch6 space: sc, ch4, 7 dc, ch4, sc to enlarge web ring (approx 144 sts)
Info :
Keep spiderweb round centers centered on a motif intersection of the lace ground for best visual balance. Blocking will flatten the web and emphasize the stitched spokes.
Round 11 :
Slip-stitch around to tidy, then ch10 and sl st into alternating spokes creating scalloped arcs over the web; rep to create 12 scallops (12 scallops)
Round 12 :
Work in cream contrast: Into each scallop: sc, (3 dc, ch3, 3 dc), sc to make dramatic curved ring; finish with sl st and weave in ends (approx 192 sts)
Round 13 :
Optional small spider body: With black yarn, make a tiny round: 6 sc in magic ring; 6 inc (12); 12 sc around; finish and leave long tail for sewing; attach to web center.
Info :
Sew web to the lace ground using small whip stitches through the cream ring only, leaving web spokes slightly raised for texture. Use blocking to ensure the web stays flat and centered.
— Ghost Applique (Make 1) :
Round 1 :
6 sc in magic ring (6)
Round 3 :
(1 sc, inc) x 6 (18)
Round 4 :
(2 sc, inc) x 6 (24)
Round 5 :
(3 sc, inc) x 6 (30)
Info :
Work in cream/ivory. This ghost is a flat applique shaped like an elongated oval with a scalloped base. We'll create length by working even rows rather than strict increasing rounds mid-shape.
Round 6 :
1 sc in each st around (30)
Round 7 :
1 sc in next 6 sts, ch6, skip 6 sts, 1 sc in next 12 sts, join with sl st (maintain oval shaping) (30 total around)
Round 8 :
Turn work to begin lengthening: ch1, 1 sc in each st across the long side for 18 sts, at corner ch3 and work 2 sc into chain loop, continue along underside 18 sc, complete with 2 sc in last corner loop (approx 40 sts)
Round 9 :
Repeat Round 8 to extend ghost body to desired length; work 6 rows of even sc around to achieve a flattened elongated shape (approx 40 each round)
Info :
Stop and measure visually against runner — ghost should be about one motif width wide. Do not stuff; keep flat. For the scalloped bottom, we'll work shell stitches on the final round.
Round 10 :
At bottom edge create scallops: *(sk 2 sts, 5 dc in next st, sk 2 sts, sl st)* across bottom edge to make 6 scallops (6 shells)
Round 11 :
Edge finish: 1 sc in each st around entire ghost (approx 60), sl st and fasten off leaving long tail for sewing
Round 12 :
Eyes: With black yarn and small hook, embroider two oval eyes: ch5, sc in 2nd ch from hook across to make small oval; sew two to upper center of ghost. Alternatively embroider using satin stitch.
Info :
Pin ghost onto lower motif junctions and sew securely using small invisible stitches through the underside only so seams are not visible on the right side.
— Pumpkin Applique (Make 1) :
Round 1 :
6 sc in magic ring (6)
Round 3 :
(1 sc, inc) x 6 (18)
Round 4 :
(2 sc, inc) x 6 (24)
Round 5 :
(3 sc, inc) x 6 (30)
Round 6 :
(4 sc, inc) x 6 (36)
Info :
Work in bright orange. After reaching desired diameter (round 6 yields approx 36 sts), change to oval shaping for pumpkin ribbing using surface slip-stitch ribs or worked rounds of front post stitches.
Round 7 :
1 sc in each st around (36)
Round 8 :
Surface ribbing round: *fpdc around next 3 sts, bpdc around next 3 sts* rep across to create alternating ribs for pumpkin texture (36)
Round 9 :
Repeat Round 8 one more time to deepen ribs (36)
Round 10 :
For pumpkin edge: *(sc, ch2, sc) in every 3rd stitch* around to create small scallops (approximately 12 scallops)
Round 11 :
Jack-o-lantern face: With black yarn, embroider triangle eyes and jagged mouth using satin stitch into center of pumpkin. Use long tail from center if necessary to anchor.
Round 12 :
Stem: With deep green, ch6, sl st to form small tube; sew to top center of pumpkin. Fasten off and weave in ends.
Info :
Pumpkin should be flat and slightly domed from ribbing; do not stuff. Block lightly so it lays flat on lace ground.
— Leaf & Vine Elements (Make multiple for scattered placement) :
Round 1 :
Ch15 for vine base (or longer to desired vine length)
Round 2 :
1 sc in 2nd ch from hook and across to end, turn and work back 1 sc across to base creating a cord (14)
Round 3 :
At desired points along vine create leaf: ch1, (1 sc, ch4, 4 dc, ch4, 1 sc) into vine edge to form a leaf loop; continue vine cord (14)
Round 4 :
Work into leaf loops to complete leaves: in ch4 loops work (sc, hdc, 3 dc, hdc, sc) to shape leaf; fasten off leaf color and continue vine
Info :
Make many short vines (6-10 per runner) of varying lengths. Pin vines along runner between motifs and sew with small stitches to anchor. For extra texture, use two shades of green to mimic natural variation.
— Small Star Flowers (Make 12-18) :
Round 1 :
Magic ring, ch1, 6 sc into ring, sl st to join (6)
Round 2 :
*ch3, sl st into next sc* rep 6 times to make 6 tiny loops; sl st to first loop (6 loops)
Round 3 :
In each loop: (sc, ch2, 3 dc, ch2, sc) to form tiny star petals; fasten off leaving long tail for sewing (approx 36 stitches)
Info :
Use bright orange for autumn flowers and olive green centers for contrast. Sew flowers randomly near the ghost and pumpkin appliques and at motif junctions for visual interest.
— Assembled Runner Layout & Placement :
Info :
Suggested layout for pictured runner: 4 motifs across by 12 motifs long. Place ghost appliqué centered on first motif row (lower end), spiderweb centered across the middle row (row 6), pumpkin centered on the top row at opposite end. Scatter 6-10 vines and 12 small star flowers across the runner to create an organic feel.
Info :
Pin motifs and appliques in place on blocked ground before sewing. Use tapestry needle and matching thread to sew through the undersides to keep right side clean.
— Outer Scalloped Border (Worked around entire assembled rectangle) :
Round 1 :
With cream yarn, join at any corner with sl st. Work 1 sc in each stitch around the whole runner to create a neat base edge; at corners, work 3 sc into corner space to ease turning. Maintain count; the total will vary by size but keep even spacing.
Round 2 :
*ch3, skip 2 sts, sc in next st* repeat around to form small scalloped chain arches. Work 3 sc into corner ch-3 spaces to preserve corner curve.
Round 3 :
In each ch3 arch: (sc, 5 dc, sc) to create medium scallops; sl st to next arch (approx 1 scallop per motif link)
Round 4 :
*ch2, picot, ch2, sl st into top of scallop* repeat around to create delicate picot finish. Fasten off and weave in ends carefully on wrong side.
Info :
For a more pronounced border, add an additional round of picot picot-edge: *sc, ch3, picot, ch3, sc* in each scallop peak. Block again after finishing border for crisp edges.
— Final Finishing & Blocking :
Info :
Wet-block the entire assembled runner. Pin to a blocking board, stretching gently to even rectangle shape and aligning scallop points. Allow to dry completely. After dry, sew any vine ends and weave in all tails on the wrong side.
Info :
Light steam-blocking is acceptable for cotton blends; avoid excessive heat. If cotton yarn tends to shrink, pre-wash a swatch to confirm behavior before full blocking.
— Optional Variation: Joining with Crochet Lace Ribbon :
Info :
If you prefer a slightly firmer runner, use a narrow crochet ribbon (ch8 loops with sc rounds) to join motifs instead of slip-stitch join-as-you-go. This creates a visible connecting line and adds structure.
— Troubleshooting & Notes :
Info :
If your runner waves at the edges after joining, check motif count and ensure you have consistent direction of motif petals; small blocking adjustments and re-pin can correct mild waves. If severe, remove one row of joins and correct orientation then rejoin.
Info :
For a longer runner, add more motifs in length; for a narrower runner, reduce motifs across and place appliques proportionally. All motif counts and join points are modular and repeatable.
Info :
Store flat or rolled loosely; folding along scallops could cause permanent creases if left compressed.
This Halloween lace table runner turns seasonal charm into tabletop art — delicate lace, playful appliques and a scalloped border join to create a show-stopping centerpiece. The modular construction makes the project enjoyable and meditative; each motif you complete brings the runner closer to life. Whether used for Halloween parties or fall dinners, this runner adds handcrafted elegance and spooky charm to your home. 🧶🎃🍂