— Pumpkin Stem (Make 1) :
Round 1 :
With brown yarn: ch 6, sc in 2nd ch from hook and next 4 ch (5)
Round 2 :
Ch 1, turn, sc across (5)
Round 3 :
Ch 1, sc2tog, sc in next, sc2tog (3)
Round 4 :
Ch 1, sc in each (3), fasten off leaving long tail for sewing
Info :
Fold the small strip lengthwise and sew closed or work a tight whipstitch along one edge to make a stout stem. Stuff lightly with a few fibers if you want a more rounded stem, then sew to the top center of the pumpkin. Position so the stem sits between two ribs for a natural look.
— Pumpkin Leaves (Make 2) :
Round 1 :
With sage green: ch 6, sc in 2nd ch from hook, hdc in next, dc in next, hdc in next, sc in last (5)
Round 2 :
Ch 1, turn, sc in first, sc in next, 2 sc in next, sc in next, sc in last (6)
Round 3 :
Ch 1, turn, sc in each st across, sl st in first st to create a pointed leaf tip if desired; fasten off leaving long tail for sewing
Info :
Sew leaves on either side of the stem using the long tails, stitching through the top of the pumpkin where the yarn is more secure. Slightly curve the leaf by pulling stitches when sewing to create natural shape.
— Classic Granny Square Background (Make 1 per pumpkin) :
Round 1 :
With cream yarn: ch 4, join with sl st to form ring, ch 3 (counts as first dc), 2 dc into ring, ch 2, *3 dc into ring, ch 2* repeat 3 times, join with sl st to top of ch-3 (4 groups of 3 dc, 4 ch-2 corners) (12 dc total)
Round 2 :
Sl st into next 2 dc and into ch-2 space, ch 3 (counts as dc), 2 dc in same ch-2, ch 2, 3 dc in same ch-2, *3 dc, ch 2, 3 dc in next corner ch-2* repeat around, join (4 corner clusters, 12 dc groups) (24 dc clusters counted as 4 clusters)
Round 3 :
Sl st into next 2 dc and into corner ch-2 space, ch 3, 2 dc, ch 2, 3 dc in corner; *3 dc in next space between clusters, ch 1, 3 dc in next corner ch-2, ch 2, 3 dc in same corner* repeat around. Adjust ch-1 spacers so the square lays flat. Join (square now has neat small spaces between groups)
Info :
Work Round 3 with gentle tension. The central pumpkin applique will be sewn on to the center of this square, covering the central holes. The cream center should remain fairly flat; if your pumpkin is slightly domed, that is fine and will add nice texture.
Round 4 :
With cream: ch 3, dc in same st, *ch 1, skip next dc cluster space, 3 dc in next space* repeat around, at corners work 3 dc, ch 2, 3 dc. Join (this round expands the square to accommodate pumpkin diameter)
Round 5 :
Switch to blush pink: join with sl st into any corner ch‑2, ch 3 (counts as dc), 2 dc in same corner, ch 2, 3 dc in same corner, *3 dc in next side space, 3 dc in next corner ch‑2, ch 2, 3 dc in same corner* repeat around, join (work with consistent tension) (granny now framed by blush)
Info :
Change to blush pink at the start of Round 5. Carry cream yarn behind work for a tidy join or fasten off and weave in tails. The blush round provides a soft inner frame around the cream center so the pumpkin sits between blush and sage later.
Round 6 :
With blush: ch 1, sc evenly around each dc and ch space to create a tidy row of single crochet edging for the blush round (this evens out holes). Join and fasten off (work approximately 32-36 sc depending on tension)
Info :
Blocking tip: Before attaching pumpin applique, lightly steam-block the square or pin to shape on a blocking mat to ensure all squares match size. Allow to dry and then continue with applique attachment and outer join rounds.
— Attaching Pumpkin to Granny Square :
Info :
Position the pumpkin centered on the cream middle of the granny square. Use pins or sewing clips to hold in place. Using the long tail left on pumpkin bottom, sew through the granny center around the underside of the pumpkin, then weave tail inside and secure. Use small whip stitches to anchor the edges of the pumpkin over the cream to avoid pulling the granny pattern out of shape.
Step :
Place pumpkin so its widest part follows the horizontal midline of the square. Sew the bottom 6-8 stitches of the pumpkin to the granny center using the tail, then flip square and stitch stem and leaves to the top center.
Info :
To emphasize ribs, run a length of the same pumpkin color across the base of each rib on the surface using surface slip stitch or embroidery stitch in matching yarn to deepen shadows if desired.
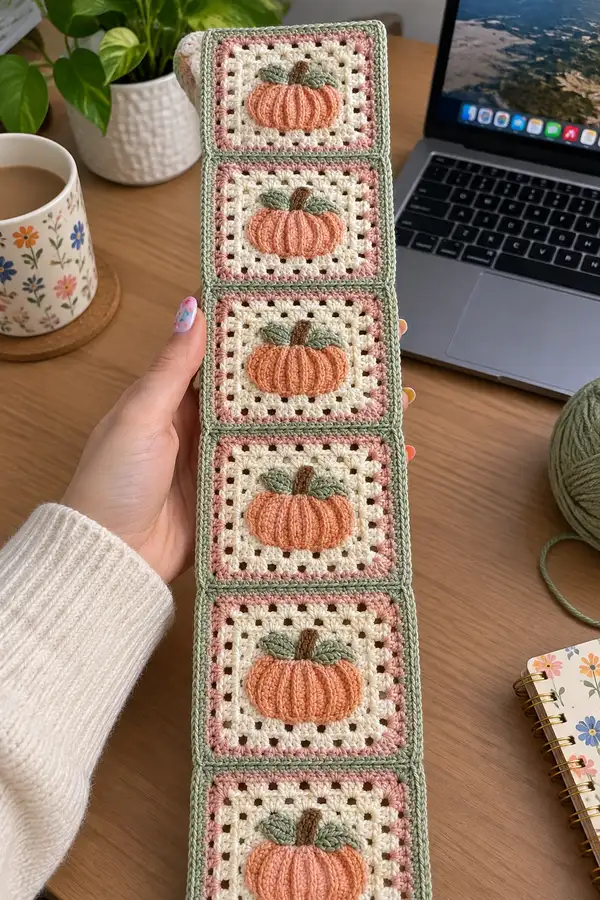
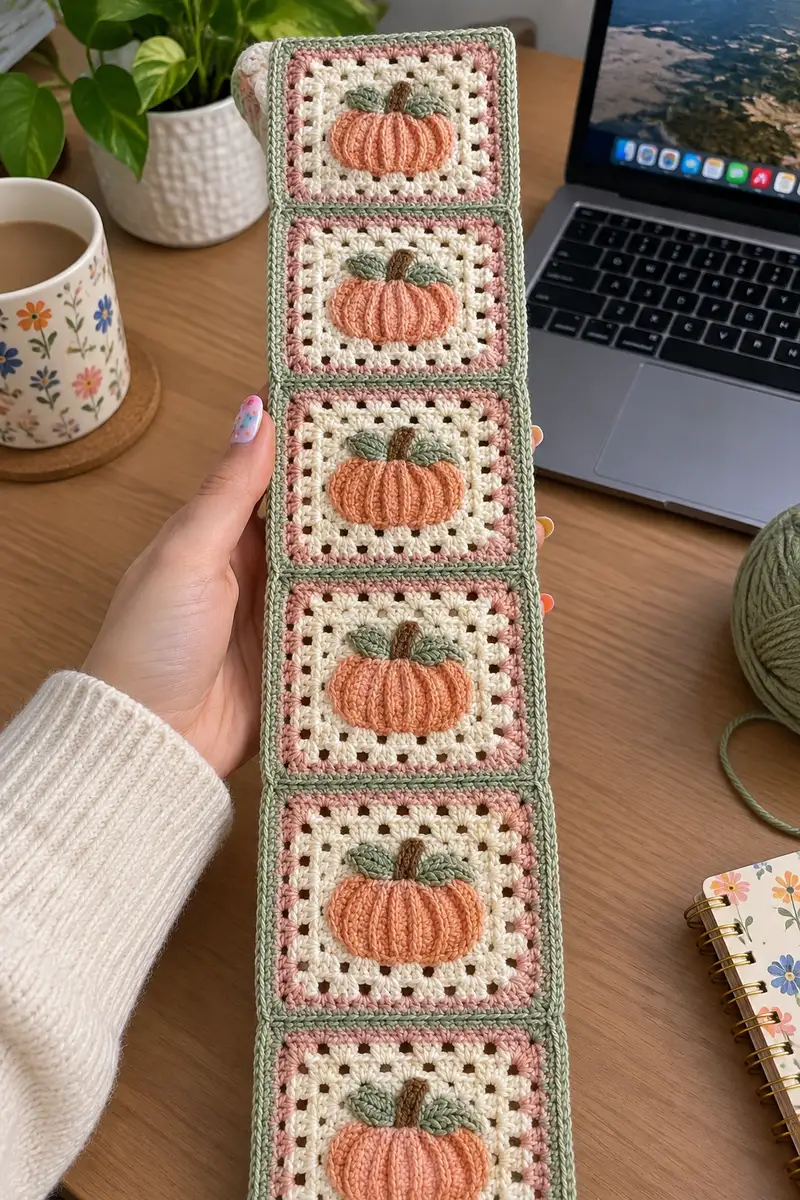
— Joining Squares Into Runner (Five squares pictured; repeat for desired length) :
Info :
Make all squares (pumpkin applique + background) first. Block them for consistent size. Squares are joined with sage green using a single crochet join worked along the side of two squares held right sides together or using mattress stitch for flat seams. The instructions below use a sc join for a slightly raised, framed join that echoes the border.
Round 1 (Join start) :
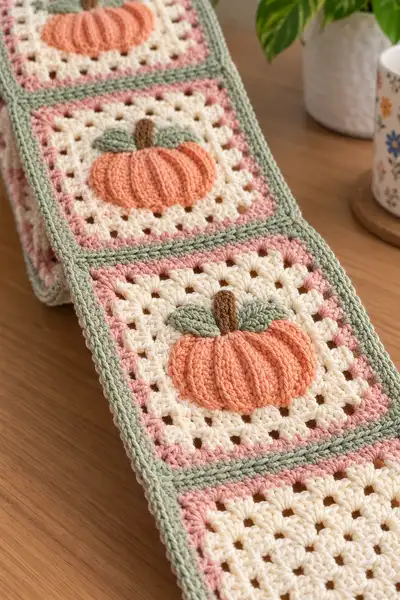
With sage green, align two squares right sides together. Join yarn at one corner of square A's side edge, ch 1, sc through both layers into corner ch-2 space, sc through both layers into each side dc cluster and chain space evenly down the side (approx 12-15 sc depending on previous rounds), sl st into corner of square B to join. Repeat to join all five squares in a single column, working seam between adjacent squares only (not between top to bottom of runner). Spaces between squares will have small sage horizontal join rows.
Info :
When joining, use a consistent number of stitches on each side to keep spacing even. If the square edges are slightly different, add or reduce an occasional sc in a ch-1 space to keep the row straight. After joining all five squares you will have a long panel to border.
Round 2 :
After joining columns, with the wrong side facing you, work a row of sc across the horizontal join between each square to reinforce seam. Insert hook through both layers and sc through both layers across the seam: approx 6-8 sc per seam depending on spacing. Fasten off after each seam; or carry sage along the inside and work continuous sc along the back for stronger seam.
Info :
Check that joins lie flat. If the runner wants to curl, add a single extra row of sc in sage on the reverse side to flatten. Press gently with a steam iron from the wrong side if necessary (use cloth to protect yarn).
— Outer Border and Finishing Rounds :
Round 1 (Border start) :
With sage green: join at any corner ch-2 space, ch 3 (counts as dc), work 2 dc in same corner, ch 2, 3 dc in same corner. Along each side work 3 dc clusters into side spaces and at corners work 3 dc, ch 2, 3 dc. Continue around entire runner; this creates a classic granny border that unifies all squares. Join with sl st to top of beginning ch-3.
Round 2 :
Ch 1, sc evenly around the entire outer edge into dc clusters and ch spaces to produce a neat single crochet edge (approx 5-6 sc per side cluster depending on length). Place 3 sc in each corner ch-2 to square the corners. Join and fasten off.
Info :
If you prefer a decorative framed edge like the photo, you can work an extra round in sage of hdc in BLO to create a subtle ridge: join yarn, ch 2, hdc in each st BLO around, join and fasten off. This gives a raised frame effect that echoes the pumpkin ribs.
Round 3 (Optional decorative rope) :
With cream or a highlight color, join and ch 2, *2 dc in next st, ch 1* repeat around edge to create a textured picot-like frame; join, weave in ends.
Info :
Weave in all tails neatly on the wrong side. Block the entire runner flat again to even the border and allow seams to sit flat. Light steam-blocking helps stitches relax and the border to sit nice and sharp.
— Alternate Smaller Detail: Raised Rib Accent (Surface Slip) :
Info :
To deepen the look of each pumpkin rib after the piece is assembled, use a yarn needle and same-color yarn to run a surface slip-stitch line down each rib, placing the needle under top loops of the rib stitch and pulling yarn snug to create deeper groove. Secure ends on the wrong side.
— Repeat and Assembly Guidelines :
Info :
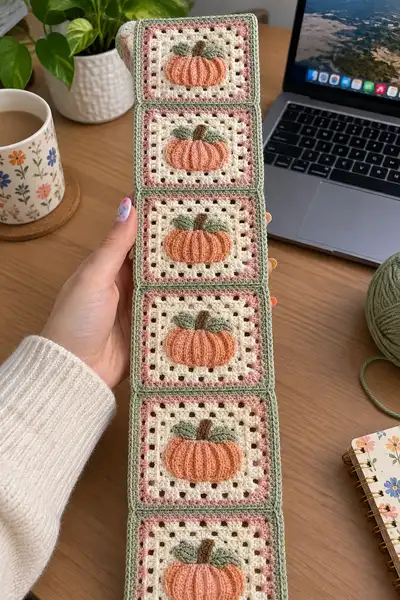
Make as many pumpkin-granny squares as needed for your desired runner length. The pattern is written for one square and the joining method produces a narrow runner like pictured (5 squares tall). For a wider runner, make sets of columns and join columns together using the same sage sc seam method across the long edge.
Final Care :
Hand wash gently in cool water with mild soap, reshape and lay flat to dry. Avoid machine washing or tumble drying to maintain the shaped pumpkin ribs and pastel colors.
This Pastel Pumpkin Granny Square Table Runner is a sweet seasonal accent that combines classic granny work with delightful dimensional texture. Each square becomes a little scene—soft cream backgrounds, blush frames and a plush peach pumpkin—joined into a neat runner you will be proud to display. The step-by-step instructions make the process approachable and satisfying from the first stitch to the final border. 🧶🍂 Enjoy making and gifting this cozy fall accent, and don't forget to snap a picture of your finished runner! 🎃