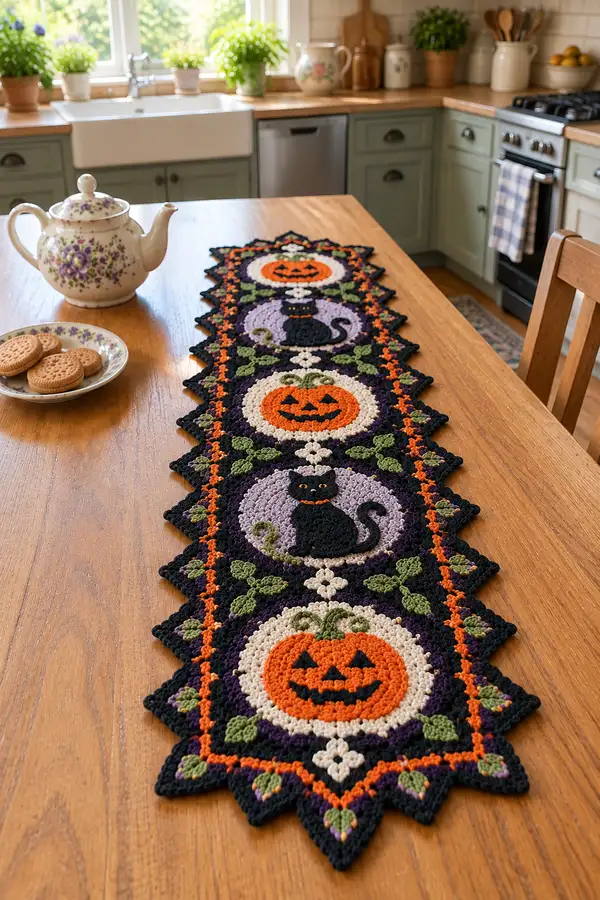
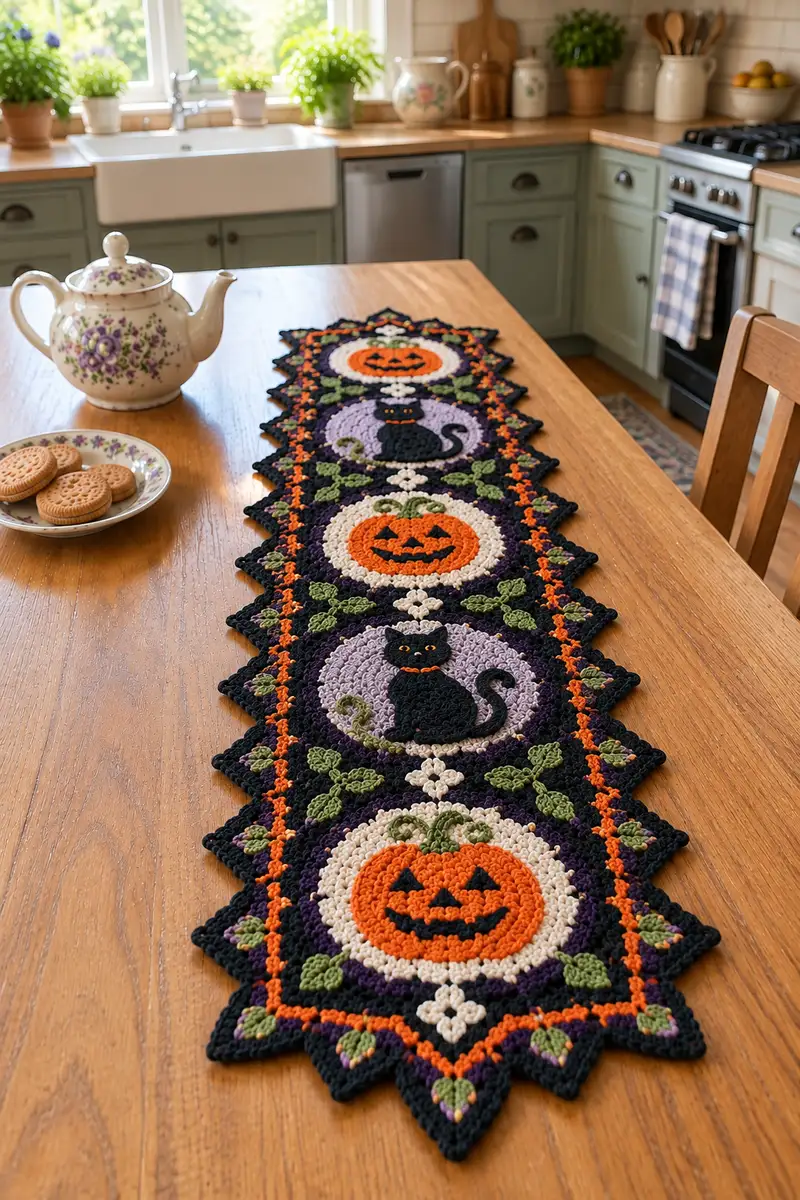
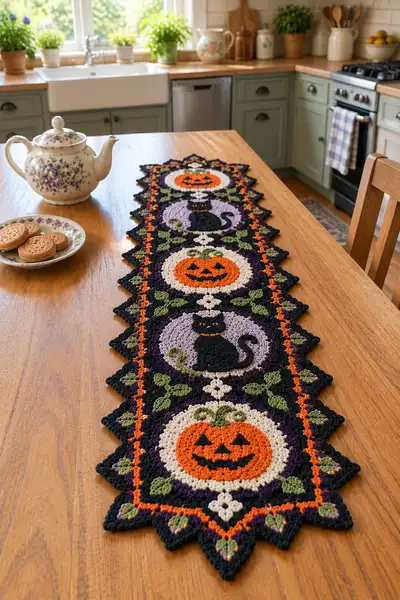
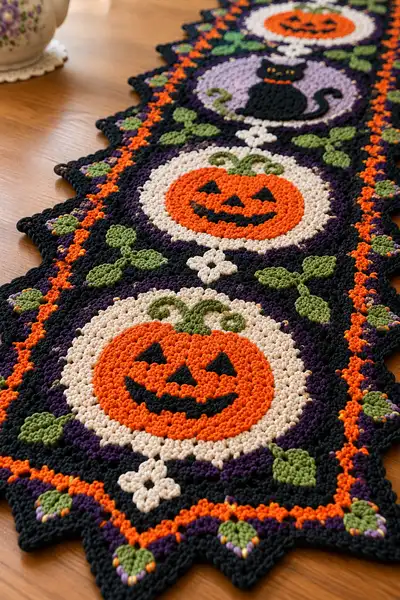
A long, spooky-chic crochet table runner featuring alternating carved pumpkins and silhouetted black cats framed in purple and black motifs. Bright orange pumpkins, soft cream backgrounds, and olive green leaves give an autumnal, vintage vibe. The runner is worked motif-by-motif and joined-as-you-go for a flat, stable finish. Perfect for a Halloween centerpiece or autumn décor on a dining table.
Progress Tracker
0% Complete
— Notes & Gauge :
Info :
Gauge is not strict for a table runner, but a consistent fabric is important. Make a 12 cm (4.5 in) sample circle using rounds 1-10 of the Pumpkin Motif to check tension. Adjust hook by +/- 0.25 mm if the circle cups or ruffles. Work tightly enough that the runner lays flat and stuffing is never needed; all pieces are flat motifs and applique9s.
Info :
Color shorthand used throughout: BLACK (background/border), ORANGE (pumpkin), CREAM (pumpkin ring & join), LAVENDER (cat backgrounds), OLIVE (leaves), YELLOW (cat eyes), PURPLE (accent row). Carry unused yarn across WS for small color changes or fasten off and weave ends for large shifts.
— Pumpkin Motif (Make 4; alternate positions) :
Round 1 :
6 sc in magic ring using ORANGE (6)
Round 3 :
(1 sc, inc) x 6 (18)
Round 4 :
(2 sc, inc) x 6 (24)
Round 5 :
(3 sc, inc) x 6 (30)
Round 6 :
(4 sc, inc) x 6 (36)
Info :
By the end of round 6 the orange pumpkin centre should be a tidy disk about 7-9 cm diameter depending on tension. If your orange center looks small, try one extra increase round before moving to the cream ring.
Round 7 :
Change to CREAM. (5 sc, inc) x 6 (42)
Round 8 :
(6 sc, inc) x 6 (48)
Round 9 :
1 sc in each st (48)
Round 10 :
1 sc in each st BLO (48)
Info :
Round 7 and 8 create the cream frame around the pumpkin. Use BLO on round 10 to create a subtle ridge that helps the cream ring sit raised against the background for a carved look.
Round 11 :
Change to LAVENDER or PURPLE depending on color placement near cats; for pumpkins we will use PURPLE. 1 sc in each st (48)
Round 12 :
1 sc in each st (48)
Round 13 :
1 sc in each st (48)
Info :
These purple rounds form the circular field that separates motifs from the black border. Keep tension consistent so the motif remains flat. If it begins to ripple, work one round of even sc with a slightly larger hook to relax the fabric.
Round 14 :
Change to BLACK. 1 sc in each st (48)
Round 15 :
1 sc in each st (48)
Round 16 :
1 sc in each st (48)
Round 17 :
Start working decorative anchor points: (6 sc, inc) x 6 (54)
Round 18 :
(7 sc, inc) x 6 (60)
Info :
Rounds 17 and 18 expand the black framing so each motif can be edged into the toothed outer border later. Maintain stitch markers at round starts; this helps when aligning motifs for joining.
Round 19 :
1 sc in each st (60)
Round 20 :
1 sc in each st (60)
Round 21 :
1 sc in each st (60)
Round 22 :
Change to OLIVE. Work leaf-anchor stitches across specific positions: *ch2, skip 3 sts, sl st in next st* across spaced evenly (approx every 10 sts) to create small vine loops (6 vine loops)
Info :
The small vine loops are the foundation for later leaf motifs. Keep the OLIVE floats tidy across WS or fasten off and rejoin later for each leaf if you prefer clean backs.
Round 23 :
Change to BLACK. 1 sc in each st (60)
Round 24 :
1 sc in each st (60)
Round 25 :
Begin scalloped tooth prep: (3 sc, 1 hdc, 1 dc, 1 hdc, 3 sc) in next 6 sections evenly across (60 with 6 scallops)
Round 26 :
Work a textured point: in each scallop work (sl st, ch 1, 3 tr cluster, ch 1, sl st) at scallop peaks to form triangular points (6 points)
Info :
These outer points create the star-toothed border between motifs when joining. Keep stitches symmetrical so points line up when motifs are placed side by side.
Round 27 :
Change to ORANGE. Using surface slip stitch, embroider the pumpkin face: surface sl st triangle eyes and a jagged smile across the ORANGE center. Tie off and weave ends on WS.
Round 28 :
Fasten off leaving 20 cm tail for assembly. Weave in ends. Block the motif flat, pinning points gently to preserve triangular shape.
— Cat Silhouette Applique9 (Make 2 per cat motif; sew together to create a flat double-thick silhouette) :
Round 1 :
With BLACK, ch 2, 6 sc in 2nd ch from hook (6) - create small oval starting point for cat body base
Round 3 :
(1 sc, inc) x 6 (18)
Round 4 :
1 sc in each st (18)
Round 5 :
FLO: (2 sc, inc) x 6 (24) - begin shaping chest and belly area
Round 6 :
1 sc in each st (24)
Info :
From here we will sculpt the cat body and head as a flat applique9. This is not stuffed; work with loose tension to keep the silhouette flat. Make two identical pieces and sew them RS together for a neater edge and slightly raised silhouette.
Round 7 :
(3 sc, dec) x 6 (18)
Round 8 :
1 sc in each st (18)
Round 9 :
Work cat neck shaping: (1 sc, dec) x 6 (12)
Round 10 :
1 sc in each st (12)
Info :
Now create ear points by splitting the top into two small triangles. For fine shaping, switch to 3.5 mm hook for ear rounds if you want crisper points.
Round 11 :
Row shaping (work flat): ch 1, turn, sc in next 6 sts (6) - forming left ear and half head
Round 12 :
ch 1, turn, dec, sc, dec (4) - finish ear point; fasten off left ear section and reattach to work on right side separately
Round 13 :
Rejoin yarn to right side base, ch 1, sc in next 6 sts (6)
Round 14 :
ch 1, dec, sc, dec (4) - finish right ear point; sew left and right ear edges together if needed for cleaner point
Round 15 :
Rejoin to main body round and extend tail: working along lower edge, sc 6, ch 8, sl st back along chain to make curled tail and secure to lower edge, sc 6 (maintain body shape)
Round 16 :
Finish edge with 1 sc in each outer st around to tidy silhouette. Make a second identical piece and sew RS together with whip stitch, leaving a small opening to weave in ends. Fasten off.
Info :
Add two tiny YELLOW French knots or sewn satin stitches for eyes. Alternatively, use tiny yellow felt circles glued on. Keep applique flat — do not stuff.
— Cat Background Circle (Make 4; one per cat motif) :
Round 1 :
6 sc in magic ring using LAVENDER (6)
Round 3 :
(1 sc, inc) x 6 (18)
Round 4 :
(2 sc, inc) x 6 (24)
Round 5 :
(3 sc, inc) x 6 (30)
Round 6 :
(4 sc, inc) x 6 (36)
Info :
Work rounds until you reach a diameter matching your pumpkin motifs. Aim for 7-9 cm for the inner disk to keep visual balance with pumpkin circles. If you want a slightly larger cat silhouette, add one more increase round to reach 42 sts.
Round 7 :
(5 sc, inc) x 6 (42)
Round 8 :
1 sc in each st (42)
Round 9 :
Change to BLACK. 1 sc in each st (42)
Round 10 :
1 sc in each st (42)
Round 11 :
(4 sc, inc) x 6 (48)
Round 12 :
1 sc in each st (48)
Round 13 :
Work decorative anchor loops in OLIVE similar to pumpkin motif: ch2 loops placed evenly (6 loops)
Round 14 :
Change to BLACK and work scallops and points as per Pumpkin Motif Rounds 25-26 (adapt to 48 sts, 6 scallops)
Round 15 :
Fasten off leaving long tail for sewing. Block flat. Sew the double-thick black cat applique9 to the lavender center with small, neat whip stitches, aligning the tail curve to overlap the bottom edge slightly.
— Small Leaf Motif (Make 24) :
Round 1 :
With OLIVE, ch 2, 6 sc in 2nd ch from hook (6)
Round 3 :
1 sc in next 4 sts, (hdc, dc, hdc) in next st, 1 sc remaining (12) - shaped leaf body
Round 4 :
1 sc around to tidy edge and flatten leaf (12)
Info :
Leaves are worked small and flat; attach to vine loops placed at Rounds 22/13 of the main motifs. For a neater back, tack each leaf in place with a few tiny stitches and weave ends through the motif back.
Round 5 :
Fasten off leaving 12 cm tail for sewing. Block each leaf lightly to shape the center crease.
— Small Four-Petal Flower Join (Make 6) :
Round 1 :
With CREAM, magic ring, 6 sc (6)
Round 2 :
(ch 2, sl st in next st) x 3 to create three loops, then rejoin to form 4th petal so total petals = 4; fasten off (approx 6 tiny petals)
Info :
These tiny crosses/quatrefoils sit between motif centers and act as join anchors. Place them precisely at motif cardinal points so the runner length lines up straight when motifs are joined.
— Connector Diamond & Rectangular Join (Make chain to desired length) :
Round 1 :
With BLACK, ch 160 (or measure to the length you want between motifs if making a longer runner), join with sl st to form a long foundation chain for connector base. This chain will be worked into an ornamental strip later.
Round 2 :
1 sc in each ch around to create a sturdy band; if forming a tube, work in continuous rounds (160)
Round 3 :
Work a decorative pattern of (3 sc, ch2, skip 2) along connector center to create small gaps for attaching 4-petal flowers and leaf clusters equally spaced
Info :
Connector length depends on the number of motifs. The example runner has four circular motifs placed in a long line with narrow connector strips between them. Adjust chain length to accommodate the desired spacing and table length.
— Outer Border & Zigzag Teeth (Entire Runner Edge) :
Round 1 :
With BLACK, join at any outer-most scallop of an assembled runner and 1 sc in each outer st around the entire runner to even edges (work continuous and count total sts for reference)
Round 2 :
1 sc in each st (use stitch markers at motif-to-motif joins so corners remain square)
Round 3 :
Work orange accent rope: change to ORANGE, (sl st, ch 2, sl st) along one round to form a raised chain; this will be visible along inner border line
Round 4 :
Change to BLACK. Work a base row for teeth: (3 sc, ch 3, sl st in next stitch) around where points will form (repeat according to counted points, typical 48-60 points across entire runner depending on motif quantity)
Round 5 :
Form triangular teeth: at each ch-3 space work: (sl st, ch1, 5 tr cluster, ch1, sl st) to make prominent points; fasten off and weave ends
Info :
Triangular points are the striking black zigzags you see. Space them evenly — typically each motif contributes 6 points; measure and match points from other motifs during assembly to keep symmetry.
Round 6 :
Finish with small olive teardrops at each point tip: join OLIVE, sc in point tip, (hdc, dc) cluster, sl st back; fasten off and repeat for each tip.
Round 7 :
Add tiny purple bead dots: join PURPLE at regular spacing within border triangles and work 3 tiny sc popcorns (ch1, 3 sc in same st, remove hook and pull loop through to form popcorn) to mimic decorative beads; weave in ends
Info :
Work the border after motifs are joined and the runner is blocked flat. Do not work heavy textured stitches that will impede laying flat. If the border curls, damp-block and pin flat until dry.
— Assembly & Join-As-You-Go (JAYG) Steps :
Info :
Layout order: Pumpkin, Cat, Pumpkin, Cat, Pumpkin (or adjust to desired length). Place motifs RS up, spaced evenly. We use join-as-you-go with sl st to edge or small whip stitch to unify motifs into a long runner.
Round 1 :
Align two motifs RS together. Join at outer black frame with BLACK yarn: insert hook through both motif outer loops and sl st in matching sts around 6-8 stitches to anchor, then continue joining along scallop peaks for visible continuity. Repeat to join all motifs in sequence (work matching point to point)
Round 2 :
After joining motifs, work connector diamond strips between motifs by sl sting through connector band and outer motif edge every 6-8 stitches to create an interlaced seam rather than a bulky seam.
Info :
Pin motifs carefully before joining to ensure triangles and scallops line up. If your motifs have slightly different stitch counts, ease the differences by spacing sl sts at tighter or wider intervals rather than forcing stitches together.
Round 3 :
Sew all OLIVE leaves into vine loops placed earlier. Each motif gets 6 leaves: sew one leaf per vine loop with a few small invisible stitches, then press flat.
Round 4 :
Sew the small cream four-petal flowers at the four cardinal join points between adjacent motifs to give the runner a chain-like central spine. Crochet a small chain of 3 sc in BLACK between these flowers to stabilize joins.
Info :
Where seams meet at the runner edges, hide tails by weaving along the underside and back through several stitches to secure. Use a sewing needle and pull ends through the black border for invisible finishing.
— Final Edging & Finishing Rounds :
Round 1 :
With BLACK, sc evenly around entire runner edge to even any gaps created by joining (count total sts and make note for future reference)
Round 2 :
Work a decorative picot row in ORANGE: (sc 3, picot) across front edge where you want the orange rope seen; this gives the runner its visible orange inner border line
Round 3 :
With BLACK, work one more tidy finishing sc round, then a slip-stitch finish to lay a neat edge. Fasten off and weave in all tails on WS.
Round 4 :
Press and block the entire runner: dampen slightly, pin to flat board, shape points and scallops carefully, and leave to dry overnight. This gives the runner its crisp pointed edges.
Info :
Optional: Use a very light starch spray if you want a stiffer runner for table display. Avoid over-starching if your table surface could be damaged by moisture.
— Measurements & Adjustments :
Info :
Sample motifs finished as shown measure roughly 18-20 cm across including points; the full runner with 4-5 motifs will be about 120-140 cm long depending on spacing. Adjust connector chain length and number of motifs to fit your table length.
Info :
To make a shorter runner, simply reduce the number of motif repeats and adapt the connector chain length accordingly. To make a table topper, add motifs side-by-side and expand border rounds to form a rectangle.
This Halloween runner transforms a table into a festive display—classic pumpkins, clever cat silhouettes, and a dramatic toothy border come together in one long, joyful project. Each motif stitches up quickly and joins into a striking centerpiece with rich black, orange, cream, purple, and olive tones. Whether you're dressing a small bistro table or a long farmhouse dining table, this runner adds seasonal charm and a handmade touch. 🎃🖤🧶