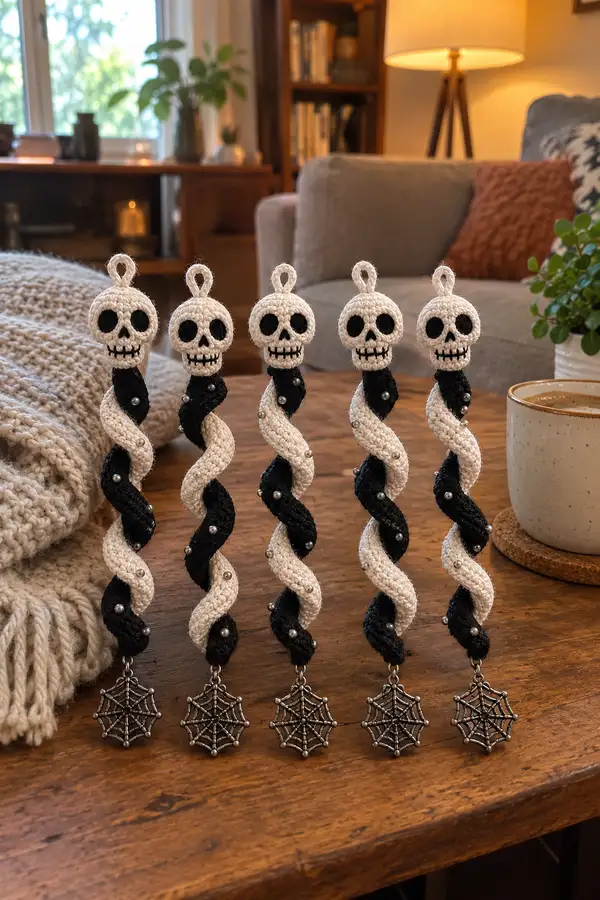
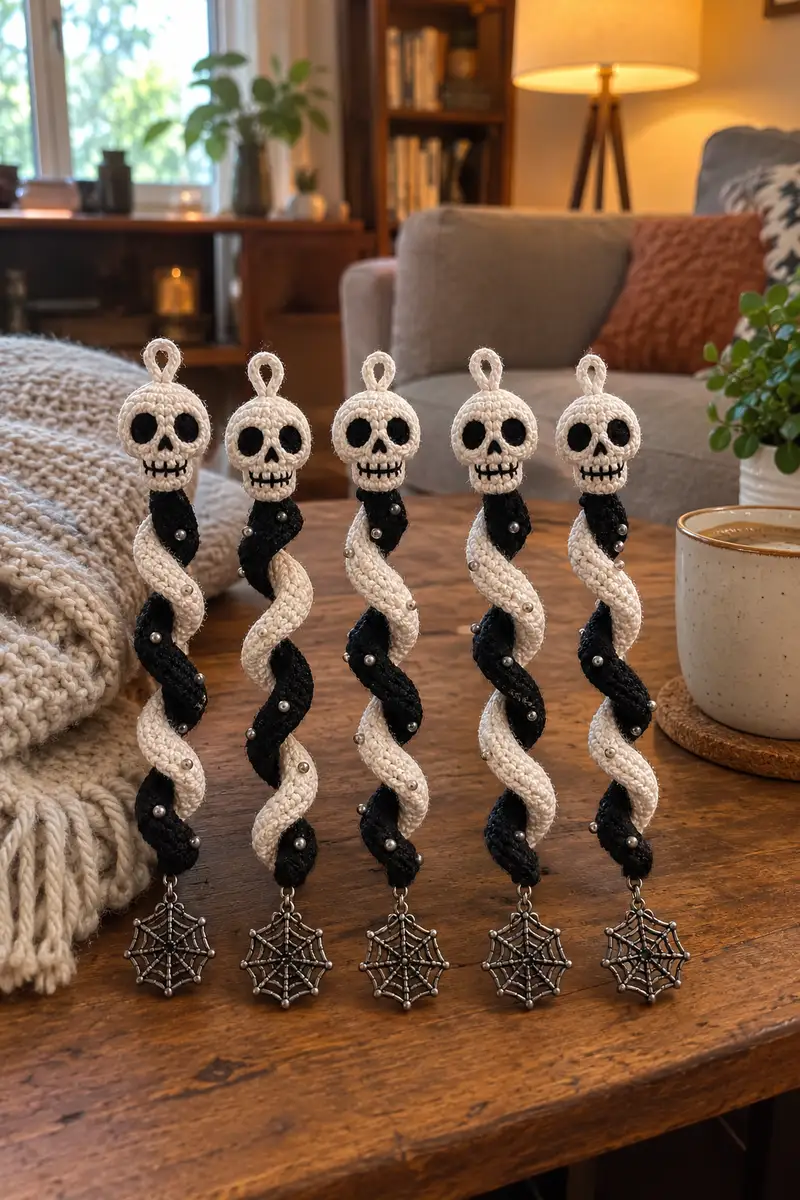
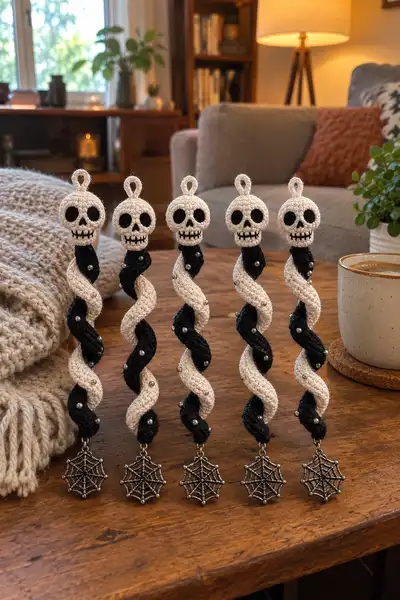
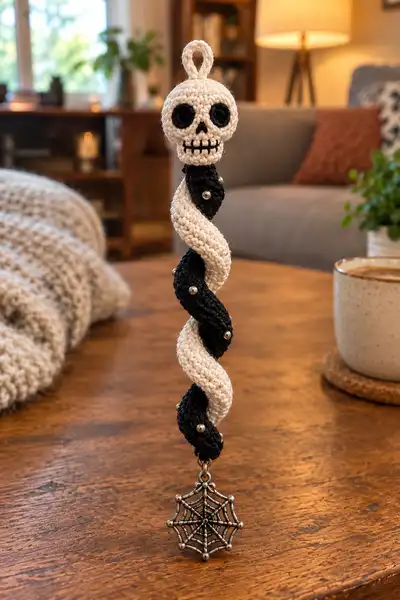
Create a spooky-chic hanging ornament inspired by classic Halloween motifs — a tiny crochet skull perched atop a twisted black-and-cream spiral, finished with metallic beads and a spider charm. This pattern teaches you to crochet a detailed skull head, two matching spiral tubes, and assemble a twisted garland ornament with a secure hanging loop. Perfect for seasonal accents, gift tags, or a spooky garland, each piece finishes with a polished handmade look.
Progress Tracker
0% Complete
— Notes & Gauge :
Info :
Gauge is not critical but a tight fabric is preferable so stuffing and beads do not show through. Recommended hook 3.5mm with worsted cotton to produce a firm fabric similar to the sample. Final ornament measures approximately 7-8 in / 18-20 cm from top of loop to bottom of charm when made with suggested yarn and hook.
— Head (Skull) :
Round 1 :
6 sc in magic ring (6)
Round 3 :
(1 sc, 1 inc) x 6 (18)
Round 4 :
(2 sc, 1 inc) x 6 (24)
Round 5 :
(3 sc, 1 inc) x 6 (30)
Round 6 :
(4 sc, 1 inc) x 6 (36)
Round 7 :
(5 sc, 1 inc) x 6 (42)
Round 8 :
(6 sc, 1 inc) x 6 (48)
Round 9-18 :
1 sc in each st (48)
Info :
These rounds create the dome of the skull. Place temporary stitch markers at the start of each round to keep track of the increase rows. The height of rounds 9-18 determines the forehead; you can adjust the number of even rounds to make the skull taller or shorter.
Info :
Place safety eyes or mark eye centers between rounds 13-14: approximately 9-11 stitches apart (center to center) to match the sample expression. If embroidering, mark the same positions with pins or a yarn tail.
Round 19 :
(6 sc, 1 dec) x 6 (42)
Round 20 :
(5 sc, 1 dec) x 6 (36)
Info :
Begin stuffing the head moderately now. Use small amounts of fiberfill, pushing into the dome to avoid lumps. The skull should be firm but still slightly yielding — not rock-hard.
Round 21 :
(4 sc, 1 dec) x 6 (30)
Round 22 :
(3 sc, 1 dec) x 6 (24)
Round 23 :
(2 sc, 1 dec) x 6 (18)
Round 24 :
(1 sc, 1 dec) x 6 (12)
Info :
At this point the basic skull sphere is closed down to a small opening. Do not fasten off — we will create a short neck/attachment ring and then construct or attach the jaw/teeth (see separate Jaw section). Keep a long tail for sewing and for the top loop placement.
Round 26 :
1 sc in each st (6) — begin neck tube (6)
Round 27 :
1 sc in each st (6)
Round 28 :
1 sc in each st (6)
Round 29 :
1 sc in each st (6)
Round 30 :
1 sc in each st (6)
Info :
These rounds form a short 5-round neck tube (6 sts circumference) which will be used to sew the skull to the top of one spiral cord. After round 30 fasten off leaving approximately 10-15 cm tail for sewing; weave the tail through the remaining stitches to close if you prefer a neater finish, but leave enough tail for assembly.
— Skull Eye Sockets (Make 2) :
Round 1 :
6 sc in magic ring (6)
Round 3 :
1 sc in each st (12)
Round 4 :
1 sc in each st (12)
Info :
Make two small flat discs in black for the eye sockets. Optionally block lightly or press with an iron on low heat covered with a cloth if using cotton to flatten. Place them on the skull between rounds 13-14 after assembling if you prefer a slightly inset look.
— Nasal Triangle (Nose) :
Round 1 :
Ch 3, sc in 2nd ch from hook and last ch (2)
Round 2 :
Turn, ch1, 2 sc in first st, 1 sc in next (3)
Round 3 :
Turn, ch1, (1 sc, 1 inc) x 1, 1 sc (4)
Info :
This small triangular nose is worked flat in black. After finishing, use the tail to sew between the eye discs at rounds 14-15 to create the skull nose. Keep it small and centered.
— Jaw & Teeth Panel :
Round 1 :
6 sc in magic ring (6)
Round 3 :
(1 sc, 1 inc) x 6 (18)
Round 4-6 :
1 sc in each st (18)
Round 7 :
(2 sc, 1 dec) x 6 (12)
Round 8 :
1 sc in each st (12)
Info :
The jaw panel is essentially a short cylinder that will be sewn to the lower front of the skull. After sewing in place, use black embroidery yarn to stitch vertical tooth marks across the front row of the jaw. Space teeth approximately every other stitch for a small, sewn grin similar to the sample.
— Top Hanging Loop (worked onto head) :
Info :
You can create the loop directly from the head top before final fastening, or crochet a separate loop and sew it. The sample uses a sturdy crocheted loop attached at the head top center that sits neatly above the skull.
Loop :
Ch 6, join with sl st to form a ring, sc 12 around the ring (12). Sl st to join, fasten off leaving long tail for sewing. Attach to center top of skull (rounds 8-9) and sew through several rounds to secure.
— Spiral Tube (Cream) :
Round 1 :
6 sc in magic ring (6)
Round 3 :
(1 sc, 1 inc) x 6 (18)
Round 4-56 :
1 sc in each st (18)
Info :
Rounds 4-56 create the long tube length; adjust the number of rounds to match the desired overall ornament length. The sample used 53 even rounds after the initial increases (rounds 4-56), producing a long narrow tube approximately 14-16 cm before joining and twisting. Work in continuous rounds (do not join) for a smooth seam. Keep consistent tension.
Round 57 :
(2 sc, 1 dec) x 6 (15)
Round 58 :
(1 sc, 1 dec) x 5 (10)
Info :
These last rounds taper slightly to make a neat base to sew the charm and for easier attachment to the lower end of the twisted assembly. Fasten off leaving a long tail for sewing and for inserting the stabilizer/cord if preferred.
— Spiral Tube (Black) :
Round 1 :
6 sc in magic ring (6)
Round 3 :
(1 sc, 1 inc) x 6 (18)
Round 4-56 :
1 sc in each st (18)
Info :
Work the black tube to be identical in stitch count and the same number of rounds as the cream tube. This ensures both cords align perfectly when twisted together. You may want to mark the start of round 1 with a marker and keep both tubes in the same orientation when assembling.
Round 57 :
(2 sc, 1 dec) x 6 (15)
Round 58 :
(1 sc, 1 dec) x 5 (10)
Info :
Fasten off leaving a long sewing tail. If you plan to insert a thin stabilizer (fishing line, floral wire or cord) insert it through the center top of each tube before tapering or after round 4 by pushing it down the center — the stabilizer should be long enough to run top-to-bottom and to be anchored into the top loop and bottom charm ring.
— Internal Stabilizer & Stuffing Notes :
Info :
For a spiral that holds its twist, insert a thin flexible cord, fishing line, or plastic boning down the center of each tubular cord before stuffing. If using wire, fold and tape the ends so there are no sharp points. Stuff tubes lightly with fiberfill — the tubes appear slightly filled in the sample. Over-stuffing makes the helix bulky and difficult to twist; under-stuffing results in limp tubes. Aim for a soft but consistent filling.
— Tube Bead Placement & Surface Embellishment :
Info :
Sew small metallic beads onto the tubes in a staggered pattern before making the full twist. Use a fine needle or thread through the bead onto the tube, knot securely and weave the tail inside the tube. Sample uses about 6-8 beads per tube spaced every ~8-10 rounds / one bead per corkscrew turn. Place beads on alternating sides of the spiral so they appear evenly distributed when twisted.
— Bottom Taper & Charm Attachment :
Info :
After finishing tube tapers (rounds 57-59), fold the final 5-stitch opening slightly and use your long tail to sew through several rounds to close. Before fully closing, attach the jump ring/charm: thread the charm jump ring onto the sewing tail or a small loop of strong thread, sew through the opening several times ensuring the charm hangs straight. Reinforce with extra passes and knot inside the tube, then finish closing the tip neatly.
— Assembly: Creating the Twist :
Info :
Lay the two tubes side by side with the same orientation for their starting rounds facing you. Anchor the top ends together by sewing the two 6-stitch neck openings together with mattress or whip stitch for about 360 degrees to form a single joined top. Sew at least 6-8 passes around the neck so the joint is secure. Ensure your stabilizer cords meet inside and are anchored to the top loop or skull neck.
Info :
To form the helix, hold the top joint firmly and begin twisting the two tubes around each other by turning the bottom end clockwise (or counter-clockwise) until you achieve the same twist count as the sample — about 3 full spiral turns from top to bottom. Keep the twist even and adjust bead placement visually as you proceed.
Info :
Once satisfied with the twist, sew the tubes together at several points along their length where the cords naturally meet (approximately at the top third, middle, and bottom third). Use small invisible stitches that pass through both tube walls to secure the twist. Be careful to avoid stitching through beads in a way that prevents some movement—stitch alongside beads rather than through them.
— Adding the Skull to the Spiral :
Info :
With the tubes twisted and secured, position the skull by placing the neck opening over the joined top of the tubes. The skull neck (6-stitch tube) will sit snugly on the top join. Pin or hold in place and sew through the neck rounds and the top rounds of the tubes using your long tail. Sew several passes so the head is stable and does not rotate independently of the spiral.
Info :
Ensure the skull faces forward in a natural manner — rotate slightly as you sew to set the orientation. Reinforce the seam with a few internal stitches into the top of the tubes and tie off inside. Weave tails inside tubes to hide ends.
— Face Assembly & Embroidery :
Info :
Sew the black eye discs to the skull using small whip stitches around the edges. Position them between rounds 13-14 on the front of the skull with spacing about 9-11 sts center-to-center. Sew the nasal triangle centered below the eyes between rounds 14-15.
Info :
Use a strand of black embroidery yarn or thin yarn to stitch the mouth/teeth on the jaw panel. Bring your needle up at the left corner of the jaw, embroider short vertical stitches for teeth across the front row spaced every 1-2 stitches, then connect with a horizontal running stitch to form the mouth line. Secure and weave ends inside the jaw piece.
— Final Finishing Touches :
Info :
Check overall tension and distribution of stuffing. Add a few extra safety stitches between skull neck and tube join if needed. If you inserted a stabilizer, trim and anchor it inside the head or top loop so it is not exposed. Ensure beads and charm are secure; add a drop of clear fabric glue to knots if desired for extra security (allow to dry thoroughly).
Info :
For a polished look, use a yarn needle to weave in all ends into the inside of the tubes/head. If you want a slightly aged look, very lightly apply a brown or gray diluted acrylic wash to stitches and wipe away quickly — test first on scrap yarn.
This spooky little ornament is a joy to make and a delight to display — the perfect handmade touch for Halloween decorating. Each twisted spiral and tiny skull brings personality and charm, and the small metallic beads and spider charm make it sparkle just enough. Whether you string a handful across a mantel or give them as individual gift tags, they are sure to enchant friends and family. Happy stitching and enjoy bringing a bit of Halloween magic into your home! 🎃🕸️