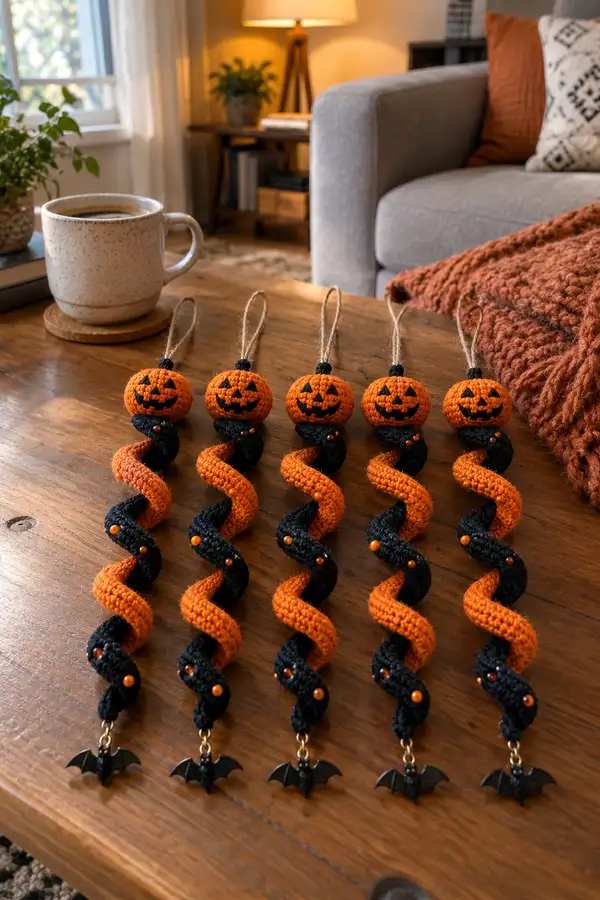
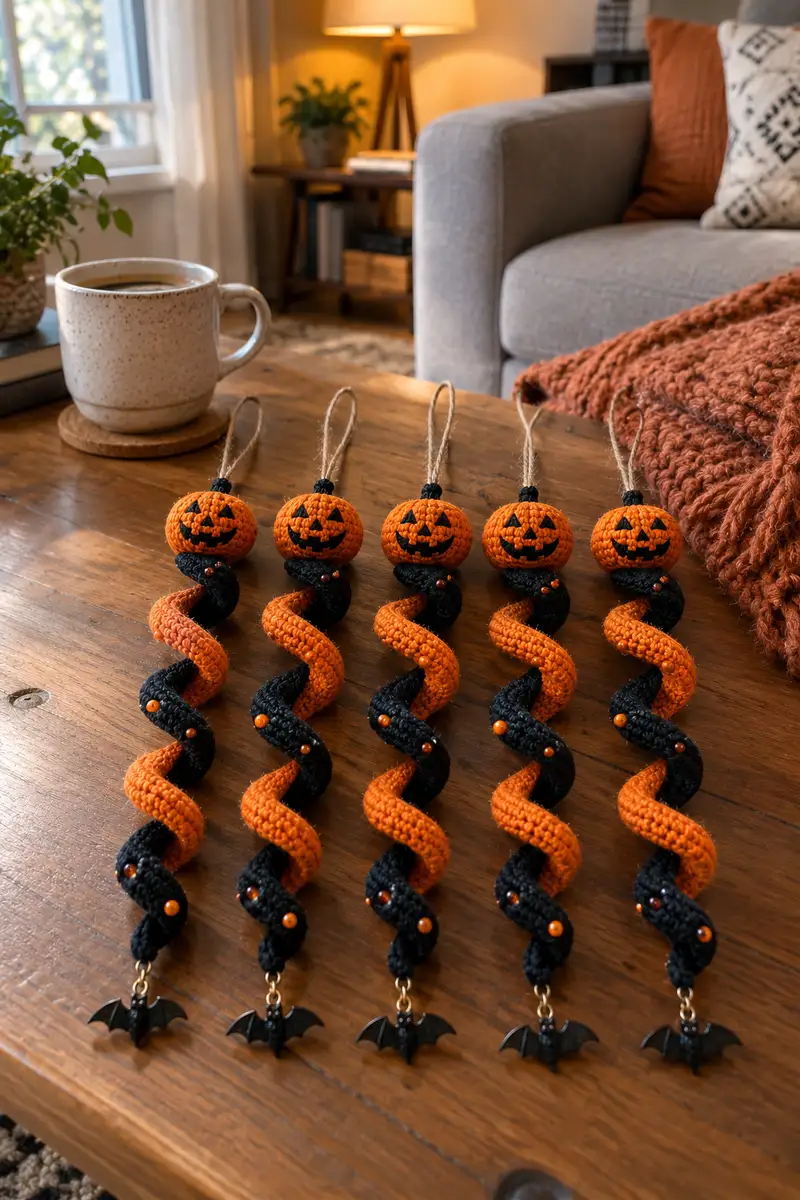
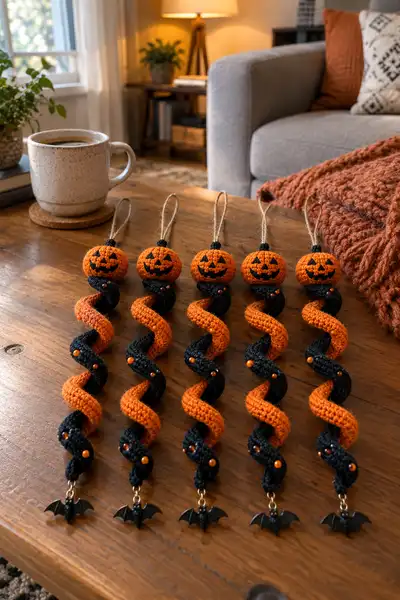
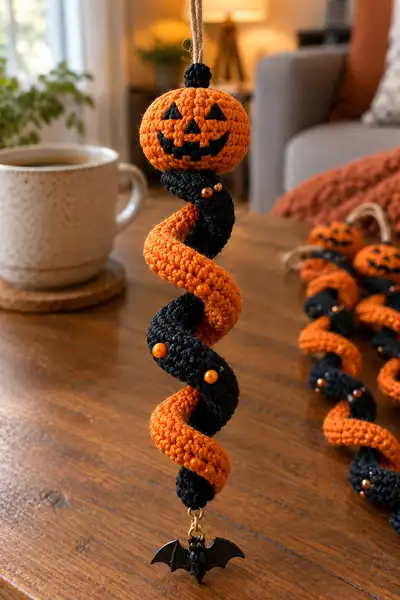
Create a spooky-fun Halloween spiral hanging ornament featuring a smiling jack-o-lantern head, two twisted tubular spirals in orange and black, tiny bead accents and a dangling bat charm. This pattern uses simple amigurumi shaping for the pumpkin head and two narrow crocheted tubes that are twisted together to form the spiral tail. The finished ornament hangs from a rustic jute loop and makes a charming seasonal garland or gift topper.
Progress Tracker
0% Complete
— Notes :
Info :
This pattern creates one hanging ornament. All pieces are worked in continuous rounds unless otherwise noted. Use a slightly smaller hook than recommended for your yarn if you want a tighter amigurumi fabric so stuffing does not show through. Work right-handed or left-handed following the same stitch counts. Numbers in parentheses at the end of each round indicate total stitches for that round.
Info :
Gauge is not critical, but a tightly worked single crochet will give the best results. Keep track of your rounds with a stitch marker and move it up each round. I recommend placing safety pins to mark bead positions once the spiral is assembled.
— Pumpkin Head :
Round 1 :
6 sc in magic ring (6)
Round 3 :
(1 sc, 1 inc) x 6 (18)
Round 4 :
(2 sc, 1 inc) x 6 (24)
Round 5 :
(3 sc, 1 inc) x 6 (30)
Round 6 :
(4 sc, 1 inc) x 6 (36)
Round 7 :
(5 sc, 1 inc) x 6 (42)
Round 8 :
(6 sc, 1 inc) x 6 (48)
Round 9 :
1 sc in each st (48)
Round 10 :
1 sc in each st (48)
Round 11 :
1 sc in each st (48)
Info :
Place face reference: mark the front center of the pumpkin. Eyes will be embroidered or sewn between rounds 12–13 roughly 10–12 stitches apart, depending on desired expression. If using safety eyes (not recommended for small ornaments), position them between rounds 12–13 and secure with washers before stuffing.
Round 12 :
1 sc in each st (48)
Round 13 :
1 sc in each st (48)
Round 14 :
1 sc in each st (48)
Round 15 :
1 sc in each st (48)
Info :
Begin stuffing the head lightly but firmly. For a round, smooth pumpkin shape, add small amounts of fiberfill and distribute evenly while you continue working. If you plan to embroider the face with yarn, leave a little extra space so stitches sit flush.
Round 16 :
(6 sc, 1 dec) x 6 (42)
Round 17 :
(5 sc, 1 dec) x 6 (36)
Round 18 :
(4 sc, 1 dec) x 6 (30)
Round 19 :
(3 sc, 1 dec) x 6 (24)
Info :
At this stage check face placement again; adding facial embroidery now will be on a stable surface. If you want a more pronounced pumpkin ribbing effect, using surface slip stitches or a contrasting thread across vertical lines at thirds can help define segments.
Round 20 :
(2 sc, 1 dec) x 6 (18)
Round 21 :
(1 sc, 1 dec) x 6 (12)
Info :
Fasten off leaving a long tail (~20–30 cm) for sewing to the neck/connector. Finish stuffing firmly but not overstuffed to avoid a distorted face. Use a blunt needle to close the hole neatly; weave tail through the 6 remaining stitches and pull snugly, then weave further inside and trim close.
Round 23 :
Optional: If you prefer a small stem, reattach yarn at the top center and crochet 6 sc in a magic ring, then 6 sc around for 2–3 rounds to create a short stubby stem. Fasten off and leave a long tail for sewing.
Info :
Embroider the face at this point if you didn't use safety eyes. Using black yarn and a tapestry needle, embroider two triangle eyes and a triangular nose. For the mouth, use satin stitch or surface embroidery to form the smiling jack-o-lantern grin. Keep stitches small and tidy for the best look.
— Neck Connector (small collar above spirals) :
Round 1 :
6 sc in magic ring (6)
Round 3 :
(1 sc, 1 inc) x 6 (18)
Round 4 :
1 sc in each st (18)
Round 5 :
1 sc in each st (18)
Round 6 :
Fasten off leaving long tail for sewing to bottom of pumpkin head. This small collar will be used to join the top of the spiral tubes and hide the raw join. If you made a stem, position the collar beneath the stem.
Info :
Before sewing collar to the head, insert a loop of jute twine folded in half through the collar so the cord forms the hanging loop; stitch the collar around the base of the loop to secure it. Make sure the loop length is even and allow extra length for knotting.
— Spiral Tube A (Black) - Make 1 :
Round 1 :
6 sc in magic ring (6)
Round 3 :
(1 sc, 1 inc) x 6 (18)
Round 4 :
1 sc in each st (18)
Round 5 :
1 sc in each st (18)
Info :
This narrow tube is worked as a continuous spiral tube. Keep rounds even to maintain a smooth tube. The diameter of this tube is approximately 2–2.5 cm depending on yarn/hook. We will work 50 rounds to reach a length that twists nicely beneath the pumpkin.
Round 6-10 :
1 sc in each st (18) — work 5 rounds (18)
Info :
If you plan to incorporate small beads into the spiral, thread them onto a short tail or secure them with a small stitch later. I prefer to stitch beads on as I go: every 6–8 rounds sew a bead to the outside ridge with matching thread.
Round 11-20 :
1 sc in each st (18) — work 10 rounds (18)
Info :
Keep the tube unstuffed or very lightly stuffed with tiny amounts of fiberfill every 10–12 rounds to keep shape and prevent flattening when twisted. Use small tufts so the tube remains flexible.
Round 21-30 :
1 sc in each st (18) — work 10 rounds (18)
Info :
Add bead accents now if desired. For halloween style, small orange pearls placed at regular intervals along the black tube look great. Secure each bead with thread and a few back-and-forth stitches through the bead hole and the crochet fabric.
Round 31-40 :
1 sc in each st (18) — work 10 rounds (18)
Info :
When you reach the last third of the tube, plan the bottom cap and attachment point for the bat charm. Leave enough tail to sew the bottom cap and add jump ring hardware.
Round 41-46 :
1 sc in each st (18) — work 6 rounds (18)
Round 47 :
(2 sc, 1 dec) x 6 (12)
Round 48 :
(1 sc, 1 dec) x 6 (6)
Round 49 :
Fasten off leaving long tail for sewing to bottom cap and attaching jump ring. If you wish, insert small bit of stuffing before closing so the tube tapers smoothly to the end.
Info :
This tube will be twisted with the orange tube to create the spiral. Keep this tube flat on the table when both are complete and twist by hand to control tightness; pin with sewing pins to test spiral before final sewing.
— Spiral Tube B (Orange) - Make 1 :
Round 1 :
6 sc in magic ring (6)
Round 3 :
(1 sc, 1 inc) x 6 (18)
Round 4 :
1 sc in each st (18)
Round 5 :
1 sc in each st (18)
Info :
Work this second tube exactly the same length as tube A so they twist smoothly together. Use identical stitch counts and rounds. For visual interest, carry a tail for each bead placement so you can add matching orange beads on the orange strand where desired.
Round 6-10 :
1 sc in each st (18) — work 5 rounds (18)
Round 11-20 :
1 sc in each st (18) — work 10 rounds (18)
Info :
Alternate where you place beads between the two tubes for a balanced look. For example, offset beads by about 3–4 rounds between the tubes so they appear staggered on the final spiral.
Round 21-30 :
1 sc in each st (18) — work 10 rounds (18)
Round 31-40 :
1 sc in each st (18) — work 10 rounds (18)
Round 41-46 :
1 sc in each st (18) — work 6 rounds (18)
Round 47 :
(2 sc, 1 dec) x 6 (12)
Round 48 :
(1 sc, 1 dec) x 6 (6)
Round 49 :
Fasten off leaving long tail for sewing to bottom cap and connecting to the black tube end. Insert small amount of stuffing to shape the taper and avoid gaps when twisted.
Info :
When both tubes are finished, block them lightly by laying flat and gently shaping. If your yarn is synthetic, a steam block (not pressing) can help even stitches. Avoid heavy wet blocking which can distort stuffing distribution.
— Bottom Cap (to attach bat charm) :
Round 1 :
6 sc in magic ring (6)
Round 3 :
(1 sc, 1 inc) x 6 (18)
Round 4 :
1 sc in each st (18)
Round 5 :
(2 sc, 1 dec) x 6 (12)
Round 6 :
(1 sc, 1 dec) x 6 (6) — do not fasten off yet
Info :
Use the long tail to sew this cap to the joined ends of the two tubes. You will insert a jump ring through the very tip of the cap or sew the cap around a small metal loop so you can attach a jump ring and chain to hang the bat charm.
— Bead Placement and Decorative Embellishments :
Info :
Recommended bead schedule: add one bead to the black tube every 8–10 rounds and one bead to the orange tube offset by 4–5 rounds. Use small seed beads or 3–4 mm faux pearls. Sew beads through the tube fabric with matching thread and knot securely on the inside of the tube.
Info :
To sew beads while the tube is live, push the needle under one or two SC loops on the outside surface, stitch through bead hole and back through a neighboring stitch, then tie a small knot and bury it inside. This is tidier than attaching beads after closing the tube.
— Assembly Instructions (joining head, collar, tubes and cap) :
Info :
Lay both tubes parallel and twist them together to form a spiral. For a 2-strand spiral, twist until the tubes wrap naturally in a 360-degree helix every roughly 8–10 rows depending on desired tightness. Pin the spiral shape on a blocking surface or table using T-pins, aligning bead placements symmetrically.
Info :
Sew the top ends of both tubes into the neck collar: Using the long tails from collar and tube tops, stitch through the collar stitches into the first round of each tube, distributing stitches evenly so tubes are centered opposite each other under the collar. Secure with tight whip stitches and weave ends into the collar/tube interior.
Info :
Attach the collar (with the jute loop already anchored) to the bottom of the pumpkin head. Whip stitch around the collar, going through the last round of the head and through the collar rounds. Adjust hanging loop so pumpkin faces forward when suspended.
Info :
Sew the bottom cap onto the tapered ends of both tubes together, bring the long tails through the cap stitches and tighten to close gaps. Before fully closing, feed a small jump ring or the head of a jewelry eye pin into the cap center so you can attach the chain and bat charm later.
Info :
Attach a short chain or jump ring to the cap and fasten the bat charm with a split ring or jump ring. Use pliers to close rings securely. Conceal raw ends inside the cap by weaving them through the cap's internal stitches.
— Final Finishing :
Info :
Weave all remaining yarn tails into the interior of tubes and head. Trim close. If beads are loose, secure with a dab of fabric glue under each bead from the inside of the fabric for extra insurance. Test the hanging balance and adjust twist tension if the ornament leans.
Info :
Optionally add a tiny dab of black paint or embroidery varnish to bead threads to keep them tidy. Make several ornaments and join their hanging loops together to create a festive garland for mantels or doorways.
Info :
Care instructions: spot clean with a damp cloth. Avoid soaking if beads or hardware may rust. Store flat or hanging to preserve spiral shape.
This Halloween ornament pattern brings together classic pumpkin charm and modern spiral playfulness into a small, giftable piece. Each section is simple enough to work quickly but offers decorative opportunities—beads, charms and embroidery—to personalize every ornament. The jute hang loop and little bat finishing touch make each one perfect for seasonal garlands or tree decorations. 🎃🦇 Enjoy the cozy rhythm of creating a set and sharing them as tiny seasonal treasures. Happy crocheting! 🍁