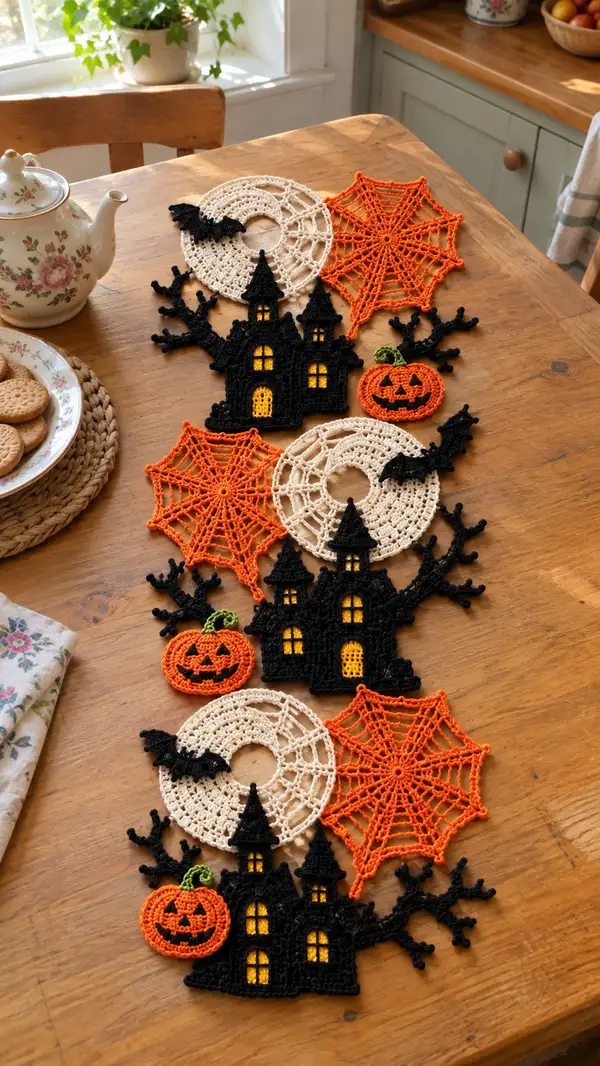
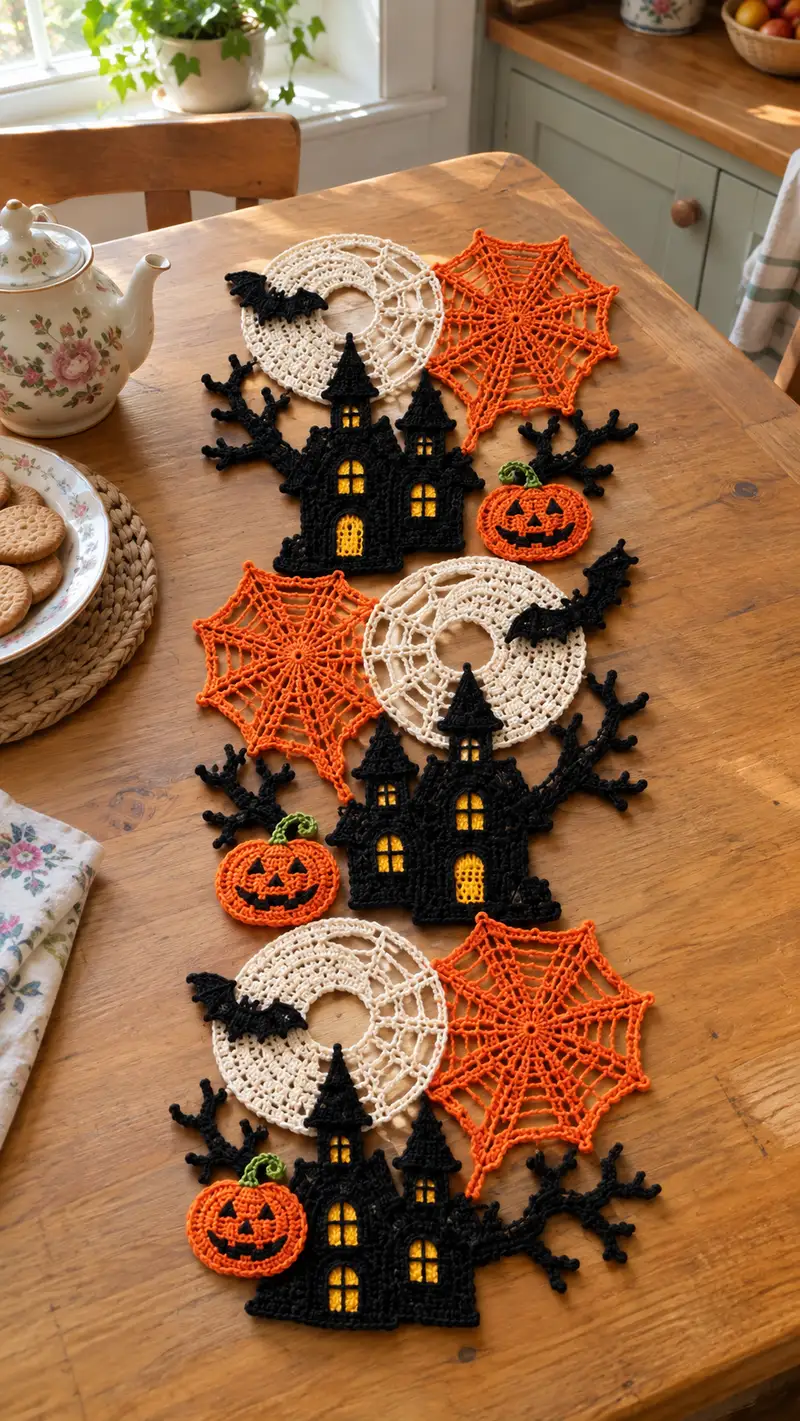
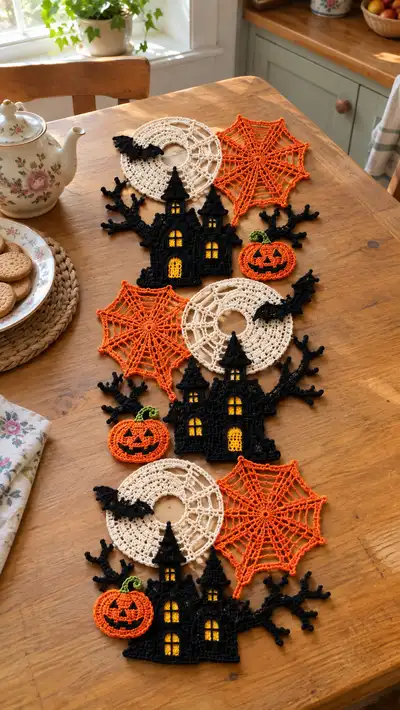
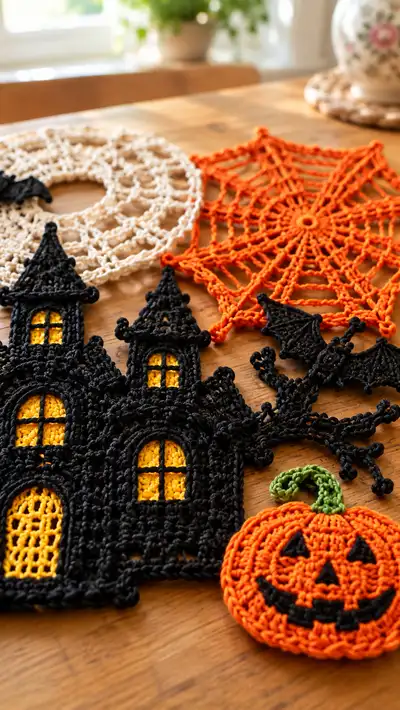
Create a spooky, layered Halloween table runner using crochet motifs — haunted houses, spiderwebs, moons, bats, pumpkins and twisted branches. This pattern shows how to make each flat motif and assemble them into a dramatic runner in black, orange, cream and a pop of yellow and green. Worked flat with basic stitches and decorative picots and bobbles, the motifs join together for a striking seasonal centerpiece.
Progress Tracker
0% Complete
— Haunted House (Make 2 large house silhouettes) :
Round 1 :
Using black yarn, make a magic ring, ch1, 6 sc into ring (6)
Round 3 :
(1 sc, inc) x 6 (18)
Round 4 :
(2 sc, inc) x 6 (24)
Round 5 :
(3 sc, inc) x 6 (30)
Info :
These first rounds form a small solid center to work outward flat. Keep tension even to avoid ruffling. Mark the first stitch of each round with a marker.
Round 6 :
(4 sc, inc) x 6 (36)
Round 7 :
(5 sc, inc) x 6 (42)
Round 8 :
1 sc in each st around (42)
Round 9 :
1 sc in next 3 sts, ch6, skip 6, 1 sc in each of next 30 sts to create first small arch placement (42)
Info :
Round 9 begins forming negative space for the future door/archway. The long ch6 will be worked into later and tacked down to form a doorway opening. If you prefer appliqued door later, work only solid row and add opening afterwards.
Round 10 :
In ch6 arch: join with sl st to first ch, ch1, 6 sc in arch (makes small filled arch), then 1 sc in each remaining st around (42)
Round 11 :
(6 sc, inc) x 6 (48)
Round 12 :
1 sc in each st around (48)
Round 13 :
(7 sc, inc) x 6 (54)
Round 14 :
1 sc in each st around (54)
Info :
At this point the motif is a circular disk that we will shape into a house silhouette by adding straight edges and pointed towers — working sections in rows from the round base and shaping off the circle by skipping and shaping edges.
Round 15 :
Work 18 sc (right side of base), join with sl st to a point 6 sts later to start side wall, ch1, turn and work back along these 6 sts in rows to build a small vertical wall: 6 sc BLO, ch1, turn; repeat 6 rows total to reach approx 6 rows high (counts remain integrated into overall 54 when rejoined)
Info :
We create the front wall by working short rows; this converts the round into a silhouette. Keep the working yarn attached to the round and use sl sts to rejoin when needed. Count your short-row width to keep symmetry.
Round 16 :
After returning to round edge, 1 sc in each st around for remaining stitches (54)
Round 17 :
Mark the center top of the front wall (this will become the first tower). From that marker, ch1 and begin tower 1: work in rows on a 12-st wide panel taken from the round edge — Row A: 12 sc, ch1 turn; Row B: 12 sc BLO, ch1 turn; repeat 8 rows total to reach tower height then dec across top row to 8 sc, fasten off leaving tail for sewing. Rejoin to round and work 1 sc in each remaining st (54)
Info :
Towers are constructed as short separate panels worked in rows attached into the round — treat them like appliqued panels to maintain flat silhouette. Adjust the tower width/height to match photo — tall and narrow towers give the haunted look.
Round 18 :
Work 1 sc in each remaining st around (54)
Round 19 :
In designated window openings: ch6, skip 6, 1 sc in next st to mark window position — repeat for three windows across the front as desired. Continue 1 sc in remaining sts (54)
Round 20 :
Work small arch for main door by making a ch10 loop at the door location: sl st into loop to work a rounded arch; then 6 sc into the ch10 loop to fill arch and sc around rest (54)
Round 21 :
Edge the entire house silhouette with 1 sc in each st BLO to create a raised, neat border (54)
Round 22 :
(2 sc, 1 inc) x 18 (72)
Info :
This increase round widens the motif slightly to create small base ledge where ground and branch attachments will connect. You can stop increasing earlier if you prefer a smaller house.
Round 23 :
1 sc in each st around (72)
Round 24 :
Work tower tops: attach yarn at tower tip, ch1, 1 sc in next 3 sts, (ch2, sl st) to form pointed peaks; work 5 sc around peak, sl st to base, fasten off. Repeat for other tower(s). Continue 1 sc around remaining (72)
Round 25 :
Decorative border: *ch3, sl st in next st* repeat around to create a scalloped outline; finish with sl st to first ch3 (72 loops)
Round 26 :
Work textured ground base by working 1 sc in next 4 sts, (ch3, picot into same st), repeat across lower edge to create rock-like bumps (72)
Info :
At this point place a piece of bright yellow felt cut slightly smaller than the largest window into position behind the house, or prepare the yellow crochet insets described below to sew into window openings. Blocking the house flat now ensures windows will align neatly.
Round 27 :
Window arches (make 3): with yellow yarn, make small inset circles — Magic ring, ch1, 6 sc (6) ; Round 2: inc x6 (12) ; Round 3: 1 sc in each st (12). Fasten off leaving tail for sewing.
Round 28 :
Sew yellow inset circles into each window opening with yarn needle; tack the edges so there is no gap between inset and house window. Continue edging house with 1 sc around once more to secure joins (72)
Round 29 :
Window frames: with black held doubled if you want bolder frame, embroider vertical and horizontal crossbars by pulling black yarn across the yellow inset and sewing through edge stitches - 2 vertical bars and 1 horizontal will create four panes per window. Secure ends at back and weave in (no stitch count change)
Info :
Detailed embroidery of window bars is aesthetic; if you prefer less detail, use black yarn to whip-stitch a thin cross on each yellow circle instead. Use small stitches and keep tension even.
Round 30 :
Branch anchor points: choose 3 positions along house sides to attach tree branches later. Mark these stitches with pins for later sewing (72)
Round 31 :
Fasten off and weave in ends. Block the house motif flat, ensuring towers are straight and windows sit flat against yellow insets.
Info :
This house motif is intentionally built as a hybrid of rounds and small-row panels to achieve silhouette edges and tower shapes. The stitch counts are maintained around the main round; the short rows do not change the total round number but change the surface shape. Recount after any adjustment.
— Pumpkin (Make 3 small pumpkins) :
Round 1 :
Using orange yarn, magic ring, ch1, 6 sc in ring (6)
Round 3 :
(1 sc, inc) x 6 (18)
Round 4 :
(2 sc, inc) x 6 (24)
Round 5 :
1 sc in each st around (24)
Info :
These rounds create a small disk which we will shape into a flat pumpkin with raised ribbing using surface loops and slip-stitch ridges.
Round 6 :
BLO: 1 sc in each st BLO around (24)
Round 7 :
(3 sc, inc) x 6 (30)
Round 8 :
1 sc in each st (30)
Round 9 :
Form pumpkin ribs: *sl st into next 2 sts, ch8, sl st back into same 2 sts* repeat 6 times evenly spaced to create 6 ridges (no change to 30)
Round 10 :
Working into the ch8 loops: (sc, hdc, 3 dc, hdc, sc) in each loop to make petal-like ribs; after working all 6 ribs, fasten off and weave tail through center to pull slightly for pumpkin shape (30)
Round 11 :
With black yarn, embroider face: triangular eyes and nose made of small sc triangles: Make 3-sc triangle: sl st to position, ch1, sc, inc, sc, sl st to base. For mouth: a small curved row of sc and decs to create smile. Secure ends (no stitch count change)
Round 12 :
Stem: join green, ch1, 6 sc in magic ring (6), Round 2: inc x6 (12), Round 3: 1 sc in each st, ch6 and slip stitch back to base to create curly stem, fasten off leaving tail for sewing. Sew stem to top center of pumpkin (no count change)
Info :
For a flatter pumpkin that layers nicely, weave the center tail tightly and press the pumpkin flat while blocking. Ensure face embroidery is anchored to back stitches so it won't snag when joined.
— Spiderweb (Make 3 large webs) :
Round 1 :
Using orange yarn, start with magic ring, ch3 (counts as first dc), 11 dc into ring, join with sl st to top of ch3 (12 dc - forms small circle)
Round 2 :
Ch3, dc in same st, ch3, sk 1, *2 dc in next, ch3, sk1* repeat around, join (12 sets) (creates 12 spokes)
Round 3 :
Join with sl st to first ch3 space, ch1, sc in ch3 space, ch5, sc in next ch3 space around to create loops between spokes (12 loops)
Info :
Spiderwebs are built by creating evenly spaced spokes and connecting them with chains and slip-stitch rounds. Keep the spacing equal by counting spokes and using stitch markers for each spoke if helpful.
Round 4 :
Join at base of one spoke, ch1, sc in same sp, *(ch4, sc in next ch5 loop) repeat around to step the web outward creating ladder rungs (12 ch4 loops)
Round 5 :
Ch1, sc into each ch4 loop and into base of spoke, then ch6 between scs to create larger open segments (12 ch6)
Round 6 :
Working back to each spoke base, slip stitch into base, ch3, 2 dc in same base, sl st into next spoke base to emphasize spoke, repeat around (no change to spoke count)
Round 7 :
Edge: join, *sc in next 2 sts, picot into next st (ch3 sl st to base)* repeat around for decorative points (spiderweb edges will have 12 points)
Info :
If your web visually droops, lightly block with a spray of starch and pin the outer points to dry in a star shape — this gives crisp points that layer well under the house silhouette.
Round 8 :
Fasten off and weave ends. Optionally work a smaller center ring in cream for a two-tone moon-web contrast (see moon section for cream variant)
— Lace Moon / Ring Doily (Make 3 cream moons) :
Round 1 :
Using cream yarn make magic ring, ch3 (counts as dc), 11 dc into ring, join (12)
Round 2 :
Ch1, sc in same st, *ch4, sc in next dc* repeat around to create 12 open loops, join (12 loops)
Round 3 :
Working into each ch4 loop: sc, hdc, 3 dc, hdc, sc to make petal-shaped spokes (no change to loop count)
Round 4 :
Ch1, *sc in next petal, ch7, sc in next petal* around to make larger open ring, join (12 ch7 spaces)
Info :
The moon in the picture is a ringed doily with an inner hole; to create the inner ring (visible center hole) work an additional small round: after Round 1, pull center closed about halfway, then continue with chains to create a wide ring rather than a solid disc.
Round 5 :
Edge: into each ch7 space work (sc, ch3, sc) to create airy mesh; join and fasten off (final size approx 14-16cm across depending on yarn tension)
Round 6 :
Optional bat placement: attach small black bat motif (see bat section) by sewing along 2-3 stitches to sit on moon edge.
Info :
The cream moon and the orange spiderweb are designed to be similar diameter to layer slightly offset — block both motifs to match diameters before assembly.
— Bat (Make 4 small bats) :
Round 1 :
Using black yarn, ch7, join with sl st to form small ring (or magic ring alternative), ch1, 12 sc into ring (12)
Round 2 :
Form wing: across chain base ch1, sc in next 3 sts, hdc in next, dc in next 2, hdc in next, sc in next 3, sl st to base (create slight scalloped wings) (12)
Round 3 :
Body: ch1, sc around entire scalloped wing edge to firm up shape, add 2 tiny bobble feet at center bottom by working bobble stitch (yarn over 4 times, pull through, complete) twice, fasten off leaving tail for sewing (12)
Info :
Bats are intentionally small and worked in a single flat piece. Make 4 and position them across moons and houses for dramatic silhouette accents.
— Spindly Branches (Make 4 branch motifs) :
Round 1 :
With black yarn, ch15, sc in 2nd ch from hook and across (14)
Round 2 :
Turn, ch1, sc across (14)
Round 3 :
Create twigs: along chain edge, at desired positions ch4, sl st back into stem to create branchlets — repeat 6 times along length. Continue a final sc row to secure (14)
Round 4 :
Work another row of sc along the opposite edge to create a thin flat branch; at tips add small picot buds (ch3 sl st to base) to mimic twig buds (14)
Info :
Branches are irregular by design — make a left-facing and right-facing version for natural layout. When sewing to the house, follow natural angles from the photo so the runner reads as connected branches between houses.
Round 5 :
Fasten off and leave long tail for sewing; block flat stretching the small twigs outward to keep shape.
— Window Inset Crochet (Yellow) :
Round 1 :
With yellow yarn, magic ring, ch1, 6 sc (6)
Round 3 :
1 sc in each st (12)
Info :
For arched or taller windows, after Round 3 work an oval extension by turning: ch1, 6 sc across the top edge of the circle as short rows adding 3-4 rows, then sew into house arched opening. These small crochet insets are tidier than felt for a fully crocheted project.
Round 4 :
Fasten off leaving a 10cm tail to sew to house openings; weave the tail around the circle edge to flatten and ensure it fills the window cavity.
— Decorative Edging and Final Picots (For joining) :
Round 1 :
Using black or matching motif color, join yarn at edge of each motif and work a round of sc stitches around the entire motif to create a consistent seam for joining (stitch count equals motif edge stitches)
Round 2 :
Work *ch3, sl st in next st* around or *sc, ch3, sc* for more pronounced loops depending on motif — this creates neat points to overlap motifs when assembling runner.
Info :
Uniform edging across all motifs makes joining easier and gives a cohesive look. Choose narrow sc edging for a subtle join or ch-loop edging if you want lacy overlaps.
— Placement Guide and Assembly Prep :
Info :
Before sewing, lay out all motifs on a flat surface to mimic the photo layout: alternating moon/web, then house, pumpkin and branch layered overlapping. Adjust spacing so larger motifs (web/moon) sit slightly behind houses and pumpkins overlap house corners. Pin in place with T-pins once satisfied.
Info :
Stitch counts for each motif (approx): House base circumference after shaping ~72 sts; Spiderweb outer points ~12; Moon outer loops ~12; Pumpkin outer loops ~30; Bat small ~12 — these are approximate and depend on tension and yarn. Block each motif to match sizes.
Round Final :
Sew motifs together using ladder stitch for invisible joins or whip stitch for a decorative raised seam. When overlapping motifs, sew through both motif edges through the final edging rounds only to keep layered surfaces flat. Fasten off and weave ends to back of runner.
Info :
For additional stability, you may tack motifs together in 2-3 small places using matching thread rather than heavy sewing that distorts the lace. If making a runner to use with hot objects, consider a heat-resistant backing or using motifs as decorative overlay only.
This Halloween motif runner is such a fun combination of lacy and silhouette shapes — each little house, pumpkin and web tells a story. I love how the yellow 'light' in each window warms the whole piece and how the orange webs add a pop of seasonal color. Layering and blocking make the motifs sing and assembly brings the spooky scene to life. 🕯️🎃🕸️