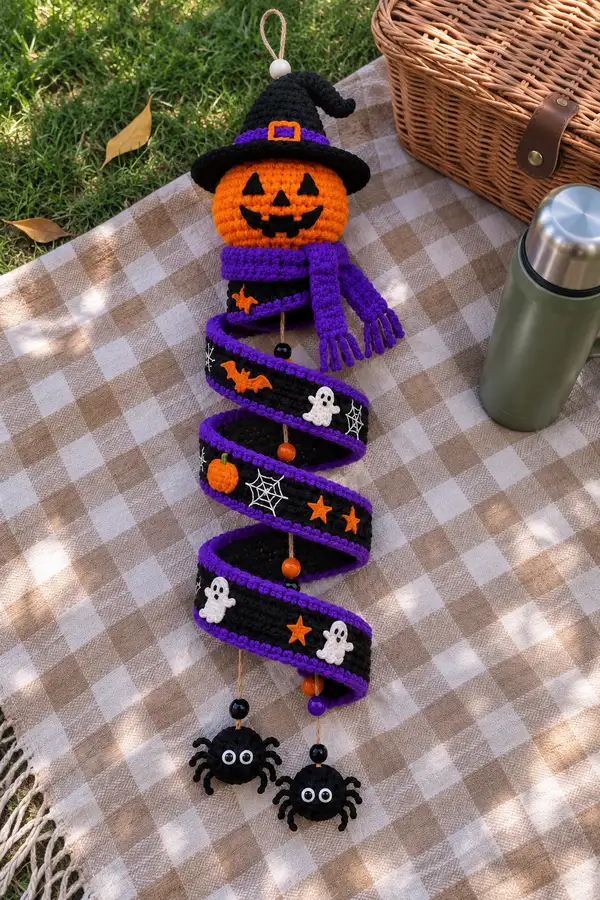
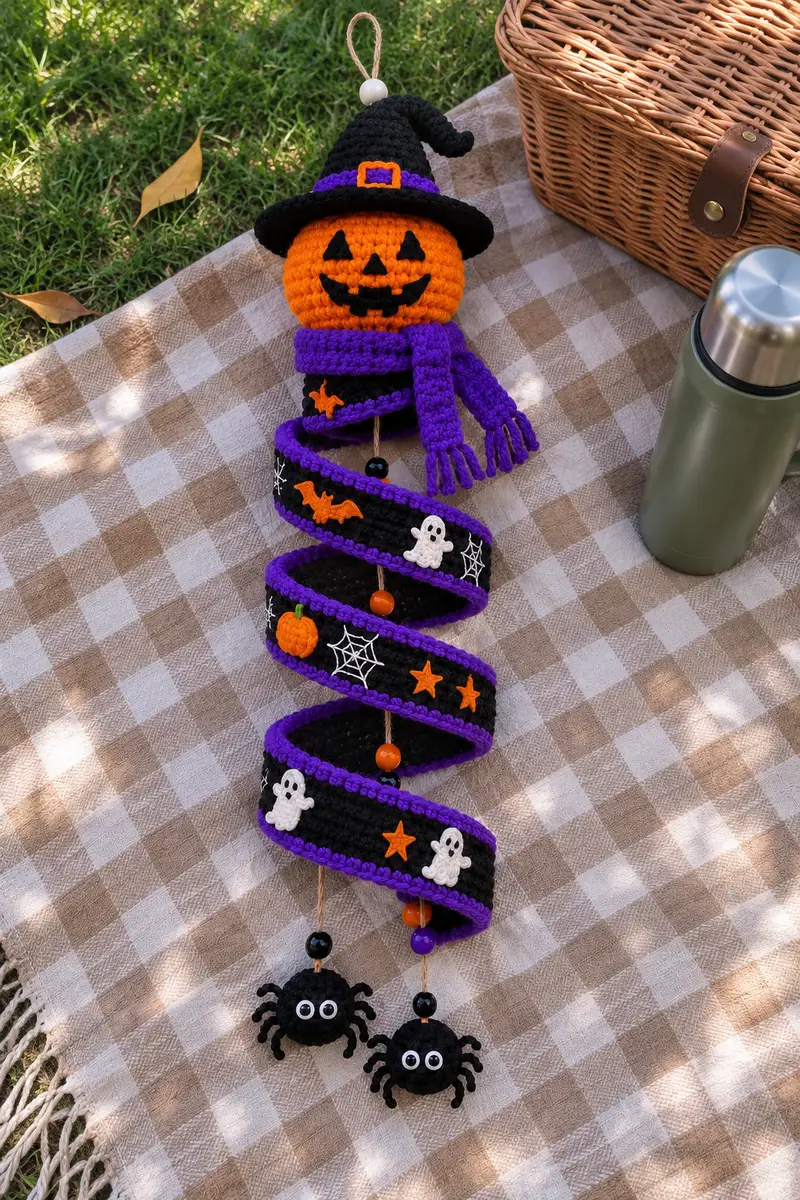
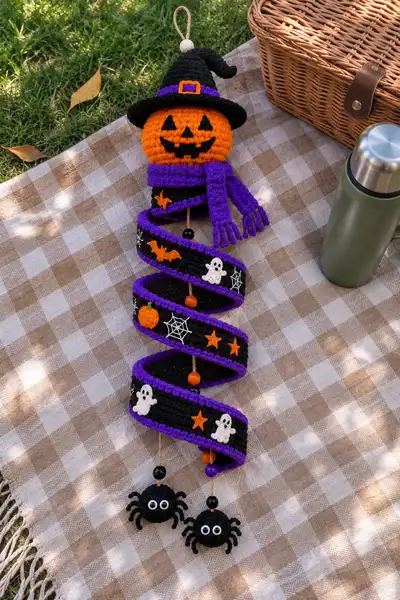
Create a whimsical hanging Halloween decoration featuring a smiling pumpkin witch head, a floppy witch hat, a chunky purple scarf, a coiled black-and-purple spiral ribbon decorated with tiny appliques (ghosts, bats, pumpkins, stars, webs) and two dangling crocheted spiders. This pattern includes step-by-step round-by-round instructions, assembly tips, and applique patterns so you can recreate the exact layered, spiraling look shown. Perfect for mantle, porch, or a seasonal gift — full of playful details and bright Halloween colors.
Progress Tracker
0% Complete
— Materials and Special Notes :
Info :
Gauge is not critical but using a slightly smaller hook than yarn label is recommended to prevent stuffing showing through. Work in continuous rounds (spiral) for amigurumi unless otherwise noted. Use stitch markers at the first stitch of each round.
Info :
All rounds are worked in sc unless specified. Unless otherwise stated, do not join rounds with sl st; use a marker and work in continuous spiral. Count your stitches carefully — all stitch counts shown in parentheses at the end of each round.
— Pumpkin Head (worked in orange) :
Round 1 :
6 sc in magic ring (6)
Round 3 :
(1 sc, 1 inc) x 6 (18)
Round 4 :
(2 sc, 1 inc) x 6 (24)
Round 5 :
(3 sc, 1 inc) x 6 (30)
Round 6 :
(4 sc, 1 inc) x 6 (36)
Round 7 :
(5 sc, 1 inc) x 6 (42)
Round 8 :
(6 sc, 1 inc) x 6 (48)
Round 9 :
(7 sc, 1 inc) x 6 (54)
Round 10 :
(8 sc, 1 inc) x 6 (60)
Round 11-16 :
1 sc in each st (60)
Info :
To create the pumpkin's subtle ribs: on rounds 11 and 13 alternate working 1 sc in each st BLO (60) to create shallow ridge lines. On rounds 12,14,15 work normally to alternate texture.
Round 17 :
(8 sc, 1 dec) x 6 (54)
Round 18 :
(7 sc, 1 dec) x 6 (48)
Info :
Begin stuffing the pumpkin firmly but not overstuffed. Add stuffing in small amounts and shape to a slightly flattened sphere (pumpkins are slightly squashed top-to-bottom).
Round 19 :
(6 sc, 1 dec) x 6 (42)
Round 20 :
(5 sc, 1 dec) x 6 (36)
Round 21 :
(4 sc, 1 dec) x 6 (30)
Round 22 :
(3 sc, 1 dec) x 6 (24)
Info :
Sew placement note: before closing entirely, leave a long tail for sewing the pumpkin to the neck cylinder (body). Mark the front center for face placement. Place the jack-o-lantern features about 8–10 rounds up from the bottom depending on how low you want the face.
Round 23 :
(2 sc, 1 dec) x 6 (18)
Round 24 :
(1 sc, 1 dec) x 6 (12)
Info :
Fasten off leaving a 25–30cm tail for sewing. Weave tail through remaining 6 sts and pull closed. Finish stuffing if needed. Use black yarn or embroidery thread to stitch the triangular eyes, nose and jagged mouth — refer to photo for placement: the eyes are approximately 10–12 stitches apart and centered on the front section between rounds 12 and 16.
— Neck Cylinder / Top Spacer (worked in black) :
Round 1 :
6 sc in magic ring (6)
Round 3 :
(1 sc, 1 inc) x 6 (18)
Round 4 :
(2 sc, 1 inc) x 6 (24)
Round 5-18 :
1 sc in each st (24)
Info :
This cylinder sits under the pumpkin and creates a small collar that connects the hat brim and the spiral. Stuff lightly so it keeps a tubular shape but remains squishy so the spiral wraps around it. Leave top and bottom edges open for sewing pieces together.
Round 19 :
(2 sc, 1 dec) x 6 (18)
Round 20 :
(1 sc, 1 dec) x 6 (12)
Info :
Fasten off leaving long tail for sewing. This piece will be sewn to the underside of the pumpkin (the opening you left) so that the pumpkin appears to sit atop the black cylinder. When sewing, line up the stitches so seams are even and tight.
— Witch Hat (worked in black with purple band and orange buckle) :
Hat Crown Round 1 :
6 sc in magic ring (6)
Round 3 :
(1 sc, 1 inc) x 6 (18)
Round 4 :
(2 sc, 1 inc) x 6 (24)
Round 5-10 :
1 sc in each st (24)
Info :
To create the slump/curve in the hat tip, begin working alternate increases and decreases near the top of the crown and occasionally scrunch or block the yarn into a curl as you shape.
Round 11 :
(2 sc, 1 dec) x 6 (18)
Round 12 :
(1 sc, 1 dec) x 6 (12)
Info :
Fasten off crown, leave long tail. Stuff very lightly the tip to hold a soft shape. Sew the crown closed and leave enough tail to attach to the brim. The crown will be sewn to the center of the brim before attaching the hat to the pumpkin.
Hat Brim Round 1 :
Make a flat circle by starting with 6 sc in mr (6)
Brim Round 3 :
(1 sc, 1 inc) x 6 (18)
Brim Round 4 :
(2 sc, 1 inc) x 6 (24)
Brim Round 5 :
(3 sc, 1 inc) x 6 (30)
Brim Round 6 :
(4 sc, 1 inc) x 6 (36)
Brim Round 7 :
(5 sc, 1 inc) x 6 (42)
Brim Round 8 :
(6 sc, 1 inc) x 6 (48)
Brim Round 9-10 :
1 sc in each st (48)
Info :
If you want a floppy brim like the photo, use a slightly larger hook (4.5mm) for the brim rounds 7-10 for a softer edge, or block the brim by hand to create the desired curve. Sew crown to center of brim with matching black yarn.
Hat Band :
With purple, ch 40 (or long enough to wrap around brim center), join and work 1 round sc around the crown base, sl st to join. Fasten off leaving tails to sew closed. With orange make a tiny square buckle: ch 6, join, 2 rounds sc to make a rectangular buckle, leave tail and sew to purple band.
Info :
Sew the hat onto the top of the pumpkin, positioning the brim so it sits slightly forward of the pumpkin's top, like a whimsical tilted hat. Use the long tails from the neck cylinder to help anchor the hat if desired.
— Chunky Scarf (worked in purple) :
Info :
The scarf in the photo appears to be worked in rows with thick texture. Use 4.5mm hook for a looser, chunky look or 4.0mm for firmer fabric. Make the scarf length approximately 30–35cm for a short wrapped look with fringe.
Row 1 :
Ch 10, sc in 2nd ch from hook and across (9)
Row 2-28 :
Ch 1, turn, sc in each st (9) — work 27 more rows or until scarf measures desired length
Info :
Create fringe by cutting 6–8 lengths of purple yarn about 7–8cm each. Fold each group in half and pull through the short edges of the scarf with a crochet hook. Trim even.
Info :
Wrap scarf around neck cylinder and tuck the ends so it sits nicely beneath the hat, then stitch in place with a few small whip stitches if you want it secured.
— Spiral Ribbon / Coil (worked as a long black tube with purple edging) :
Info :
The long spiral is made by crocheting a narrow tube in continuous rounds, then coiling it around a hanging cord. The tube is worked in black with a purple round at the edge to create contrast. The sample spiral shows about five coils; to achieve that, the tube should be roughly 170–220cm long depending on coil diameter. Below are rounds to make a tube approximately 180cm long; adjust by repeating rounds to lengthen or shorten.
Tube Round 1 :
6 sc in magic ring (6)
Round 3 :
(1 sc, 1 inc) x 6 (18)
Round 4 :
(2 sc, 1 inc) x 6 (24)
Round 5-8 :
1 sc in each st (24)
Info :
From round 9 onward you will work in continuous rounds and do not increase — this maintains the tube diameter. If you want a narrower tube, stop increasing earlier. Place a stitch marker at the first stitch of round 9 and move it each round.
Round 9-140 :
1 sc in each st (24) — work until tube measures desired length (this example assumes 132 rounds ~180cm with worsted yarn; adjust according to gauge)
Info :
Every 20 rounds or so you can do a decorative purple edge by switching to purple and working 1 round sc around the tube, then switch back to black. For the effect in the photo, work purple edging rounds every 6–10cm of tube length (see below for exact edging method).
Edging (worked intermittently) :
Change to purple, 1 round sc evenly around the last round (24). Sl st to join and change back to black for next rounds. This creates thin purple ridges visible on the spiral edges.
Info :
Fasten off when you reach your desired length. Leave a long tail for sewing the ends closed. If you want the spiral to have a filled look you can work two tubes and insert a thin jute cord between them before closing to create a central hanging core.
— Appliques (worked separately and sewn on) :
Ghost Applique (make 4) Round 1 :
With white, 6 sc in magic ring (6)
Round 3 :
1 sc in each st (12)
Round 4 :
Ch 3, sl st into three adjacent sts to form waving arms, ch 1, sc across next 4 sts. Fasten off leaving tail to sew. Embroider two small black eyes and mouth with black yarn.
Bat Applique :
Ch 8, sc in 2nd ch from hook and across to form small wing strip, fasten off leaving tails. With orange, sew the strip into a bat wing shape and attach to spiral.
Pumpkin Applique :
With orange, 6 sc in mr (6), (1 sc, 1 inc) x 3 (9), 1 sc in each st around (9) — flatten slightly and stitch to spiral. Add a tiny green stem by chaining 3 and attaching.
Star Applique (make multiple) :
Ch 4, sl st to first ch to make ring, (ch 3, sl st in ring) x 5 create five points, tighten and sew flat onto spiral.
Web Embroidery :
Use white yarn and a yarn needle to embroider simple webs: bring thread up through spiral, create 6 radial lines about 6 stitches long, then connect arcs between radials with short chain stitched loops. Secure ends neatly on the inside of the tube.
Info :
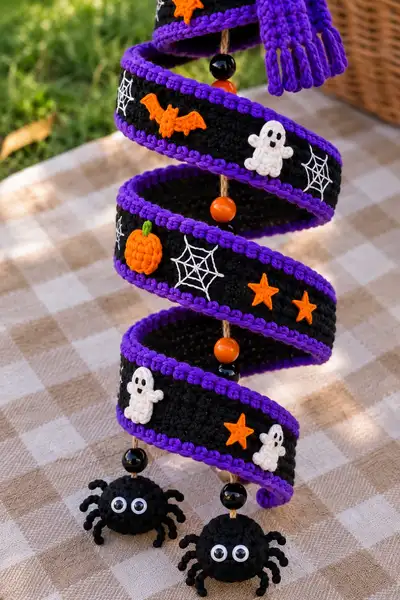
Pin appliques onto the coiled spiral before sewing to ensure even spacing. The sample layout repeats ghosts, bats, pumpkins, stars and webs along the coil with beads between coils.
— Hanging Cord and Beads :
Info :
Use strong natural jute or cotton cord as the backbone for hanging. Thread beads through cord at even intervals to create spacers between coils; in the sample there are 3 spacer beads per coil and a larger bead between coils. Tie a strong knot at the bottom and tack-stitch the knot into the bottom spider cap for security.
— Spider (make 2) :
Spider Body Round 1 :
6 sc in magic ring (6)
Round 3 :
(1 sc, 1 inc) x 6 (18)
Round 4-6 :
1 sc in each st (18)
Info :
The spiders in the photo are slightly flattened; you can stuff lightly and then flatten when sewing the legs in place. For the googly-eye look either glue small plastic eyes on or embroider concentric circles with white and black.
Round 7 :
(1 sc, 1 dec) x 6 (12)
Info :
Fasten off leaving long tail for sewing to the cord. Make 8 legs from long chain segments: ch 8, sl st back along chain to create curled legs, make 8 and sew evenly around the spider body sides. Use a small dab of glue behind eyes to secure if using plastic eyes.
— Finishing Applique & Embroidery Details :
Info :
Use black yarn to embroider the pumpkin face on the orange head using satin stitch or small surface slip stitches. The eyes are symmetrical triangles about 4–5 stitches wide on their base; the mouth is a jagged horizontal mouth stitched across about 14–16 stitches wide.
Info :
Sew each applique to the exterior of the spiral using a whip stitch with matching yarn. For the spiderwebs use white yarn and a thin needle to create tidy arcs between radial lines. Knot and weave ends inside the tube so they are hidden inside the spiral.
— Optional Embellishments and Adjustments :
Info :
If you want a heavier spiral, insert a thin wire or a second inner tube to give structure. If making for a child's room, replace safety eyes with embroidered options and secure all beads with extra stitching or hot glue. For a rustic look use natural twine as the hanging loop and larger wooden beads.
— Complete Round-Count Summary and Small Extra Sections :
Info :
Totals here are estimates based on the sample: Pumpkin Head ~25 rounds, Neck Cylinder ~21 rounds, Hat ~20–25 rounds, Scarf rows ~28 rows, Spiral Tube ~132 rounds (adjust for length), Spiders ~8–10 rounds each, Appliques and decorations add small rounds. This adds to an overall round count well above 150 rounds across all parts — many small parts and continuous tube length are what create the finished look.
Info :
Keep track of which rounds correspond to which sections so you can align appliques with coils. Mark the center of each coil by pinning the tube carefully around the hanging cord during assembly to ensure even spacing.
This Spooky Spiral Pumpkin Witch is a joy to make and a delight to display — from the textured pumpkin face to the coiled ribbon full of tiny appliques and the playful dangling spiders, every detail adds charm. The pattern combines amigurumi basics with decorative embroidery and assembly techniques for a satisfying, creative project. Hang it on a door, porch, or wall to add playful Halloween personality to your home. Happy stitching and enjoy the spooky season! 🎃🕷️