🧶 Beautiful ✨ Detailed 💝 Adorable

Pumpkin Table Runner Pattern

Pumpkin Table Runner Pattern
4.8★ Rating
8-10 Hours Time Needed
4.0K Made This
✂️

Intermediate Level

Ideal for those with basic crochet experience, featuring slightly more advanced stitches and techniques to expand your skills.

⏱️

All-Day Adventure

Requires 8-10 hours, ideal for a full day of immersive crocheting.

🏡

Cozy Accent

A warm touch for your space that transforms ordinary corners into inviting nooks filled with handmade charm.

🧶 Jump to Pattern ↓

About This Pumpkin Table Runner Pattern

This pattern creates a long, decorative table runner made from repeated round pumpkin motifs set on a delicate cream lace background. Each motif features a raised, ribbed orange pumpkin, a curled green stem and an attached leaf. The motifs are joined in a row and finished with a scalloped granny-edge to create a cohesive runner perfect for fall tables and seasonal displays.
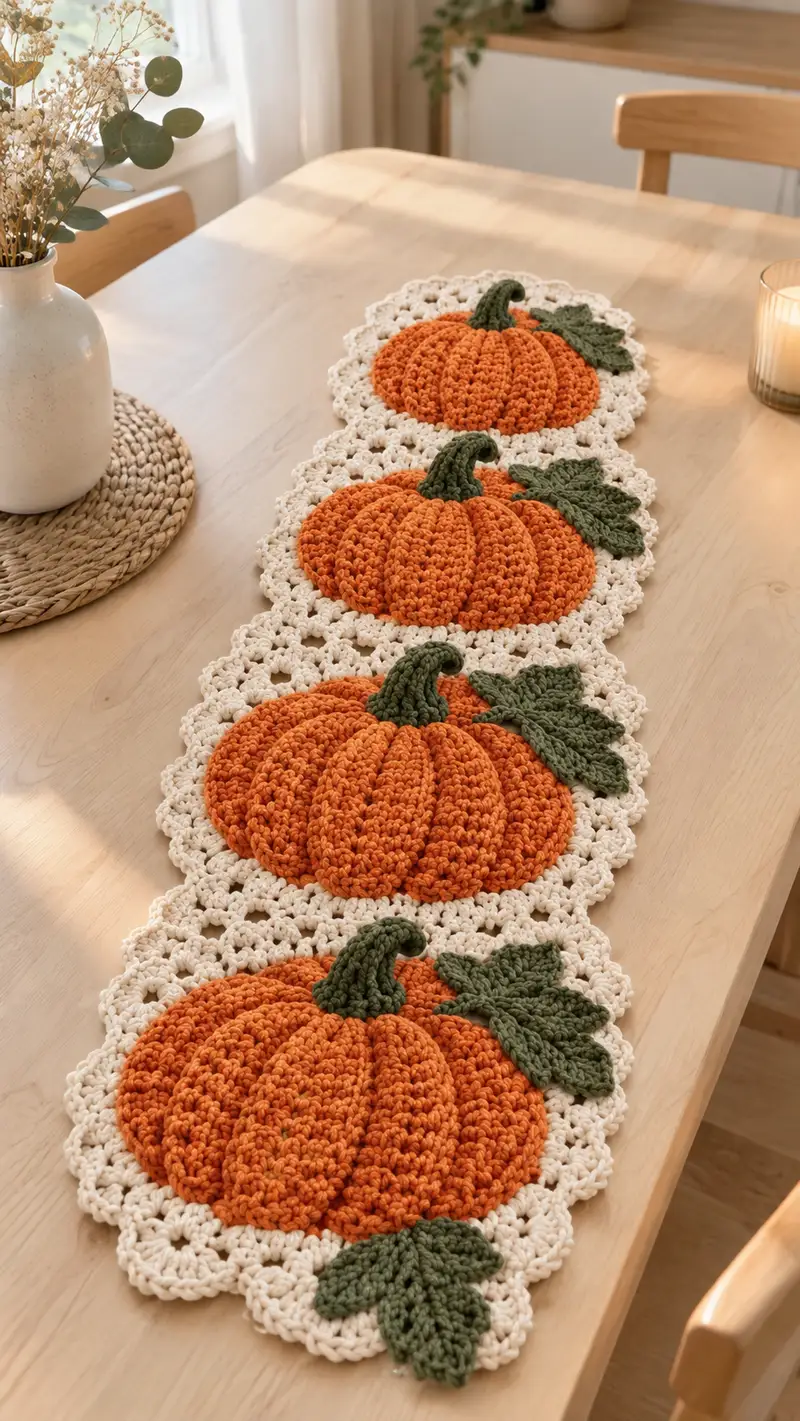
Pumpkin Table Runner Pattern crochet pattern - detailed view of completed project

The technique uses basic rounds, puff stitches for pumpkin ribs, and a classic granny-style lacy border to balance texture and openness. The pattern is modular — make as many pumpkin motifs as you like to fit your table.

Why You'll Love This Pumpkin Table Runner Pattern

I love this pattern because it pairs sculptural pumpkin texture with airy lacework to create a truly seasonal centerpiece. The puff-ribbed pumpkins have lovely depth and the curled stem and leaf add playful character. It's satisfying to construct each motif and watch them join together to become a stunning runner.

Pumpkin Table Runner Pattern step 1 - construction progress Pumpkin Table Runner Pattern step 2 - assembly progress Pumpkin Table Runner Pattern step 3 - details and accessories Pumpkin Table Runner Pattern step 4 - final assembly and finishing

Switch Things Up

I absolutely loved constructing this pumpkin runner conceptually because it blends bold texture with gentle lacework—it's so satisfying to see each ribbed pumpkin pop against the airy cream disc. Try swapping the orange for deep rust or burgundy and use a soft moss green for the leaves to make a richer autumn palette.

I often change the layout to fit different tables: for a narrow table use 3 motifs, for longer dining tables make 6 motifs. You can also create a single large round to use as a centerpiece mat by increasing the disc rounds and adding multiple pumpkins around the edge.

If you enjoy contrast, try a cream pumpkin on a chocolate brown disc for a modern look, or make mini motifs to become coasters or placemats. The construction is forgiving—adjust the number of puff rounds to make pumpkins taller or flatter depending on your taste.

Common Mistakes & How to Fix Them

✗ Skipping stitch markers at round starts can cause misaligned motifs and uneven joins; always mark the first stitch of each round for consistency ✗ Using a hook that's too large will create loose stitches and cause the pumpkin ribs to collapse; use a slightly smaller hook than yarn label for crisp texture ✗ Ignoring tension when making puff stitches will create uneven ribs; keep each puff consistent by pulling loops to the same height ✗ Joining motifs without pinning leads to mismatched spacing; pin each motif and check alignment before final slip-stitch or whip-stitch joins ✗ Not weaving in ends securely lets motifs come apart after washing; weave tails through several stitches and knot if necessary ✗ Overstuffing or forcing stuffing into small motifs (if stuffing is used for dimensional pumpkins) will distort the shape; use only light stuffing or none for this table runner ✗ Changing yarn brand or fiber without checking gauge can alter motif size significantly; test one complete motif to confirm sizing ✗ Rushing edging rounds results in wavy borders; keep consistent tension and check flatness frequently
Pumpkin Table Runner Pattern

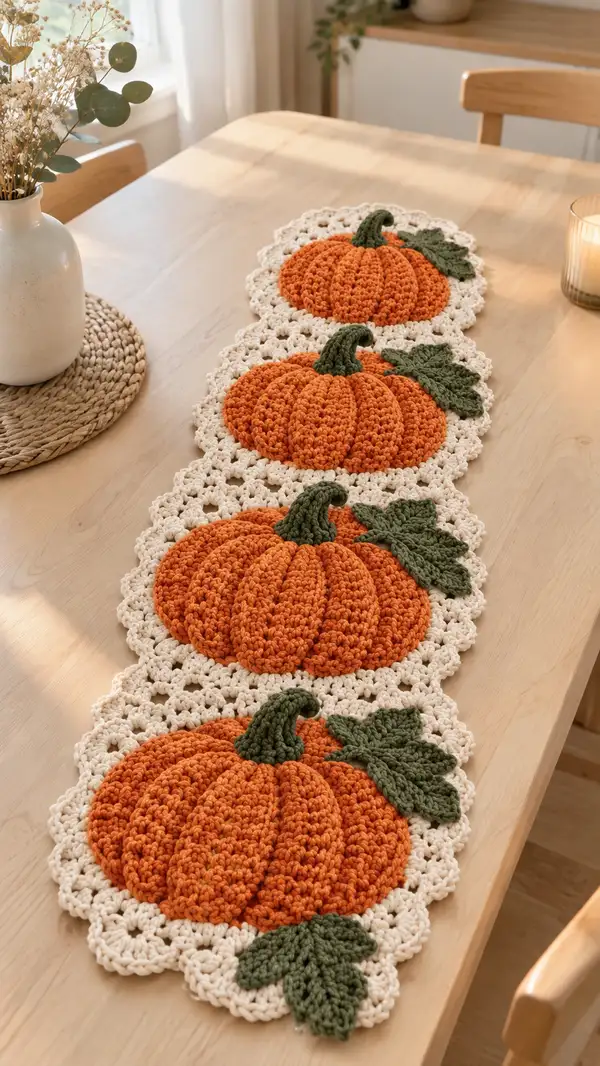
A warm, seasonal table runner featuring a row of plump, textured pumpkins set on a lacy cream background. Each pumpkin has sculpted ribbing, a curled green stem and a large leaf accent—perfect for autumn décor. The design joins multiple round motifs into a long runner with a scalloped edge for a handmade, cozy centerpiece.

Intermediate 8-10 Hours

Materials Needed for Pumpkin Table Runner Pattern

— Main Fabric

  • 01
    Worsted weight yarn (#4), approximately 320-350g in main pumpkin orange (approx. 4-5 100g skeins depending on motif count)
  • 02
    200-240g in cream/ivory for background rounds and scalloped border (approx. 3 skeins)
  • 03
    80-100g in olive/leaf green for stems and leaves (approx. 1 skein)
  • 04
    Small amounts (10-20g) of darker green for optional embroidered veins or accent

— Tools Required

  • 01
    4.0mm (G) crochet hook for main work (recommended for textured look)
  • 02
    3.5mm (E) hook for tighter details (optional for stems/leaves)
  • 03
    Tapestry/yarn needle for sewing and weaving ends
  • 04
    Stitch markers (at least 4-6)
  • 05
    Scissors
  • 06
    Blocking supplies: pins, blocking mat (optional to shape motifs before joining)
  • 07
    Measuring tape or ruler
  • 08
    Optional: stitch counter or notepad to track rounds

Progress Tracker

0% Complete

— Pumpkin Motif (Make 1 motif per pumpkin):

Notes :

This pumpkin motif is constructed in rounds to form a slightly domed, ribbed pumpkin that sits on a lacy cream disc. Work the pumpkin body in orange yarn. Puff stitches create the vertical ribs. Each finished pumpkin motif measures approximately 8.5" - 9" (21-23 cm) across when using worsted weight yarn and a 4.0mm hook. Make as many motifs as needed; the pictured runner uses 4 motifs joined end to end.

Special Puff Stitch :

Puff stitch used throughout counts as one stitch. To make a medium puff stitch: yo, insert hook into indicated stitch, yo and pull up loop (3 loops on hook), yo, insert hook same stitch, yo and pull up (5 loops), yo, insert hook same stitch, yo and pull up (7 loops), yo and pull through all 7 loops, ch 1 to close puff (the ch 1 counts as the top of the puff). When counting, treat the entire puff+ch1 as one stitch. Keep each puff consistent by drawing loops to same height.

Round 1 :

6 sc in magic ring (6)

Round 2 :

Inc around (12)

Round 3 :

(1 sc, inc) x6 (18)

Round 4 :

(2 sc, inc) x6 (24)

Round 5 :

(3 sc, inc) x6 (30)

Round 6 :

(4 sc, inc) x6 (36)

Round 7 :

(5 sc, inc) x6 (42)

Round 8 :

(6 sc, inc) x6 (48)

Info :

At this point you have a flat circular base with 48 sts. We will use 8 pumpkin ribs; 48 divides evenly into 8 segments of 6 stitches each which helps place puff ribs evenly. Place a removable marker at the start of round to track round starts.

Round 9-12 :

1 sc in each st around (48) (work 4 rounds even to build base height)

Info :

These even rounds create a little disc before ribbing starts. Keep tension slightly firm so the ribs later have a raised edge. If you prefer a slightly flatter pumpkin, work one fewer even round.

Round 13 :

*5 sc in next 5 sts, puff in next st; rep from * around (48) — this is (5 sc, puff) x8

Round 14 :

1 sc in each st and in each puff-ch1 (48)

Round 15 :

*5 sc in next 5 sts, puff in next st; rep from * around (48)

Round 16 :

1 sc in each st and in each puff-ch1 (48)

Info :

Alternate a puff round with a plain sc round. This builds the vertical ribs by creating repeated puff columns. Keep your stitch count consistent: every repeat equals 6 physical stitch-spaces (5 sc + 1 puff), and the round total remains 48.

Round 17 :

*5 sc, puff* x 8 (48)

Round 18 :

1 sc in each st/puff (48)

Round 19 :

*5 sc, puff* x 8 (48)

Round 20 :

1 sc in each st/puff (48)

Info :

Check rib definition now. If you prefer deeper ribs, continue pairs of (puff round + sc round) for additional rounds until desired height is reached. The pictured pumpkins use 6 pairs of puff-sc rounds to create pronounced ribs.

Round 21 :

*5 sc, puff* x 8 (48)

Round 22 :

1 sc in each st/puff (48)

Round 23 :

*5 sc, puff* x 8 (48)

Round 24 :

1 sc in each st/puff (48)

Info :

At the end of these rounds your pumpkin should have a squat dome and clearly defined ribs radiating from center outward. We will create a slight edge and then transition to the cream background disc. Fasten off orange yarn leaving a 20-24" (50-60cm) tail for sewing/attaching to the cream disc if you prefer to sew rather than join-as-you-go.

Round 25 :

1 sc in next 6 sts, sl st to next to create a subtle ridge, *1 sc in next 6 sts, sl st* around to create an outer ridge (48) — work alternate sc and sl st to create a slightly defined rim

Info :

Some crocheters prefer to add a single decorative round to set the pumpkin off from the background. The sl st paired with sc forms a neat raised rim. If assembling via join-as-you-go to the cream disc, do not fasten off; proceed directly to joining round instructions in the Background section below.

Round 26 :

Fasten off and weave in ends if you will sew motif later. If join-as-you-go, leave yarn attached and switch to cream as instructed in the Background section.

— Stem (Make 1 per pumpkin):

Info :

The stem is a small curved cone made in olive/green yarn. You can make it firmer by working with a 3.5mm hook and using tight tension. Optionally, insert a small pipe cleaner or twisted yarn inside for a permanent curl—fold and secure the end so there are no sharp wire ends.

Round 1 :

6 sc in magic ring (6)

Round 2 :

Inc around (12)

Round 3 :

(1 sc, inc) x6 (18)

Round 4 :

(2 sc, inc) x6 (24)

Round 5 :

1 sc in each st around (24)

Round 6 :

1 sc in next 6 sts, hdc in next 6 sts, 1 sc in next 12 sts (24) — creates a tapered texture

Round 7 :

(3 sc, dec) x6 (18) — start tapering

Round 8 :

(2 sc, dec) x6 (12)

Round 9 :

(1 sc, dec) x6 (6)

Info :

If you want a curled stem: after round 5, work a short chain of 6-8 ch, then slip-stitch back along the chain to create a curly tail. Alternatively, after finishing, bend the upper portion carefully to shape a curve and hand sew it to the pumpkin top. Fasten off leaving a 10" tail for sewing.

Round 10 :

Fasten off leaving long tail for sewing. Use tail to sew stem to top center of pumpkin, covering the small hole if any. If using pipe cleaner, insert and bend for curl and then hide the end securely.

— Leaf (Make 1 large leaf per pumpkin):

Info :

Leaves are worked flat in green yarn using a combination of dc/tr clusters to create lobed leaf shape. You may make one or two leaves per motif depending on preference. The pictured runner uses one large decorative leaf per pumpkin placed toward one side.

Round 1 :

Ch 11, in 2nd ch from hook sc, hdc, dc, tr, dc, hdc, sc, sl st to last ch to form center spine (9 stitches along chain)

Round 2 :

Working along one side of foundation: sl st into next st, sc, hdc, dc into next st, (dc2tog over next 2 sts) to shape tip, then mirror on other side: dc, hdc, sc, sl st to base (approx 16 sts total depending on shaping)

Round 3 :

Picot edge: ch 3, sl st to create small point at each lobed tip; sc evenly along leaf edge to smooth, work small clusters (2 dc in one st) at lobes to give definition (approx 18-20 sts - keep symmetry)

Info :

Block leaf flat if desired and use the tapestry needle to embroider a central vein with sc or slip stitches using contrast green. Fasten off leaving long tail for sewing to motif at about rounds 10-12 of pumpkin body where stem will be attached.

— Cream Background Disc & Scalloped Border (Make 1 disc per pumpkin):

Info :

The cream disc is a lacy granny-style round that the pumpkin sits upon. You can either join the orange pumpkin to the cream disc as you work the disc rounds (join-as-you-go) or make discs separately and sew the pumpkins on. The disc is worked outwards from a small center to a scalloped edge that frames the pumpkin.

Round 1 :

With cream yarn, mr, ch 3 (counts as dc), 11 dc into ring, sl st to top of ch3 (12 dc) (12)

Round 2 :

Ch 3, dc in same st, dc2tog? No - to create open granny: *ch 2, skip 1 st, 3 dc in next st* rep around ending with ch2, sl st to base (12 clusters)

Round 3 :

Slip to next ch-2 space, ch3, 2 dc in same sp, ch2, 3 dc in same sp (granny cluster in corner), *3 dc, ch2, 3 dc into each ch-2 sp around* sl st to join (creates classic granny squares turned round) (12 clusters)

Round 4 :

Switch to a more open, lacy round: ch4 (counts as tr), tr in same sp, ch1, *skip cluster, (2 tr, ch1) in ch2 space* rep around to form airy lattice (maintain 12 major segments)

Round 5 :

Work ch3 spaces: sl st to ch1 space, ch3, (2 dc, ch2, 3 dc) in ch1 spaces to create scallop foundations between clusters, rep around (12 scallop foundations)

Round 6 :

Shell round: *5 dc in each shell foundation, sl st in next space* around to create a wide scalloped edge (approx 60 stitches total depending on shells)

Info :

Make sure the cream disc is large enough to fully frame the pumpkin — the disc built as above will create a circular frame roughly 10-11" across. If your pumpkins are slightly larger, add an extra shell round to widen the disc until you are satisfied.

Round 7 :

Optional picot scallop: *sl st in next 2 sts, (3 dc, ch 3, sl st in top of center dc) in next shell* around. Fasten off leaving long tails if you will sew pumpkin to disc.

Info :

If joining-as-you-go: do not fasten off. Continue to the next section for instructions on joining the pumpkin to the cream disc in the JAYG method. If making separately, fasten off, weave in ends, and pin pumpkin centered on cream disc before sewing.

— Join-As-You-Go Option: Attaching Pumpkin to Cream Disc

Info :

Join-as-you-go allows you to seamlessly attach the orange pumpkin round to the cream disc during the disc's final rounds. Work the pumpkin body first (leaving the outer rim round unfastened), then begin the cream disc. When you reach a ch-space or sl st near the location where the pumpkin rim sits, slip-stitch through the pumpkin rim stitch to secure. Continue working shell repeats and join at evenly spaced points (12 joins around).

Round J1 :

When you have a shell or ch-space that aligns with a pumpkin rim stitch, work the shell as: (3 dc, ch2, 3 dc) in ch-space of disc, sl st into corresponding rim stitch of pumpkin to anchor. Continue around making sure each shell gets anchored to a matching rim point (12 anchors). This produces a neat join and secures the pumpkin to the disc.

Info :

Tension is important while joining — keep joins snug but not overly tight so the disc lays flat without puckering the pumpkin. If you prefer a softer, looser join, use a slip-stitch join every other shell and sew the rest afterward.

— Creating Additional Pumpkins:

Info :

Repeat the Pumpkin Motif (pumpkin body), Stem and Leaf and cream Disc for each pumpkin you want in your runner. The pictured runner uses 4 identical motifs spaced in a linear arrangement. If making more or fewer motifs, plan final runner width and add extra discs or reduce accordingly.

— Joining Motifs into a Runner (Row Joining & Middle Connector):

Info :

You can join finished motifs two ways: (A) sew motifs together using whip stitch through cream disc edges for a slightly raised seam, or (B) use join-as-you-go during the last round of the cream scalloped edge so motifs are joined seamlessly as you complete each disc. The JAYG method produces a flat, neat runner—this is recommended.

Method A - Sew Together :

Lay motifs in desired linear order with cream edges touching. Using long tails from each disc, whip stitch through both cream scallops around the touching area. Space stitches evenly to hold discs snugly but allow the runner to flex.

Method B - Join-As-You-Go Row (recommended) :

Work the outermost round of the second disc. When you reach the area that should be attached to previous motif, instead of completing the shell normally, sl st into the corresponding shell of the already-completed motif, then complete your shell. Repeat for each shell that should be joined — typically 3-5 shells across the side where discs meet. Continue to the next disc and repeat so each new disc is anchored to the disc before it along a band of shells, creating a continuous runner.

Info :

Use blocking pins to keep motifs aligned flat while joining; this helps avoid a wavy runner. If your discs do not align perfectly, adjust with small gathering stitches behind the join to even spacing.

— Runner Central Connectors & Mid-row Mesh (Optional band between pumpkins):

Info :

The pictured runner has small connecting meshes between each cream disc to create a continuous lacy band along the runner center. Create a small band motif (approx 4-6" long) in cream to connect discs—this is worked as a 6-chain strip with shell repeats at ends and slip-stitched to the adjacent disc edges creating gentle spacing.

Connector Row 1 :

Ch 40 (or desired spacing), sl st in 2nd ch from hook and each ch across to create a narrow chain band. Along the band, work small shells at ends and anchor with sl st to both disc edges where needed. Make 1 connector between motifs and sew securely.

Round Info :

Alternate connectors can be a small granny strip: ch 6, in 3rd ch from hook work 3 dc, ch2, 3 dc; this forms a miniature granny cluster that can be anchored to discs to form a decorative bridge between motifs.

— Runner Scalloped Edge & Final Border:

Info :

Once all motifs are joined into a row, work an edging round along the long sides and both ends to create a unified scalloped border. This will hide join stitches and produce a finished look. Work with cream yarn and maintain the scallop rhythm to match the discs.

Border Round 1 :

With cream, join at any seam and work 1 round of sc evenly along entire outside perimeter of runner, placing 1 sc into each visible st and 2 sc into shell centers to maintain smooth curvature. Keep corners (ends) with increases to stay flat.

Border Round 2 :

Scallop round: *skip 2 sts, 7 dc in next st, skip 2 sts, sl st in next* repeat along length to create large scallops that mirror discs. On ends, work 3-4 scallops to finish end shape symmetrically. Fasten off and weave ends.

Info :

Check the runner for flatness. If any area pulls in, add extra sc in the next round to widen slightly. If any area flares, omit some sc or tighten tension in that region. Blocking gently under a steam iron or damp blocking will improve final look.

— Finishing Touches & Decorative Embroidery:

Info :

Optional detail: embroider faint veins on leaves with a running stitch in darker green. Add small French knots or seed stitches in darker orange at pumpkin tops for visual texture if desired. Secure all ends and trim close.

Final Care :

Hand wash in cool water with mild detergent and lay flat to dry. Avoid heavy agitation to maintain shape of puff ribs. Store flat to avoid distortion.

Assembly Instructions

  • Place your cream discs in the desired order on a flat surface, aligning them so scallops meet evenly. Pin each motif to hold spacing before joining.
  • If using join-as-you-go: complete the final round of the next disc and slip-stitch into corresponding scallop shells of the previous disc at evenly spaced points (about 3-5 anchors along the touching edge) to form a neat seam.
  • If sewing: with long tails and a yarn needle, whip-stitch through the back loops of the scalloped edges of adjacent motifs, using small, even stitches for a flat seam. Knot securely and weave in tail.
  • Sew the green stems to the center top area of each pumpkin. Use the long tail from the stem to stitch through the pumpkin body and cream disc to secure; weave ends on the underside.
  • Attach leaves to the pumpkin side using a yarn needle, positioning leaf base just beside the stem and stitching through a few stitches at the leaf base to firmly secure.
  • Once motifs are joined, work the border round(s) around entire runner to conceal join seams and create a cohesive edge. Block the entire runner to shape and flatten scallops if desired.
  • Weave all loose ends into the back of the runner, stitching through several stitches to ensure ends do not pull free during washing or use.
  • Optionally, add embroidered veins to leaves or tiny accent stitches to pumpkin tops for extra detail. Use small, controlled stitches and secure thread ends on the underside.

Important Notes

  • 💡Use stitch markers consistently at the beginning of each round to avoid counting errors and maintain proper shaping
  • 💡Work puff stitches with consistent loop height to keep ribs uniform across the pumpkin
  • 💡Stuffing is not required for this flat runner motif; the puckered rib effect is created through puff stitches and tension. If you must stuff small parts, use very light stuffing and avoid bulk
  • 💡For join-as-you-go, pin motifs and test placement before permanently anchoring to ensure even spacing and flat joins
  • 💡Block motifs before joining if your tension is uneven; blocking smooths shells and makes joining easier
  • 💡Weave in ends securely and hide tails between layers of stitches to prevent them showing on the front
  • 💡If using different yarn brands, make a test motif to match size because yarn thickness alters finished dimensions
  • 💡Keep a gauge swatch and measure finished motif before making many to ensure consistent sizing across all motifs

This pumpkin table runner brings cozy autumn character to any table with sculpted pumpkins and airy cream lace. Each motif is satisfying to crochet and assemble, giving you a warm seasonal centerpiece that can be treasured year after year. The modular design is adaptable—add more pumpkins for longer tables or shorten for a cozy side table vignette. 🧶🍂 Enjoy every stitch and the beautiful result of your handmade autumn decor! 🎃

You ask,

we answer.

FAQs

What is the finished size of this table runner?

Using worsted weight yarn and a 4.0mm hook, each pumpkin motif measures about 8.5"-9" (21-23 cm) across. A runner of 4 motifs will be roughly 36-38" long without additional border; final size will depend on spacing and border rounds.

Can I use different yarn weights for this pattern?

Yes, you can change yarn weight, but adjust your hook accordingly (typically 1-2 sizes smaller than the yarn recommendation for crisp texture). Different weights will change the motif size; make a test motif to confirm desired dimensions.

Do I need stuffing for the pumpkin ribs?

No stuffing is required. The ribbed, puffy look is created by the puff stitches and tight tension. If you want an extra padded look, very light stuffing may be slipped under ribs before joining but it is not necessary for a table runner.

How many motifs do I need for my table?

Measure your table and decide on pumpkin motif size. Each motif is approximately 8.5" wide; for a 60" table, plan for 6-7 motifs. You can increase or decrease motif count as desired.

Can motifs be machine washed?

Hand wash in cool water and lay flat to dry to preserve puff stitch definition and prevent stretching. Machine washing is not recommended for best longevity.

How do I prevent puckering when joining motifs?

Keep join tension even and pin motifs on a flat surface before joining. Use blocking pins to keep edges aligned while slip-stitch joining or sewing. If puckering occurs, add extra sc in adjacent shells to ease tension.

Can I add extra decorations like beads or buttons?

You can add small decorative touches, but avoid heavy or hard items that could damage fabric or create pressure points on a table. Small wooden buttons or embroidered seeds work well.

How do I customize the runner length?

Make more or fewer pumpkin motifs and adjust spacing connectors. You can also change motif size by using a different hook or yarn weight; rework one motif to determine how many will fit your desired length.
