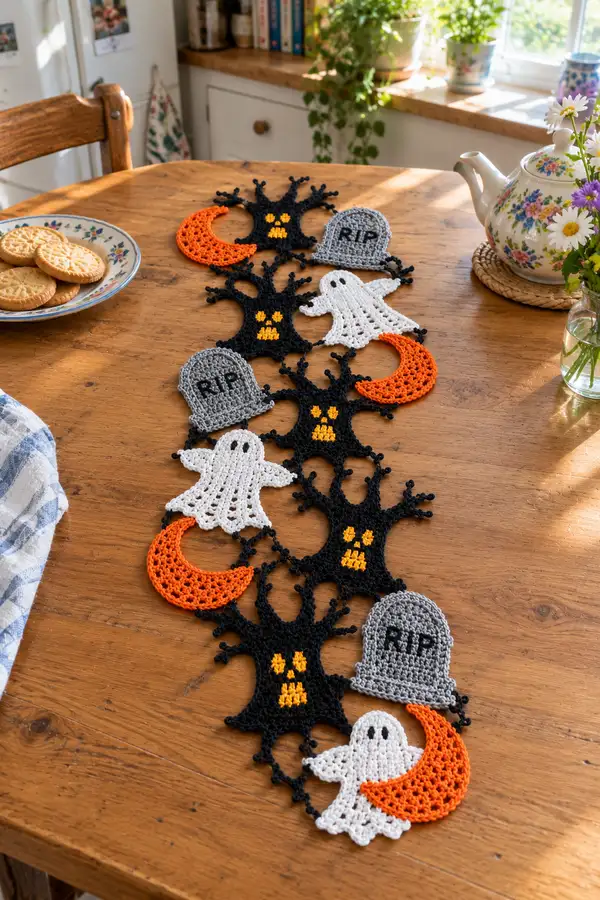
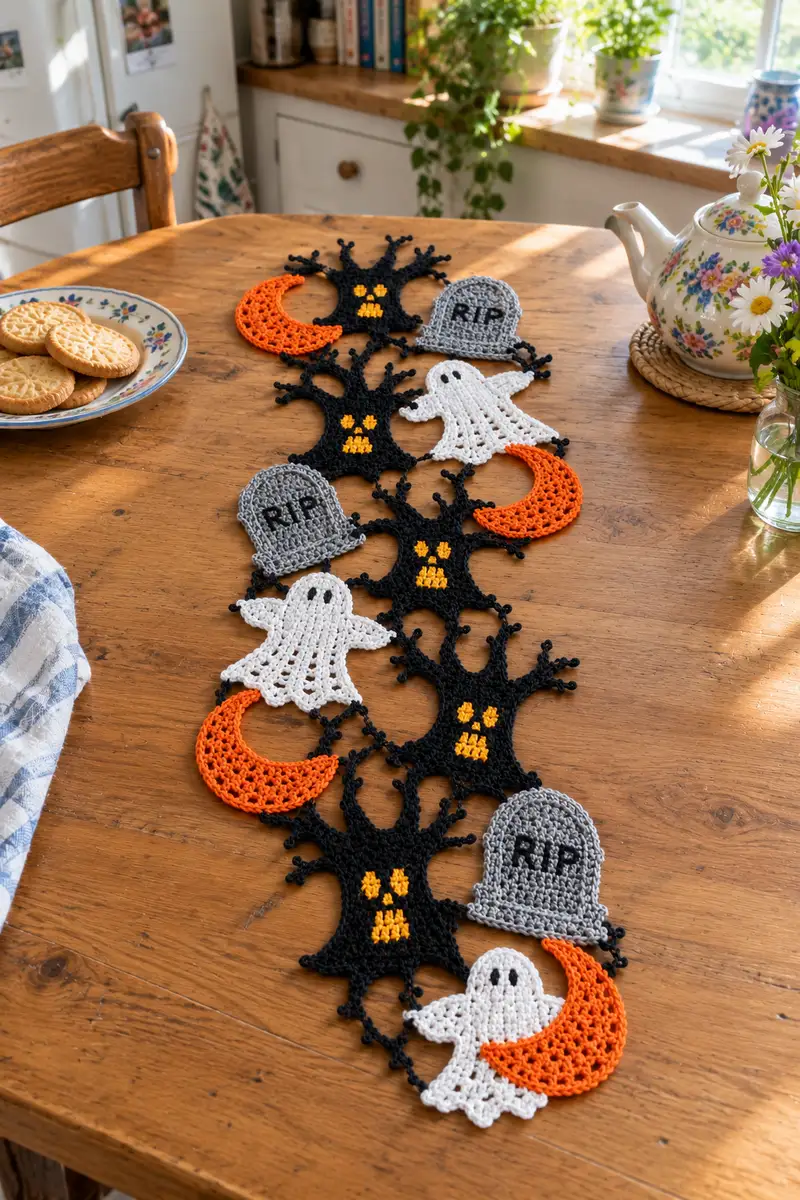
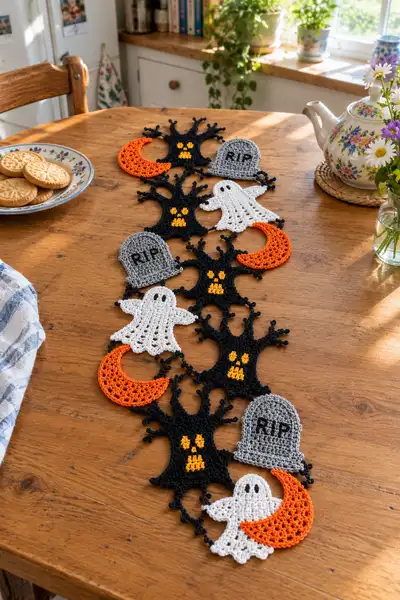
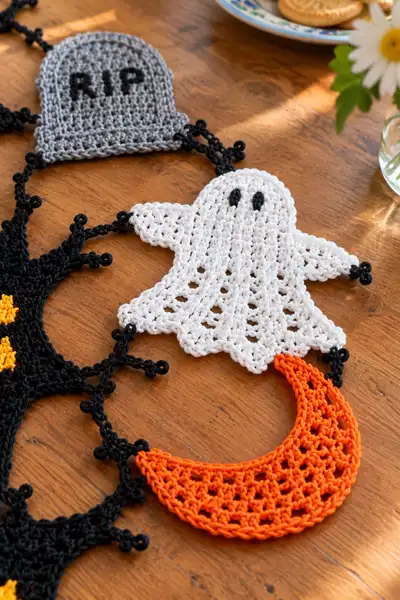
Create a spooky, decorative Halloween table runner made from linked crochet motifs: eerie black trees with yellow faces, soft white ghosts, grey tombstones embroidered with RIP, and bright orange crescent moons. This pattern uses small motifs joined with delicate looped connectors to produce a lightweight, drapey runner that lays beautifully on a wood table. Each motif is worked flat with simple rounds, picot edging and joining loops — perfect for seasonal decoration or gifting.
Progress Tracker
0% Complete
— Materials and Gauge :
Info :
Gauge is not critical for motif-based runner, but a 10cm square of simple dc in DK cotton should measure approximately 16 dc across with 3.5mm hook. Use a hook that gives a firm, defined fabric. Block motifs gently after finishing.
— Spooky Tree Motif :
Round 1 :
6 sc in magic ring (6)
Round 3 :
(1 sc, 1 inc) x 6 (18)
Round 4 :
(2 sc, 1 inc) x 6 (24)
Round 5 :
(3 sc, 1 inc) x 6 (30)
Info :
Work in black yarn. These initial rounds form a small solid center for the jack-o-lantern face area. Keep stitches tight for a defined face area.
Round 6 :
1 sc in each st (30)
Round 7 :
1 sc in each st (30)
Info :
Place a safety stitch marker into the first stitch of each round to keep your place. This will help when adding chain-loop branches later.
Round 8 :
(4 sc, 1 inc) x 6 (36)
Round 9 :
1 sc in each st (36)
Info :
We will begin shaping the outer outline of the tree in the next rounds; keep the fabric flat by checking for twists and adjusting tension.
Round 10 :
(5 sc, 1 inc) x 6 (42)
Round 11 :
1 sc in each st (42)
Round 12 :
1 sc in each st (42)
Round 13 :
(6 sc, 1 inc) x 6 (48)
Info :
Switch to arranging the face: the jack-o-lantern face will be surface-stitched in yellow. Mark the central 12 stitches of Round 8-10 area as the face zone (about 6 stitches across centered horizontally).
Round 14 :
1 sc in each st (48)
Round 15 :
1 sc in each st (48)
Round 16 :
1 sc in each st (48)
Info :
Begin creating branch loops by working chain loops at spaced intervals on the next round. You will make five branch loops around the top half: two small side branches, two medium, one central top cluster.
Round 17 :
*1 sc in next 6 sts, (ch 6, sl st in next st) for branch loop; rep from * 5 times, finish with sc to end (48 plus loops)
Round 18 :
Work 1 sc in each sc and 6 sc along each chain loop to anchor loops down into the round; total should resolve to approximately 48 main rounds plus 30 loop sts absorbed (count will vary by loop technique; main count remains 48)
Info :
When anchoring loop chains, stitch evenly so the loops sit as small branch stubs. If you prefer picot tips, add a ch3 sl st in the tip stitch of each chain for a tiny bead-like end.
Round 19 :
1 sc in each st (48) and when you reach each branch chain anchoring point, work (sc, pic, sc) into the loop top to form a small bud. After completing all branch buds, continue round.
Round 20 :
Work FLO: 1 sc in each st FLO (48)
Round 21 :
(4 sc, 1 dec) x 8 (40)
Info :
Begin slight inward shaping below the face to suggest trunk narrowing. The decorative yellow face will be embroidered across Rounds 6-10 area.
Round 22 :
(3 sc, 1 dec) x 8 (32)
Round 23 :
1 sc in each st (32)
Round 24 :
(2 sc, 1 dec) x 8 (24)
Round 25 :
(1 sc, 1 dec) x 8 (16)
Info :
Fasten off leaving a long tail for attaching to connectors; block motif flat, centering branches symmetrically. Embroider the face now using yellow yarn with surface slip stitch or duplicate stitch: two triangular eyes and three small triangular teeth arranged vertically for a jack-o-lantern look.
Round 26 :
Optional edging: join yarn at base and work reverse sc around base to make a small decorative border: 16 sc around, sl st to join (16)
Round 27 :
Optional picot finish: *(sc, ch 3, sl st into first ch) across base points to define bottom edge
Info :
Make 8 tree motifs for a medium-length runner (or make as many as needed to achieve desired length). Block each tree so the branch loops and picots are tidy and all motifs lie flat for joining.
— Ghost Motif :
Round 1 :
6 sc in magic ring (6)
Round 3 :
(1 sc, 1 inc) x 6 (18)
Round 4 :
(2 sc, 1 inc) x 6 (24)
Round 5 :
(3 sc, 1 inc) x 6 (30)
Info :
Work in white yarn. These rounds form the ghost head. Keep the circle slightly smaller than tree centers so the ghost appears tucked in front of branches when joined.
Round 6 :
1 sc in each st (30)
Round 7 :
1 sc in each st (30)
Round 8 :
(4 sc, 1 inc) x 5 (35)
Info :
Start shaping ghost shoulders and arms by working slight increases on two opposite sides to create wing-like lobes. Mark arm start points with stitch markers (about 8 stitches apart).
Round 9 :
From marker, work 8 sc across shoulder, ch 6, skip 6 sts, join with sc to continue across back, work 8 sc across other shoulder, ch 6, skip 6 sts, sc to continue (stitch count remains 35 excluding chains)
Round 10 :
Anchor ch-6 arms: sc 6 along each arm chain then 1 sc in each sc around body (35 + 12 = 47 held then normalize as 35 main stitches)
Round 11 :
1 sc in each st (35)
Round 12 :
*dc shell across next 5 sts: (2 dc, ch 1, 2 dc) in same st, skip 1 st, sc in next; rep across to create soft scalloped skirt; finish row*
Info :
The scalloped skirt is created with shells and small spaces to give a flowing ghost edge. Keep shells evenly spaced; count shells for symmetry (we aim for 6 shells around the lower flange).
Round 13 :
Work into shells: ch 1, sc between shells, (3 dc in shell) repeat to emphasize shells. This increases the skirt width slightly but keep stitches even (approx 42 stitches when counted across shells).
Round 14 :
Edging scallop: *(sc, ch 3, sl st) in center dc of each shell for picot ripple; rep around*
Round 15 :
1 sc in each top-loop and around body to tidy edge (count approx 42)
Info :
Embroider ghost eyes with black yarn: two small vertical oval shapes centrally in the head area across Rounds 3-5. Use duplicate stitch or surface slip stitch for solid black eyes.
Round 16 :
Optional arm shaping: turn the motif and work 3 sc short-row shaping on each arm to make them sit forward: join yarn at arm tip and sc 3 rows back and forth, finish and weave in ends.
Round 17 :
Final tidy round: 1 sc in each st around to regularize edge (approx 42). Fasten off leaving long tail for joining.
Info :
Block ghost flat to open shell lace and produce the flowing hem. If you want a stiffer motif, use a light spray starch when blocking.
— Tombstone Motif :
Round 1 :
6 sc in magic ring (6)
Round 3 :
(1 sc, 1 inc) x 6 (18)
Round 4 :
(2 sc, 1 inc) x 6 (24)
Round 5 :
(3 sc, 1 inc) x 6 (30)
Info :
Work in medium grey. These rounds build the rounded top; we will flatten into an arch and then continue in rows to form the rectangular tombstone body.
Round 6 :
1 sc in each st (30)
Round 7 :
Switch to working in rows across a semi-oval: ch 1, turn, sc 14, ch 1, turn (do not join). Continue back-and-forth to make a flat rectangular lower body 8 rows deep.
Round 8 :
Row 2: sc 14 across, ch 1, turn (14)
Round 9 :
Row 3: sc 14 across, ch 1, turn (14)
Round 10 :
Row 4: sc 14 across, ch 1, turn (14)
Info :
This row-work will create the rectangular body of the gravestone. Keep edges even; you will join the lower edge back to the curved top to form a single flat motif.
Round 11 :
Row 5: sc 14 across, ch 1, turn
Round 12 :
Row 6: sc 14 across; now join across to the curved top by working sc evenly along the underside curve to close the seam (approx 30 sc to join with top arc)
Round 13 :
Work a tidy border around entire tombstone: 1 sc in each st around, with (3 sc) in corners to create a gentle rounded base rim (count approx 44)
Round 14 :
Base rim: FLO 1 sc in each st for definition (44)
Info :
Embroider 'RIP' centrally using black yarn or surface slip stitch. Mark letters with pins first to ensure spacing: each letter occupies 3-4 stitches in height and about 2-3 columns wide.
Round 15 :
Optional top scallop: *(ch 3, sl st into next st) across the top edge to define a carved look; rep across
Round 16 :
Fasten off leaving long tail for joining. Block flat so the top arch is neat and the tile-like body sits square.
— Crescent Moon Motif :
Round 1 :
6 sc in magic ring (6)
Round 3 :
(1 sc, 1 inc) x 6 (18)
Round 4 :
(2 sc, 1 inc) x 6 (24)
Round 5 :
(3 sc, 1 inc) x 6 (30)
Info :
Work in bright orange. We will form a moon by creating a circle and then removing an inner curved section to make the crescent. Keep the circle fairly open to maintain lacy texture.
Round 6 :
1 sc in each st (30)
Round 7 :
(4 sc, 1 inc) x 6 (36)
Round 8 :
1 sc in each st (36)
Round 9 :
Begin inner carve: ch 1, *skip 8 sts (this will become the hollow inner of the crescent), continue sc around rest of circle; you will end up with an arc spanning approx 28 sc making a thick crescent outer band
Round 10 :
Work across arc edge: 2 sc in each of the first and last few sts of the arc to beef up tips, then 1 sc in each st across arc (approx 28)
Info :
To deepen the crescent shape, work a decreasing inner curve: join yarn at the inner edge and sc 2tog occasionally along the inner edge to create the hollow. Mark the two points where the crescent tips should be and maintain symmetry by counting stitches from the center line.
Round 11 :
Inner tightening: *sc 3, sc2tog* around inner edge where you want more concavity; repeat 4 times (approx reduces inner circumference)
Round 12 :
Outer scallop: *(ch 2, skip 1 st, sc in next) around outer curve to create a lacy outer edge (approx 28)
Round 13 :
Top finishing round: 1 sc in each st around the visible arc to tidy edges (28)
Round 14 :
Optional picot tips at the two crescent ends: at each tip work (sc, ch 3, sl st into 3rd ch), fasten off leaving tail for joining.
Info :
This crescent construction is intentionally a little open and lacy; adjust the number of skipped stitches in Round 9 to change the depth of the crescent. Block gently to shape the moon curve.
— Connector Chain and Loop Units (Make Many) :
Round 1 :
With black yarn, ch 10, join with sl st to form a small ring (10)
Round 2 :
Ch 1, 12 sc around ring placing 3 sc evenly across each side to make a small connector loop (12)
Round 3 :
Edge with tiny picots: *(sc, ch 3, sl st into 3rd ch) around to create several small beads for a twig-like connector (12)
Info :
Make many of these small loop connectors in black: they are used to join motifs and to add twig-like embellishment between motifs. The connectors can be lengthened by increasing chain length in Round 1 for longer spacing.
Round 4 :
For stronger join points, make a slightly longer loop: ch 14, sl st to form loop then 14 sc around (14). Make 24-30 connectors depending on runner length.
Round 5 :
Optional: for extra twig effect, at every 4th connector work an extra ch-6 branch and secure it back into the same loop with a sl st, then sc around as normal.
Info :
We will join motifs using these loops with simple sewing and slip stitches; make at least two connectors per side of a motif to ensure secure joining.
— Edging and Final Decorative Border :
Round 1 :
With black yarn and working around assembled runner, pick up 1 sc every 6-8mm around outer edge to form a tidy border. If the runner is assembled by slip-stitch joining, work edging in continuous round to hide joins.
Round 2 :
Work a decorative picot border: *(sc 3, pic) repeat around edges. For curves, adjust to (sc 2, pic) or (sc 4, pic) to maintain smooth edge. Count should be consistent across straight sections.
Info :
Edging unifies the runner visually and hides small joining irregularities. Keep picots small and consistent for a neat final look. After edging, weave in all ends and block runner flat for final presentation.
— Detailed Joining Notes and Assembly Prep :
Info :
Layout: arrange motifs on a flat table in the desired sequence before joining (example sequence from top to bottom: crescent — tree — tombstone — ghost — crescent — tree — tombstone — ghost). Use pins to hold connectors in place. Make sure motifs slightly overlap at connector points to create an integrated look without gaps.
Info :
Join method (recommended): Use connectors; thread yarn through connector loops and whipstitch to both motif edges through the back loops only to create a compact seam. Alternatively, slip-stitch join the motif edges to connector loops, working on the WS to keep RS tidy.
Info :
Sewing order: join motifs in short sections first (pairs or groups of three), then join sections together. This reduces shifting and allows easier blocking after partial joins. Use pins liberally to maintain alignment while sewing.
Info :
Blocking assembly: after joining, steam-block the whole runner with a cloth over the crochet to avoid scorching, or wet-block by pinning the runner to size and letting dry overnight. This smooths joins and ensures the runner sits flat on the table.
— Alternative Extra Motifs and Decorative Extras :
Info :
Add small pumpkin discs, bats, or tiny spider motifs as extra anchors between main motifs following a 6-12 round construction with simple increases and picot edges. Make and attach sparingly to avoid overcrowding the runner.
Info :
For longer runners, repeat motif sets: 4 motifs across width x however many to reach desired length. The runner in the photo uses 8 main motifs arranged in a narrow single-column layout for a slim runner effect.
— Care and Finishing :
Info :
Care: hand wash gently in cool water and reshape while damp. Avoid tumble drying. Cotton will relax slightly after washing; re-block if necessary. For seasonal storage, fold with acid-free tissue to protect delicate picots and loops.
Finishing this Halloween table runner is incredibly rewarding — each small motif comes together to create a playful, spooky centerpiece that delights guests and family alike. The mix of bold black silhouettes and bright orange and white accents gives a handcrafted seasonal touch that’s both fun and elegant. Display it across your dining table or sideboard and enjoy the compliments! 🎃🕯️