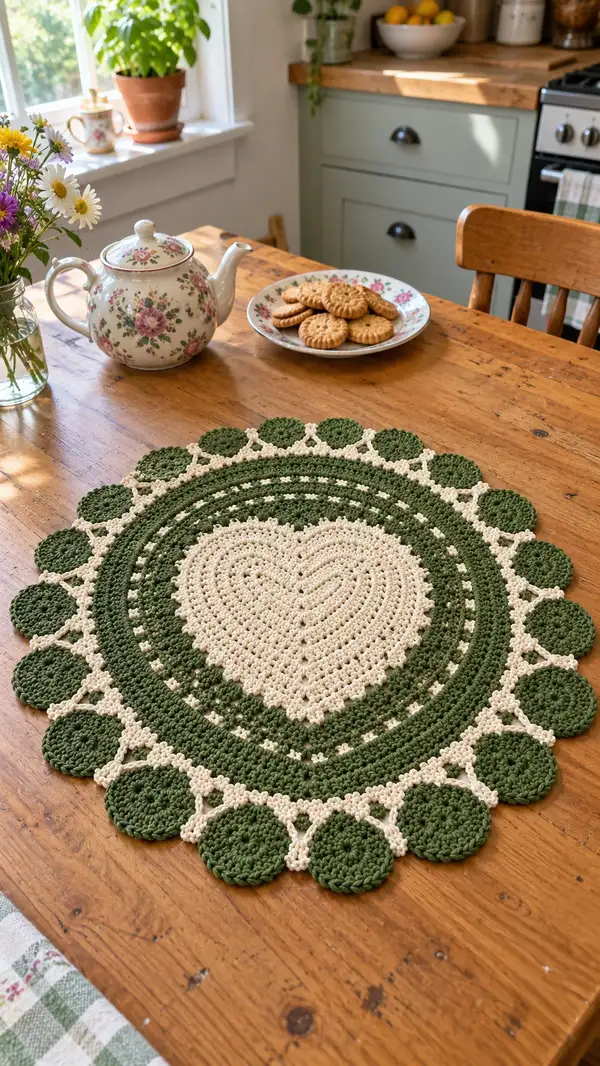
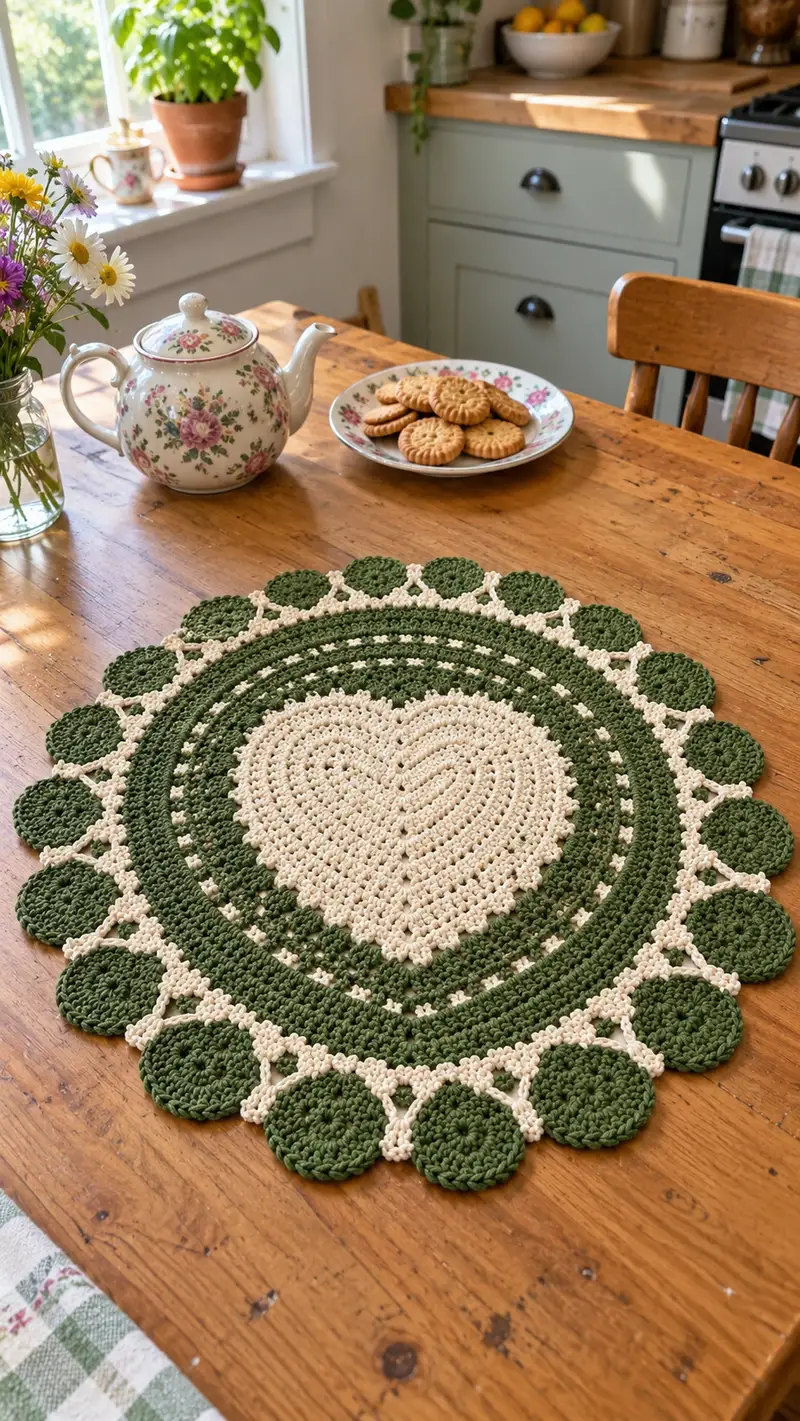
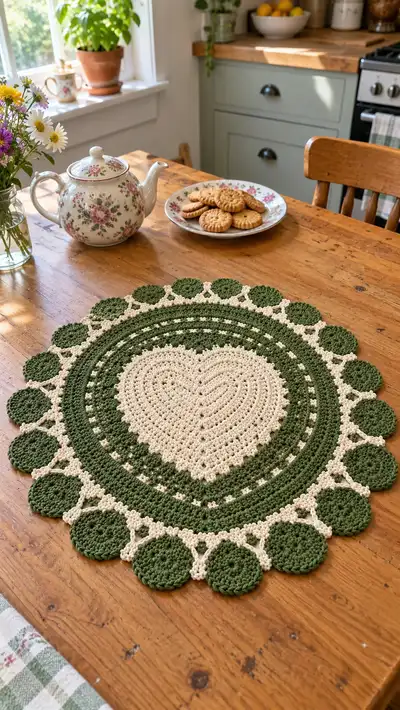
A vintage-inspired round table centerpiece featuring a raised cream heart at the center, concentric textured rings in deep olive green, and a scalloped bobble border connected with delicate cream lace. Designed to sit beautifully on a wooden table, this decorative mat mixes solid crochet rounds with openwork joins for a handcrafted heirloom look.
Progress Tracker
0% Complete
— Center Heart (Cream) :
Round 1 :
Work a foundation: ch 21 (this chain creates the base width for a symmetrical heart). Turn and work along chain to form first lobe: 1 sc in 2nd ch from hook, 1 sc in next 4 ch, 1 hdc in next 2 ch, 1 dc in next 2 ch, 4 dc in next 3 ch (center curve), 1 dc in next 2 ch, 1 hdc in next 2 ch, 1 sc in next 4 ch, 3 sc in last ch; now rotate to work on opposite side of foundation chain: 1 sc in next 4 ch, 1 hdc in next 2 ch, 1 dc in next 2 ch, 4 dc in next 3 ch (other lobe), 1 dc in next 2 ch, 1 hdc in next 2 ch, 1 sc in next 4 ch. Slip stitch to first sc to join (total approximate stitches around: 54). This forms the rounded heart base.
Info :
Keep the foundation chain loose to avoid a tight ridge; this first round creates the two lobes and the central point of the heart. Use a stitch marker at the join for round starts.
Round 2 :
Ch 1, 1 sc in same st, 1 sc in next 6 sts, 1 hdc in next 4 sts, 1 dc in next 6 sts, 2 dc in next 3 sts, 1 dc in next 6 sts, 1 hdc in next 4 sts, 1 sc in next 12 sts (increase evenly along sides) (approx 66 sts)
Round 3 :
Ch 1, 1 sc in each st around working into both loops (66)
Round 4 :
Ch 1, (1 sc, 1 inc) repeat across each of the two top lobe areas to strengthen curves - work (1 sc, inc) x 12 across the lobes combined, then 1 sc around remaining sts (increase count becomes approx 78 sts)
Info :
On this round add incremental increases specifically targeted at the lobes to accentuate the rounded heart tops while keeping the lower point slightly tapered. Your stitch count may vary slightly depending on how many dc/hdc were converted; recount to confirm.
Round 5 :
Ch 1, 1 sc in each st around (78)
Round 6 :
Ch 1, (2 sc, inc) x 26 evenly around (104)
Round 7 :
Ch 1, 1 sc in each st around (104)
Round 8 :
Ch 1, (3 sc, inc) x 26 (130)
Info :
Rounds 6-8 expand the heart into a smooth, slightly raised disk that still reads as a heart because of the foundation shaping. Work neatly and keep tension consistent to preserve the heart outline.
Round 9 :
Ch 1, 1 sc in each st around (130)
Round 10 :
Ch 1, 1 sc in next 6 sts, *hdc in next 3 sts, skip the next st and place 1 sc in next st (creating a slight scallop texture around the heart)*, rep from * around until 6 sts remain, finish sc in last 6 sts (maintain 130)
Round 11 :
Ch 1, 1 sc in each st around (130)
Round 12 :
Ch 1, (4 sc, inc) x 26 (156)
Info :
By Round 12 the heart is a flattened, raised central motif about 14-16 cm across (depending on yarn/hook). Check overall heart outline visually — the top lobes should still be seen. If you prefer a smaller heart, stop increasing earlier and proceed to surrounding rings.
Round 13 :
Ch 1, 1 sc in each st around (156)
Round 14 :
Ch 2 (counts as hdc), 1 hdc in next 3 sts, *ch 1, skip 1 st, 1 hdc in next 4 sts* rep around; finish with hdc in last sts (keeps texture and provides tiny chain arches) (156)
Round 15 :
Ch 1, 1 sc in each st around (156)
Round 16 :
Ch 1, (5 sc, inc) x 26 (182)
Info :
Round 16 increases transition the heart core into a softly oval shape suitable to merge with the first ring of green. If you are happy with heart size, stop increasing and begin color change here.
Info :
Change to deep olive green yarn here for the first outer ring. Fasten on by pulling green through last stitch of cream round and continue working in green. Carry or weave in the cream tail later.
Round 17 :
With green: Ch 1, 1 sc in each st around in BLO to create a defined ridge at the heart edge (182)
Round 18 :
Ch 2 (counts as hdc), 1 hdc in next 6 sts, *ch 1, skip 1 st, 1 hdc in next 7 sts* rep around (creates a breathable ring of tiny chains) (182)
Round 19 :
Ch 1, 1 sc in each st around (182)
Round 20 :
Ch 1, (6 sc, inc) x 26 (208)
Info :
Rounds 17-20 form a sturdy transition ring in green. Working Round 17 in BLO gives a ridge that frames the heart nicely. Recount and ensure 208 sts at the end of Round 20.
— Inner Decorative Rings (Green & Cream Alternating) :
Round 21 :
Ch 1, 1 sc in each st around (208)
Round 22 :
Ch 1, (7 sc, inc) x 26 (234)
Round 23 :
Ch 1, 1 sc in each st around (234)
Info :
At this point the piece will be wide enough to begin texture bands. Maintain a stitch marker at round start and keep tension consistent for a flat fabric.
Round 24 :
Change to cream now for a narrow contrast band: ch 1, 1 sc in each st around (234)
Round 25 :
Ch 1, *ch 3, skip 3 sts, sc in next st* repeat around creating a spaced chain-v motif (creates openwork row) (234)
Round 26 :
Change back to green: Ch 1, 1 sc in each st around working into spaces from previous row as needed to maintain even fabric (234)
Round 27 :
Ch 1, (8 sc, inc) x 26 (260)
Info :
Rounds 24-27 alternate color and texture to set up the visual rings. The openwork cream row will later echo in the lace connectors near the outer edge.
Round 28 :
Ch 1, 1 sc in each st around (260)
Round 29 :
Ch 2, 1 hdc in next 4 sts, *(1 hdc, ch 1, 1 hdc) in next st (a small picot/cluster), 1 hdc in next 8 sts* repeat around (260)
Round 30 :
Ch 1, 1 sc in each st around (260)
Round 31 :
Ch 1, (9 sc, inc) x 26 (286)
Info :
Check the piece at this stage: it should be a large round with the heart still visible in the center. If the outer edge begins to ripple, block lightly before proceeding.
Round 32 :
Ch 1, 1 sc in each st around (286)
Round 33 :
Change to cream: Ch 1, *sc in next 3 sts, ch 3, skip 3 sts* repeat around to create a band of chain arches spaced evenly (286)
Round 34 :
With cream: Ch 1, 1 sc in each sc and 1 sc in each chain-3 space around (286)
Round 35 :
Change to green: Ch 1, 1 sc in each st around (286)
Info :
This alternating green-cream banding visually separates the inner body from the outer scallop row. Count and ensure consistent spacing so outer discs will sit evenly.
Round 36 :
Ch 1, (10 sc, inc) x 26 (312)
Round 37 :
Ch 1, 1 sc in each st around (312)
Round 38 :
Ch 1, *1 sc, ch 4, skip 4 sts* repeat around for pronounced arching (312)
Round 39 :
Ch 1, 1 sc in each sc and 2 sc in each ch-4 space to firm up arches (312 + extras folded into existing placement)
Info :
These arches will serve as visual anchors for the later lace connectors which reach out to the discs at the edge. Work each arch evenly; if you end with a leftover stitch or two, distribute them across the round to maintain symmetry.
— Outer Disc Bases (Make 12 discs) :
Info :
The pattern pictured has 12 circular discs around the edge. Make 12 identical discs in green. Space them evenly around the finished rings and join with cream lace arches. Each disc is worked flat in the round.
Disc (Make 12) — Round 1 :
With green, mr, 6 sc in mr (6)
Disc Round 2 :
(inc) x 6 (12)
Disc Round 3 :
(1 sc, inc) x 6 (18)
Disc Round 4 :
(2 sc, inc) x 6 (24)
Disc Round 5 :
(3 sc, inc) x 6 (30)
Disc Round 6 :
1 sc in each st around (30)
Disc Round 7 :
1 sc in each st BLO to create a slight ridge and thickness to the disc (30)
Disc Round 8 :
Finish off leaving a 20-25 cm tail for sewing. Flatten discs gently and set them aside (30)
Info :
The discs are intentionally thickened using BLO in Round 7 to make pronounced scallops. Use a slightly tighter tension so discs remain firm and do not sag when joined.
— Lace Connectors (Cream) :
Info :
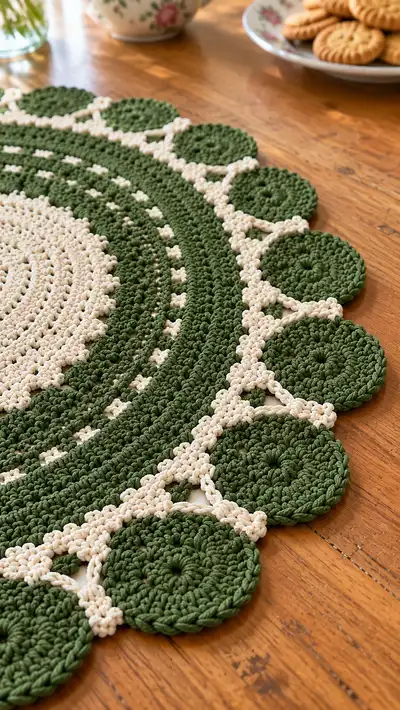
Each lace connector is made in cream and will bridge the space between the large ring and the outer discs. There are two rows of small chain arches joined to create the triangular lace motif visible between discs.
Round 1 :
Attach cream to an evenly spaced point on the outermost green round (use counts to divide the circumference into 12 sections). Ch 1, sc in joining st to anchor.
Round 2 :
Ch 5, sl st into anchor point forming a loop, move forward 6-8 sts along the green round, sc to next anchor, repeat ch-5 loops around to create 12 small loops total. Fasten off last loop and reattach in first loop to begin decorative chain work.
Info :
Spacing is critical for uniform lace. Measure or count stitches to place each loop at equal intervals. Use pins to mark 12 equal points around the outer edge before attaching loops.
Round 3 :
Reattach cream in first loop: ch 1, sc, ch 3, sl st in top of next loop 3 loops ahead to form a triangular bridge, ch 1, sc in next loop; repeat across all 12 loops to create triangular connectors (this forms the lattice that sits between discs)
Round 4 :
Ch 1, work sc around the top of each triangular bridge to tidy edges: sc, hdc, sc into bridge peaks (12 peaks total). Fasten off and weave in ends.
Info :
These rounds create the cream webbing visible between discs. Keep tension even — slightly snug loops will give crisp points and prevent drooping.
— Joining Discs to Mat :
Info :
Pin the 12 green discs evenly around the outer band of the mat using the previously placed chain loops as join points. Each disc will be attached at three small points to secure it in a scalloped manner.
Join Step 1 :
Position each disc so the center aligns with the midpoint of each cream triangular connector beneath it. Using the long tail left on each disc, sew through the outer ring of the mat and through the disc edge at three evenly spaced points (left, center, right) using whip stitch, pulling gently to shape each disc into a scallop.
Join Step 2 :
After each disc is sewn at three points, secure yarn and weave in tails under the discs to keep the underside neat. If discs wobble, add a few hidden securing stitches across the disc back to the mat for extra stability.
Info :
Prioritize symmetry: pin all discs first, step back and view before sewing. Tweaks at this stage are much easier than after finishing. Use small, neat stitches so join lines are barely visible.
— Final Outer Edge & Picot Trim :
Round 1 :
With cream, pick up at any join point and work *sc across 3 stitches bridging the disc outer edge to the mat, ch 3, sl st in next stitch to form a picot arch; rep from * around the entire outer row to add a delicate picot outline. Fasten off and weave in ends.
Round 2 :
Optional extra: Work a final round of 1 sc in each st around both mat outer edge and disc rims to give a uniform edge. This will slightly increase diameter (work evenly to avoid ripple).
Info :
This decorative picot/arch trim creates the tiny points seen between the discs and rounds off the mat with a neat border. Blocking after this round helps the picots sit uniformly.
— Blocking & Finishing :
Info :
Wet-block or steam-block the finished mat pinned out to a flat oval: pin the heart symmetrically and ensure each disc is pinned to be identical in height around the edge. Allow to dry fully for a crisp finish.
Finishing Step :
Weave in all ends on the wrong side, trim excess yarn. If desired, add a light spray starch to help the mat hold shape on dining surfaces.
Info :
For longer-lasting structure, use cotton yarn and avoid machine washing frequently. Hand wash gently and reshape while damp.
Completing this heart lace centerpiece is such a satisfying experience — the raised heart, bold green rings, and scalloped discs come together into a cozy heirloom for your table. Each step is meditative: growing the heart, building texture, and finally stitching the discs into a charming ruffled border. I hope you love the vintage-cottage look this piece adds to your home. 🧶💚 Place it under a teapot or bouquet and enjoy the handmade warmth it brings! ✨