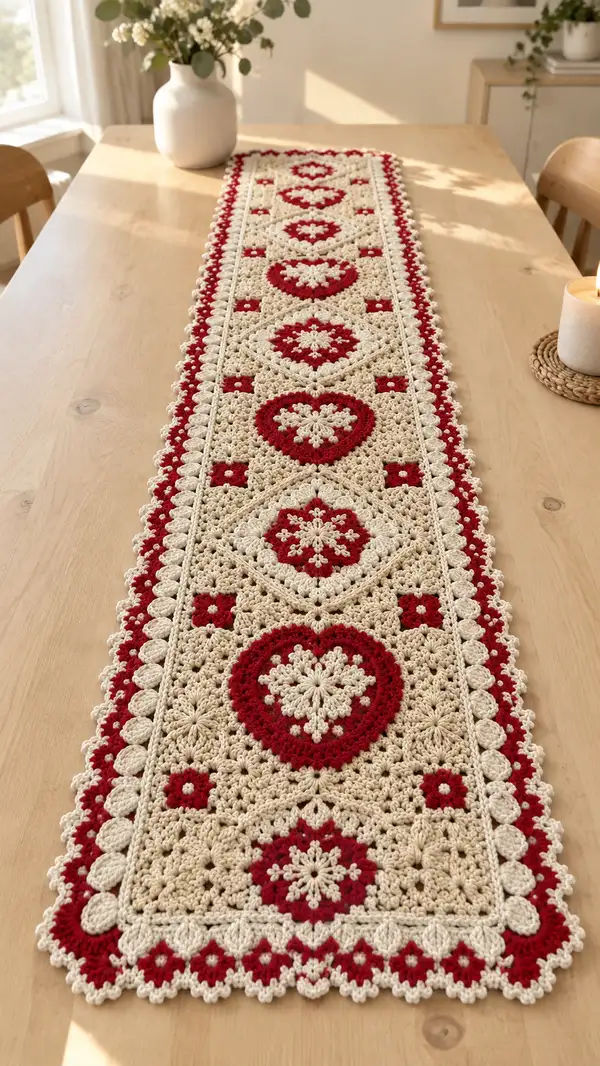
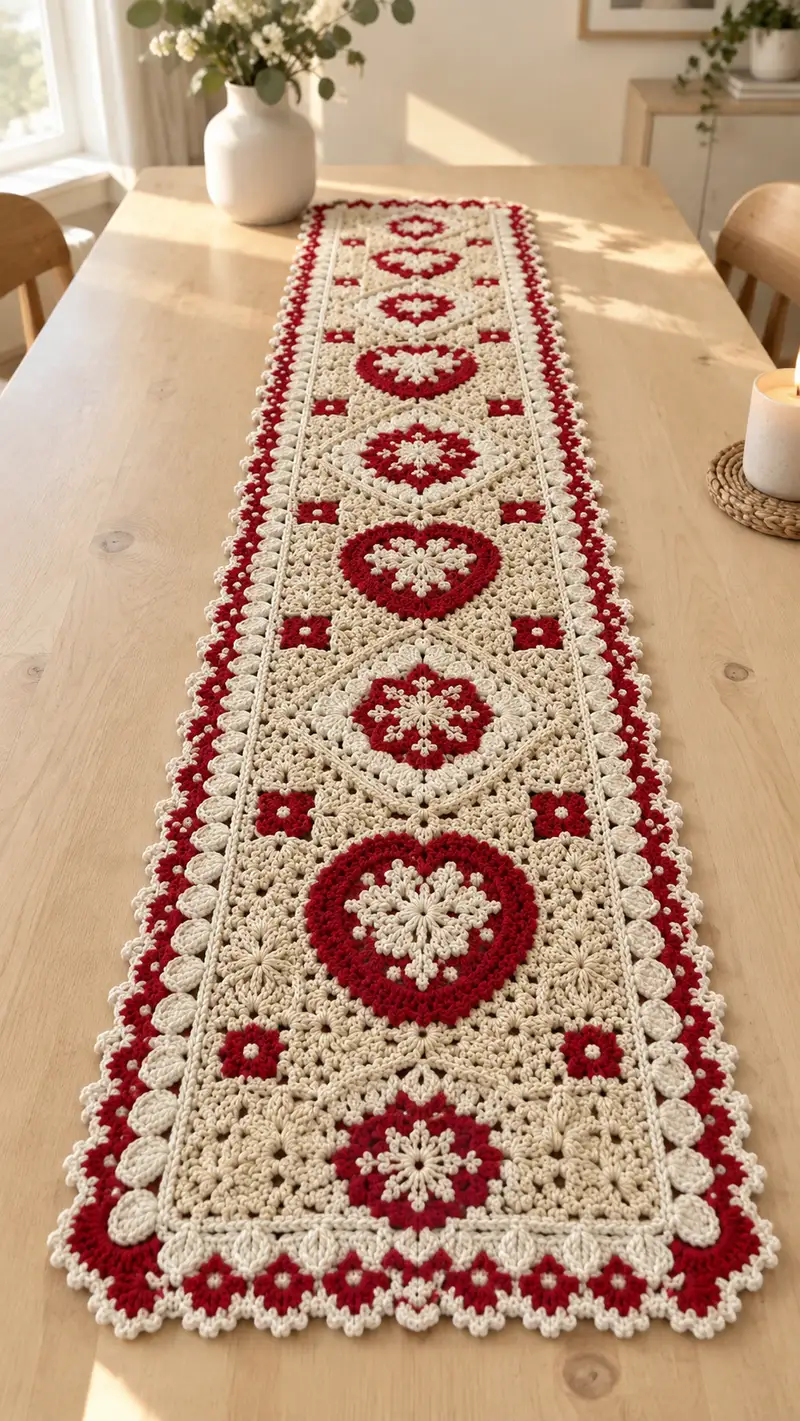
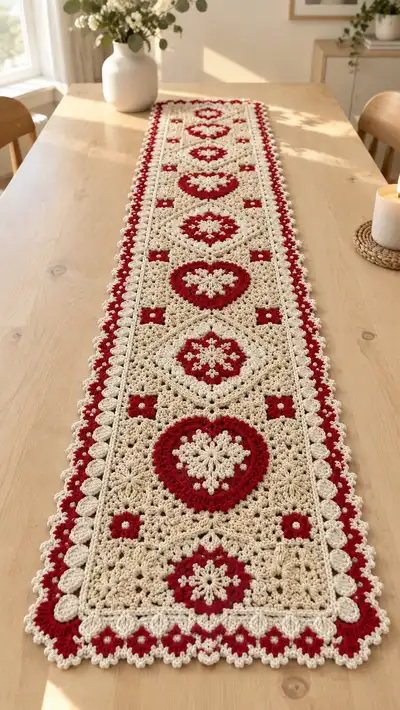
A long, vintage-inspired table runner featuring alternating round medallions and diamond squares in warm cream and rich red. The pattern uses layered puff and cluster stitches to create raised hearts and floral centers, framed by a scalloped border. Perfect for dining tables, holiday displays, or as a detailed accent piece that brings handmade charm to any room.
Progress Tracker
0% Complete
— Large Round Medallion (make 6+ as many as needed) :
Round 1 :
With cream yarn, make a magic ring, ch 1, 6 sc in ring (6). Tighten ring and join with sl st to first sc if desired (6)
Round 2 :
Inc in each st around (2 sc in each) (12)
Round 3 :
(1 sc, inc) x 6 (18)
Round 4 :
(2 sc, inc) x 6 (24)
Info :
This early increase section creates a small flat base; keep tension even. If your center puckers, make your first rounds looser or use a larger hook for rounds 1-3
Round 5 :
(3 sc, inc) x 6 (30)
Round 6 :
Switch to cream puff flower sequence: *ch 2, puff (yarn over, insert hook, yo pull up loop) repeat puff 7 times total in same st, ch 1 to close puff; sk next st, sc in next st* repeat around to create 6 petals (30)
Info :
Puff petal rounds form the white floral center you see. Work puffs consistently; each puff recorded counts as one cluster placed into a st of the previous round. Use a stitch marker to mark the first puff petal.
Round 7 :
ch 3 (counts as dc), 2 dc in same st as first puff base, *ch 1, sk 2 sts, (3 dc, ch 2, 3 dc) in next puff base (creates small cluster-petal), ch 1, sk 2 sts* rep around; join with sl st to top of ch-3. Total cluster corners 6
Round 8 :
Switch to red yarn (see Info below). In each ch-2 corner from Round 7 work: (sc, ch 3, sc) to define petal arches; in chain spaces between petals work 3 dc. End with even counts to maintain circle shape (approx 48)
Info :
Change to red here to create the ring around the cream floral center. Fasten off and weave tail neatly if you like, but for continuous color work, carry the red up and around the outside for the next round.
Round 9 :
With red, ch 1, sc in same st, (ch 3, sc in next ch space) around to create a small lacy ring; total around approx 24 ch-3 loops (24)
Round 10 :
ch 2 (counts as hdc), hdc in same st, *sk next ch-3, in next ch-3 work (3 dc, ch 2, 3 dc)* repeat between petals to create scalloped medallion points; join to top of ch-2 (approx 48)
Round 11 :
Switch to cream. ch 1, sc in each dc around to create a neat cream band (48)
Round 12 :
(4 sc, inc) x 8 (56) working increases evenly into this round to slope the medallion outward
Info :
Start blocking medallions flat after Round 12 if you prefer. At this stage the medallion is stable and can be layered with the following rounds that will create the heart impression.
Round 13 :
ch 1, sc in next 2 sts, (puff in next st, ch 1) x 8 across the sectors to create raised texture; sc in remaining sts (56)
Round 14 :
Using cream, mark 8 evenly spaced stitch groups. In each group work (ch 3, 3 dc, ch 3) into the puff spaces from Round 13 to start forming 8 outer petals (approx 64)
Round 15 :
Switch to red. Around each petal edge work: sc, hdc, 3 dc, hdc, sc to make thicker red rings around the cream petals (64)
Info :
This area is where the visual heart appears in the finished runner. The heart is implied by the combination of the inner floral star and the red ring; if you want a more defined heart shape, embroider a small heart onto the cream center now using red yarn before continuing outwards.
Round 16 :
With cream, ch 2, dc in same, *ch 2, sk 1 st, (2 dc, ch 2, 2 dc) in next space* repeat around to create a diamond-like lattice that will later align with square motifs (approx 72)
Round 17 :
sc in each st BLO to create a ridge that will make joining easier later (72)
Round 18 :
Alternate cream and red: *ch 3, puff in next space, ch 1, sc in next* repeat to add texture bands (keep counts even) (approx 72)
Round 19 :
ch 1, sc evenly around working 1 sc in each st creating a smooth edge for later joining (72)
Info :
Fasten off leaving a 12-15 cm tail for sewing. Weave ends into the back of the medallion. Block medallions flat and square the shape gently so it sits even when joined.
Round 20 :
Optional decorative outer trim: join red yarn and *(ch 3, sl st into same st)* repeat around to create picot-like loops for extra accent (72)
Info :
At this point the Large Round Medallion is complete. The medallion measures approximately 20-24 cm across when using worsted yarn and a 4.0mm hook; adjust by changing hook size. Make all medallions to the same round before assembling.
— Diamond Square Motif (make alternating squares) :
Round 1 :
With red yarn, make a magic ring, ch 2 (counts as hdc), 8 hdc in ring, pull tight, join with sl st (8)
Round 2 :
ch 3, dc in same st, ch 1, *2 dc in next st, ch 1* around to create a small star (16 dc, 8 ch-1 spaces)
Round 3 :
Switch to cream. Into each ch-1 space: (3 dc, ch 2, 3 dc) to form 8 puff corner petals (each corner formed by a 3dc-ch2-3dc) (approx 64)
Info :
This creates a round-to-square transition: the ch-2 spaces become the 4 diagonal corner points of the square after a few rounds.
Round 4 :
ch 1, sc in next 3 sts, (ch 3, sc in next ch-2 corner) repeat across to create four clear corner loops (approx 64)
Round 5 :
Work in corners: (sc, ch 3, sc) into corner loops, along edges work *3 dc in each group of next 3 dc from previous round*; this starts forming square sides; maintain even counts (approx 72)
Round 6 :
Switch to shell clusters along each edge: *(ch 1, sk 2 sts, shell (5 dc) in next st, ch 1, sk 2 sts)* repeat across edge to create a lacy panel within the square (72)
Round 7 :
sc evenly around in cream to tidy edges, placing 3 sc in each corner to maintain shape (72)
Info :
At this stage the square should be roughly 12-14 cm across from flat corner to corner. Block squares to a consistent size before joining them to medallions for a neat finished piece.
Round 8 :
In cream, ch 3, dc cluster in shell spaces to add height: in each shell work (dc3tog cluster, ch 1) to create a textured lattice (approx 80)
Round 9 :
Switch to red for small corner squares: in the midpoints between corners work small solid 3x3 clusters: (sc, sc, sc) in single spaces to create red accent squares; there will be four per motif (these are the little red squares visible in the runner)
Round 10 :
Return to cream: sc in each st, working evenly to maintain the square outline and flatten the motif (approx 80)
Round 11 :
Edge definition: in each corner work (sc, ch 3, sc) and along sides work (puff, ch 1) sequences creating small raised X-like texture between larger shells
Info :
Make as many Diamond Squares as needed to alternate with the Large Round Medallions along the runner. Consistency in blocking and stitch tension is key for even joins.
Round 12 :
Final tidy round in cream: sc in each st, sl st to join. Fasten off leaving a 12-15 cm tail for sewing (approx 80)
— Small Accent Square (make many as filler motifs) :
Round 1 :
With red yarn, ch 4, sl st to form ring, ch 1, 8 sc into ring (8)
Round 2 :
Switch to cream. (ch 3, 2 dc) in same st, *2 dc, ch 2, 2 dc in next st* repeat around to create a small square (8 corner spaces) (approx 32)
Round 3 :
ch 1, sc in each st, placing 2 sc in each corner ch-2 space (32)
Round 4 :
Edge tidy: sc around, sl st to join; fasten off leaving tail for sewing (32)
Info :
These small squares are used as spacer accents between the large medallions and diamond squares. Make a generous number to fill spaces; they are quick and stackable.
— Joining Strip and Connector Rows :
Round 1 :
Using cream yarn, ch 1, sc evenly across one edge of a motif to create a joining band. Work 1 sc in each stitch around the edge for a flat joining ridge (counts will vary per motif; aim for 40-80 sc per side).
Info :
When joining motifs, use the sc ridge you created in Round 17 of medallions and Round 7-12 of squares to align and sew. Pin motifs RS together, matching decorative elements symmetrically before stitching.
Round 2 :
With RS facing, whip stitch or mattress stitch through the back loops of the sc ridge of each adjoining motif. Use the tail left from finishing round to sew. Work 1 seam per joining side; each seam should have evenly spaced stitches so motifs do not pucker.
Round 3 :
After sewing motifs in a strip, work a single crochet connecting band across the long edges: join yarn with sl st at short edge, ch 3, dc evenly around the outer edges to create a neat band for later border rounds (counts depend on total runner length)
Info :
For best stability, sew the medallions and squares in pairs first (medallion+square), then join those pairs into a long strip. Use blocking pins to ensure each join is straight and the motifs align corner-to-center as pictured.
Round 4 :
Create narrow lattice rows between motifs: with cream, ch 1, sc evenly across connecting stitches, then *ch 4, sk 2 sts, sc* to create small arches that mimic the runner's internal lacy panels (repeat down connector length)
Round 5 :
Switch to red for small square inserts along connector: in every 6th sc of the joining band, make a red 3-sc cluster (sc, sc, sc) to echo the small red squares visible between motifs
Info :
Keep your joining tension relaxed but neat. If seams feel tight and the runner pulls, remove a few stitches and rejoin with slightly looser tension to allow the runner to lie flat. Always weave tails into the connecting band to hide ends.
— Main Runner Assembly (layout and joining order) :
Info :
Layout pattern visually before joining: the runner alternates Large Round Medallion, Diamond Square, Small Accent Square, then Diamond Square, then Large Medallion, repeating down the length. Pin motifs in place and ensure consistent spacing (approximately 1.5-2 cm seam allowance between motifs).
Round 1 :
Join the first medallion to a square along one long side using mattress stitch through back loops only for an invisible seam. Use the long tails left on motifs for a tidy join; do not tug tightly (seam should be secure but flat).
Round 2 :
Between each pair work 2 rounds of the narrow lattice connector (see Joining Strip Rounds) to square off seams and create the small diamond-shaped spaces seen in the runner's pattern (counts vary with row length)
Info :
As you assemble, place small filler squares in the small cross spaces that appear between medallions and diamonds. These provide the red accent four-dot squares visible in the runner photo.
Round 3 :
After all motifs are joined into a single runner strip, tidy the long edges by working a continuous sc border in cream with 3 sc in each corner or end seam to maintain the rectangular shape (work counts evenly so that the border falls neat and straight)
Round 4 :
Work a second sc round in BLO to create a ridge for the scalloped edging to attach to: 1 sc in each st BLO around (total count will be the same as prev round)
Info :
Check the runner length as you join and adjust the number of medallions and squares to fit your table. The sample runner shows five large medallions alternating with five diamond squares and numerous small filler squares; add or subtract repeats to scale length.
— Decorative Double Scallop Border (final finishing) :
Round 1 :
With red yarn, join at one corner with sl st, ch 1, sc in same stitch, *ch 3, sc in next sc* around the long outer edge to form small looped foundation for large scallops. Place 4 ch-3 loops on each short end corner (counts vary by runner length)
Round 2 :
Switch to cream. Create larger scallops: in each ch-3 loop work (sc, hdc, 4 dc, hdc, sc) to form rounded shells. For corners work (sc, ch 4, sc) between shells to smooth the corner curve
Round 3 :
Work a second scallop row offset between the first by sl st to the mid-point of each big shell and work (ch 3, 5 dc, ch 3, sl st) to add a raised bead row on top of the first shell forming the double scallop seen in the image
Info :
The double scallop is the distinctive outer edge with a red base and cream raised scallops. Keep shell sizes consistent by using the same number of dc per shell; adjust if necessary to maintain straight edge along the runner. Block the border after completing all rounds for a crisp look.
Round 4 :
In red, add tiny picot beads between large cream scallops: *sl st to space, (ch 3, sl st in 3rd ch)* repeat between shells to create small red beads peeking out from under the cream scallops
Round 5 :
Final finishing round in cream: sc across the very edge to smooth any irregularities and secure all border ends. Weave in ends and tie off securely
Info :
For best results, steam or wet-block the entire runner laying flat and pinning scallops into shape. Allow to dry completely before unpinning. This helps the scallops and motifs sit flat and aligned as shown in the photograph.
— Optional Embellishments & Finishing Touches :
Info :
Embroider small heart outlines into the cream centers of the medallions using red yarn and a yarn needle for a stronger heart motif. Use a backstitch or surface slip stitch to keep the stitches flat. Add small French knot-style puff beads in cream or red to the centers for more texture.
Info :
If you prefer a lighter-weight runner, use a 3.5mm hook and fingering/sport weight yarn substituting the same stitch counts; you will need less yarn and the motifs will be smaller and more delicate.
Info :
Always make an extra motif or two to practice blocking and joining before assembling the full runner. This allows you to establish your preferred seam tension and border spacing without disrupting the layout of already-made motifs.
This beautiful runner is a celebration of texture and color — each motif brings a small moment of handcrafted charm to your table. The vintage heart medallions and lacy diamond squares create a timeless, cozy look that elevates every meal. Enjoy the satisfaction of modular crochet: piece by piece, stitch by stitch, your runner grows into a showpiece you can treasure. 🧶✨ Place it on your favorite table and enjoy the warmth and personality handmade brings. Happy stitching! ❤️