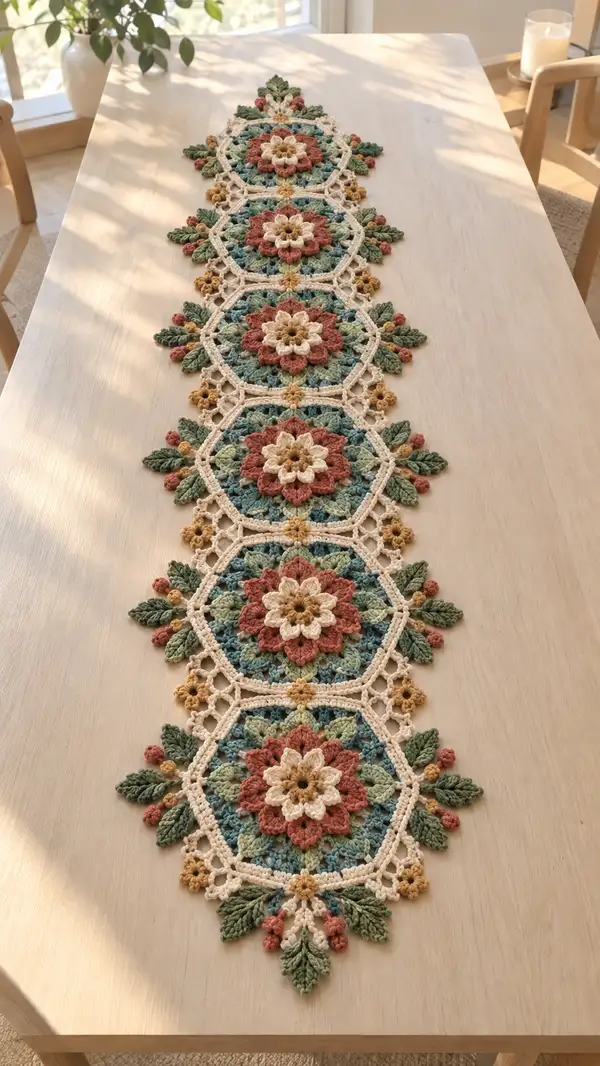
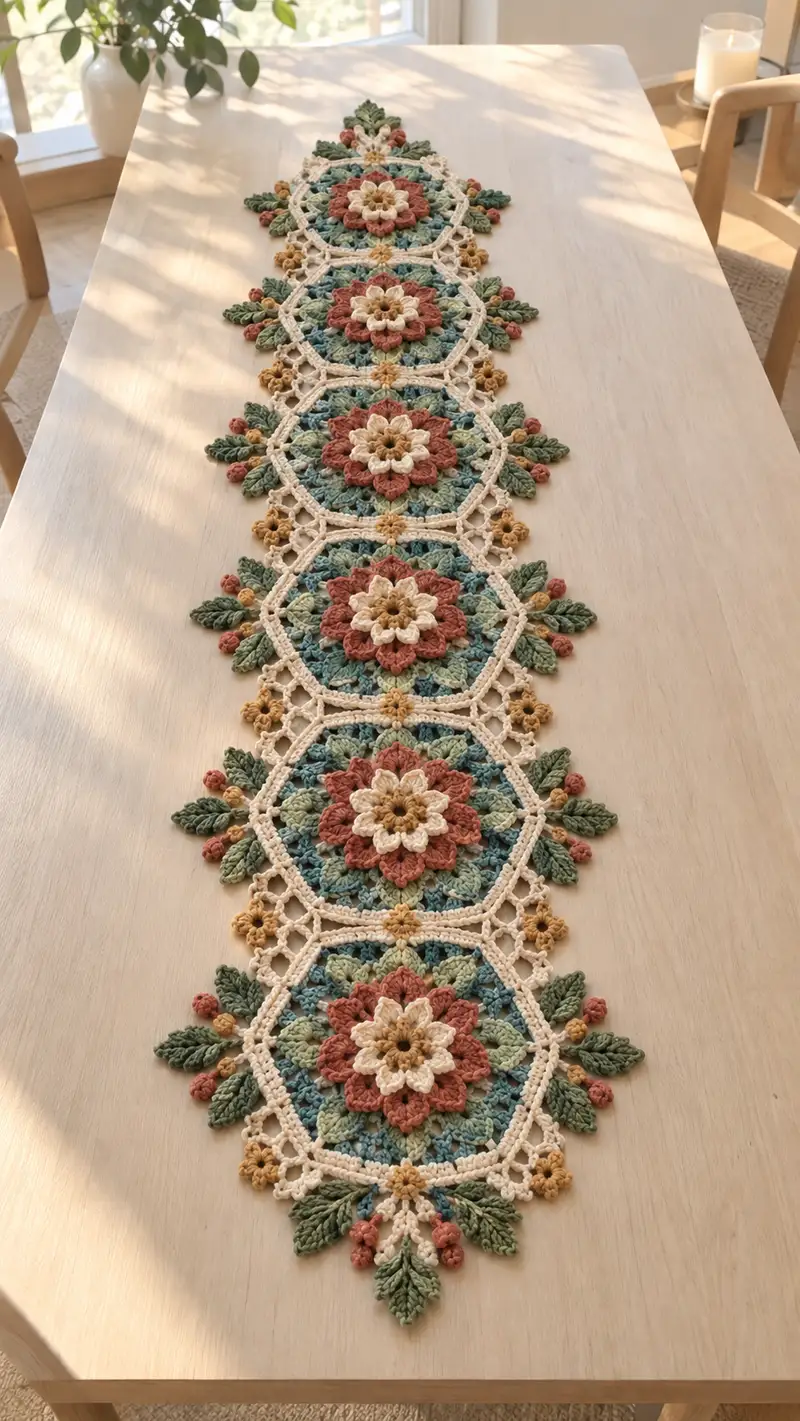
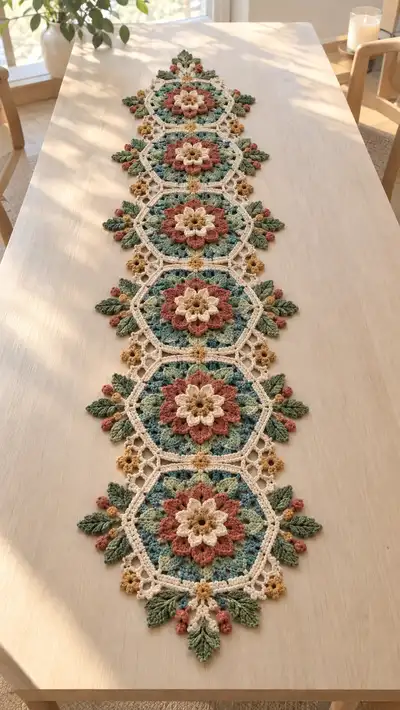
A beautiful hexagonal floral table runner composed of linked floral medallions, leafy scalloped edges and tiny berry clusters. This pattern uses layered petals, textured leaves and a delicate lace join-as-you-go technique to create an elegant runner perfect for dining tables or console tops. Worked in soft cotton yarn with warm neutrals and muted greens, each hex motif joins seamlessly into a continuous, eye-catching centerpiece.
Progress Tracker
0% Complete
— Materials & Notes :
Info :
Work in continuous rounds for textured elements where noted; otherwise join rounds with sl st and begin next round with ch counts indicated. Use a 3.25mm hook unless your tension makes motifs smaller or larger; adjust hook so motifs are consistent. All motifs are worked from center out. The counts shown are for one hex motif; the runner as pictured uses 6 hex motifs joined in a straight line. Gauge is not critical but consistency is important for even joining.
Info :
Puff stitch: yarn over, insert hook into designated stitch, yarn over and pull up loop (repeat this 3 more times until you have 5 loops on hook), yarn over and pull through all loops, ch 1 to close puff (ch 1 does not count as a st unless specified). When puff is anchored into a stitch without changing stitch counts, work it into the anchor stitch and proceed to the next anchor stitch as instructed.
— Center Flower (Stage A) :
Round 1 :
6 sc in magic ring (6)
Round 3 :
(1 sc, inc) x6 (18)
Round 4 :
(2 sc, inc) x6 (24)
Round 5 :
(3 sc, inc) x6 (30)
Info :
Change to cream (or your chosen center color) now. We will build the first raised petal layer using puff stitches anchored evenly around the center; each puff will use one anchor stitch from Round 5.
Round 6 :
*puff in next st, sl st in next st* rep around to make 15 puff petals; finish with sl st to first puff (15 anchor points; still work over 30 sts but pillows occupy every other st visually; keep base stitch fabric intact) (30)
Info :
Do not count the puff as additional stitches for future rounds; subsequent rounds will work into the base round stitches or into the spaces between puffs as directed. If your puff definition is too large, reduce loops to 3 instead of 4 for a flatter petal.
Round 7 :
1 sc in each st (30)
Round 8 :
(4 sc, inc) x6 (36)
Round 9 :
1 sc in each st (36)
Round 10 :
Change to dusty rose (petal color) - Info: fasten on in any sc and carry tail tightly to wrong side (36)
Round 11 :
*ch1, skip 1 base st, 7-dc fan into next st (or work 7 dc cluster/petal) anchored into the next sc; sl st into next sc* rep around to make 12 petal fans. Maintain base stitch distribution by working each petal into every 3rd stitch roughly (36)
Info :
When forming the 7-dc fan petals, work them tall but avoid stretching the base round; keep even tension so petals sit neatly on top of the base.
Round 12 :
1 sc in each base st between petal anchors (36)
Round 13 :
*(2 sc, inc) x6* around to make subtle outward curve: (2 sc, inc)x6 (42)
Info :
Begin shaping the motif to a wider circle to prepare for the textured background rounds. Check petals sit evenly before proceeding; adjust if a petal sits too close to neighbor by shifting anchor by 1 base st on next round so petals balance.
— Secondary Petal & Texture Rounds (Stage B) :
Round 14 :
Change to muted teal for background fill. 1 sc in each st (42)
Round 15 :
1 sc in each st BLO (42)
Info :
Working BLO here creates a shallow ridge that the next decorative stitches will sit behind, giving more definition to the petal layer. Keep tension slightly looser for BLO rounds to allow petals to peek over the ridge.
Round 16 :
(3 sc, inc) x10 + 0 sc remainder to expand evenly (48)
Round 17 :
1 sc in each st (48)
Round 18 :
*ch2, skip 1 st, sc in next st* repeat to create a gentle lacy texture around the base (48)
Round 19 :
Change to sage green for a ring of leaf anchors (Info: join yarn and work into designated stitch positions) 1 sc in each st (48)
Round 20 :
1 sc in each st (48)
Info :
At this point the motif has a defined center flower, a petal layer and a background ring large enough for additional textured leaves and the hex shapeline. Count stitches to verify you have 48 before starting hex shaping.
— Hexagon Shaping & Corner Formation (Stage C) :
Round 21 :
(6 sc, inc) x6 (54)
Round 22 :
1 sc in each st (54)
Round 23 :
(7 sc, inc) x6 (60)
Round 24 :
1 sc in each st (60)
Info :
The increases are placed at six equal intervals around the circle which will become the hexagon corners. Place stitch markers at the start of the six increase groups to keep consistent corner placement for future rounds and for joining motifs later.
Round 25 :
1 sc in each st BLO (60)
Round 26 :
(8 sc, inc) x6 (66)
Round 27 :
1 sc in each st (66)
Info :
These rounds set the hexagon outline. At end of Round 27 the motif should clearly have six protruding corner sections; keep markers in place and check symmetry visually against prior motifs if making multiples.
Round 28 :
sc around working corners as follows: in each corner increase group work (sc, ch3, sc) into the corner anchor st to start forming a small openwork corner loop; sc the remaining stitches evenly (66)
Round 29 :
1 sc in each st and in each corner loop work (sc, ch2, sc) to strengthen corner arches (66)
Info :
These small corner loops will later be used as join points in the join-as-you-go method so keep them even and of consistent height. If you prefer a closed hexagon, eliminate ch loops and work only sc into corners.
— Decorative Leaf Clusters (Make 6 clusters per motif) :
Info :
Each corner will be accented with a set of leaves and tiny berries. You will make a top leaf, two side leaves and a small berry cluster for each corner. Use sage green for leaves and mustard for little flower centers/berries.
Leaf Round 1 :
Start with sage green at designated corner loop. Ch6, sc in 2nd ch from hook, hdc, dc, tr, sl st back into corner loop to anchor (creates a small leaf chain) (no count)
Leaf Round 2 :
Work along leaf chain: sl st, sc, hdc, 2 dc, hdc, sc; turn and work the opposite side into the anchor to create symmetrical leaf edges; sl st into corner base (leaf completed) (no count)
Info :
For more texture: on the return edge work (hdc, sc) into front loops only so the leaf has a raised midrib. Make two identical leaves flanking each corner anchor and one longer leaf extending outward for a layered look.
Leaf Round 3 :
Repeat leaf creation twice more for side leaves (3 leaves per corner) - work slightly shorter chain for side leaves (ch5 anchor, mirror stitches) (no count)
Leaf Round 4 :
Optional: surface slip stitch along center of leaf to simulate vein. Use small neat stitches to maintain flat leaf surface (no count)
Info :
When making all leaves, avoid pulling tight on the anchor sl sts so the leaf tips sit freely and don't pull corner loops inward. If leaf appears floppy, increase the number of hdc on return edge for stiffness.
— Tiny Flower Rosettes & Berries (Make 6 sets per motif) :
Rosette Round 1 :
In mustard yarn make a 5-sc ring: mr, ch1, 5 sc in ring, pull tight, join with sl st (5)
Rosette Round 2 :
*ch2, 3 dc into next sc, ch2, sl st in next sc* around to form 5 tiny petals; fasten off leaving tail (5 petal clusters anchored into 5 base sts) (5)
Info :
These tiny rosettes are sewn to the motif at three equidistant outer points between corners. They serve as a visual connector when joining motifs; leave a 5-6 cm tail to stitch securely to motif when assembling.
Berry Cluster :
Using mustard or rose: make 3 mini bobbles near each corner: over 3 separate nearby stitches work bobble: (yarn over, insert, pull through, repeat 3 times total loops then draw through all loops, ch1). Place clusters staggered rather than in a straight row for visual interest (no count)
Info :
Bobbles add bulk and texture. Keep them small (3-loop bobbles) so they do not pull the motif shape. If worried about bobbles falling off, secure with a small dab of fabric glue after sewing and weaving ends.
— Leaf Variations (Edge Embellishment) :
Edge Leaf 1 :
At outermost points between corners, work elongated leaf: ch8, sc in 2nd ch from hook, hdc, dc, 2 tr, dc, hdc, sc, sl st into base; mirror back along the chain to thicken leaf edge (no count)
Edge Leaf 2 :
Make smaller alternate leaves (ch5 anchor) to create a scalloped leafy border. Space leaves evenly between corner clusters to produce the visual rhythm shown (no count)
Info :
Alternate long and short leaves to reproduce the layered look in the photo. You will make approximately 12 leaves around the hex motif spaced evenly; this visually fills the gaps and creates the lace outline before join-as-you-go.
— Joining Lace & Connector Rounds (Join-As-You-Go Preparation) :
Round 30 :
Change to cream (lace join color). 1 sc in each st around motif working corners with (sc, ch4, sc) to form larger corner loops to accept neighboring motifs (66)
Round 31 :
1 sc in each st and each ch4 loop work (sc, ch4, sc) so the corner loops are consistent and slightly raised (66)
Info :
These loops are your primary join locations. The photo shows a hex lace border with larger arches at joins; maintain even loop sizes so motifs connect without puckering. If working all motifs first, leave loops intact for later sewing; if joining-as-you-go, stop after making loop and proceed to join on the next motif as described below.
Round 32 :
Make a final picot-style decorative round: *ch2, sl st in next st* around the edge to create small open spaces that soften the hex outline; fasten off and weave in ends (66)
Info :
At this stage you can block the motif flat. Wet block or steam block with pins on a blocking mat, pinning the corner loops to exact hex points so joining remains consistent across motifs. Allow to dry fully before joining.
— Making Multiple Motifs :
Info :
Repeat Stages A-C for additional motifs. The runner pictured uses six motifs joined in a straight line; you can add or remove motifs to fit your table. Make all the motifs before joining if you prefer; for a more organic result, join-as-you-go so the runner grows as you work.
— Join-As-You-Go (JAYG) Method — Connecting Motifs :
Info :
To join motifs using JAYG, work up to Round 30 on your new motif until the cream lace loops are present. Lay the new motif on top of the previously completed motif in the intended position, lining up corner loops. For each corner loop connection, replace the ch4 loop on the new motif with: sl st into the corresponding ch4 loop of the anchored motif, ch4, sl st into the next lace space of the new motif to form a secure arch. Repeat for all contact loops between the two motifs. Then continue to finish the new motif's remaining rounds.
Round J1 :
When joining at a side that adjoins an already-made motif, for each corner loop perform: work (sc, ch4 then sl st into neighbor's ch4 loop, ch4, sc) which replaces the original corner sl st to anchor motifs together in three points along the side. After anchoring all neighbor connections, continue across the rest of the round (no additional stitch count change if done in place).
Info :
Join motifs on a flat surface; pin motifs lightly before finalizing sl sts so you can adjust tension to keep runner flat. If a gap appears, add a tiny sc bridge or embroidered bar to close it before finishing.
— Final Border & Edge Accent Rounds (After All Motifs Joined) :
Edge Round 1 :
With cream yarn pick up all outermost edge loops and work 1 sc evenly around entire runner perimeter, working (sc, ch3, sc) into corner points to emphasize hex edges (work evenly to maintain smooth perimeter)
Edge Round 2 :
1 sc in each st and in each ch3 loop work (sc, picot, sc) to add delicate picot edging. Picot = ch3, sl st into 3rd ch from hook. This creates the lacy finish seen around the motif edges (no change in base counts)
Edge Round 3 :
In sage green add small leaf sprigs between motifs along runner side: work (ch5, leaf pattern as earlier anchored into side arches) every 6-8 stitches to create repeated foliage borders (no base stitch count change)
Info :
When working across motif joins you may need to work extra sc in join points to compensate for small gaps created by JAYG. Keep a consistent rhythm of added leaves and bobbles for a balanced overall look.
Edge Round 4 :
Optional surface crochet: using a contrasting color lightly embroider veins on leaves and outlines around hex shapes with surface slip stitch to emulate the look from the photo; do not pull tightly to avoid puckering (no stitch count change)
Info :
Weave all ends through the back of the runner using a tapestry needle, trimming close after securing. Give one final blocking after assembly to encourage motifs to lay flat and the border to settle.
— Making the Leaves & Berries Separately (Alternative Method) :
Info :
If you prefer to make leaves separately and sew them on, follow the leaf creation rounds above but leave a 6 cm tail for sewing. Sew leaf bases to the cream border loops and secure with neat whip stitches. Attach tiny berry bobbles nearby with a few backstitches for a clustered look.
Extra Leaf Round 1 :
Ch7; in 2nd ch from hook sc, hdc, dc, tr, dc, hdc, sc; sl st to base; fasten off and weave tail (no count)
Extra Berry :
Make a small 3-loop bobble directly in mustard: insert hook in chosen stitch, yarn over and pull through 3 times, yarn over pull through all loops, ch1; leave tail to sew down (no base count)
Info :
Sew berries singly or in groups of two-three. Tension should be slightly looser than surrounding stitches so berries sit raised and not sunken.
— Finishing & Blocking :
Info :
After joining all motifs and completing border rounds, soak runner gently in lukewarm water with a touch of wool wash. Press out excess water and pin runner on blocking mat to exact shape, pinning all corners, leaves and outer arches. Allow to dry fully. If you used mercerized cotton, a light steam-blocking is also effective.
Info :
Reinforce any loose join stitches by sewing with matching yarn and a tapestry needle. Check both sides for stray tails and weave them securely into nearby stitches for longevity.
— Pattern Notes & Troubleshooting :
Info :
If the runner pulls in at join seams, loosen your sl st tension at those connection points or add a tiny bridging ch1-2 between motifs to soften the angle. Conversely, if you have gaps, add an extra sc or a small decorative bar stitch to draw motifs neatly together. Keep motifs blocked before joining for best results.
Info :
For an extended runner add additional motifs; keep the same joining rhythm. For a square or table centerpiece consider arranging 3x3 motifs and joining in the same manner but take care to maintain even corner alignment.
Completing this Hex Floral Table Runner is so rewarding—each motif is like a little work of art that grows into a beautiful whole. The layered petals, textured leaves and tiny berries give a vintage botanical charm that brightens any table. Take your time with blocking and joining to achieve a professional, flat finish that will be admired for years. 🧶🌿✨