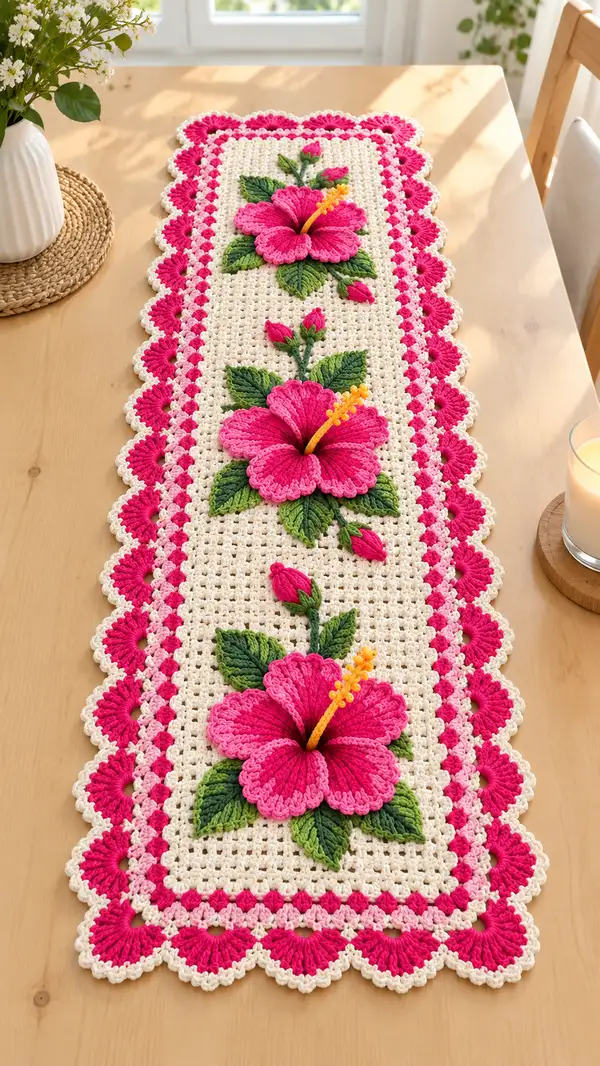
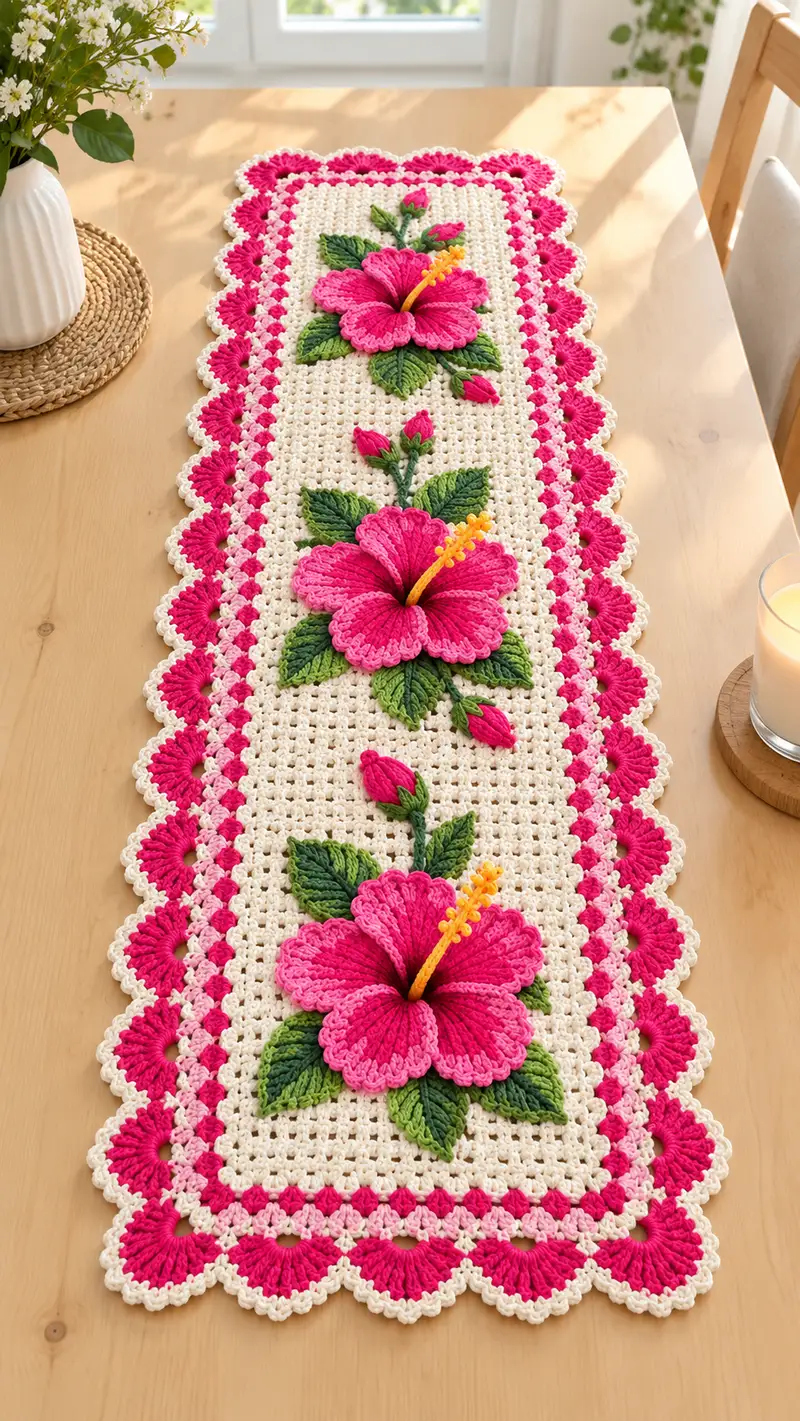
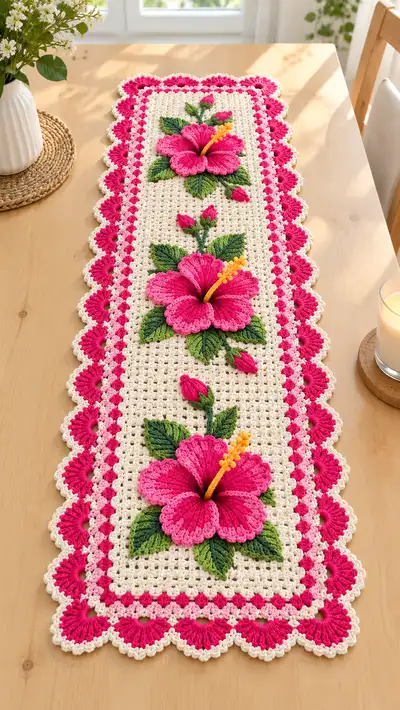
A bright, floral table runner featuring three layered hibiscus applique9s, leafy sprigs and a scalloped border. Worked in a soft cream mesh with vivid pink and green accents, this runner adds a hand-made tropical charm to any table. The textured 3D flowers are applique9d on top for a dramatic, dimensional finish.
Progress Tracker
0% Complete
— Main Mesh Panel :
Preparation :
Work panel flat in rows. Final runner width in this pattern is worked from a foundation chain of 101 base chains to produce a long narrow runner approximately 12" wide by 46" long (size adjusts with yarn/hook). Tension: tightly enough that motifs sit on top; aim for a gauge of approx. 4 dc = 1" with 4.0mm hook in this yarn.
Foundation Row 1 :
Ch 101 (this gives 99 base spaces across). Turn. Note that the pattern's mesh uses pairs of dc and ch spaces - counts throughout will be given in dc counts where possible.
Row 2 :
Ch 3 (counts as dc), dc in next 3 ch, *ch 1, sk 1 ch, dc in next 2 ch*; rep from * to end. End with dc in last 2 ch. (Approx 99 dc + ch spaces; repeating unit maintains full-width mesh)
Info :
Place stitch marker at the first st of every 10th row to help track progress and avoid miscounts. Maintain same stitch count across mesh rows by always ending the repeat as described above.
Row 3 :
Ch 3, turn. Dc in each dc across, working dc into each dc and dc into the top of turning ch where needed. (99 dc)
Row 4 :
Ch 3, turn. Dc in next dc, *ch 1, sk next dc, dc in next dc*; rep to last st, dc in last st. (99 dc + ch spaces)
Row 5 :
Ch 3, turn. Dc in each dc across. (99 dc)
Info :
Begin alternate mesh pattern: odd-numbered rows worked solid (dc across), even-numbered rows form the open grid with ch-1 spaces. This creates a subtle filet mesh allowing applique9 stitches to be sewn on without many obstructions.
Row 6 :
Repeat Row 4. (99 dc + ch spaces)
Row 7-16 :
Repeat Rows 3-6 twice (working 4 rows as a set) to total 10 mesh rows so far. Keep tension even. (99 dc)
Info :
Measure as you go. The three hibiscus placements are worked laterally along the centerline, so mark the center of your panel at this stage and mark the three center points spaced roughly 12" apart along the length of the panel to center your flowers.
Row 17-36 :
Continue in established mesh pattern (odd rows dc across, even rows grid with ch-1 spaces) until you have completed 36 rows total from foundation (this creates a substantial foundation on which to attach appliques). (99 dc per odd row)
Info :
For a longer runner, repeat mesh sets in multiples of 4 rows. If adjusting width, maintain foundation chain such that the final pattern unit ends with the last repeat as written.
Row 37-48 :
Work an additional 12 rows of mesh pattern to reach 48 rows total (adjust if you prefer more space between hibiscus motifs). These 48 rows are where the three hibiscuses will be placed; default spacing places one hibiscus centered at approx Row 12, Row 24, and Row 36 from the top edge. (Maintain 99 dc on solid rows)
Info :
If you prefer to work the runner in one continuous piece and add motifs after blocking, stop at desired length - record total rows. Block the panel flat with pins before applying appliques; this will keep edges straight.
Row 49-56 :
Work 8 rows of plain dc across (solid rows) to provide an even margin before the border rounds begin. (99 dc)
Info :
Fasten off leaving long tail for joining to first border round. We will work the scallop border in rounds around the long rectangle; you will need to pick up stitches evenly along the long sides and short ends.
— Hibiscus Flower (Make 3) :
Overview :
Each large hibiscus is built in layers: Petal Base (large ruffled petals), Petal Overlay (smaller lighter-pink edge), Flower Center (cup and optional light stuffing), and Stamen (long yellow stalk and tiny pistils). Each petal is worked in short rows/rounds to create a three-dimensional cup. Use 3.5mm hook for petals for tighter texture.
Petal Base - Round 1 :
With Raspberry Pink and 3.5mm hook, ch 6, sl st to first ch to make a ring, or alternatively work magic ring and ch 1. (6)
Petal Base - Round 2 :
Work 6 sc into ring. (6)
Info :
This small central ring anchors petal shaping. If using magic ring, pull center tight and do not close completely - you will shape into a shallow cup.
Petal Base - Round 3 :
Ch 1, (inc) x 6 around (work 2 sc in each sc). (12)
Petal Base - Round 4 :
(1 sc, inc) x 6. (18)
Petal Base - Round 5 :
(2 sc, inc) x 6. (24)
Info :
These rounds form a small circular center which the petal rows will attach to. Keep the center slightly cupped by working the next rounds into the FLO to encourage curling.
Petal Base - Round 6 :
(3 sc, inc) x 6. (30)
Petal Base - Round 7 :
(4 sc, inc) x 6. (36)
Petal Base - Round 8 :
(5 sc, inc) x 6. (42)
Info :
Begin petal shaping: you will now split these 42 sts into 5 petal groups (for a five-petal hibiscus). Mark the start of each petal by placing a stitch marker after every 8 or 9 sts depending on even spacing. Here we will divide as: 8, 8, 8, 9, 9 = 42.
Petal Shaping - Round 9 (Petal 1 Start) :
Work into first 8 sts to shape Petal 1: ch 2 (counts as first hdc), (2 hdc in next st) x 2, hdc in next 3, sl st in next to join and fasten off petal? (This builds a short petal unit). (Approx 8 sts used)
Petal Shaping - Round 10 (Petal 2-5) :
Continue similarly for each petal section: for each petal work ch 2, 3-6 hdc or dc in short row to create a broad petal. Repeat until you have shaped 5 petals around center. Total petals = 5. (5 petal units)
Info :
Important: Create petals so that each petal is slightly overlapping the previous petal when laid flat. If a petal feels too flat, add an extra dc or hdc to the middle of that petal to bulk it and create a natural curve.
Petal Ruffle (Round 11) :
Join Raspberry Pink at petal base edge. Working around the outer edge of each petal: *(sc, hdc, 3 dc, hdc, sc) in same space* to create a scalloped ruffled edge on each petal. Repeat for each of 5 petals. (This adds texture and fullness.)
Petal Ruffle - Round 12 :
Work one additional decorative round over the ruffle if desired: *(sc in first sc, picot or sl st in top of 3 dc cluster, sc in final sc)* to refine edge. Fasten off and weave tails. (No numeric total required here; each petal retains 5 ruffles.)
Info :
If you prefer a layered look, make a second (slightly smaller) set of 5 overlay petals in Soft Pink using the same method but begin the petal division at Round 6 with division sizes of 7,7,7,7,7 (35 sts). This overlay is sewed on top of the base petals and offset for a two-tone effect.
Flower Center - Round 13 :
With Dark Pink/Dampen center color, make a small cup: ch 6 join, 6 sc in ring; inc to 12, (1 sc, inc) x 6 to 18, finish in FLO to make cup. Lightly stuff the cup center with a small pinch of fiberfill if you want lift. (18)
Stamen - Round 14 :
Using Bright Yellow, ch 20. In 2nd ch from hook, sc across to create narrow chain. Optionally, with a leftover small thread of yarn, wrap a thinner thread around the chain to stiffen, or use a pipe cleaner covered in yarn for a poseable stamen. At top, add tiny french knots or embroidered knots in yellow to simulate pollen (or small picot clusters: ch 3, sl st in base). Fasten off leaving long tail for sewing down the center of the petals.
Info :
Make 3 of these full hibiscus flowers. Take care to make one overlay per base if you want the layered lighter rim effect. Blending two shades of pink creates the soft rim as seen in the photo.
— Hibiscus Petal Detailed Rounds (expanded: 30 rounds per flower for fullness) :
Round 1 :
Make magic ring, ch1, 6 sc into ring. (6)
Round 3 :
(1 sc, inc) x6 (18)
Round 4 :
(2 sc, inc) x6 (24)
Info :
Work the following rounds into FLO to encourage a cupped center. You will change texture for the petals on top of this disk.
Round 5 :
(3 sc, inc) x6 (30)
Round 6 :
(4 sc, inc) x6 (36)
Round 7 :
(5 sc, inc) x6 (42)
Round 8 :
Divide rounds into 5 petal anchors: mark sts after every 8/9 sts. Prepare to work petal panels.
Round 9 :
Petal 1: ch2, 2 hdc in next st, hdc in next 4 sts, 3 hdc in central st to shape point, hdc back along other side, sl st to base. (Approx 10-12 sts used)
Round 10 :
Petal 2: Repeat as for Petal 1 on next marked segment. (Approx 10-12 sts)
Round 11 :
Petal 3: Repeat. (Approx 10-12 sts)
Info :
At this point your petals should begin to overlap slightly. Adjust by adding or removing an hdc in the middle of each petal to shape the flare and depth.
Round 12 :
Petal 4: Repeat. (Approx 10-12 sts)
Round 13 :
Petal 5: Repeat. Finish petal shaping. All 5 petals now attached around center.
Round 14 :
Working around each petal edge: (sc, hdc, 3 dc, hdc, sc) in outer-most st across petal to create ruffled edge. Repeat across all petals. (5 ruffles)
Round 15 :
Round of slip stitch around petal base to tidy join. Fasten off. (No count required)
Round 16 :
Make second overlay in lighter pink: repeat Rounds 1-12 but stop one round earlier to create slightly smaller petals. Attach overlay to base petals with a few whip stitches to offset petals for layered look.
Round 17 :
Stamen construction: ch 18 in yellow, sc back across to create narrow tube. At the tip, attach 6 small yellow clusters (picots) embroidered or crocheted: *(ch 3, sl st in base)* x6 around final ch to simulate pollen. Fasten off, leaving long tail for sewing through the center of the flower and down through the mesh panel to secure.
Info :
Optional: insert a tiny bit of fiberfill under overlay petals to help the flower puff slightly. Keep stuffing light so it sits flat on the table surface.
Round 18 :
Make small cup (optional): make 6 sc into magic ring, inc to 12 then 18 as earlier to create a small cup that will be sewn to the underside of the petal center to give a cupped look. Lightly stuff. Fasten off with long tail for sewing. (18)
Round 19-30 :
Repeat small decorative rounds as desired adding texture: (sc in FLO) one or two rounds; surface crochet additional veins with darker pink thread if desired. Fasten off and weave in ends. (Decorative rounds, no stitch counts required)
Info :
Three full hibiscus flowers are required for the runner. Make all three before moving to leaves and buds so you can position them together and balance color/scale.
— Leaf (Make 8-10) :
Leaf Overview :
Leaves are worked flat in two-tone green to capture the veined texture. Each leaf uses short rows, front post/back post stitches and surface slip-stitching for veins. Use medium green for main leaf and darker green for veins.
Round 1 :
With Medium Green and 3.5mm hook, ch 11. (11)
Round 2 :
Sc in 2nd ch from hook and across to last ch, 3 sc in last ch, continue working down the other side of foundation ch with sc across back to first ch, sl st to first sc. (Approx 22 sc around - counted as symmetric leaf edge)
Info :
This creates a pointed teardrop leaf base. To scale leaves for larger or smaller look, increase or decrease initial chain by 2-4 chains.
Round 3 :
Ch 1, sc in next 3 sts, hdc in next 6, dc in next 4 (center ridge), hdc in next 6, sc in final 3, sl st to join. (22)
Round 4 :
Work one round in BLO to create a raised edge: sc in each st BLO. (22)
Round 5 :
Switch to Dark Green; using surface slip stitch or embroidery, work a central vein: starting at base, surface-sl st up the center to the tip, then backfill diagonal veins from center to sides every 2-3 stitches using running stitch. Fasten off. (No change to stitch count)
Info :
Make 8 leaves in medium green and 2-4 in a slightly larger scale (ch 13 start) to create visual variety. Press lightly when blocking to set shape.
Round 6-12 :
For additional texture, work a short row of fpdc (front post double crochet) down the center on RS to create a folded midrib before adding surface veins. This adds realistic dimension and helps leaves sit under petals. (No numeric changes)
Info :
Leaves will be sewn under and slightly overlapping the base of each hibiscus. Make sure the size of your leaves matches the scale of your flowers by placing them before sewing.
— Buds (Make 3-4) :
Bud Round 1 :
With Raspberry Pink, ch 6, sl st to form ring, 6 sc into ring. (6)
Round 3 :
(1 sc, inc) x6 (18)
Info :
Work in continuous rounds to shape a closed bud. Use darker green to crochet a small leaf-cap at base of bud (join green, sc around base and create 3 tiny leaf points).
Round 4 :
Work in BLO around bud: sc in each st BLO to create a seam. (18)
Round 5 :
Dec x6 (12) - but do not close completely. Lay bud over a small bit of stuffing or leave hollow to be flattened later. Fasten off leaving long tail for sewing. (12)
Round 6 :
Make 3-4 buds to place near each flower along the center stem. Add a tiny green leaf-cap: join green to base, ch2, 3 dc in same st, sl st and finish. Fasten off. (Leaf-cap adds visual finish.)
Info :
Buds are sewn with stems to the mesh panel, often connecting to leaves or directly to the center line. Place pins and adjust angle before sewing so they appear natural and varied.
— Border Shell Edging (work in rounds around panel) :
Overview :
The scalloped border is made in two contrasting rows: a raspberry scallop row that forms large fan shells, and an outer cream picot edging to highlight each shell. Work around the entire rectangle picking up evenly along the sides and working short sequences around corners to maintain flow.
Round 1 (Join Border) :
With Raspberry Pink held, join with sl st to any corner stitch of the mesh panel. Ch 1, sc evenly along the short end edge, working 1 sc into each row end across to next corner. Place 3 sc in corner st to turn. Continue along long side with 1 sc in each turning chain edge to next corner. Short end again 1 sc per row end, 3 sc in corner. Total sc around will equal approximate perimeter total; count and ensure even spacing. (Perimeter sc - depends on panel length)
Info :
Carefully count sc along one long side then double to estimate. For an even scallop, you will work fan shells across long sides every 6-8 sc depending on spacing. Mark the points where shells will be worked before you begin to maintain symmetry.
Round 2 (Shell Placement) :
*Shell: skip 2 sc, in next sc work (5 dc), sk 2 sc, sl st in next sc*; rep along each long side to create uniform shells. At corners work a larger fan of 7 dc into corner sc to maintain curve. Continue around entire runner. This creates bold raspberry fans around perimeter. (Number of shells dependent on spacing; ensure they are evenly distributed.)
Round 3 (Shell Stabilizing) :
Slip stitch around and into the top of each shell to create a neat ridge. In the top center of each 5-dc shell work sc, ch2, sc to create a small arch. This gives a decorative early row for the cream overlay to attach. Fasten off Raspberry Pink with long tail to weave if desired.
Round 4 (Cream Outer Edge) :
Join Cream/Ecru to the top of any shell with sl st. *Ch 3, sc in top of shell center, ch 3, sl st in space between shells* to form scalloped picot points along outer rim. At corners work ch 3, sc in large 7-dc corner fan edge and continue. This gives the delicate cream outer detail visible in the photo.
Round 5 :
Work one more round of sc in BLO along cream edge to reinforce and tidy. Fasten off and weave in ends. The dual-row border (raspberry fan, cream picot) frames the runner with strong color contrast as shown.
Info :
If you prefer a double-cream edge, switch Round 4 to Cream and then add a narrow Raspberry slip-stitch echo along the inner margin for additional color repeat.
— Assembly & Applique Placement :
Info :
Lay your blocked, bordered panel on a flat workspace. Arrange the three hibiscus motifs along the centerline with approx. 10-12" spacing between centers, oriented so petals face outwards evenly along the runner length. Place leaves under petals so they slightly peek out; place buds along stem lines to create natural clusters.
Step 1 :
Pin the first hibiscus flower over the center mark made earlier (approx Row 12). Use T-pins around the edges of the petals to hold them flat but slightly cupped. Make sure the stamen is pointing at a slight upward angle and that leaves are layered beneath so they are visible from above.
Step 2 :
Sew the flower center to the mesh panel using a tapestry needle and matched yarn tail: whip-stitch through back of flower cup to the mesh at five evenly spaced points around the center disc. Avoid sewing through petal tops to keep them free-standing. Use small invisible stitches to hold the base securely. Repeat for all three flowers.
Step 3 :
Sew leaves: Position leaves beneath petals using pins. Using matching green yarn and needle, sew the leaf bases into the mesh with a ladder stitch to hold securely. Anchor each leaf at 3-4 strategic points (base, mid, tip) to prevent flipping. For larger leaves add a few hidden stitches under petals to hide thread.
Step 4 :
Sew buds: Attach small buds to the mesh via their long tails; position buds on slender stems using green embroidered lines (surface slip stitch) to visually connect them to leaves and flowers.
Info :
Use a blunt-eyed tapestry needle for sewing through mesh to avoid splitting yarns. Secure long tails at least twice through the seam area, knotting if necessary, and weave away ends toward the mesh interior to hide them.
Step 5 :
Attach stamen: center the yellow stamen in the flower hole and run the long tail down through the center cup and through the mesh twice, knotting underneath. If you used a pipe cleaner or wire core, be sure to cover/finish the end so it cannot poke through fabric. Add embroidered French-knot pollen at the stamen tip if desired.
Step 6 :
Final tidy: Once all appliques are sewn, double-check symmetry and make small adjustments with extra stitches if a petal lifts too much. Trim any excess threads and weave in all ends on RS and WS for a clean finish.
Info :
Block the entire finished runner lightly with steam or wet-blocking to even out the mesh and set edges. Place a cloth between iron and crochet if using steam to prevent flattening 3D petals.
— Finishing Touches & Optional Embellishments :
Round 1 :
Surface embroidery: Using a fine yarn or embroidery thread, add a few small veins on petals with closely spaced running stitches in a slightly darker pink to increase realism. Keep stitches short and subtle.
Round 2 :
Beading (optional): Add a few tiny pearl or seed beads near the center of flowers for bling. Sew each bead individually with strong thread and secure knot under the flower cup.
Round 3 :
Edge reinforcement: If runner will see heavy traffic, crochet a final round of single crochet around the inner cream margin (between mesh and raspberry border) with cream yarn to stabilize and hide any joined tails.
Info :
Allow finished runner to dry completely after blocking. Store flat when possible or rolled loosely to avoid permanent creasing of petals.
This hibiscus table runner brings garden-fresh color and texture to your dining or console table. The layered flowers and scalloped border create a dramatic focal point that's both decorative and practical. Each stitch contributes to a piece you'll be proud to display and gift. 🧶🌺 Enjoy the satisfying process of assembling petals, leaves and border, and then delight in the lovely finished runner on your table! ✨