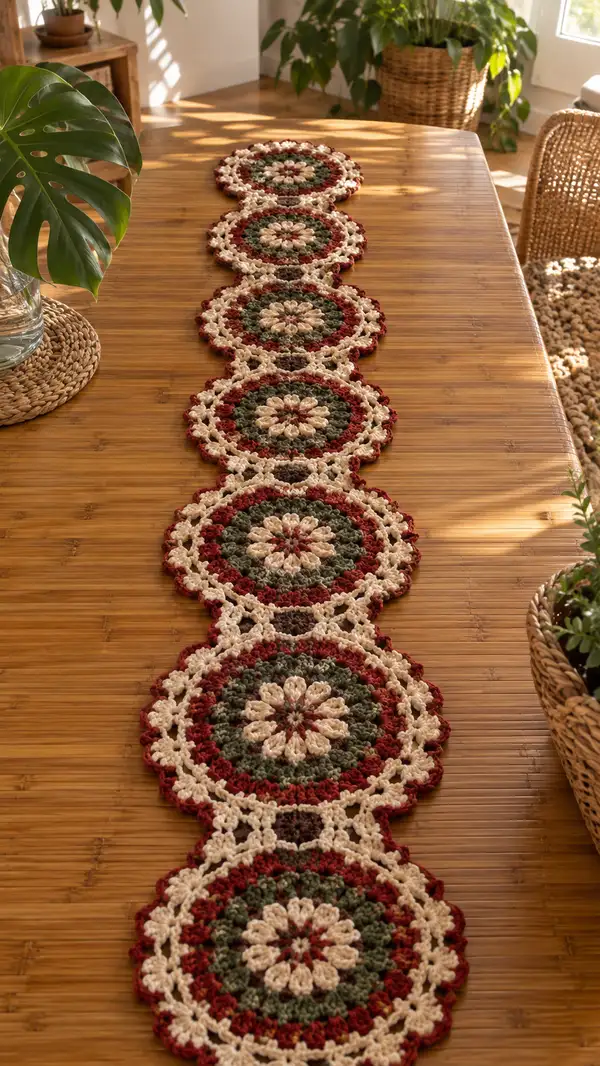
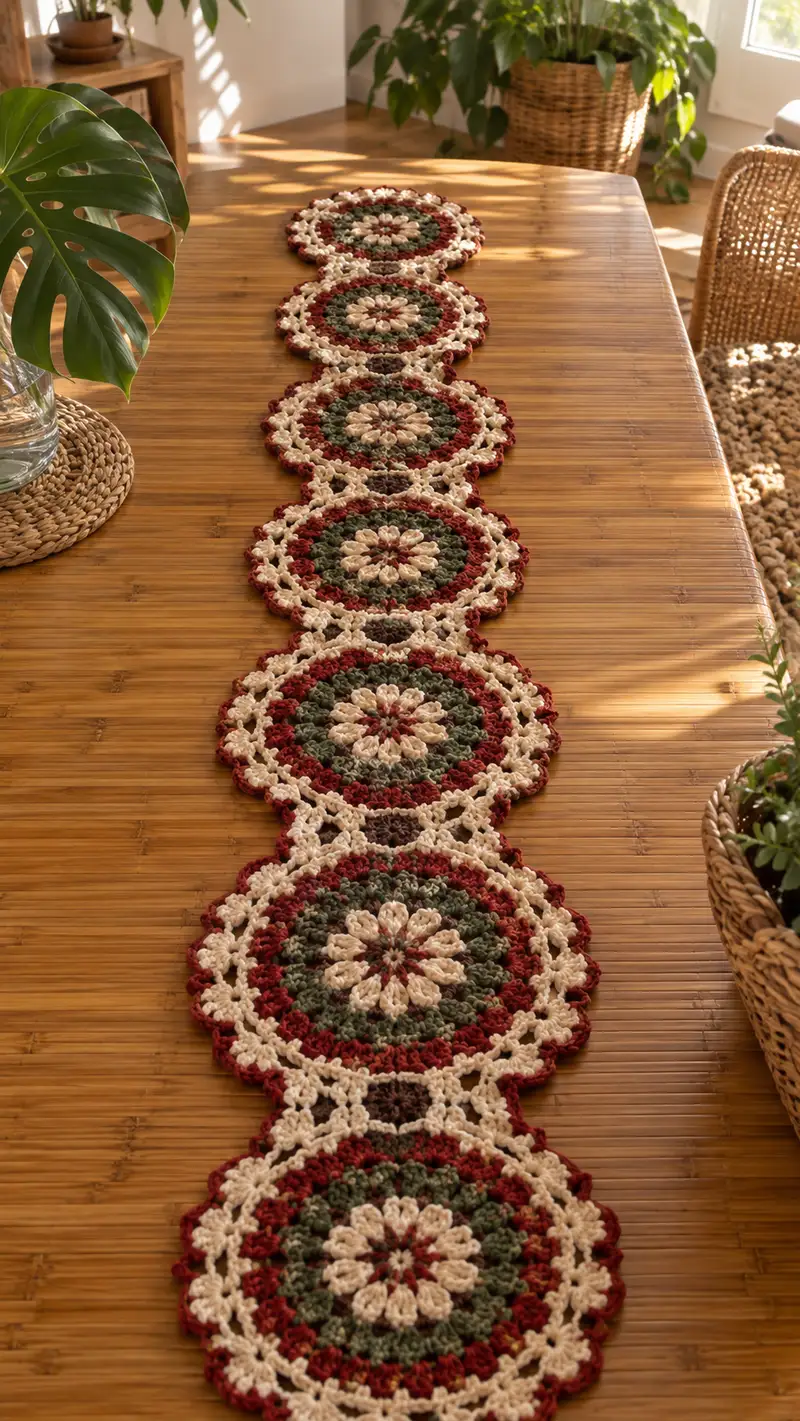
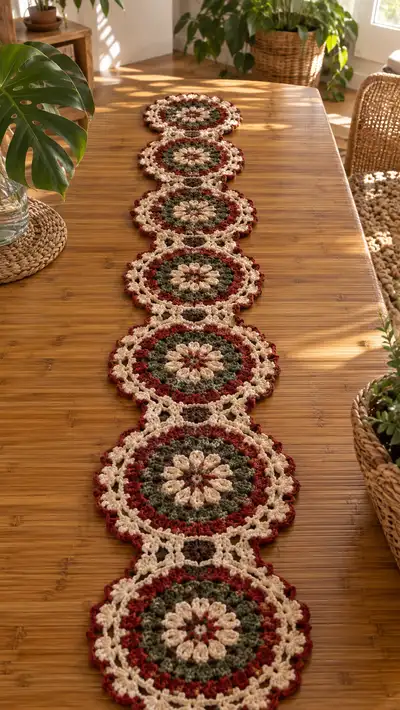
Create an elegant ivory and burgundy floral mandala table runner made of linked round mandalas in warm fall tones. This pattern uses puff clusters, open lace rounds and a scalloped joining edge to form a long, eye-catching centerpiece. The finished runner in the photo features six connected motifs in ivory, burgundy, olive green and warm brown — perfect for seasonal decorating or a cozy everyday centerpiece.
Progress Tracker
0% Complete
— Notes & Gauge :
Info :
Gauge is not critical for table runners but for consistent motif size use worsted weight yarn and a 4.0mm hook. One finished motif measures approximately 8.5" (21.5 cm) across before blocking. The runner pictured is six motifs long (approx. 48-52" / 122-132 cm after blocking and joining). Work tensions consistently and block each motif lightly to the measurements for even joins.
Info :
Puff stitch: yarn over, insert hook into indicated stitch, yarn over and pull up loop (repeat to have 5 loops on hook total for "puff5" or 3 loops for "puff3" as indicated), yarn over and pull through all loops on hook, ch1 to close puff. When making puff clusters, keep loop height even and do not pull loops too tight until you secure them with the finishing yarn over.
— Main Mandala Motif (Make 6) :
Round 1 :
mr, ch1, 8 sc in magic ring, pull ring closed tightly (8)
Round 2 :
Inc in each st around (2 sc in each st) – 8 inc (16)
Round 3 :
(1 sc, 1 inc) x8 (24)
Round 4 :
(2 sc, 1 inc) x8 (32)
Round 5 :
(3 sc, 1 inc) x8 (40)
Round 6 :
(4 sc, 1 inc) x8 (48)
Info :
At this point the center circle is established. Keep an even tension; if your circle buckles, try one size larger hook for the increasing rounds or ease tension slightly. Change to your inner-color (olive) if following the pictured colorway now.
Round 7 :
1 sc in each st around (48)
Round 8 :
1 sc in each st around (48)
Round 9 :
Switch to contrast color A (olive). *Ch3, skip next 2 sts, sc in next st* repeat across to make 16 ch-3 loop spaces around (work evenly so you have 16 ch-3 spaces) (48)
Round 10 :
Into each ch-3 space: make a puff5 stitch (see Info), ch1 to close puff and anchor with sc into the next indicated st. Layout: *(puff5, ch1, sc in next sc) x16* — this produces 16 puff petals sitting on the 48-st foundation (48 puff anchors counted as 16 petal groups)
Info :
Puff5 technique tip: Keep each puff loop the same height by pulling up loops to the same height, then finish all loops in the puff with one yarn over draw through. After completing a puff, ch1 to stabilize before working the next anchor stitch.
Round 11 :
Change to ivory. Ch1, sc evenly around working 1 sc in each stitch and into the top of each puff cluster to create a tight round that joins petals into the circle (48)
Round 12 :
Switch to burgundy. *Ch2, skip 1 st, dc in next 2 sts, ch2, sc in next st* repeat to form small arches between petals; there will be 16 arches total (48)
Round 13 :
Change to green (or continue with burgundy if you prefer). Work 1 sc in each st around using FLO to create slight ridge if desired (1 sc in each st FLO) (48)
Round 14 :
Switch to burgundy. *Ch3, sc in top of next puff cluster to create looped texture, ch3, skip 2 sts, sc* repeat so you have 16 larger loops encircling motif (48)
Info :
At the end of Round 14 you should have a defined row of loops; count loops to be sure you have 16. This row is used later to form the lace and join points between motifs. If counts are off, unravel to the last even round and correct spacing of dc/skip sequence.
Round 15 :
Change to ivory. Into each larger loop: *(sc, ch3, 3 dc, ch3, sc) — forming a little petal-lace fan*. Repeat around, creating 16 fan clusters (this round maintains the same base stitch count as worked fans into loops) (48)
Round 16 :
Work 1 sc in each st around to tidy the fan bases and keep motif flat (48)
Round 17 :
Switch to burgundy for outer motif accent. *Ch4, sl st into the top of the fan center (creates open chain arches), sc into next sc base* repeat across to create an airy scaffolding — count 16 arches total (48)
Round 18 :
Final motif round (scallop prep) — change to ivory. *Into each chain arch make: sc, hdc, 3 dc, hdc, sc (a small scallop)* repeat around to form 16 scallops. Finish round and fasten off leaving a long tail for weaving if you plan to join-as-you-go on the next motif (48)
Info :
Block this motif lightly to 8.5" if your motif is slightly smaller or larger. Lightly wet and pin edging flat, easing the scallops outward to form a neat circle. If you are joining motifs as you go, keep motif 1 pinned and ready for the join round when you make motif 2.
— Motif 2 (Rounds 19-36) : Repeat Motif 1 and Join-as-you-Go :
Info :
Use the same rounds 1-18 sequence for motif 2 (rounds 19-36 below repeat the exact stitch sequence as Rounds 1-18). On Round 36 (which corresponds to Motif Round 18), join motif 2 to motif 1 using the scallop points: when forming scallops, align scallops so that selected scallops meet the previous motif's scallop tops and join by sl st or sc through the corresponding chain arch of motif 1. The instructions below mirror rounds 1-18 but indicate join points on the last round.
Round 19 :
mr, ch1, 8 sc in magic ring (8)
Round 20 :
Inc in each st around (16)
Round 21 :
(1 sc, 1 inc) x8 (24)
Round 22 :
(2 sc, 1 inc) x8 (32)
Round 23 :
(3 sc, 1 inc) x8 (40)
Round 24 :
(4 sc, 1 inc) x8 (48)
Round 25 :
1 sc in each st around (48)
Round 26 :
1 sc in each st around (48)
Round 27 :
Switch to olive. *Ch3, skip next 2 sts, sc in next st* repeat to make 16 ch-3 loop spaces (48)
Round 28 :
Into each ch-3 space: *(puff5, ch1, sc in next sc) x16* to create petals (48 puff anchors)
Round 29 :
Switch to ivory. Sc in each st around and in top of each puff to stabilize (48)
Round 30 :
Switch to burgundy. *Ch2, skip 1 st, dc in next 2 sts, ch2, sc in next st* repeat (48)
Round 31 :
Sc in each st FLO to create a slight ridge if desired (48)
Round 32 :
Switch to burgundy. *Ch3, sc in top of each puff cluster* repeat (48)
Round 33 :
Switch to ivory. Into each larger loop: *(sc, ch3, 3 dc, ch3, sc) x16* forming fan-lace (48)
Round 34 :
Sc around to tidy bases (48)
Round 35 :
Switch to burgundy. *Ch4, sl st into fan center, sc into next base* repeat making 16 arches (48)
Round 36 :
Change to ivory. Scallop round: *sc, hdc, 3 dc, hdc, sc* in each arch to make 16 scallops. When you come to the positions where the scallops of motif 2 meet motif 1, instead of finishing the scallop alone, join at 2 or 3 spots: work sc into the corresponding top of the scallop on motif 1 and then continue scallop on motif 2. Use sl st or sc to connect securely so the motifs sit flat together. Fasten off and weave in ends (48)
Info :
Joining note: For a neat long runner, join motif 2 to motif 1 at three equally spaced scallop points: the central opposite scallop and the two nearest neighbor points. Pin motif 2 to motif 1 to check spacing before joining. The rest of the scallops remain free to create the decorative indentations between motifs.
— Motif 3 (Rounds 37-54) : Repeat & Join :
Info :
Repeat the same 18-round motif sequence (Rounds 37-54 mirror Rounds 1-18). On Round 54 (the scallop round) join motif 3 to motif 2 following the same three-point join method. Continue pinning motifs aligned along the center so the runner stays straight.
Round 37 :
mr, ch1, 8 sc in magic ring (8)
Round 38 :
Inc in each st around (16)
Round 39 :
(1 sc, 1 inc) x8 (24)
Round 40 :
(2 sc, 1 inc) x8 (32)
Round 41 :
(3 sc, 1 inc) x8 (40)
Round 42 :
(4 sc, 1 inc) x8 (48)
Round 43 :
1 sc in each st around (48)
Round 44 :
1 sc in each st around (48)
Round 45 :
Switch to olive. *Ch3, skip next 2 sts, sc in next st* repeat (48)
Round 46 :
Into each ch-3 space: *(puff5, ch1, sc in next sc) x16* (48)
Round 47 :
Switch to ivory. Sc in each st and in tops of puffs (48)
Round 48 :
Switch to burgundy. *Ch2, skip 1 st, dc in next 2 sts, ch2, sc in next st* repeat (48)
Round 49 :
Sc in each st FLO (48)
Round 50 :
Switch to burgundy. *Ch3, sc in top of each puff cluster* repeat (48)
Round 51 :
Switch to ivory. *(sc, ch3, 3 dc, ch3, sc) x16* forming fans (48)
Round 52 :
Sc around to tidy (48)
Round 53 :
Switch to burgundy. *Ch4, sl st in fan center, sc in next base* repeat (48)
Round 54 :
Ivory scallop round: *sc, hdc, 3 dc, hdc, sc* in each arch, joining at three points to motif 2 by sl st/sc into the corresponding scallop tops on motif 2. Fasten off (48)
Info :
Keep joining consistent: choose the three join-points on each new motif (center and two side-points) so that the runner maintains a straight line. If you want a tighter join, sew through both motif edges with a yarn needle after joining with slip stitches.
— Motif 4 (Rounds 55-72) : Repeat & Join :
Info :
Repeat rounds for motif; join to previous motifs using the same method. By the time you attach motif 4 you should have a stable runner that is lying flat. Check alignment and spacing after each join before fastening off tails.
Round 55 :
mr, ch1, 8 sc in magic ring (8)
Round 56 :
Inc in each st around (16)
Round 57 :
(1 sc, 1 inc) x8 (24)
Round 58 :
(2 sc, 1 inc) x8 (32)
Round 59 :
(3 sc, 1 inc) x8 (40)
Round 60 :
(4 sc, 1 inc) x8 (48)
Round 61 :
1 sc in each st around (48)
Round 62 :
1 sc in each st around (48)
Round 63 :
Switch to olive. *Ch3, skip next 2 sts, sc in next st* repeat (48)
Round 64 :
Into each ch-3 space: *(puff5, ch1, sc in next sc) x16* (48)
Round 65 :
Switch to ivory. Sc in each st and in puff tops (48)
Round 66 :
Switch to burgundy. *Ch2, skip 1 st, dc in next 2 sts, ch2, sc in next st* repeat (48)
Round 67 :
Sc in each st FLO (48)
Round 68 :
Switch to burgundy. *Ch3, sc in top of each puff cluster* repeat (48)
Round 69 :
Switch to ivory. *(sc, ch3, 3 dc, ch3, sc) x16* (48)
Round 70 :
Sc around to tidy (48)
Round 71 :
Switch to burgundy. *Ch4, sl st in fan center, sc in next base* repeat (48)
Round 72 :
Ivory scallop round: *sc, hdc, 3 dc, hdc, sc* in each arch, joining at three points to motif 3. Fasten off and weave ends (48)
Info :
When joining multiple motifs, occasionally step back and check that the runner stays visually straight. If one motif is slightly larger, a small adjustment in joining points (move one join by one stitch) can straighten the row.
— Motif 5 (Rounds 73-90) : Repeat & Join :
Info :
Follow the same 18-round sequence (rounds 73-90 mirror rounds 1-18). Join motif 5 to motif 4 in the same three-spot method on the scallop round. Tidy all tails as you go to keep the workspace neat.
Round 73 :
mr, ch1, 8 sc in magic ring (8)
Round 74 :
Inc in each st around (16)
Round 75 :
(1 sc, 1 inc) x8 (24)
Round 76 :
(2 sc, 1 inc) x8 (32)
Round 77 :
(3 sc, 1 inc) x8 (40)
Round 78 :
(4 sc, 1 inc) x8 (48)
Round 79 :
1 sc in each st around (48)
Round 80 :
1 sc in each st around (48)
Round 81 :
Switch to olive. *Ch3, skip next 2 sts, sc in next st* repeat (48)
Round 82 :
Into each ch-3 space: *(puff5, ch1, sc in next sc) x16* (48)
Round 83 :
Switch to ivory. Sc in each st and in puff tops (48)
Round 84 :
Switch to burgundy. *Ch2, skip 1 st, dc in next 2 sts, ch2, sc in next st* repeat (48)
Round 85 :
Sc in each st FLO (48)
Round 86 :
Switch to burgundy. *Ch3, sc in top of each puff cluster* repeat (48)
Round 87 :
Switch to ivory. *(sc, ch3, 3 dc, ch3, sc) x16* (48)
Round 88 :
Sc around to tidy (48)
Round 89 :
Switch to burgundy. *Ch4, sl st in fan center, sc in next base* repeat (48)
Round 90 :
Ivory scallop: *sc, hdc, 3 dc, hdc, sc* in each arch; join to motif 4 at three matching scallop tops. Fasten off (48)
Info :
If you prefer a runner with wider gaps between motifs, join at only two points instead of three. Joining at three points gives the same look as the photo and keeps the motifs from moving independently.
— Motif 6 (Rounds 91-108) : Final Motif & Join :
Info :
Complete final motif (rounds 91-108 repeat the motif sequence). Join motif 6 to motif 5 on the scallop round. After joining, we will work a final continuous edging that travels along the runner's length to unify the look and tidy any exposed joins.
Round 91 :
mr, ch1, 8 sc in magic ring (8)
Round 92 :
Inc in each st around (16)
Round 93 :
(1 sc, 1 inc) x8 (24)
Round 94 :
(2 sc, 1 inc) x8 (32)
Round 95 :
(3 sc, 1 inc) x8 (40)
Round 96 :
(4 sc, 1 inc) x8 (48)
Round 97 :
1 sc in each st around (48)
Round 98 :
1 sc in each st around (48)
Round 99 :
Switch to olive. *Ch3, skip next 2 sts, sc in next st* repeat (48)
Round 100 :
Into each ch-3 space: *(puff5, ch1, sc in next sc) x16* (48)
Round 101 :
Switch to ivory. Sc in each st and in puff tops (48)
Round 102 :
Switch to burgundy. *Ch2, skip 1 st, dc in next 2 sts, ch2, sc in next st* repeat (48)
Round 103 :
Sc in each st FLO (48)
Round 104 :
Switch to burgundy. *Ch3, sc in top of each puff cluster* repeat (48)
Round 105 :
Switch to ivory. *(sc, ch3, 3 dc, ch3, sc) x16* (48)
Round 106 :
Sc around to tidy (48)
Round 107 :
Switch to burgundy. *Ch4, sl st in fan center, sc in next base* repeat (48)
Round 108 :
Ivory scallop round: *sc, hdc, 3 dc, hdc, sc* in each arch, joining at three points to motif 5. Fasten off and weave ends (48)
Info :
After all motifs are joined, press entire runner gently under a damp cloth or steam-block each motif for an even, flat finish. Secure loose ends by weaving them underneath the lace rounds so they remain hidden from the top side.
— Final Continuous Edging (Rounds 109-120) :
Info :
The final edging unifies the runner and tidies any raw joins. Work this edging after all motifs are joined and the runner is pinned flat. The edging will travel along the outer scallops and across the small connecting arches between motifs so the runner looks continuous.
Round 109 :
With ivory, join anywhere on outermost scallop edge with a sl st. Ch1, sc evenly around outer scallop edges across all motifs, working 2 sc in each scallop center (adjust as needed to keep scallop spacing even). Maintain an approximate count of stitches that runs evenly along the outside scalloped edge (expect approx. 6-8 sc per scallop depending on size).
Round 110 :
Work a decorative open lace row: *ch5, sl st into next sc base to create airy loops across scallops.* Continue around entire runner, spacing loops so they fall into scallop valleys. This creates a light airy border that echoes the motif centers.
Round 111 :
Switch to burgundy. *In each lace loop work (sc, ch2, 2 dc, ch2, sc) to form mini-arches* — this adds a colored trim that mirrors the scallops and ties color across motifs
Round 112 :
Switch to ivory and sc evenly around to tidy the row and flatten any arches (work sc in each visible stitch and in each top of the mini-arch) — keep tension slightly loose so edging lays flat (run count will vary by motif size)
Round 113 :
Optional small picot round in burgundy: *sc, ch3, sl st into same sc (picot), skip 1 sc* repeat to create a delicate dotted trim around the runner.
Round 114 :
Final tidy round in ivory: sc in each st around to neaten the join between colors. Fasten off and weave all remaining ends through the underside lace using a tapestry needle.
Info :
Blocking final runner: pin the runner on a flat blocking surface to the intended final dimensions; gently steam or mist and allow to dry completely. This softens yarn joins and sets the scallop shape for a professional finish. If you used different yarn weights or changed hook sizes, blocking is essential to get a uniform look.
This ivory burgundy floral mandala table runner brings classic crochet charm to your table with richly textured puffs, delicate lace and a scalloped edge. Working through each mandala feels wonderfully rhythmic — each round adds a new layer of floral detail until the whole runner unfolds. Blocking and join-as-you-go make finishing feel satisfying and polished. I hope this project fills your table with warmth and handmade joy! 🧶🌸