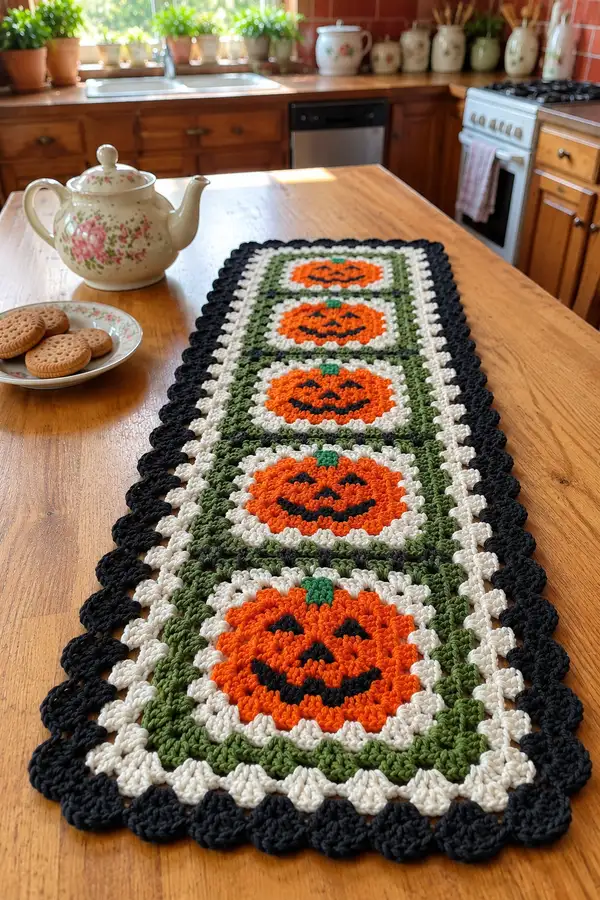
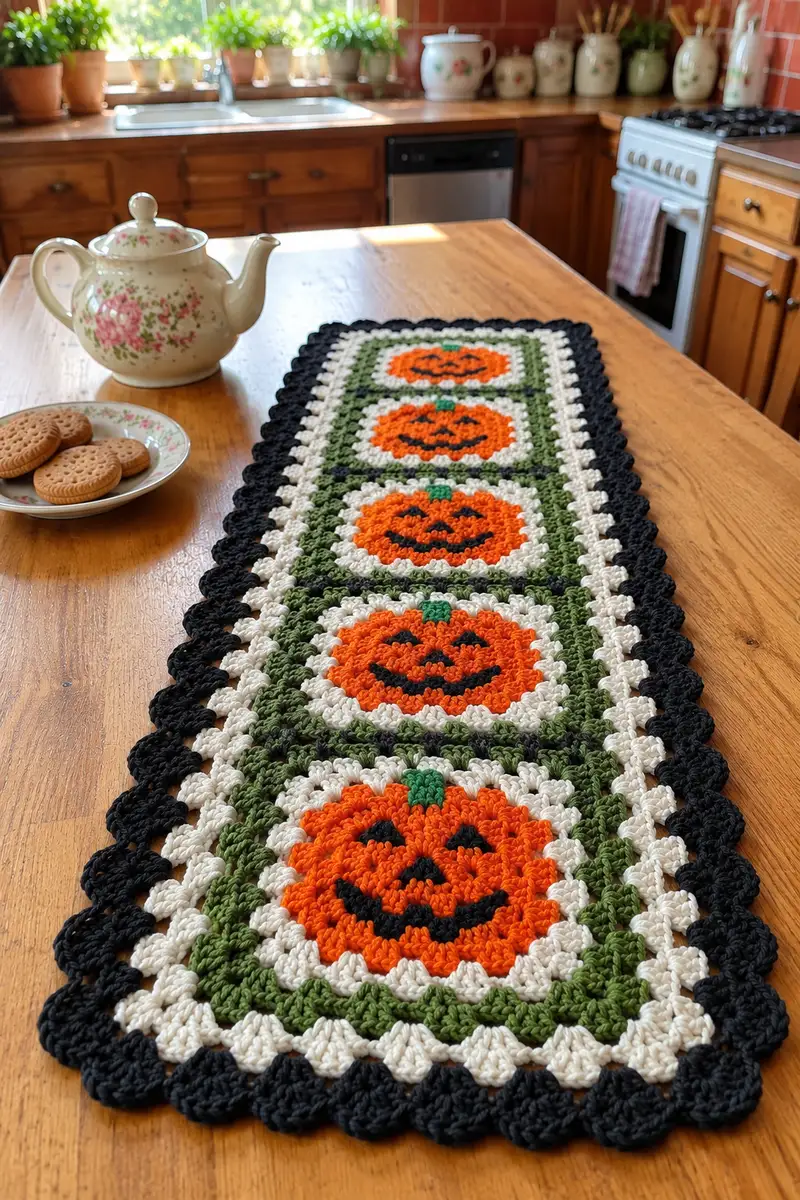
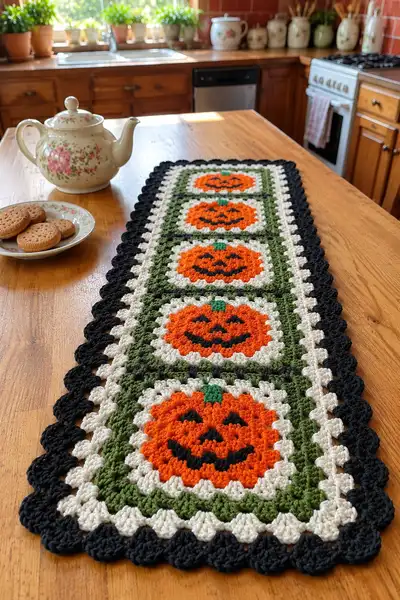
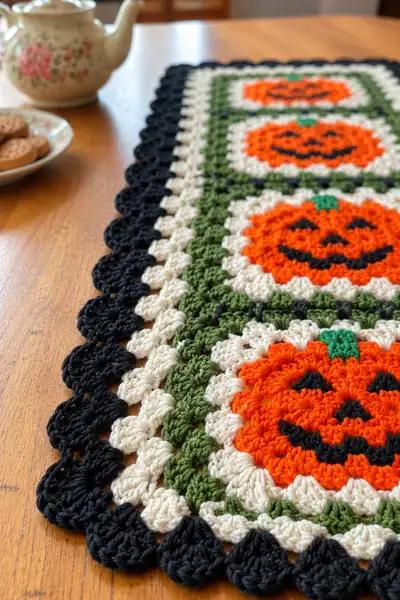
A charming Halloween table runner featuring four smiling jack-o-lantern granny squares joined into a long, festive runner. Worked in warm orange pumpkins with cream halo, olive-green framing and a bold black scalloped edge, this runner brightens any wooden table. The design uses classic granny-cluster construction with color changes for the pumpkin face and stem, finished with a decorative scallop border. Perfect for seasonal décor and gift-making.
Progress Tracker
0% Complete
— Notes & Gauge :
Info :
This pattern is written in US terms. The sample was worked in worsted weight acrylic/cotton blend on a 4.5mm hook. One finished motif measures approximately 5.5" (14 cm) square before blocking; assembled runner shown measures approximately 6.5" x 28" (16.5 cm x 71 cm) after joining and border. Gauge is not critical for look but impacts final size — adjust hook size if you want a looser or tighter fabric
Info :
Work tightly enough to keep defined stitches; block squares flat before joining for neat edges. Carry color where possible or fasten off and weave ends as you prefer; surface crochet for facial details gives a clean look
— Pumpkin Granny Motif (Make 4) :
Info :
Each motif is worked in rounds from the center outward. The center pumpkin is worked in orange using dc rounds to create a circular pumpkin, then converted into a square with granny-cluster rounds and framed in olive green. Surface crochet or embroidery in black adds the face; a tiny green stem is worked and attached at the top. The instructions below are detailed and mathematically consistent to create four identical squares
Round 1 :
With Pumpkin Orange, make a magic ring. Ch 2 (does not count as a stitch when working dc groups), work 11 dc into ring; pull ring tight and join with sl st to top of first dc. (12 dc total)
Round 2 :
Ch 2, (1 dc in next st, 1 dc inc in next st) repeat around to end — this is (1 dc, inc) x6 rounds for even increases. Join with sl st. (18 dc)
Round 3 :
Ch 2, (2 dc in next 2 sts, 1 dc inc in next) repeat evenly to end — simplified as (2 dc, inc) x6. Join. (24 dc)
Round 4 :
Ch 2, (3 dc, inc) x6. Join. (30 dc)
Round 5 :
Ch 2, (4 dc, inc) x6. Join. (36 dc)
Info :
These increasing rounds create a round, slightly domed pumpkin base. Keep tension even and pull the magic ring snug so the center is closed. If you want a flatter pumpkin, work Round 5 in even dc instead of increasing (36 dc stays even)
Round 6 :
Ch 2, 1 dc in each st around. Join with sl st. (36 dc)
Round 7 :
Ch 2, working in the BLO only across this round to give a subtle ridge, 1 dc in each st BLO around. Join. (36 dc)
Round 8 :
Ch 2, 1 dc in each st (working through both loops) around. Join. (36 dc)
Info :
Rounds 6-8 build the pumpkin body and add texture. The BLO round creates a shallow ridge which helps imply pumpkin segments. If you prefer deeper segment lines, use FPdc in later rounds on the stitch markers placed every 6th stitch
Round 9 :
Ch 2, work sequence: (fpdc around next st, then 5 normal dc) repeat this sequence 6 times to create 6 slightly raised segments. End with sl st to join. Total normal dc including fpdc count remains 36 stitches but with 6 raised fpdc placement points
Info :
FPdc = front post double crochet. When working fpdc, yarn over as for dc, insert hook from front to back to front around the post of the indicated stitch and complete dc. These raised posts create visual ribs on the pumpkin
Round 10 :
Ch 1, switch to Leaf Green for a tiny stem: working along the top-front of the pumpkin (choose the side that will be the top), work into two adjacent sts: sc3 in first st across (3 sc), ch 1, turn and sc3 across to create a 2-row stub stem (or sc4 rows for a taller stem). Fasten off leaving a long tail for sewing and lay the stem flat on top; later secure with a few stitches so it sits centered at the top edge of the pumpkin circle.
Info :
If you prefer the stem to be crocheted separately, make a small 4 ch x 2 row sc rectangle and sew into position. Either method gives a compact rectangular stem seen in the photo
Round 11 :
Change to Cream. Ch 3 (counts as first dc), working into the 36-dc round below, make clusters of 3 dc in each st to create shell-like clusters that will become the halo. Work (3 dc in next st, ch1) repeated around into each of the 36 base stitches, placing the ch1 between each cluster. Join with sl st to top of ch3. (12 clusters of 3 dc when treated as groups of 3 base stitches = 12 cluster spaces; overall stitch equivalents = 36 dc)
Info :
We're grouping the 36 stitches into 12 shell placements to make it simpler to convert to a granny-square framework in the following rounds. You will see sides emerge as we add increases at four cardinal points
Round 12 :
Ch 3, work a shell (3 dc) in the same place, ch2, 3 dc in same place to form the first corner. Then along the side work: skip the ch1 space from previous round, in the next cluster base work 3 dc, ch1. Continue across until you reach the next corner: in that corner space work (3 dc, ch2, 3 dc). Repeat around so there are four corners formed and shells along side spaces. Join with sl st to top of ch3. (You will have 4 corners and shell groups between them; cluster count increases by 4 from the previous round)
Info :
This round converts the circular halo into a square by adding corner shell groups (3 dc, ch2, 3 dc). Count shells per side to ensure the squares are balanced — typically you'll have 3 shells per side between corners at this stage
Round 13 :
Ch 3, in each ch1 space along the sides work (3 dc, ch1) to widen the square sides. In each corner work (3 dc, ch2, 3 dc). Join. (Shell clusters increased proportionally; you should now have roughly 4 shells per side between corners depending on exact distribution from earlier rounds)
Round 14 :
Ch 3, continue working (3 dc, ch1) in each side space and (3 dc, ch2, 3 dc) in each corner to enlarge the square to your preferred size; replicate pattern evenly so sides remain straight. Join. (Cluster count will increase by 4 each round as corners remain and sides expand)
Info :
At this point the pumpkin is visually centered inside a cream halo that is transitioning into a square with defined corners. If your cluster count varies slightly, adjust the number of side clusters to keep the square even — you should aim for all four sides to have the same number of clusters
Round 15 :
Change to Olive Green. Ch 3, work 1 dc in the top of each cluster around, and in each corner repeat (3 dc, ch2, 3 dc) to reinforce corners. This green round begins the frame around the pumpkin. Join. (Stitch equivalents will vary; count cluster tops to ensure even side shaping)
Round 16 :
Ch 3, work 1 dc in each dc across the sides, placing (3 dc, ch2, 3 dc) in corner ch2 spaces as usual. Join. (This establishes a clean green frame; you should now have a square body roughly matching the sample size)
Info :
If you want the green frame to be slightly wider, add an additional green round repeating Round 16 before proceeding to the narrow join bar in black
Round 17 :
Change to Cream. Ch 3, work (3 dc in next cluster top, ch1) across sides and (3 dc, ch2, 3 dc) at corners to add an ivory separation round around the green frame. Join. (This cream round will create the bright halo seen around each pumpkin in the photo)
Round 18 :
Ch 1, change to Black for a slim accent round. Working in the top of each st from Round 17, work 1 sc in each st around; when you reach corners, work 2 sc in the corner sts to keep corners squared. Join. (This slim black line is the thin row seen separating squares in the photo)
Info :
Secure ends neatly at color changes. This black accent round is a useful landmark for later joining: leave a long tail in black when you fasten off so that you may join motifs with a neat black seam or slip-stitch join
Round 19 :
Ch 3, change back to Olive Green. Work a final green frame round using 1 dc in each st across sides, and (3 dc, ch2, 3 dc) in each corner. Join. Fasten off and weave ends. (This produces a tidy outer green border for the motif)
Round 20 :
Info: Surface crochet or embroider the pumpkin face now using Black yarn. Using a tapestry needle and duplicate-stitch technique or surface single crochet, add two triangular eyes, a triangular nose and a smiling mouth shaped as in photos. Work from the center of the pumpkin outward, placing features centrally. Secure yarn ends on the wrong side
Round 21 :
Info: Block the completed motif lightly by pinning to a blocking mat and spritzing with water (or steam) to square edges. Allow to dry fully. Repeat to make 4 identical motifs
Info :
Make 4 motifs total following Rounds 1-19. Ensure surface face placement is consistent on each motif so faces align when motifs are joined
— Joining Motifs (Join-as-you-go or Sew) :
Info :
You can join motifs with the join-as-you-go (JAYG) method while working the final round, or finish all motifs and sew them together with a whip stitch or mattress stitch. The design in the photo has four motifs joined in a single column with a slim black accent seam and a narrow green spacer row between each motif — instructions for both JAYG and sewn join follow
Round 22 (JAYG option — join second motif to first) :
With right sides facing out, start final green round on motif #2 as for Round 19. When you reach the side where motif #1 will join, instead of working 1 dc in the ch1 space, slip stitch into the adjacent ch1 space on motif #1, ch1, and continue alternating working (3 dc in space on motif #2, sl st into motif #1 space) across the joint. At the corner, work the corner (3 dc, ch2, 3 dc) on motif #2 and slip stitch into the matching corner on motif #1. Complete the round and fasten off. This produces a neat seam with black accent already in place from earlier black rounds
Info :
When joining motifs vertically, join motifs 1-2, 2-3, 3-4 sequentially to avoid twisting and keep edges aligned. Use stitch markers to line up corner points when working JAYG
Round 23 (Sewn join option) :
Use a long tail of black yarn and a tapestry needle to sew motifs together through the back loops of the outer rounds. Position motifs with right sides up, align edges and corners, and use a mattress stitch-like whip through matching sts to create a slim black seam. Make sure tension is even to prevent puckering. Repeat between each pair of motifs until you have a long strip of four motifs joined
Info :
If using sewn join, create a narrow spacer band of 1 or 2 rounds of green between motifs by crocheting thin green bars across the seam and sewing them in place to imitate the narrow green separation in the photo
— Full Runner Frame and Additional Rounds :
Round 24 :
With the four motifs joined into a single strip, work a finishing round of Cream across the entire perimeter to even the edges. Start in any outer corner: join cream with a sl st, ch 3, work 1 dc in each st and (3 dc, ch2, 3 dc) in each corner ch2 space as you go around the whole assembled rectangle. Join with sl st. (This balances out small size differences between motifs)
Info :
Because the runner is long and narrow, pay attention to the long sides to keep them even. Count cluster groups every side to ensure evenness. Use pins to hold the piece flat on the blocking mat
Round 25 :
Ch 1, change to Olive Green. Work 1 sc in each st around to create a narrow green band. On the long edges, maintain even sc spacing and in corners work 2 sc in the corner to keep them uncurled. Join with sl st
Round 26 :
Ch 3, change to Cream. Work a loose round of shells around the entire runner to create the soft white halo between the outer green frame and the final scallop. Work (3 dc in next st, ch1) across sides and (3 dc, ch2, 3 dc) in corners to preserve the square corners. Join
Info :
If you prefer a flatter runner, omit the shell style and work a plain dc round instead. The shells give the textured vintage look similar to the photo
Round 27 :
Ch 1, change to Black. Work 1 sc in each st around for a tidy inner black edge. On the long sides you will be working many sts; work 2 sc in corner sts to maintain shape. Join
Round 28 :
Ch 1, still in Black, work a decorative scallop edge: *skip 2 sts, work (5 dc) in next st (shell), skip 2 sts, sl st in next st; repeat from * around. At corners adjust repeats so scallops sit evenly — you may need to work sl st pairs in corner spaces to keep the scallops rounded. Join and fasten off. (This creates the bold black scallop border pictured)
Info :
Scallop size can be adjusted by changing the number of dc in each shell (3 dc for smaller scallops, 5 dc for fuller scallops as shown). Work slowly around long sides to ensure even spacing, and pin scallops during blocking if needed
Round 29 :
Optional: Add an additional black mock-picot or small sl st edging around each scallop to make them pop. For each scallop, sl st into the top of the 3rd dc of the 5-dc shell, ch3, sl st back into same st to create a small picot, then move to the next scallop. Fasten off and weave ends
Info :
Weave in all ends on the wrong side, trim close and secure. Lightly block the assembled runner to settle scallops and ensure the runner lies flat on the table
— Alternate sizing and color notes :
Info :
To lengthen the runner, make additional motifs and join them with the same join technique. To make a placemat, use a single motif and finish with the same border rounds. Replace Olive Green with any accent color to change mood (e.g., burgundy for richer autumnal tone). If you wish a tighter fabric, drop to a 4.0mm hook for the final rounds
Info :
For machine-washable runners, choose acrylic yarn and test your blocking method on a scrap first. If using cotton, be mindful of possible shrinkage on heat; prefer cool-water washing
This festive jack-o-lantern table runner brings classic Halloween cheer to any table with warm pumpkin centers and a bold scalloped border. Each carefully constructed motif joins together to create a charming display that works perfectly for seasonal gatherings. I hope you enjoy making every pumpkin, watching this runner come to life one square at a time. Happy stitching — and may your table be filled with cozy autumn moments! 🎃🧶