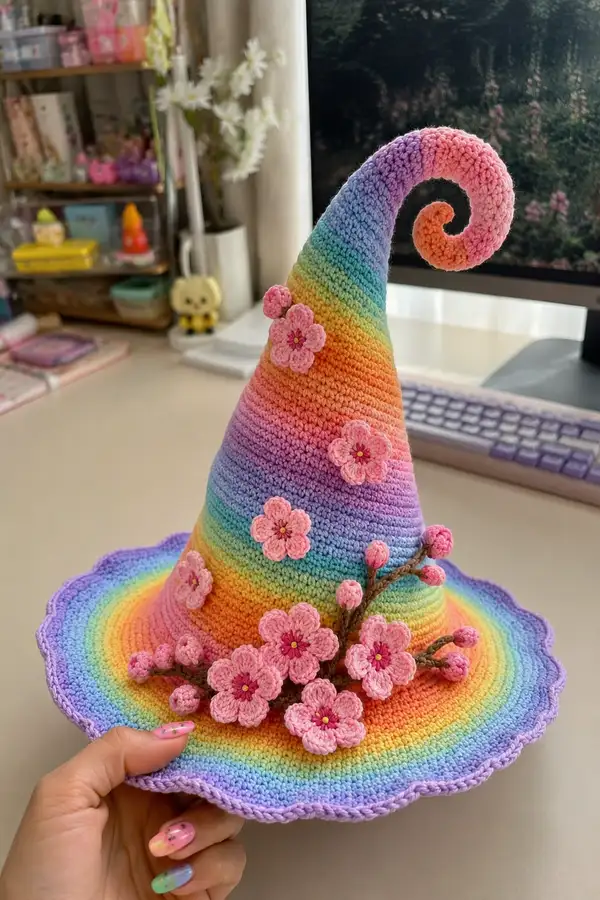
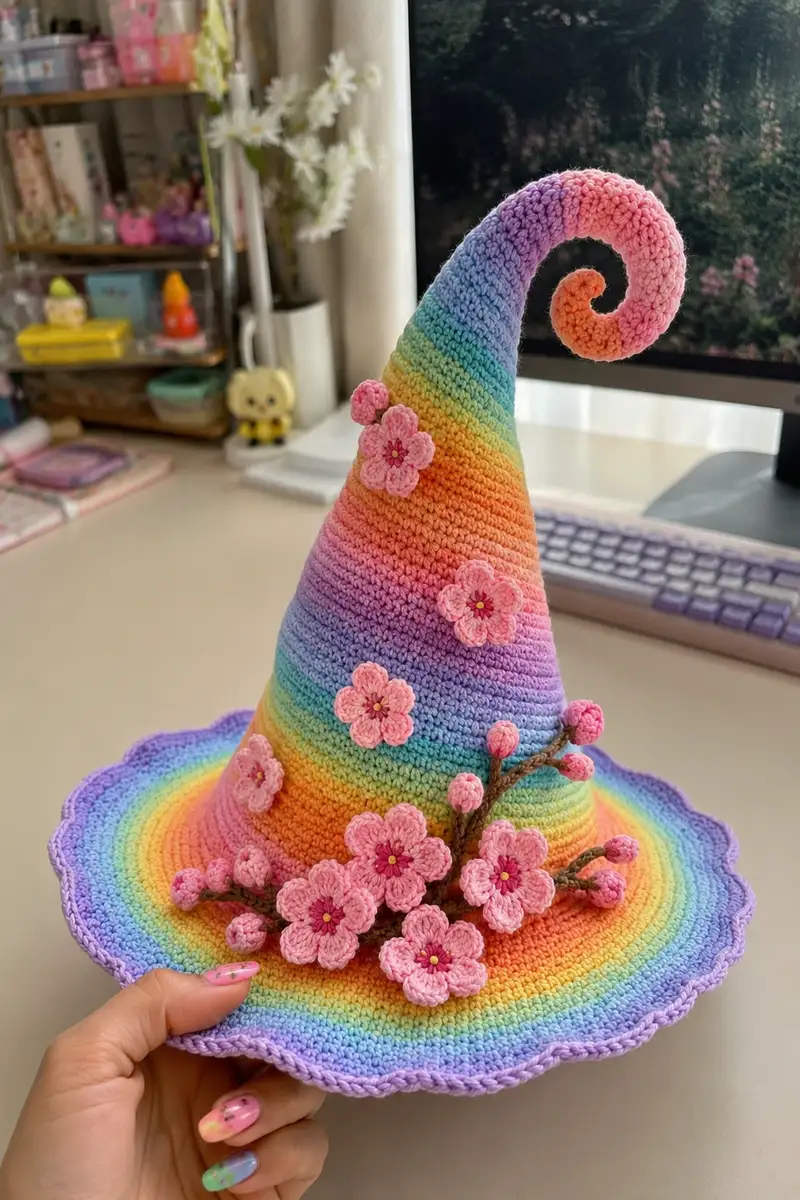
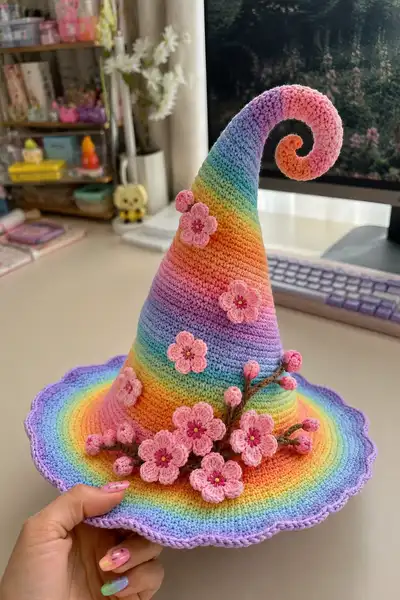
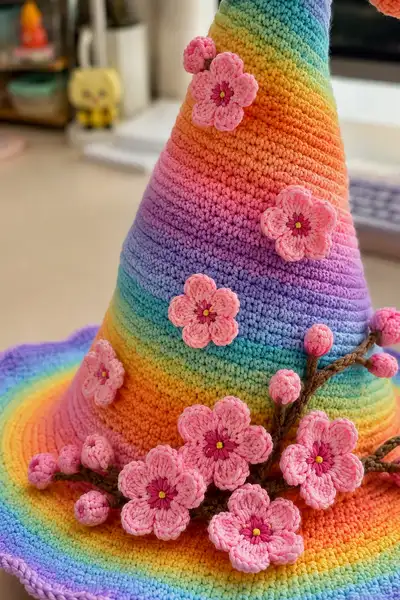
A whimsical oversized witch hat crocheted in a soft pastel rainbow gradient, finished with a curled spiral tip and delicate cherry blossom appliques. The wide wavy brim provides structure and personality while the tall cone tapers into a playful spiral. Perfect for display, costume accents, or a magical gift—this pattern includes step-by-step shaping, floral embellishments, and clear assembly tips to recreate the dreamy piece shown.
Progress Tracker
0% Complete
— Crown (Hat Top) :
Round 1 :
6 sc in magic ring (6)
Round 3 :
(1 sc, inc) x 6 (18)
Round 4 :
(2 sc, inc) x 6 (24)
Round 5 :
(3 sc, inc) x 6 (30)
Round 6 :
(4 sc, inc) x 6 (36)
Info :
If using a gradient cake yarn, begin here and allow the cake to flow naturally for color transitions. If changing colors manually, change roughly every 4-6 rounds for smooth bands. Carry ends or weave in tails as you go.
Round 7 :
(5 sc, inc) x 6 (42)
Round 8 :
(6 sc, inc) x 6 (48)
Round 9 :
(7 sc, inc) x 6 (54)
Round 10 :
(8 sc, inc) x 6 (60)
Round 11-16 :
1 sc in each st (60) Work 6 rounds even to build the lower, wider portion of the cone; this creates stable curvature.
Info :
Place a stitch marker at round start and move it each round. Check the cone against a hand or head model periodically to verify height and taper proportion—aim for a tall cone before tapering.
Round 17 :
(8 sc, dec) x 6 (54)
Round 18 :
(7 sc, dec) x 6 (48)
Round 19 :
(6 sc, dec) x 6 (42)
Round 20 :
(5 sc, dec) x 6 (36)
Info :
Begin tapering gently now. Stuffing is minimal in the crown except near the spiral base; leave the cone mostly hollow so it sits naturally over the brim. Check counts—decreases reduce 6 stitches per round here.
Round 21 :
(4 sc, dec) x 6 (30)
Round 22 :
(3 sc, dec) x 6 (24)
Round 23 :
(2 sc, dec) x 6 (18)
Round 24 :
(1 sc, dec) x 6 (12)
Info :
At this point you have a narrow upper cone (12 sts). Decide how tall and tight you want the spiral base to be. For a pronounced upward curl leave approx. 6-8 rounds beyond this before joining to the spiral tube; for a tighter curl begin spiral construction directly.
Round 25 :
1 sc in each st (12)
Round 26 :
1 sc in each st (12)
Round 27 :
1 sc in each st (12)
Info :
If you used a gradient cake yarn the color will continue to shift; if you want a distinct tip color, change now using a small tail and secure the color change by working the last two loops of the last stitch with the new color.
Round 28 :
1 sc in each st (12)
Round 29 :
Start spiral tube: sc in each st (12). Insert a short length of florist wire (optional) inside the tube to give the eventual spiral a poseable core; wrap wire in tape or yarn for safety.
Round 30 :
1 sc in each st (12)
Round 31 :
(1 sc, inc) x 6 (18) - increase to create a small flared base for joining to the tube if required
Info :
At the junction between the cone and spiral, ensure a smooth transition by increasing slightly then continuing tube rounds. Stuff very lightly as you progress through these rounds to maintain shape but keep the tube flexible for curling.
Round 32-39 :
1 sc in each st (18) continue straight for a short tube length (8 rounds) to give enough length to begin curling. Add a small amount of stuffing as you go—the tube should be lightly filled, not firm.
Round 40 :
(4 sc, dec) x 3 (15) - begin a gentle taper towards the tip
Round 41 :
(3 sc, dec) x 3 (12)
Round 42 :
(2 sc, dec) x 3 (9)
Round 43 :
(1 sc, dec) x 3 (6)
Round 44 :
Dec around (3 dec) (3) - do not close completely; leave a small opening to finish stuffing and allow you to sew the final spiral tip closed after shaping
Info :
Finish stuffing the tip until it is firm enough to hold a spiral curve but soft enough to shape. If you used wire, bend it slowly to the desired spiral curve and then stitch around the outer edge to hold the curl in place.
— Brim :
Round 1 :
6 sc in magic ring (6)
Round 3 :
(1 sc, inc) x 6 (18)
Round 4 :
(2 sc, inc) x 6 (24)
Round 5 :
(3 sc, inc) x 6 (30)
Round 6 :
(4 sc, inc) x 6 (36)
Round 7 :
(5 sc, inc) x 6 (42)
Round 8 :
(6 sc, inc) x 6 (48)
Round 9 :
(7 sc, inc) x 6 (54)
Round 10 :
(8 sc, inc) x 6 (60)
Round 11 :
(9 sc, inc) x 6 (66)
Round 12 :
(10 sc, inc) x 6 (72)
Round 13 :
(11 sc, inc) x 6 (78)
Round 14 :
(12 sc, inc) x 6 (84)
Round 15 :
(13 sc, inc) x 6 (90)
Round 16 :
(14 sc, inc) x 6 (96)
Round 17 :
(15 sc, inc) x 6 (102)
Round 18 :
(16 sc, inc) x 6 (108)
Round 19 :
(17 sc, inc) x 6 (114)
Round 20 :
(18 sc, inc) x 6 (120)
Info :
At round 20 the brim is approximately the target diameter for a medium-large hat. If you prefer a wider or narrower brim, add or remove increase rounds accordingly (each increase round adds approximately 1 cm-1.5 cm depending on yarn and tension).
Round 21-26 :
1 sc in each st (120) Work 6 even rounds to build brim height that sits well under the cone; these rounds will later be joined to the cone neck area.
Info :
Carry the color gradient here as well. If using a single cake, the colors will create concentric bands across the brim. If the cake runs out or color shift is too abrupt, join new cake at start of a round and weave ends securely.
Round 27 :
(5 sc, inc) x 20 (140) - gentle flare to give brim a wavy lift
Round 28 :
1 sc in each st (140)
Round 29 :
1 sc in each st (140)
Info :
To create the scalloped edge similar to the photo, we will work a decorative edging next. Ensure brim rounds are even and do not have unintentional increases—counting a few sample sections helps.
Round 30 :
BLO 1 sc in each st (140) - working in BLO creates a subtle ridge where the scallop will sit
Round 31 :
*Sk 1 st, 5 dc in next st, sk 1 st, sl st in next st* repeat around to form open scallops. Adjust spacing so the final repeat completes around evenly (approx 20 scallops).
Round 32 :
Sl st into each scallop apex to tidy, then fasten off if desired and weave in ends. Optionally work one additional round of sc around edge to firm up the shape if scallops appear too floppy.
Info :
If the brim feels floppy, block it by pinning to a flat surface in desired shape and misting with water or lightly steaming; allow to dry fully. For more structure, knit a thin interfacing disk or insert light plastic under brim before finishing.
— Spiral Tail (Curled Tip) :
Round 1 :
With color at top of cone, pick up 6 sc around the top opening or begin new mr to make tube (6)
Round 3 :
(1 sc, inc) x 6 (18)
Round 4 :
(2 sc, inc) x 6 (24)
Round 5 :
(3 sc, inc) x 6 (30)
Info :
Spiral tube increases to the desired circumference then works straight so it can be stuffed lightly and curled. If you prefer a tighter spiral, stop increasing earlier and work with 18-24 sts around.
Round 6-12 :
1 sc in each st (30) continue straight for 7 rounds to create length for spiral. Insert thin wire or lightly stuff as you go.
Round 13 :
(4 sc, dec) x 5 (25)
Round 14 :
(3 sc, dec) x 5 (20)
Round 15 :
(2 sc, dec) x 5 (15)
Round 16 :
(1 sc, dec) x 5 (10)
Round 17 :
Dec around until tip is small (5) leave opening to insert stuffing
Info :
Lightly stuff the tube so it can be curled without kinks. Bend the optional wire core gradually, wrapping the tube as you shape the spiral so that each layer slightly overlaps. Sew a few small whip stitches between overlapping layers to secure the spiral form invisibly.
Round 18 :
Fold spiral to desired curl and stitch through outer edge to anchor each overlapping coil, using your tapestry needle and yarn tail from the spiral.
Round 19 :
Work small finishing round: sl st around raw edge if needed and fasten off. Weave tail inside and hide end in cone.
Info :
For a more defined spiral, use a slightly smaller hook for the later tube rounds (Rounds 13-17) to tighten the fabric and ensure a neat curl. If using wire, fold the end and cap it with yarn to avoid sharp tips.
— Branch (Decorative Twig, make 1-2) :
Round 1 :
Ch 30 (or desired length for branch), join to first ch with sl st to work in the round and avoid twisted cord (30)
Round 2 :
Ch1, 1 sc in each ch around (30) - the chain will be a flat cord now joined in the round
Round 3-6 :
1 sc in each st (30) continue for 4 more rounds to thicken the branch (30)
Info :
For a more textured branch, alternate working 1 sc, 1 hdc around for a slightly bumpy surface. Use brown yarn and stretch lightly while stuffing with a tiny bit of filling or thread for firmness.
Round 7 :
Begin taper: (4 sc, dec) x 5 (25)
Round 8 :
(3 sc, dec) x 5 (20)
Round 9 :
(2 sc, dec) x 5 (15)
Round 10 :
Fasten off leaving a long tail for sewing. Shape the branch and position on the hat brim and cone overlap; pin before sewing.
Info :
Make two branches of slightly different lengths for a natural arrangement. You can make the branch cord more rigid by inserting a thin piece of florist wire in the center when working the cord and securing it with stitches.
— Flower Center & Petal Motif (Make 8-12 flowers) :
Round 1 :
With darker pink (center) - mr, ch1, 6 sc in mr (6)
Round 3 :
Change to lighter pink. *Ch2, sl st in next st* around to create loops for petals (12 loops)
Round 4 :
Working in each ch-2 loop: (sl st, hdc, 2 dc, hdc, sl st) in loop to form petal - repeat 6 times for 6 petals. (6 petals)
Info :
Petal stitch cluster creates a rounded petal. Keep tension even so petals sit flat. Use a small hook (2.5-3.0mm) for neatness on flowers.
Round 5 :
Fasten off leaving a long tail for sewing. Embroider center with tiny yellow French knot (or sew a yellow seed bead) to mimic the cherry blossom center.
Round 6 :
Optional: For a fuller flower, add a second row of slip stitch around petal bases to create a little ruffled underside to help the blossom stand away from the hat surface.
Round 7 :
Make smaller 5-mm buds: mr, 6 sc in mr, pull tight, fasten off. Make 8-10 buds to cluster with branches.
Info :
Make several flowers and buds; in the reference photo there are around 7-9 blossoms of various sizes and ~6-8 small buds clustered on and around the brim. Vary orientation for a natural arrangement.
— Bud Attachment & Finishing Stems :
Round 1 :
Sew buds to branch using long tail and whip stitch; position three buds near tip of branch clusters and a few along the lower portion for a natural progression.
Round 2 :
Sew blossoms to hat: arrange larger blossoms in clusters resting on brim and low cone, and one or two higher near the spiral base. Pin each blossom before sewing so placement looks balanced; you can view from multiple angles.
Info :
To secure robustly, stitch through several base rounds and branch cord if applicable, making 6-10 passes per blossom depending on weight. Conceal knots by weaving ends through the interior brim rounds.
— Small Decorative Details and Surface Embroidery :
Round 1 :
Using contrasting thread (yellow), embroider small French knots or sew tiny beads into centers of each blossom (6-8 stitches per center for security when sewing beads).
Round 2 :
With a thin yarn tail, tack the branch base to the hat interior where cone and brim meet to prevent sagging; secure with several passes and hide the knot inside the brim.
Info :
Use small amounts of tack stitches to shape petals outward or flatten them against the hat—this lets you control whether blossoms appear raised or flat. If using beads, add a drop of fabric glue on the knot for extra hold.
— Assembly & Final Shaping :
Round 1 :
Attach crown to brim: place the cone inside the brim opening (align rounds where cone taper begins to brim top) and pin evenly—aim for 24-32 attachment points around the join depending on brim circumference.
Round 2 :
Sew around join using whip stitch or ladder stitch for a tidy seam; use the yarn tail from the crown or a matching yarn strand and stitch through corresponding stitches on brim and crown. Make sure seam is even and secure.
Round 3 :
Once sewn, stitch a few reinforcement passes under where branches will be attached to distribute weight and avoid stressing the seam area over time.
Info :
Pin the spiral into the position you like (slightly to one side or centered). If using internal wire, adjust curl until satisfied and then sew inner layers of spiral to the cone through several stitches to lock the curl in place.
Round 4 :
Weave in all tails by threading them with a yarn needle and passing them through multiple rounds inside the hat; trim close to work after pulling the tail under stitches so it cannot come loose.
Round 5 :
Block lightly if desired: pin the brim scallops to shape and steam or mist lightly; reshape blossom petals after blocking if necessary.
Info :
Final step: step back and check symmetry. Add a tiny dab of fabric glue on the underside of heavy blossoms if you expect a lot of handling, but generally properly sewn embellishments should hold well.
This pastel rainbow spiral witch hat is pure magic to stitch up—each round brings the cone closer to a whimsical curl, and placing the cherry blossoms feels like arranging a tiny garden. The final piece is colorful, tactile, and full of personality—great for photos, costume accessories, or as a charming tabletop accent. 🌈🌸 Enjoy the meditative process and celebrate every stitch; your finished hat will feel like a hand-crafted treasure. Happy crocheting! ✨