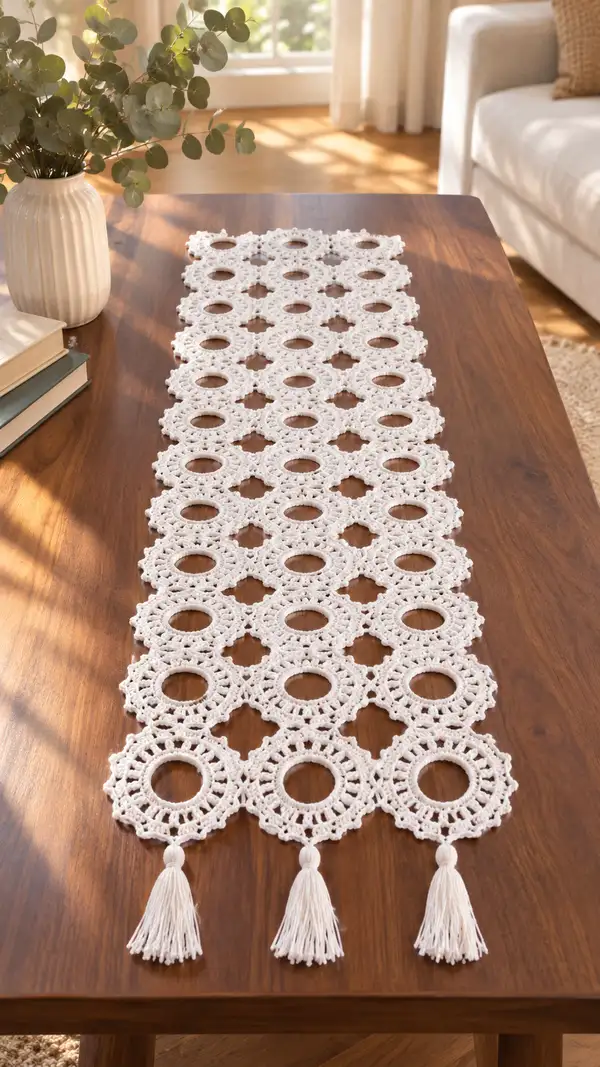
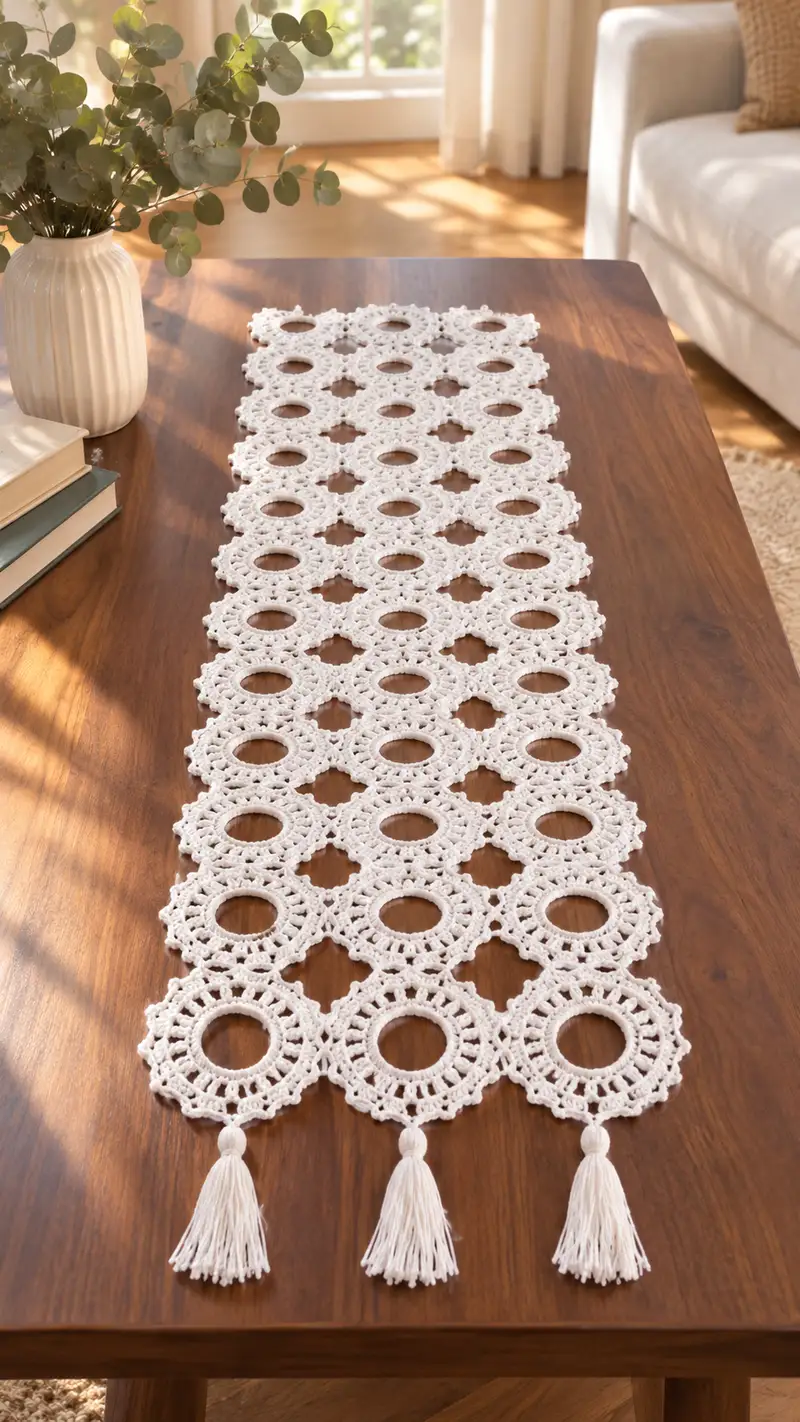
A delicate lacy table runner made from joined circular motifs with a decorative picot-style scalloped edge and tassels on each short end. The runner in the photo is worked in soft white cotton, arranged in neat rows and columns to create a long narrow centerpiece. The motif has a defined open center ring and a lacy outer round that creates elegant negative space on the table. Perfect for dressing a dining or console table with a handmade, vintage-inspired accent.
Progress Tracker
0% Complete
— Overview :
Info :
This runner is constructed from identical circular motifs. Each motif is worked in the round from the center out and finished with a decorative scalloped edge. Motifs are joined as-you-go along two joining rounds so seams are clean and mostly invisible on the right side. The sample runner is 7 motifs wide by 12 motifs long (84 motifs total) for an approximate finished length of 56-60 inches and width of 10-12 inches. Adjust the number of motifs to your desired runner size.
Info :
Work motifs with consistent tension and block lightly before joining to ensure flat motifs and consistent size. The pattern below shows the motif worked in 20 rounds, then the joining sequence and border. Rounds are written with stitch counts for clarity; all math is consistent between rounds.
— Motif (Make 84 or desired amount) :
Round 1 :
Ch 8, sl st to first ch to form a ring. Ch 3 (counts as 1 dc), work 23 dc into ring. Sl st to top of beginning ch-3 to join (24 dc total).
Round 2 :
Ch 3 (counts as dc), dc in same st, (1 dc, inc dc in next st) around repeating the pattern so you do (1 dc, 2 dc in next st) x 8 to create even increases. Join with sl st to top of ch-3 (36 dc total).
Round 3 :
Ch 1, sc in same st, (2 sc, inc) x 12 — work (2 sc, 1 sc inc into same st) repeated across the round. Join with sl st to first sc (48 sc total).
Round 4 :
Ch 2 (counts as hdc), hdc in same st, (3 hdc, inc hdc) x 12 — increasing evenly to build circular shape. Join to top of beginning ch-2 (60 hdc total).
Info :
Check motif lays flat; if it ruffles, reduce the number of increases in the next round; if it cups inward, add a small extra increase evenly. Blocking will help even minor variations.
Round 5 :
Ch 1, sc in same st, *(ch 3, sk 2 hdc, sc in next hdc), repeat from * around until you have 15 ch-3 loops, adjust final placement so spacing is even. Join with sl st to first sc (60 sts but with 15 ch-3 picot loops).
Round 6 :
Work into each ch-3 loop: sl st into loop, ch 3, (2 dc, ch 1, 2 dc) in same loop (shell), sl st into next sc, repeat across all 15 loops to create shell ring. Join with sl st to first st (15 shells).
Round 7 :
Ch 1, sc in same st, (ch 5, sc in center of next shell) x 15 — creating larger picot arches. Join with sl st to first sc (15 arches).
Round 8 :
Into each ch-5 arch: work (sc, hdc, 3 dc, hdc, sc) making a lace petal over each arch. Join to first sc (15 petals, balanced outer circumference).
Info :
After Round 8 the motif has reached the size you will use for joining. If you want larger motifs, add extra lace rounds repeating the petal increase sequence; if smaller, stop at Round 6 and finish with a smaller picot edge.
Round 9 :
Ch 1, sc in same st, *ch 2, (sk next 3 sts on petal, sc in the small space between petals), ch 2, sc in center top of petal; rep from * around to create a secondary connecting loop. Join with sl st to first sc.
Round 10 :
Ch 1, sc in same st, *(ch 4, sc) in each ch-2 space around to create small open arches between petals. You should have 15 ch-4 loops. Join with sl st to first sc.
Round 11 :
Work into each ch-4 loop: sl st, ch 3, 4 dc, ch 3, sl st into same loop to form small raised fans (this emphasizes the lace). Join with sl st to first st (15 small fans).
Info :
We will add an outer decorative scallop next; keep stitch counts even as we work across fans so motifs match for joining.
Round 12 :
Ch 1, sc in same st, *(sk 2 dc of a fan, 5 dc in next space to form a prominent scallop, sc between fans), rep around. Join with sl st to first sc. You should have 15 scallops around the edge.
Round 13 :
Ch 2, hdc in same st, *(ch 1, hdc in center top of scallop, ch 1, hdc) across the top of each scallop to define the edge; repeat this across all 15 scallops. Join with sl st to top of ch-2.
Round 14 :
Ch 1, sc in same st, *(ch 3, 3 tr in space at the point between scallops, ch 3, sc in center top of scallop) around to create decorative high points. Join with sl st to first sc (15 decorative points).
Round 15 :
Ch 1, sc in same st, *(picot: ch 3, sl st in 3rd ch to create a small picot), sc between each decorative point) repeat for all points. Join with sl st. This gives the motif a refined, delicate outer edge.
Info :
If your picots are too loose, make ch-2 picots instead. The goal is 15 evenly spaced tiny points that help when joining motifs together for a lattice look.
Round 16 :
Ch 1, sc in same st, *ch 5, sc in top of next picot; repeat across to create slightly larger loops around edge for joining points. Join to first sc.
Round 17 :
Into each ch-5 loop: sl st, ch 3, (2 dc, ch 1, 2 dc), sl st to close. This forms small shells spaced evenly around the motif (15 shells). Join with sl st.
Round 18 :
Ch 1, sc in same st, *(ch 3, sc in next shell point), rep around making connecting loops that will align with neighboring motifs when joined. Join with sl st. Final stitch adjustments: tidy any small gaps with slip stitches if needed.
Round 19 :
Work a finishing round of sc around entire edge putting 1 sc into each picot and shell top to even the rim. Aim for a final count of 90-96 stitches depending on how your lace worked out; counts will be consistent if you used the detailed sequence above (expected ~90 sts).
Round 20 :
Ch 1, sc in same st, sl st to finish, fasten off leaving a 10-12 inch tail for joining if you will sew, otherwise weave in tightly. Block motif flat to exact measurement before joining to neighbors.
Info :
Blocking tip: pin motif to blocking mat stretching gently to create uniform outer scallops. Use a light steam or damp cloth to set the motif if cotton yarn is used. Allow to dry completely before joining.
— Joining Motifs (As-You-Go Method) :
Info :
For the sample runner we join motifs as we work the outer joining round (work Round 17 or 18 as joining round) so connections are formed while the final outer shells are made. This keeps joins flat and tidy. If you prefer, you may finish all motifs and sew them together later; detailed sew-join instructions follow after as-you-go notes.
Joining General Method :
When working the outer shell round on a motif that will touch an already-finished motif, pause at the point where two shells align, insert hook into corresponding loop of finished motif and sl st to join, then continue shell onto working motif. Each connection uses 1 sl st + ch to keep spacing identical. Below are round-by-round joining steps that mirror the motif round numbers where joins occur.
Round J1 (Joining Round - first join row) :
Work Round 17 shell sequence as follows when joining to an adjacent motif: for shells that border another motif, after completing the first dc of the shell, sl st into the corresponding ch-5 loop of the neighboring motif, then resume remaining dc of the shell on the working motif. For free shells (edge of runner) complete shells normally. Continue around and fasten off if this motif is completed and joined on one or more sides.
Info :
Always align motifs so their picot points meet and shells sit directly opposite one another. Use pins to hold motifs together while joining if needed. Count shell positions to ensure symmetrical joins—15 shells per motif simplifies alignment (neighbors meet at specific shell numbers).
Round J2 :
As you join successive motifs in a row, work the shell round and at each join point connect to previously joined motifs with a single sl st in the loop then continue. For corners where three motifs meet (edge and neighbor), work a three-way join: sl st into both adjacent motifs' loops before finishing the shell on the active motif. This locks three motifs neatly together.
Round J3 :
When joining motifs into rows, keep track of motif numbers and which shell positions connect to motifs above/below. It helps to number shells in your head: shells 1-15 clockwise starting at top; motif to the right connects at shells 2-6 etc. If new to joining, pin each join before making the first connecting sl st to confirm placement.
Round J4 :
After joining a full row of motifs, fasten off and weave in ends. For the runner arrangement in photo, join rows sequentially: make row 1 (7 motifs), then join row 2 to row 1 motif-by-motif along the top edge using the joining round technique described. Continue adding rows until reaching desired length.
Info :
As-you-go joining keeps seam visibility low on the right side of the work. If joining by sewing instead, use mattress stitch or whip stitch between shell points and hide ends within shells.
— Lattice Fill and Stabilizing Joining Rounds :
Round L1 :
Once the grid of motifs is assembled to your desired dimensions, work a stabilizing pass along the horizontal seams: with RS facing, join yarn at the first seam intersection and work a single round of sc along seam edges where shells meet to strengthen joins. Place 1 sc into each loop that previously had a single sl st join; this reinforces the seam and evens the runner's surface.
Round L2 :
Work a second reinforcement row using 1 sc into each connecting point but in BLO (back loops only) to create a subtle ridge that frames each motif and helps the runner lie flat. Join with sl st at the end and fasten off.
Info :
Reinforcement rows are optional but helpful on runners that will see tableware or movement. Use a smaller hook (3.0mm) for these passes for tighter joins.
— Outer Border and Finishing Edge :
Round B1 :
With the assembled runner laid flat, pick up yarn at a corner motif outer shell point. Ch 1, sc evenly around the entire perimeter placing 1 sc in each outer picot or shell top. When you reach a corner point where two motifs meet, work (sc, ch 2, sc) to create a small corner turn that preserves shape. Continue to join ends with even spacing. Expected final perimeter stitch count will vary with runner size; aim for consistent spacing.
Round B2 :
Ch 3 (counts as dc), *skip 1 sc, 5 dc in next sc (shell), skip 1 sc, dc in next sc; repeat around creating a scalloped outer edge. At corners, work 7 dc cluster for a rounded corner. Join with sl st to top of ch-3.
Info :
This scalloped border complements the motif edges and gives a finished look. If you prefer a subtler border, do a single round of sc and then a row of picots instead of large shells.
Round B3 :
Ch 1, sc in same st, work picot points across the peaks of the scallops: *(ch 3, sl st in 3rd ch, sc in center dc of shell), repeat across. Join and fasten off, weave in ends. This is purely decorative and optional depending on your preferred look.
Round B4 :
Final tidy round: using tapestry needle, run a fine whip stitch into the back loops of the outermost round to hide any irregularities and create a slightly weighted edge to help the runner lay flat. Block again lightly if needed and press gently with a warm iron under a damp cloth to set shape.
Info :
Check the runner on a flat surface and tweak any scallops or picots by re-blocking individual motifs if they appear twisted after joining. Uniform tension will avoid many of these issues.
— Tassels (Make 6 – 3 per short end) :
Step 1 :
Using a piece of cardboard or tassel maker about 3.5 inches tall (for a 4-inch tassel after tying), wrap yarn around 60 times for a full tassel. Slide yarn bundle off and tie tightly at the top with a 6-inch length of yarn to form the tassel head.
Step 2 :
Fold the bundle at the tied point and wrap additional yarn around the top 1/2 inch to form the neck of the tassel, secure with a knot and weave ends to the back. Trim the bottom loops to create even fringe, comb and trim to shape.
Step 3 :
Attach tassels to the runner by sewing the tied top firmly through the motif opening at the runner ends. Place three tassels spaced evenly across the short edge: near each corner and one centered. Secure with several passes and weave ends into the runner for a clean finish.
Info :
If using contrasting color for tassels, secure the color change with a tight knot and hide the knot inside the wrapped neck of the tassel. Tassels can be omitted for a simpler look.
— Alternative Sew-Join (If not joining as-you-go) :
Step S1 :
Lay motifs out on a flat surface according to your planned grid. Using a tapestry needle and a length of yarn matching the motif color, sew motifs together through the outermost shells using whip stitch or mattress stitch. Aim for 3-5 stitches per joining shell to ensure stability.
Step S2 :
When sewing intersections where 4 motifs meet, use small bridging stitches through the center of the shell to draw all four edges together evenly. Tie off and hide ends within shells. This method gives more control but is slower than as-you-go joining.
Info :
Use pins liberally to confirm alignment prior to sewing. Press motifs lightly from the wrong side while sewing to keep edges flat. Check seam tension frequently to avoid puckering.
— Final Finishing :
Info :
Weave in all ends with a tapestry needle, pulling ends under several stitches to hide them. Trim any stray fibers and comb tassels to neaten. Block the finished runner flat and allow to dry fully to set stitches. Optionally, press under a damp cloth to add a crisp finish for display.
Care Instructions :
Hand wash cold with mild detergent and lay flat to dry. Avoid machine washing and tumble dry which can distort cotton lace. If made in acrylic or cotton blends, a gentle machine wash in a laundry bag on delicate may be possible—test a swatch first.
This lacy circle runner is a beautiful blend of vintage-inspired motifs and modern modular construction. Each motif is satisfying to crochet and joins neatly into a continuous lace table accent that elevates any space. The tassel-finished ends give it a relaxed, boho-chic flair that pairs beautifully with both rustic and contemporary decor. Enjoy the meditative rhythm of making the motifs and the joy of seeing them come together into a cohesive, elegant runner. 🧶✨