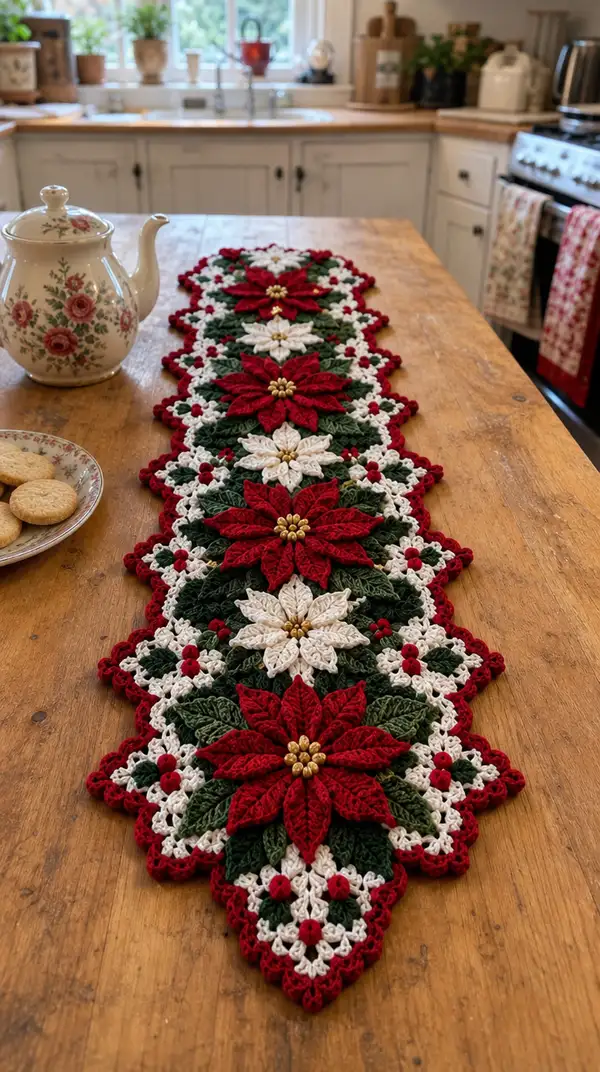
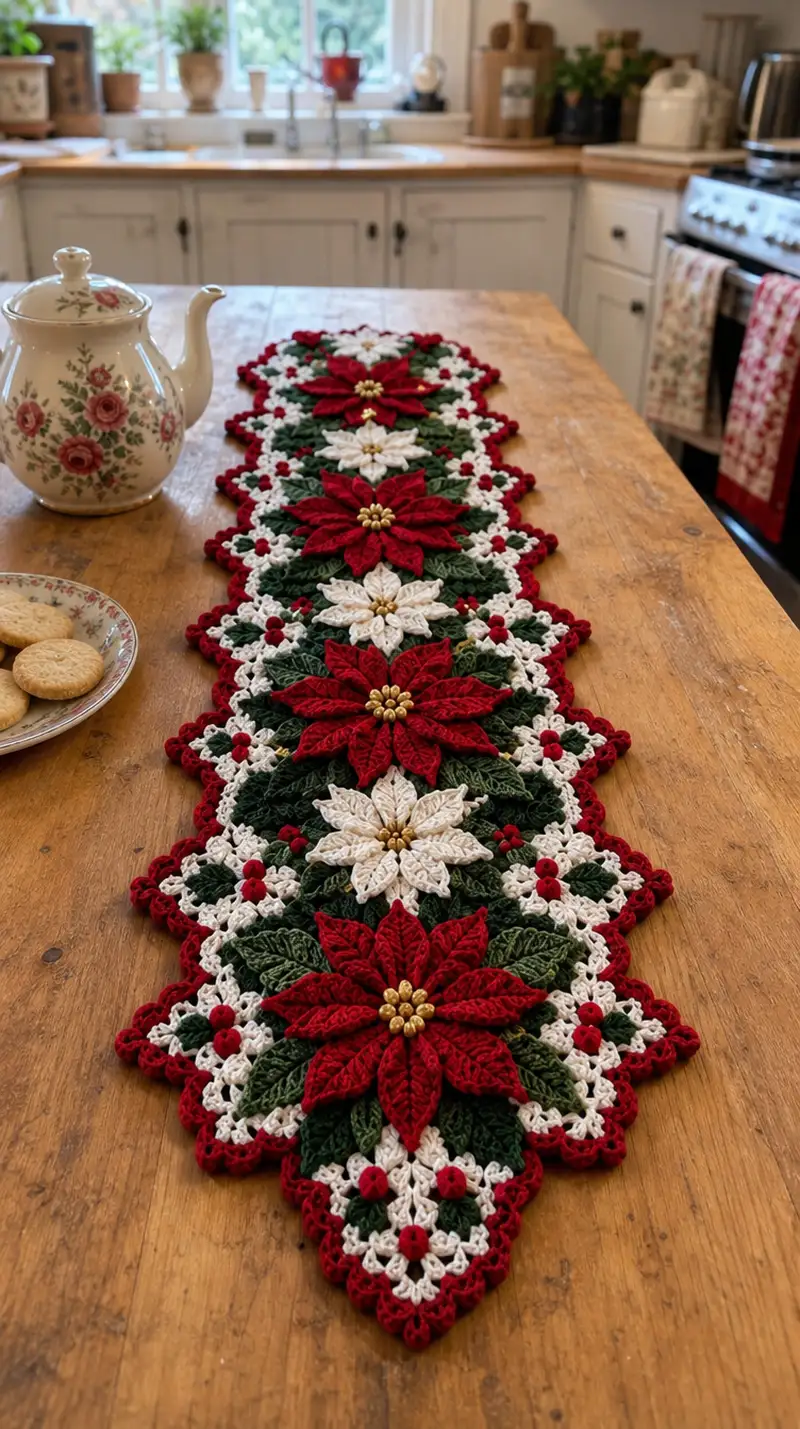
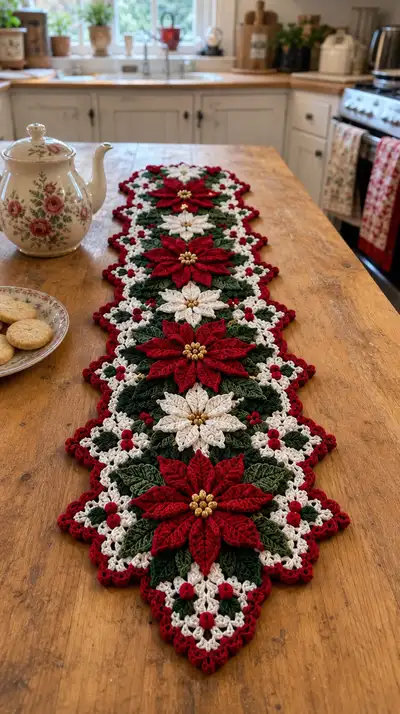
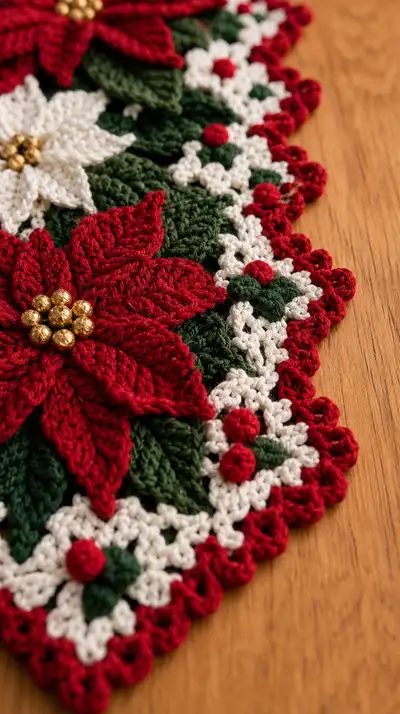
Create a festive poinsettia table runner featuring layered red and cream flowers, textured green leaves and a lacy white connector with golden bead centers. This richly detailed pattern uses modular motifs joined into a long runner, finished with a scalloped red edge and tiny bobble berries for seasonal charm. The finished piece is decorative and robust enough for a dining table centerpiece or sideboard accent. Clear step-by-step rounds and assembly guidance are included for a polished final result.
Progress Tracker
0% Complete
— Notes & Techniques :
Info :
This pattern is modular: you will make large poinsettia motifs, smaller cream flowers, leaf motifs and white lattice connectors then join them join-as-you-go. Gauge is not critical, but a dense fabric is required so stitches do not sag. Use a slightly smaller hook than suggested on the yarn label if you prefer a firmer texture. Block each motif before assembly for best results.
Info :
Puff/cluster petal technique used here: yarn over, insert hook, yarn over and pull up a long loop; repeat 3-4 times in same base stitch, then yarn over and pull through all loops, ch1 to secure. You may substitute a front-post treble cluster for a different texture.
— Large Poinsettia Motif (Make 5 or as many as required to desired length) :
Round 1 :
Using red yarn, mr, 6 sc in ring (6)
Round 3 :
(1 sc, inc) x 6 (18)
Round 4 :
(2 sc, inc) x 6 (24)
Round 5 :
(3 sc, inc) x 6 (30)
Round 6 :
(4 sc, inc) x 6 (36)
Info :
These first rounds form the small central disc that anchors the petals. Keep stitches tight to support the puff petals worked later.
Round 7 :
1 sc in each st around (36)
Round 8 :
1 sc in each st around BLO (36)
Round 9 :
Ch3 (counts as dc), *sk next st, dc in next st, ch1; rep from * around to form 18 dc clusters and 18 ch1 sps; join with sl st to top of ch3 (18 dc, 18 ch1 sps)
Info :
Round 9 creates base points where petals will attach. If you prefer a denser petal base, substitute ch2 and dc clusters instead of ch1 loops.
Round 10 :
Slip to first ch1 sp, *(ch2, 5-tr cluster petal in ch1 sp: (yo, insert, pull up) x5, yo pull through all loops, ch1, sl st into same ch1 sp), sl st to next dc; rep from * around to make 18 small petal clusters. Fasten off red if you plan to work a second petal layer in the same color or continue without fastening (18 petals)
Info :
Work petals with consistent tension so petals sit at same height. Puff/cluster size determines the dimensionality—5 loops is medium; use 4 or 6 loops for smaller/larger petals.
Round 11 :
Join red behind each small petal cluster, ch1, sc around the base of each petal (36 sc) placing 2 sc per petal anchor to stabilize (36)
Round 12 :
Change to red (if fasted off) and ch4 (counts as tr), *in same st make 4 tr cluster anchored at base to form a taller outer petal: (yo, insert, pull up) x4, yo pull through all loops, ch1, sl st into base; skip 1 sc and repeat across each petal base; rep around to make 18 taller petals; join (18 tall petals)
Info :
Round 12 builds a second layer of petals that overlap the inner petals. Adjust the cluster size or stitch type (tr vs dc) for a more open or compact petal.
Round 13 :
Ch1, sc evenly around the bases of the tall petals, placing 2 sc per base for security (36)
Round 14 :
(1 sc, inc) x 12 around the base edge where needed to increase shaping (48)
Info :
This small increase round creates a wider ring to attach the large statement petals and the leaf underlayer later; you should now have 48 sts for consistent petal anchoring.
Round 15 :
Ch2, *(5-dc fan petal in next st: (dc, ch1, dc, ch1, dc) all in same st), skip 2 sc, sl st into next st; rep around to create 16 large ornamental petals (16 large petals)
Round 16 :
Working into the space between each large fan, ch1, sc, ch1, sc to create small anchor loops (32 anchors total) for leaf layer (32)
Info :
Large petals are decorative and will be fluffed outward. When fastening off, leave a long tail to stitch petals downward slightly if desired.
Round 17 :
Change to green yarn. Ch1, sc in each sc around the outer petal base (48)
Round 18 :
(3 sc, inc) x 12 to create gentle bulge under petals (60)
Round 19 :
1 sc in each st around (60)
Info :
Round 17-19 form the leaf base from which individual leaves will emerge. Keep the green fabric firm so leaves hold shape.
Round 20 :
Ch1, *make 1 sc in next 3 sts, ch6, sl st into the 4th st to create leaf anchor; rep around to make 10 ch6 sps spaced across the green ring (60)
Round 21 :
Working into each ch6 sp: join green, (sc, hdc, 3 dc, hdc, sc) into ch6 sp to form a rounded leaf; fasten off and weave in end. Repeat for each of 10 leaf anchors (10 leaves attached)
Info :
These first leaves are the underleaf layer. Leaves are worked as shells into ch-spaces; make sure leaves are symmetrical and blocked after completion.
Round 22 :
Return to red yarn, join at the tip of each large outer petal base, and work a decorative ridge: sc along petal base, 1 picot at tip, sc back (works like surface trim) for each of the 16 large petals. Fasten off.
Round 23 :
Join cream yarn at inner ring between petals, ch1, 1 sc in each base st (60)
Round 24 :
(4 sc, 1 dec) x 10 (50)
Info :
Round 23-24 add a cream highlight seam that will blend into the white lace when motifs are joined. Weave in ends or carry color carefully to avoid bulk.
Round 25 :
Change to cream, ch3, dc around in each st, placing 2 dc in every 5th st to create scalloped base (approx 58-60 dc depending on tension)
Round 26 :
*(ch3, 3 dc in same st), skip 2 dc, sl st into next dc; rep around to form decorative loops (approx 18 loops)
Round 27 :
Fasten off and block motif flat. Attach 6 gold beads to the center using a short length of thread or yarn tail, tying securely on the back. Secure knot with a dab of fabric glue if desired.
Info :
Petal and leaf counts here are designed to produce a full poinsettia about 18-20cm (7-8") across when using worsted yarn and 3.5mm hook. Adjust hook for desired size. Make 5 motifs for a standard runner length shown, or add more for a longer table.
— Small Cream Star Flower (Make 5, centers between large motifs) :
Round 1 :
With cream yarn, mr, 6 sc in ring (6)
Round 3 :
(1 sc, inc) x 6 (18)
Round 4 :
Ch3, *dc cluster in next st, ch1, sl st to next st; rep to form 9 small dc-anchor points spaced around (9 clusters)
Info :
These small cream flowers fill the negative space between large poinsettias and provide contrast. Keep petals flat and consistent in size.
Round 5 :
Working into each cluster space, join cream, ch1, sc, hdc, 3 dc, hdc, sc to form a star petal (9 petals)
Round 6 :
Sc around base of petals, placing 2 sc per petal base for stability (18)
Round 7 :
Change to gold bead attachment: sew a cluster of 5 small beads into center, secure thread on back and knot. Fasten off.
Info :
Make sure bead clusters sit flat. Optionally, use seed beads for a more delicate center or larger beads for extra sparkle.
— Medium Green Leaf (Make 24-30 total as needed per motif) :
Round 1 :
With green yarn, mr, 6 sc in ring (6)
Round 3 :
(1 sc, inc) x 6 (18)
Round 4 :
(2 sc, inc) x 6 (24)
Round 5 :
Ch1, sc around (24)
Info :
These rounds create a small oval leaf base. Leaves are worked in the round then shaped with surface stitches for the central vein.
Round 6 :
Work along one side only: ch1, sc in next 6 sts, hdc in next 4, dc in next 6, sl st to base to form a tapered point; fasten off and repeat on opposite side by rejoining to starting point (creates leaf shape)
Round 7 :
Join and work surface slip stitch center vein: using yarn tail or contrasting green, work sl sts down center line to create a visible vein. Fasten off and weave ends.
Info :
Block leaves gently, pinning to shape while damp. Make enough leaves to tuck under the large petals and fill between motifs—typical layout uses 4-6 leaves per large motif.
— Small Red Bobble Berry (Make many, approx 30-40) :
Round 1 :
With red yarn, mr, 6 sc in ring (6)
Round 3 :
1 sc in each st (12)
Round 4 :
Work 1 round of tight sc in BLO to create a small ridge (12)
Round 5 :
Fasten off leaving a long tail for sewing. Lightly stuff with a small bit of fiberfill to make a firm berry and sew to desired spots on white lattice or near leaves.
Info :
Berries are intentionally small and firm. Use a smaller hook for extra firmness. Sew through the base and wrap thread around base to secure before weaving in ends.
— White Lacy Connector Motif (Make between and around large/cream motifs to form runner base) :
Round 1 :
With cream yarn, ch6, sl st to form ring (or mr, 8 sc) – we will work a square-ish connector that fits between motifs; for clarity use ch6 ring and 8 sc inside (8)
Round 2 :
Ch3 (counts as dc), 2 dc in ring, ch2, 3 dc, ch2, 3 dc, ch2, 3 dc, ch2, join to top of ch3 to create four lobes (16 dc, 4 ch2 sps)
Round 3 :
Work into each ch2 sp: (ch3, 2 dc, ch2, 3 dc), between lobes sl st across top of next 2 dc; rep to form a floral square base (approx 32 dc)
Info :
This connector is designed to sit between motifs and create small diamond openings where bobble berries can be sewn. Work each connector flat and block to the same thickness as motifs.
Round 4 :
Ch1, sc around all edges placing (sc, ch3, sc) in each outer corner sp to create even squares (approx 40 sc & ch3 corners)
Round 5 :
Form small picot clusters along edge: *(ch3, sl st into 1st ch to make picot, sk1) rep across edge; fasten off (creates decorative edge loops)
Round 6 :
Make small green leaflets: join green in corner ch3 sp and work (sc, hdc, 3 dc, hdc, sc) to form mini leaves at strategic junctions. Fasten off.
Round 7 :
Join cream again and make connecting ch bridges: ch6 and sl st into adjacent connector points to create a stable lattice when joining multiple connector units. Fasten off and block flat.
Info :
Adjust spacing of connector pieces to match the distance between large poinsettia motifs. These units are intended to be joined-as-you-go in the assembly step below.
— Decorative Scalloped Border (Worked after joining all motifs and connectors) :
Round 1 :
With red yarn, join at any outer edge st, ch1, sc evenly around the entire assembled runner spacing 1 sc per crochet stitch along edges and placing (3 sc) in corner points to maintain shape. Count to make spacing even (approx varies by assembled width)
Round 2 :
*(ch4, 4 dc in next st, ch2, sl st into base between motifs) repeat along each scallop anchor to create petalled scallops. Ensure 16-18 scallops along each long side depending on number of motifs. Fasten off.
Info :
The border is decorative and reinforces the runner's edge. Pin the runner flat and work with even tension to avoid waves. Adjust the number of chains in scallops to fit perimeter spacing.
Round 3 :
For additional texture, work a finishing round of *picot sc (sc, ch3, sl st into first ch), skip 2 sc; rep along edgeto give neat beaded finish. Fasten off and weave ends.
Info :
If you prefer a heavier edge, add a final row of reverse sc or crab stitch (reverse sc) worked left-handed for a rope-like edge.
— Finishing & Optional Details :
Info :
Sew gold bead clusters in the center of each large red poinsettia (6-8 beads per center) using a short length of matching thread; tie and secure on back with a small piece of felt to protect yarn if table will be used often.
Info :
Sew small cream star flowers into the diamond gaps between large motifs using a few whip stitches at points where connectors meet. Add small red bobble berries in connector holes for added holiday motif.
Info :
Block the entire assembled runner with steam or wet blocking. Pin edges to measurement to square the runner and allow to dry completely before use. This ensures motifs sit flat and join seams are consistent.
Completing this poinsettia table runner is a joyful project that rewards patience with holiday-worthy results. The layered petals, textured leaves and sparkling bead centers come together for an heirloom-quality centerpiece that will delight friends and family. Whether you make a short runner or a grand length for a dining table, each motif adds to the festive charm. Enjoy the slow process, add your own color twists, and proudly display your handmade creation this season! 🎄🧶