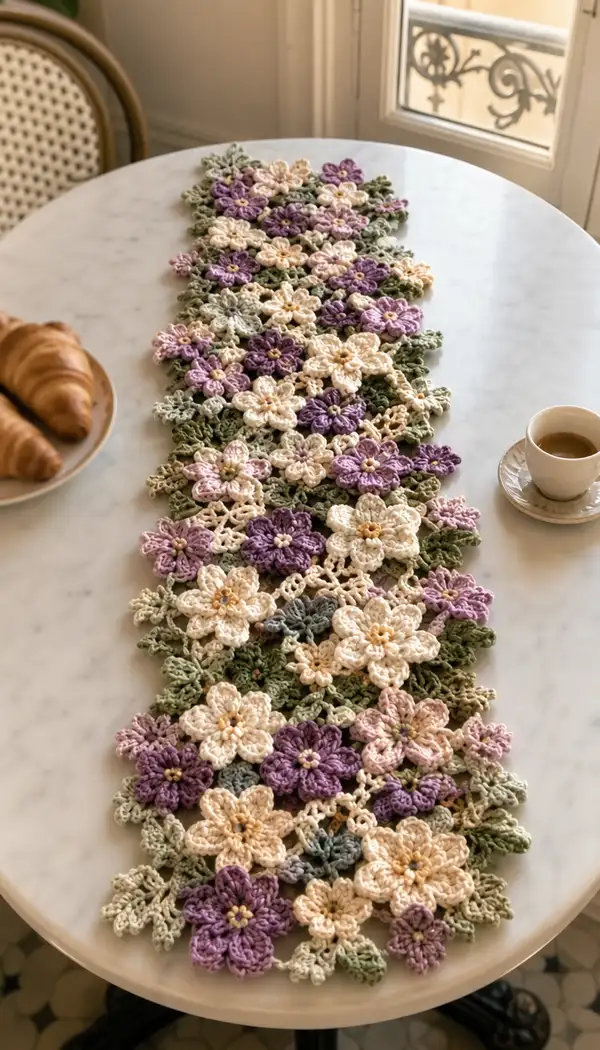
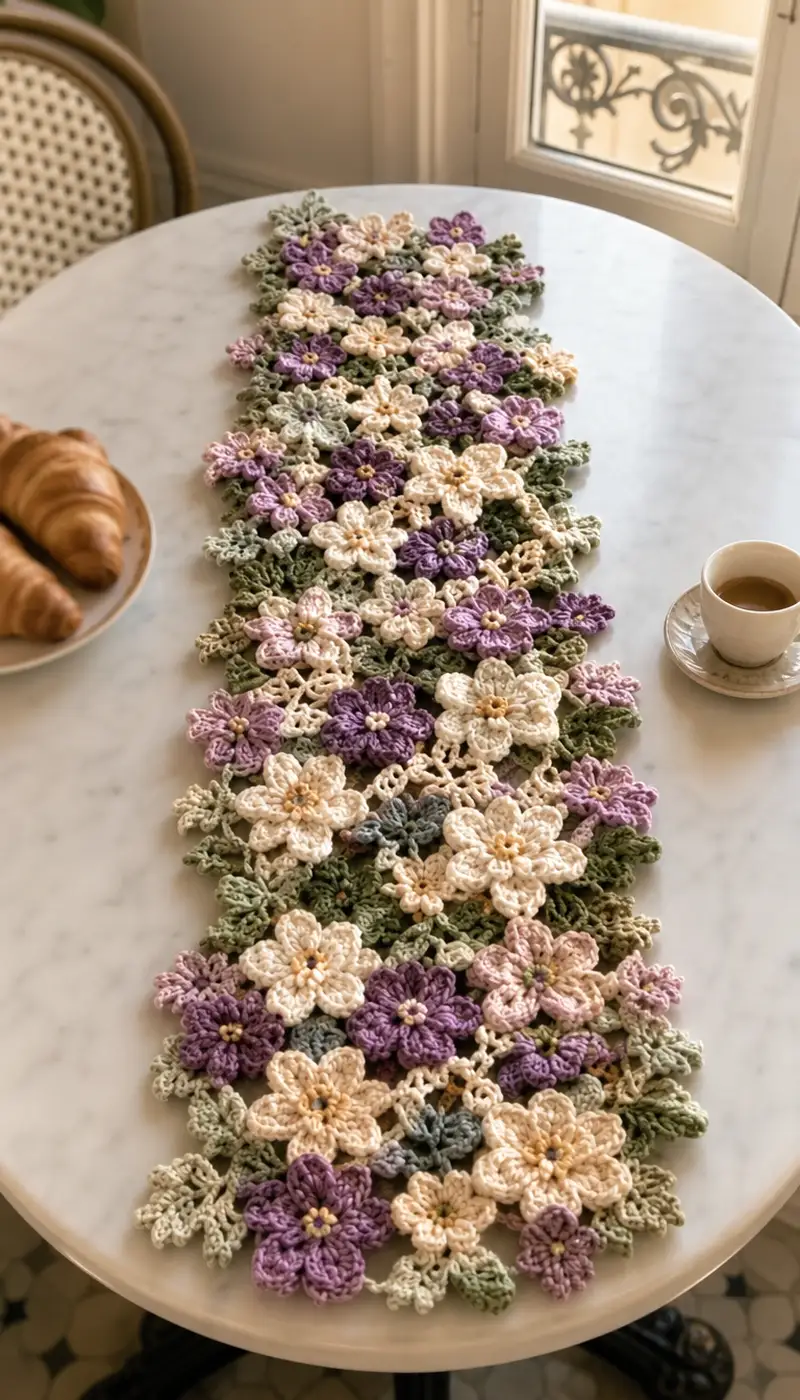
A delicate floral table runner made from layered crochet blossoms and leafy motifs in lavender, cream and soft green tones. This runner features a mix of large and small flowers joined with openwork lace and leafy connectors for an airy, romantic look. Perfect for a spring or vintage-inspired table setting, the modular motifs are crocheted individually then joined with a join-as-you-go lace mesh. Detailed assembly and finishing tips make this project approachable for intermediate crocheters.
Progress Tracker
0% Complete
— Overview :
Info :
This pattern creates a runner from individual motifs: Large Flower (A), Medium Flower (B), Small Flower (C), Tiny Blossom (D), Large Leaf (L1), Small Leaf (L2), and small filler connectors and centers. You will crochet many identical motifs and join them with a lace join-as-you-go mesh. Block motifs flat before joining for best results. Adjust runner length by adding or removing rows of motifs.
— Gauge & Size Approximation :
Info :
With DK/sport cotton and a 3.5mm hook, one Large Flower measures about 9-10cm (3.5-4 in) across; Medium ≈ 6-7cm; Small ≈ 4-5cm. The pictured runner is approximately 90-100cm (35-40 in) long and 24-26cm (9.5-10.5 in) wide composed of five staggered columns of motifs. Adjust motif counts to change length and width.
— Large Flower (A) :
Round 1 :
Make a magic ring, ch3 (counts as dc), 11 dc into ring, pull tight and join with sl st to top of ch3 (12 dc)
Round 2 :
Ch1, sc in same st, *ch3, skip 1 st, sc in next st* repeat around to create 6 ch3 loops, join with sl st (6 ch-spaces)
Round 3 :
Work petals: *(into next ch3 loop) [3 tr, ch3, 3 tr], sl st into base of loop* x6 (creates 6 tall petals). Fasten off or change color for petal trim. (6 petals)
Info :
Use longer stitch height (tr) for tall, soft petals. Keep tension even; do not pull petals tight. You can use a slightly larger hook for Round 3 if you want airier petals.
Round 4 :
Join contrast or same yarn at base between two petals, ch1, sc around petal bases placing 3 sc around each petal cluster base (18 sc total). Join with sl st. (18)
Round 5 :
Ch2 (counts as hdc), hdc in same st, *ch2, skip 2 sc, (hdc, hdc) in next sc* repeat around to form scalloped ring: (6 sets) finish joining. Approx (12 hdc separated by ch2 loops)
Round 6 :
Into each ch2 loop: *(5 dc shell) in loop, sl st into next sc cluster* x6 - this creates a fuller outer petal ring. (6 shells)
Round 7 :
Ch1, sc in each dc across shell (work approx 30 sc total working evenly across shells to create a round). Join with sl st (approx 30)
Info :
At this stage you have a wide floral motif. If you prefer a layered look repeat a short petal round: work small 5-dc picot petals into alternating shell tops. For the pictured depth, continue with Round 8 to add a raised inner petal ring.
Round 8 :
Change to a slightly lighter/darker shade for layered look. Ch3 (counts as dc), *1 dc into next 3 sts, (picot: ch3 sl st into first ch) 1 dc in next 3 sts* repeat around to create textured crown. Join with sl st. (approx 30 dc)
Round 9 :
Ch1, sc in each st around working evenly (30) Join and fasten off leaving tail for sewing.
Info :
Optional: Embellish center with a small cluster of 5-8 single crochets in pale yellow or use 3–4 small beads sewn into the centre. If using beads, secure with a dab of fabric glue after stitching, or tie off inside and weave ends through several stitches.
Round 10 :
If you prefer a puffed center: rejoin yarn in center and work 6 puff stitches (yo, insert, pull up loop x3 times, yo and pull through all loops), sl st to secure. Fasten off. (6 puff stitches)
Info :
Block the large flower flat while still slightly damp, shaping petals with fingertips. Pin outer scallops gently to a foam board for consistent size across motifs.
— Medium Flower (B) :
Round 1 :
Magic ring, ch3 (counts as dc), 8 dc into ring, pull tight and join with sl st (9 dc)
Round 2 :
Ch1, sc in same st, *ch2, sc in next st* repeat around forming 9 ch2 loops, join (9 loops)
Round 3 :
Into each ch2 loop: *(2 tr, ch2, 2 tr), sl st into base of loop* x9 – creates 9 small petals. Fasten off or change color. (9 petals)
Round 4 :
Join yarn at back between two petals, ch1, sc evenly around petal bases placing 2 sc per petal base (18 sc). Join with sl st (18)
Round 5 :
Ch2, (hdc, ch1) across to create small open lace ring: *(hdc in next sc, ch1) x18* join (18 hdc/ch1 loops)
Round 6 :
In each ch1 space: *5 dc shell, sl st into next sc* x18 approx – this forms a decorative edging and fills shape (18 shells)
Round 7 :
Ch1, sc around evenly across shells (approx 36 sc) Join and fasten off.
Info :
Medium flowers are the most common motif in the runner photo. Make enough to alternate with large blooms in a balanced layout. Block flat before joining.
— Small Flower (C) :
Round 1 :
Magic ring, ch1, 6 sc into ring, pull tight and join (6 sc)
Round 2 :
Ch2, *(dc, ch2) into same st, sl st into next st* x3 to make 3 raised petals with small gaps; join and fasten off (3 petals visual) or continue for 5-petal variant by using ch1 loops as below
Round 3 :
For 5-petal: rejoin yarn between sts, *ch3, sl st into next st* x5 round to create 5 loops, then *(3 dc, ch2, 3 dc) into each loop* x5 Fasten off. (5 petals)
Info :
Small flowers add filler and scale contrast. They can be worked quickly and left as flat motifs or slightly blocked to give gentle curvature.
— Tiny Blossom (D) :
Round 1 :
Ch4, join to form ring, ch1, 10 sc into ring, join (10 sc)
Round 2 :
*[ch3 sl st into 3rd sc] repeat around to make tiny picot-like loops; join and fasten off. Use these to cluster around larger blooms as accents.
Info :
These are great for tucking into spaces. Work in a contrasting tiny color or same cream for subtle texture.
— Large Leaf (L1) :
Round 1 :
Make a foundation chain of 12 ch. Row 1: sc in 2nd ch from hook, sc across (11 sc) - this forms leaf centre.
Round 2 :
Ch2, turn, 2 hdc in first st, hdc in next 3, 2 hdc in next, hdc across to last 3 sts, 2 hdc in next, hdc in last st - create a subtle increase to form an oval (approx 15 hdc)
Round 3 :
Ch1 turn, sc in each st across working evenly, at point ends work (sc, picot, sc) to create pointed tip on each end. Fasten off. (approx 15 sc)
Round 4 :
Optional surface rib: rejoin at center spine and work 1 sc along center row in BLO to create vein texture. Fasten off.
Info :
Block leaves with slight curve by pinning edges down and the center raised a little, so they cup slightly like natural leaves. Use two green shades to add depth and variety.
— Small Leaf (L2) :
Round 1 :
Foundation ch 8, sc in 2nd ch from hook across (7 sc)
Round 2 :
Ch2, turn, 2 hdc in first, hdc across, 2 hdc in last - creates small teardrop leaf (9 hdc)
Round 3 :
Ch1, sc across, at ends add small picot (ch3 sl st into first ch) for decorative point. Fasten off. (9 sc)
Info :
Small leaves are used as spacers and to soften motif joints. Use them generously around larger blossoms for an organic look.
— Flower Center & Puff Cluster :
Round 1 :
With pale yellow or beige, make magic ring, ch1, 8 sc into ring, pull tight, join (8 sc)
Round 2 :
Ch1, sc in each st around (8). Fasten off leaving tail to sew to center of flower. Alternately work 6 small puff stitches around center for raised texture: *(yo insert pull up loop x3, yo draw through all loops, ch1) x6*
Info :
Sew or stitch centers onto each flower from the back to hide knots. If using beads, pull bead to center and stitch through several times, knot securely on wrong side.
— Lace Connector Motif (Join-as-you-go mesh) :
Round 1 :
Work a lightweight net connector used to join flowers. Ch10, sl st to form ring, ch3 (counts as dc), 11 dc into ring, join (12 dc)
Round 2 :
Ch4 (counts as tr+ch1), *tr in next st, ch1* around to create alternating tr/ch1 spaces (12 tr, 12 ch1 loops)
Round 3 :
Into each ch1 space: *(sc, ch3, sc) to form small joining loop* around. Fasten off. These loops will be used to connect to adjacent flower petal bases during join-as-you-go.
Info :
When joining motifs, align loops and insert hook into loop on sewn motif and the corresponding loop on the new motif, sl st to join. Work two or three connection points per motif edge to stabilize.
— Join-As-You-Go (JAYG) Method :
Round 1 :
Work your first motif fully and block. Begin second motif, and when you reach its final round where loops are created, plan join points to match the first motif edges.
Round 2 :
Example: On a medium flower final round with 18 ch1 spaces, work through each ch1 space: *(sc, ch3, sc) but when a space aligns with an adjacent blocked motif, instead of ch3 make (sc, ch3, sc) but at the end of the 3 chains insert hook into the target motif loop and sl st to join, then continue.* Continue around joining where motifs touch.
Round 3 :
Use 2-3 join points for small overlaps, 4-6 for larger overlapping petal edges. Keep joins invisible by using the same color yarn and pulling sl st tightly. Leave small gaps to maintain airy lace character of runner.
Info :
Always pin the motifs before joining, matching petals and leaves so the runner lays flat. Work joins on the top side to hide seams on the wrong side. If desired reinforce joins afterward with a few small whip stitches using a yarn needle.
— Decorative Edge & Filling Lace Rows :
Round 1 :
Once main motif field is joined, work a decorative edge to tidy ragged edges: Join yarn at an outer corner point, ch1, sc evenly around outside edge of outermost motifs, placing (3 sc, picot, 3 sc) around petal tips to highlight points.
Round 2 :
Ch3, *(dc, ch2, dc) into small side gaps to make gentle scallops; in deeper pockets work (2 dc, ch3, 2 dc) for fuller curves. Work evenly until you return to corner and join with sl st. Fasten off.
Round 3 :
For finishing loop fringe: join a contrast color and *ch6, sl st into next stitch* repeat around to create airy loops. Block loops outward slightly for a delicate, cottage-style finish.
Info :
The pictured runner uses a subtle point-edge with leaf tips extending beyond the flower edge. Recreate this by allowing leaves to project beyond scalloped edging and only sc-ing the space between leaf tips, leaving leaf points free.
— Alternate Joining Grid (Optional denser row) :
Round 1 :
To make a denser connecting mesh for more stability: ch4, sl st to form a small ring, ch5, 8 dc into ring, join (8 dc)
Round 2 :
Ch3, dc in each dc and make ch2 loops between every second dc to form more connection points. Use these loops when joining motifs together providing a firmer grid.
Info :
Use the denser grid if you plan to use the runner under heavier decorations or frequent use, otherwise the open lace maintains the airy floral aesthetic.
— Assembly Sequence & Suggested Layout :
Info :
Layout example for pictured runner: central staggered column of Large (A) and Medium (B) flowers alternating with rows of Small (C) and Tiny (D) blooms filling gaps. Leaves (L1 & L2) are distributed to fill edges and tuck under petals creating a natural, overlapping look. Plan at least 3 large, 8-10 medium, 12-15 small, and many tiny blossoms plus 20-30 leaves depending on final length.
Round 1 :
Arrange motifs in rough layout on a blocking board or towel. Pin motif centers to hold positions. Ensure edges are not bunched and that leaf points alternate direction for organic flow.
Round 2 :
Start joining from the center outward using the join-as-you-go instructions. Attach 2-3 connection points per touching petal/leaf pair. Frequently step back and ensure runner remains flat and symmetrical along length.
Info :
If adjusting length, add a repeating band of Medium and Small flowers. To make the runner wider, add an extra staggered column of Medium flowers and corresponding leaves, adjusting join points accordingly.
— Blocking & Finishing :
Round 1 :
After joining, gently dampen the entire runner using a spray bottle of water. Pin onto blocking board or towel, spacing pins about 2-3 cm apart along outer edges and shaping each petal tip and leaf to your desired silhouette. Allow to dry thoroughly (12-24 hours).
Round 2 :
Weave in all ends using a tapestry needle, hiding tails into backs of motifs and knotting when necessary. Reinforce critical joins with small whip stitches on the underside if runner will have heavy use.
Info :
For extra stability, block with a light starch spray or fabric stiffener diluted according to manufacturer instructions. This keeps petals lifted and the runner crisp on the table surface.
— Tips for Consistency and Variation :
Info :
Make a small gauge sample of one large flower and one medium flower and block them before making the full set. This helps you determine exact motif count needed to reach desired runner length. Keep color placement balanced by distributing the same color flowers evenly across the runner rather than clustering like colors together unless a clustered effect is desired.
Info :
Alternate using satin beads in some centers for a subtle sheen; use small wooden beads for a rustic feel. If you want a vintage look, use a slightly heavier hook to create a tighter, denser motif structure.
Info :
Estimate motif counts: for pictured size (~90-100cm long) plan for roughly: 12 Large A, 18 Medium B, 20 Small C, 25 Tiny D, 30 L1, 20 L2. Adjust counts based on your blocking and exact measurements.
This floral table runner brings a garden to your tabletop with soft lavender and cream blooms woven together with leafy accents. Each motif is a tiny piece of handmade charm and the join-as-you-go lace keeps assembly creative and flexible. Enjoy the satisfaction of watching petals and leaves come together into a beautiful, functional centerpiece. 🌸🧶 Add your personal color touch or beads for an extra sparkle — every stitch tells a story. Happy crocheting and enjoy your new, handmade table centerpiece!