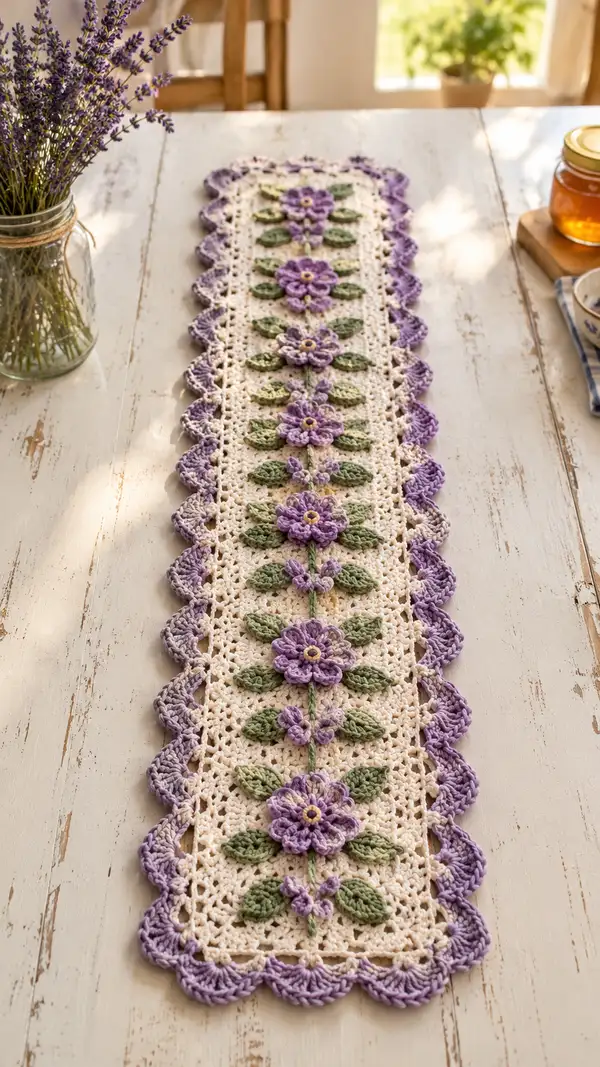
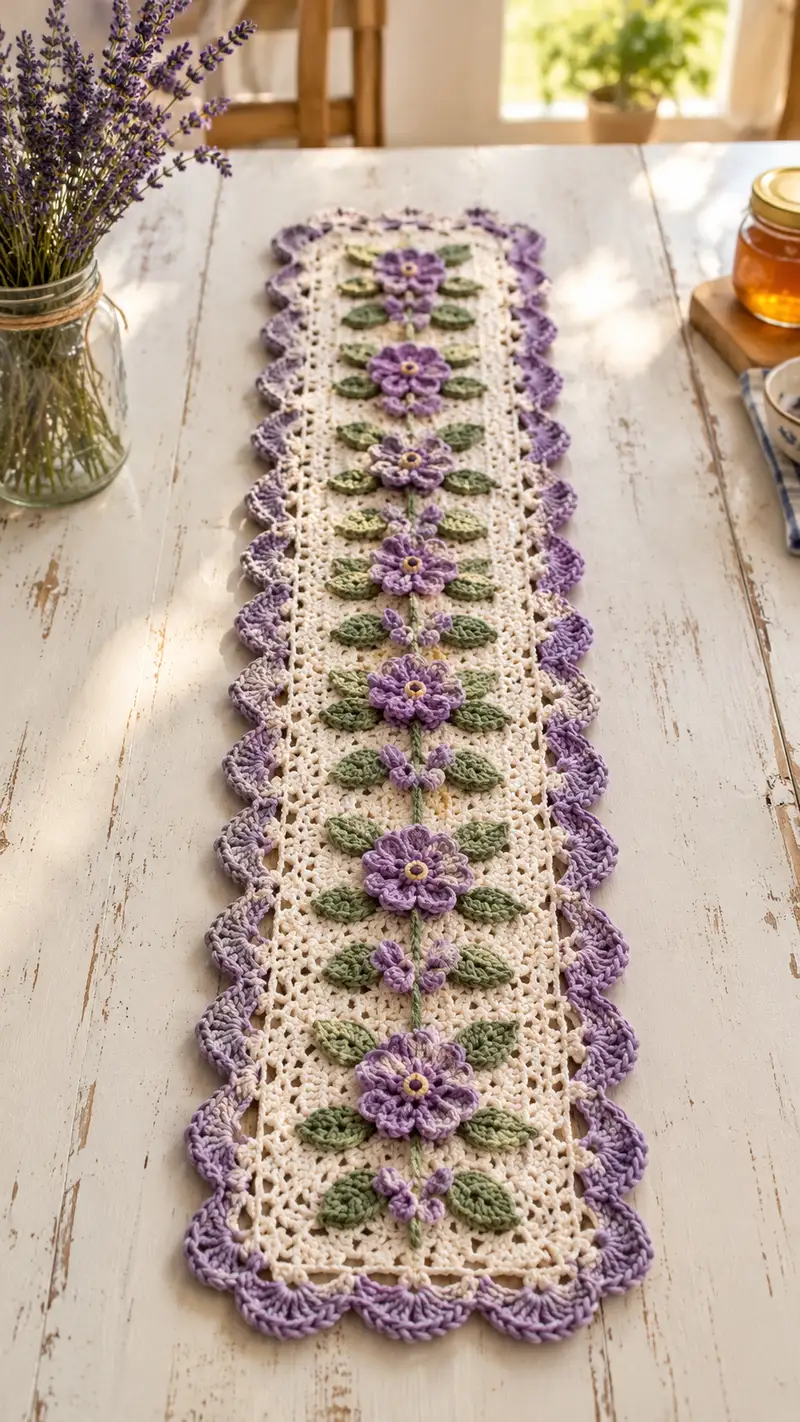
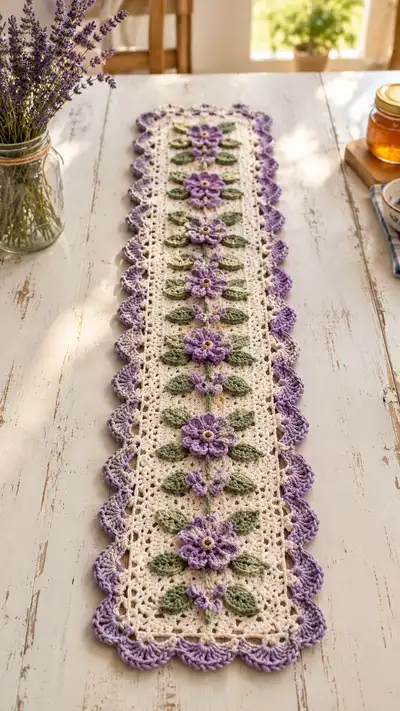
A delicate cream lace table runner embroidered with rows of raised lavender daisy applique9s and soft green leaves. This runner features a lacy mesh center, a scalloped lavender border, and dimensional flowers worked separately and sewn on for a vintage botanical look. Perfect for a sunny kitchen table, dresser or as a thoughtful handmade gift, the pattern includes clear step-by-step rounds, applique instructions and finishing tips.
Progress Tracker
0% Complete
— Notes & Gauge :
Info :
Gauge is not critical for this decorative runner, but correct hook and consistent tension will produce a runner similar in scale. With worsted weight cotton and a 3.5mm hook, one 10cm (4in) square worked in mesh pattern is approximately 14 rows by 14 pattern repeats. The finished runner as pictured measures approximately 9" (23 cm) wide by 36" (91 cm) long. Adjust starting chain to change width and add or remove flower repeats to adjust length.
— Materials Prep :
Info :
Prepare yarn bobbins or small cakes for lavender and sage colors to avoid long floats when applique9s are sewn on. Wind small center bobbins for each flower and leaf if you plan to make multiple applique9s at once. We recommend making and blocking all applique9 pieces prior to final assembly.
— Foundation Base (Mesh Panel) :
Round 1 :
Ch 49 (this creates a 48-st wide panel). Turn; ch 1, sc in 2nd ch from hook and in each ch across (48 sc) (48)
Round 2 :
Ch 4 (counts as tr), turn, sk 1 st, tr in next st, *ch 1, sk 1 st, tr in next st* across to last st; tr in last st (24 tr, 23 ch-1 sps) - keep count of tr posts for reference (48 effective posts)
Round 3 :
Ch 1, turn, sc in first tr top, *ch 3, sk next tr, sc in next tr top* across, ending sc in top of last tr (24 sc, 23 ch-3 sps) (47 elements; maintain even spacing)
Info :
This creates a lightweight mesh ground. The ch-3 spaces are where you will attach openwork and later sew the stem alignment. Keep tension relaxed on chains to prevent puckering.
Round 4 :
Ch 1, turn, sc in first sc, *ch 3, sc in next sc* across (24 sc, 23 ch-3 sps) (47 elements)
Round 5 :
Ch 3, turn, tr in next ch-3 sp, *ch 1, tr in next ch-3 sp* across to last sp; tr in turning ch (24 tr, 23 ch-1 sps) (48 effective posts)
Round 6 :
Ch 1, turn, sc in first tr top, *ch 3, sc in next tr top* across (24 sc, 23 ch-3 sps) (47 elements)
Round 7-12 :
Repeat Rounds 4-6 twice (three full mesh repeats total). Keep counts consistent: each even mesh row will be 24 sc and 23 ch-3 spaces (47 elements), each tr-row will have 24 tr posts (48 effective posts). After Round 12 you will have established a stable mesh for attaching flowers and leaves.
Info :
Mark the center column: place a removable stitch marker in the ch-3 space at the exact center of the panel on Row 6 for reference. This central running column is where applique9 stems will align; each flower will be centered on a ch-3 space every 6-8 rows depending on desired spacing.
Round 13 :
Ch 4, turn, tr in next ch-3 sp, *ch 1, tr in next ch-3 sp* across (24 tr posts) (48)
Round 14 :
Ch 1, turn, sc in first tr top, *ch 3, sc in next tr top* across (24 sc, 23 ch-3 sps) (47)
Round 15-24 :
Continue repeating the mesh sequence (Rows 4-6 pattern) until panel measures desired length less 6 rows for border and finishing; for pictured runner make 10 flower placement repeats spaced every 6 rows over the length. Maintain the central marker for stem alignment. Typical full panel body: work 40 mesh rows total (counting from Round 1). At Row 40 the mesh still measures 48 effective posts across.
Info :
Blocking tip: if you want a perfectly flat mesh, lightly wet-block the panel after completing the base and before adding applique9s. Pin edges to square and allow to dry completely to stabilize background tension.
— Flower Applique9 (Make 6; Lavender) :
Round 1 :
With lavender, make a magic ring, ch 1, 6 sc in ring (6)
Round 2 :
Inc in each st around (12) (work 2 sc in each sc)
Round 3 :
(1 sc, inc) x 6 (18) - place a small stitch marker at the start of this round to keep orientation for petal placement
Info :
Round 3 forms the small disc base; this will later be the petal anchor. Keep the circle flat by not pulling the tail too tight when closing the ring.
Round 4 :
*(ch 2, 3 dc) in next st, sl st in next st* repeat 6 times to form six simple petals around the center (each petal occupies 2 sts, total 6 petals) (12 sts used for petals)
Round 5 :
Fasten off lavender and change to a slightly smaller hook (3.0mm) for crisp petals. Rejoin lavender in back loop of each petal base, *sc around petal base 3 times (work sc evenly around petal to create raised petal), sl st to next petal base* repeat around to create layered textured petals (6 raised petals)
Round 6 :
Change to yellow for center ring: join in the central hole, ch 1, [6 sc] in center forming a small contrasting eye; sl st to first sc, fasten off and weave tail to underside (6)
Info :
Optional: for a fuller blossom, after Round 5 add an extra round of picot edging on each petal by working *(sc, ch 3, sl st in first ch) across petal edge* to create tiny scallops. Keep petals consistent in size by using the 3.0mm hook for petal rounds and 3.5mm for base if you prefer slightly softer petals.
Round 8 :
Finish : weave in ends leaving a 6-8" tail for sewing. Block each flower lightly on a foam pad to open petals and flatten slightly. Make 6 flowers for the runner pictured. Each flower measures roughly 1.75" (4.5 cm) across when blocked.
— Leaf Applique9 (Make 12 large leaves + 12 small leaves) :
Round 1 :
With sage green, ch 7. In 2nd ch from hook: sc, hdc, dc, tr, hdc, sc along chain (6 sts across chain) (6)
Round 2 :
Turn to work along opposite side of chain: sc in next 2 sts, (hdc in next, dc in next, tr in next, dc in next, hdc in next, sc in last) creating a mirrored side; sl st to first sc. Fasten off for small leaf (12 working loops around leaf). Block small leaves slightly cupped.
Round 3 :
For larger leaf, ch 9. 2nd ch from hook: sc, hdc, dc, tr, tr, dc, hdc, sc (8 sts along chain). Turn and mirror along opposite side similarly. This larger leaf will be slightly longer and fuller. Fasten off leaving 6-8" tail for sewing. Make 12 large leaves and 12 small leaves.
Info :
To give leaves a raised midrib, with contrasting sage strand held, embroider a single horizontal cord down the center of each leaf using a simple chain stitch or surface crochet once the leaf is sewn in place.
— Tiny Bud Cluster (Make 10) :
Round 1 :
With lavender, ch 4, sl st into first chain to form ring, ch 1, 6 sc into ring, sl st to first sc, fasten off leaving tail for sewing (6)
Info :
These tiny buds are used as filler between leaves and flowers. Make 10-12 and arrange in pairs around larger leaves for the clustered effect shown in the photo.
— Stem Cord (Embroidered) :
Round 1 :
With sage green, attach yarn at center marker at the topmost flower position by inserting hook under ch-3 sp and pulling a loop through; ch a chain long enough to reach next flower position (approx ch 6-8 for spacing), sl st into next designated ch-3 space to anchor. Repeat to create an embroidered running stem down the center of the panel, anchoring every 6 mesh rows where a flower sits. Fasten off and weave tails in.
Info :
Use a large-eyed tapestry needle if you prefer to surface crochet the stem by sewing a chain-like cord with the yarn instead of crocheting directly through the mesh. Keep the stem slightly raised by using a loose chain and sewing through spaces only at anchor points.
— Flower & Leaf Placement & Sewing :
Round 1 :
Mark flower placement: starting at one end, mark a ch-3 space and count down the panel 6 mesh rows between each flower for even spacing. On the pictured runner there are 6 primary lavender daisies spaced evenly down the center; leave margin of 4 mesh rows at each end for the border.
Round 2 :
Pin each flower centered on its marked ch-3 space. Place 2 large leaves flanking each flower horizontally (left and right) and small leaf clusters between flowers as in photo. Use sewing pins to arrange; step back and ensure symmetry before sewing.
Round 3 :
Sewing method: using the long tail from each applique, whip stitch through the bottom of the flower disc into the sc or tr posts around the central ch-3 space, catching mesh threads in each stitch for stability. For leaves, sew the tapered tip first and then secure the base with a few mattress stitches. Bury sewing tails along the back of the panel and weave in tightly to prevent unraveling.
Info :
Attach buds and smaller accents last to avoid obscuring the main flower shapes. Use a small knot on the underside only when necessary; otherwise weave the tail thoroughly to secure.
— Border Setup & Base Preparation :
Round 1 :
Once all applique9s are sewn and tails woven, prepare for border by working 3 rows of single crochet in cream around entire perimeter to create a neat edge and even out any uneven mesh. Work 3 sc evenly into each corner turning space to maintain 90-degree corners; counts will vary slightly depending on blocking but expect approximately 48 sc along short edges and 150 sc along long edges (counts are approximate—ensure shells will fit evenly across side length).
Info :
When working sc rounds around corners, place 3-4 sc into each corner turning ch-1 or ch-3 space to allow the fabric to lie flat. After 3 sc rounds, your perimeter foundation will be stable for the decorative scallop edge.
— Scalloped Lavender Edge :
Round 1 :
Join lavender at any mid-side sc. *Ch 1, sc in next sc, ch 3, skip next sc, shell in next sc made of (5 dc, sl st in next sc to anchor)* repeat along length. For every shell, you will be working into single sc from the foundation round. Each shell consumes 2-3 foundation sc equivalent; adjust repeat spacing so shells lie evenly. Expected shell count on longer sides: approx 25 shells per long side, 6 shells per short side.
Round 2 :
Work a second shell row to increase scallop depth: *sl st to center of each shell from previous round, ch 3, (3 dc, ch 1, 3 dc) into center of shell, sl st to next shell center* repeat. This creates a taller layered scallop like the photo.
Round 3 :
Finish scallop by working picot points between shells if desired: *ch 3, sl st in base between shells* to create a delicate pointed edge. Fasten off and weave in ends on backside carefully.
Info :
Work shells evenly: if you find a mismatch at the corners, slightly increase stitches in the last shell before the corner to fill space. Place pins in shells while blocking to create uniform scallops.
— Decorative Raised Bud Chain (Optional) :
Round 1 :
Using leftover lavender, with a 3.0mm hook chain a thin decorative cord long enough to run the length of the stem; using surface slip stitch, attach a tiny bud every 6th space along the cord by sewing the pre-made tiny bud with its tail to each anchor point. This creates the paired tiny clusters seen between flowers.
Info :
Keep this cord loose enough to appear slightly raised but not so loose it catches on objects. Fasten the cord on the underside using tiny stitches and hide tails under nearest sc foundation row.
— Final Blocking & Finishing :
Round 1 :
Gently hand-wash the runner in lukewarm water with mild soap if cotton yarn allows. Press gently with towel to remove excess water. Pin the runner out on blocking mat to measured dimensions, aligning scallops and flowers. Use rust-proof pins to hold scallops open. Allow to dry completely before removing pins.
Round 2 :
Weave in all remaining ends securely on the reverse side. If any applique edges lift, tack them lightly with small hidden stitches. Inspect border shells for evenness and retension if necessary by reblocking selective shells.
Info :
To preserve the runner, avoid machine washing frequently. Spot clean as needed and reblock after cleaning. For longevity, rotate the runner periodically to prevent sun fading in a single position.
— Alternate Size & Repeat Options :
Round 1 :
To make the runner wider, increase foundation chain by increments of 8 to maintain mesh repeat harmony (add equal repeats across width), then work additional mesh repeats per row accordingly. Add more flower repeats along length by increasing mesh row count between border allowance.
Round 2 :
For a longer runner, maintain width and add additional flower and mesh repetition units down the length; plan flower spacing at 6 to 8 mesh rows apart depending on desired look. Make and block additional applique9s accordingly.
Info :
This modular design is forgiving—flowers and leaves are added after the mesh base is completed, so you can customize spacing and density without altering the base structure significantly.
This lavender-on-cream runner is a lovely project that brightens any table with vintage floral charm. Each raised daisy and leaf is an opportunity to practice applique9 sewing and textural stitches. The scalloped lavender border ties the whole piece together for a polished finish. 🧶 Place it under a vase of lavender or present it as a handmade gift—the time you spend crafting it will show in every delicate petal. Happy hooking and may your stitches be even and your petals bloom beautifully! 🌸