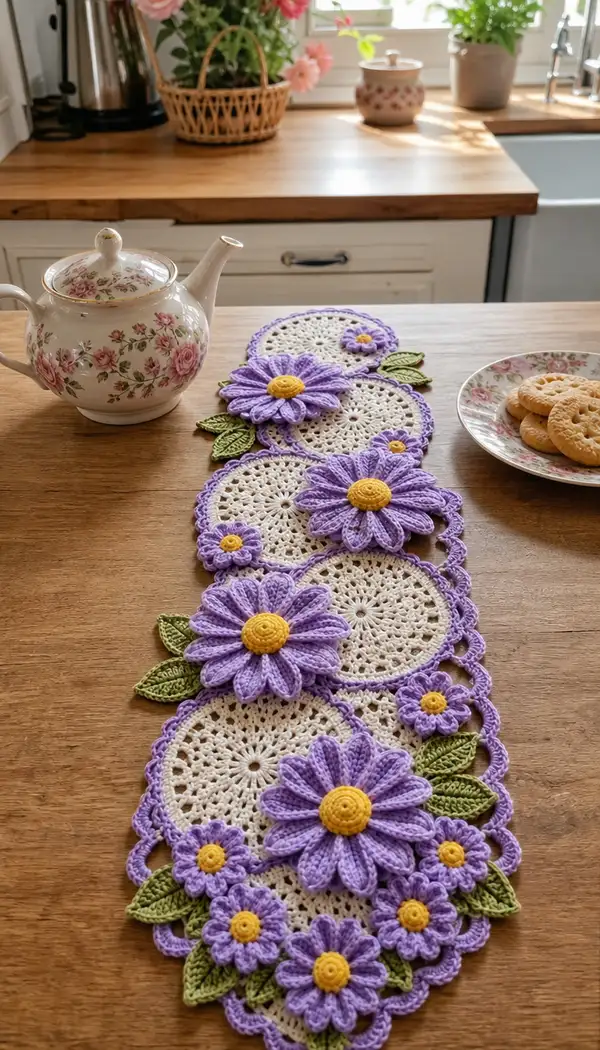
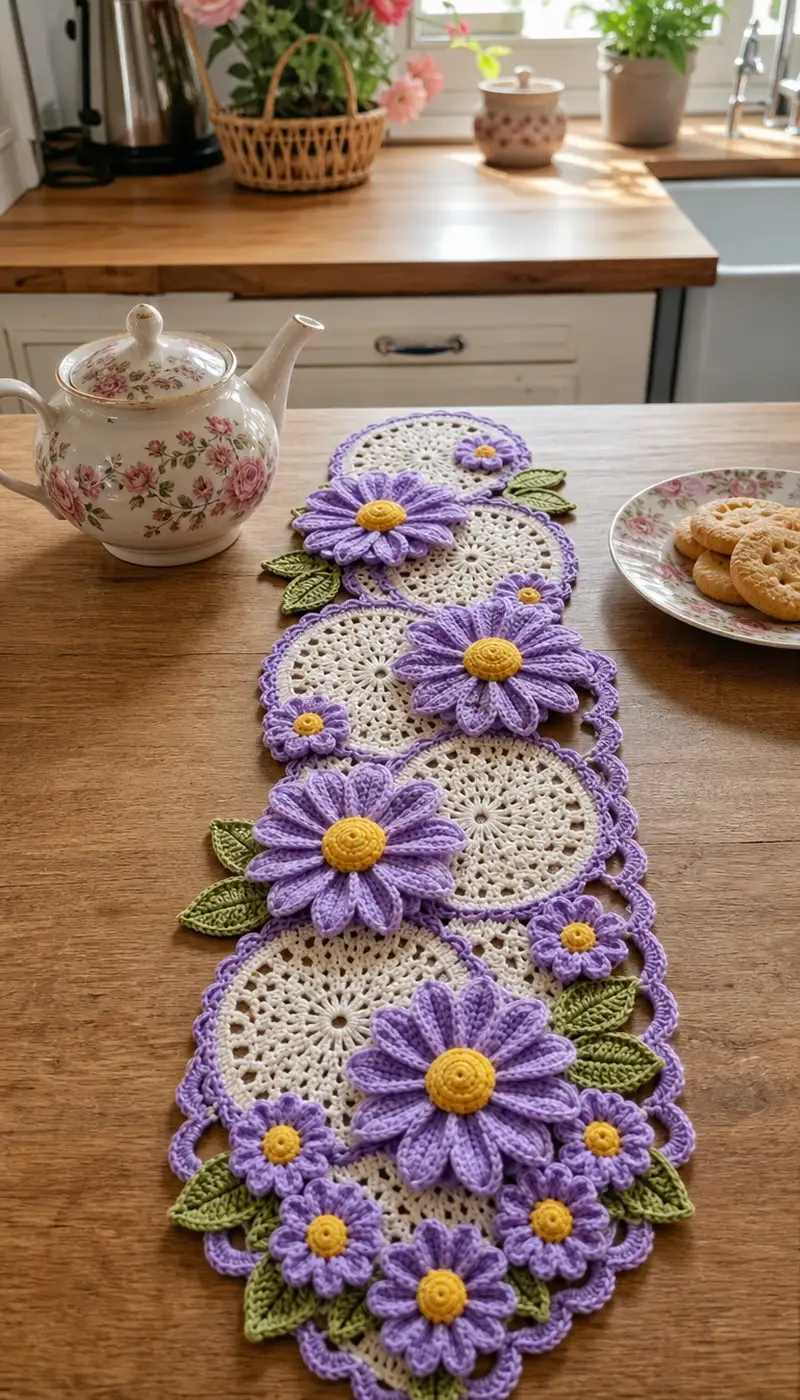
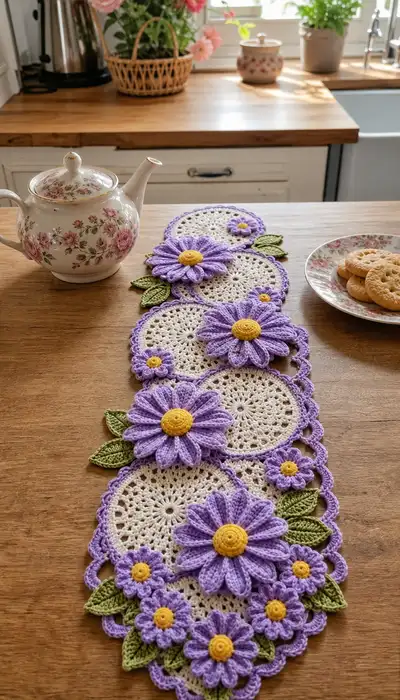
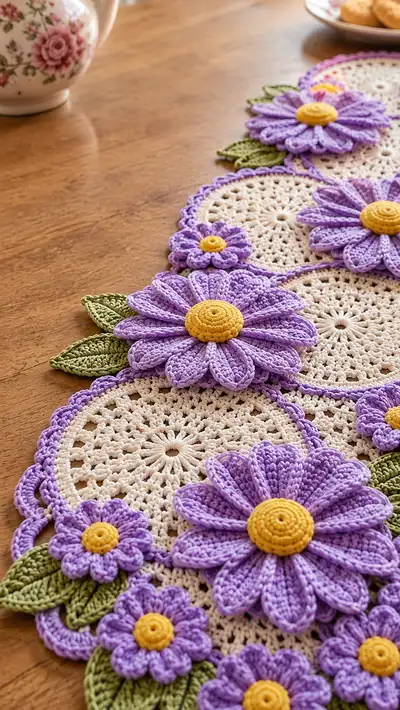
This elegant lavender daisy table runner features cream circular doilies joined with a scalloped lavender border, layered with dimensional purple daisies, sunny yellow centers and olive-green leaves. The design is worked in cotton yarn for crisp stitch definition and a slightly firm, decorative finish. Perfect for a dining table, dresser or tea setup—this runner combines lacy motifs and raised floral appliques for a stunning handmade accent.
Progress Tracker
0% Complete
— Doily Circle (Make 6-8 depending on runner length) :
Round 3 :
(1 sc, 1 inc) x 6 (18)
Round 4 :
(2 sc, 1 inc) x 6 (24)
Round 5 :
(3 sc, 1 inc) x 6 (30)
Info :
Keep tension even; these first 5 rounds form the compact centre of the doily. Work in continuous rounds or join and sl st, whichever you prefer. I work in joined rounds for a neat, visible seam.
Round 6 :
(4 sc, 1 inc) x 6 (36)
Round 7 :
(5 sc, 1 inc) x 6 (42)
Round 8 :
(6 sc, 1 inc) x 6 (48)
Round 9 :
(7 sc, 1 inc) x 6 (54)
Round 10 :
(8 sc, 1 inc) x 6 (60)
Info :
At this point the circle is broad enough to begin lacy rounds. If you want a smaller circle decrease by omitting the next increase round; for a larger circle extend increases beyond Round 10.
Round 11 :
1 dc in each st around (60)
Round 12 :
1 dc in each st around (60)
Round 13 :
(8 dc, ch 2, skip 1) x 6 (60)
Info :
The ch-2 spaces work as evenly spaced lacy windows. Place your marker at the start of each round to track the round start when using joined rounds.
Round 14 :
In each ch-2 sp: (sc, 3 dc, sc) forming small shells in each window. In other stitches: 1 dc. (6 shells + remaining dc = 60)
Round 15 :
(3 dc, ch 3, sk 3) around to create larger lacy arches; work an even texture between arches (count remains 60 by placement of arches)
Round 16 :
Into each ch-3 arch: (sc, 5 dc, sc). In the intervening dc stitches work 1 hdc to maintain even coverage. (6 arches + other sts spaced evenly; maintain stitch flow)
Round 17 :
1 sc in each st around to tidy the lacy row (60)
Info :
Begin blocking doilies now. Pin into a circular shape to open lacy arches and steam or wet-block to set the motif. Blocking now gives crisp edges for attaching edging and flowers later.
Round 18 :
(4 sc, ch 2, skip 1) x 12 to create scallop foundations (72)
Round 19 :
In each ch-2 sp: (sc, 3 dc, sc) - creating 12 scallops around. Work 1 sc in remaining sc stitches as necessary to keep evenness (72)
Round 20 :
1 sc around in BLO to create a slightly raised ridge, gives a neat join edge with the lavender border later (72)
Round 21 :
BLO: (1 sc in next 3 sts, 3 sc in next st) x 18 to create a subtle texture band (90)
Info :
Leave a long tail at the end of this round if you prefer to join motifs by whip stitch; otherwise finish off and weave ends. Make 6 full doilies for the runner shown; adjust counts if you want more circles.
Round 22 :
Fasten off leaving a 20cm tail for joining. Weave in the end across the back and trim. Block again if needed after weaving ends.
— Large Daisy Center (Make 5) :
Round 3 :
(1 sc, 1 inc) x 6 (18)
Round 4 :
(2 sc, 1 inc) x 6 (24)
Info :
Work the yellow center in continuous rounds for a smooth spiral. Place a stitch marker at the first stitch and move it each round to mark the start.
Round 5 :
(3 sc, 1 inc) x 6 (30)
Round 6 :
1 sc in each st around (30)
Round 7 :
1 sc in each st around (30)
Round 8 :
1 sc around then fasten off leaving a 25cm tail for sewing to flower petal base. Optionally add a tiny bit of fiberfill (very flat) for a slightly domed center before closing.
Info :
For a firm, textured center, work tightly and avoid stuffing much; the firmness helps petals sit neatly around the center when sewn.
— Large Daisy Petals (Make 5 sets, 10 rounds per petal sequence; repeat petals 12 times per flower) :
Info :
Each petal is worked individually onto a ring of chs around the center. You will create a petal base round which forms 12 attachment points; then build 6-8 rows per petal worked in BLO to produce raised petal ridges. All petals repeat around the center 12 times for a full blossom.
Round 1 :
Attach lavender yarn to the edge of the yellow center by sl st. Ch 8 for first petal foundation. (Ch 8 foundation = length of first petal)
Round 2 :
Sc in 2nd ch from hook, hdc in next, dc in next 3, hdc in next, sc in last ch; sl st back into the same stitch on the center to anchor petal. Repeat: ch 8, form petal around ch, sl st into center, rep x 12 to make 12 petal foundations. (12 petals)
Info :
Work petals evenly spaced; move around the center and count anchor points so the 12 petals are evenly distributed. If space is tight, reduce foundation chain by 1-2 ch for a slightly shorter petal.
Round 3 :
Now working back over first petal foundations: For each petal, into the petal foundation stitches work (sl st into base, ch 1, 1 sc in base, 1 hdc, 3 dc, 1 hdc, 1 sc, sl st to join at anchor) to thicken base (petal 1 strengthened). Repeat for each petal x 12 to add thickness.
Round 4 :
Work petals in BLO: for each petal, (ch 1, sc, hdc, dc in next 3, hdc, sc) working into the back bump of the petal base only to create a raised, shaped petal. Repeat for 12 petals.
Round 5 :
Repeat Round 4 to add height and curvature to the petals. Make sure to keep consistent stitch counts across petals so sizes match.
Info :
Create a subtle ridge by working the next round in BLO again. This gives the petals the slightly pleated look in the photo. You can gently steam-block individual petals to coax them into a slightly curved shape.
Round 6 :
Work 1 sc in each petal stitch across to even the edges, finishing the petal surface. Repeat for each of 12 petals.
Round 7 :
Edge each petal with a round of sl st in lavender to clean the edges and give definition (work evenly 1 sl st per st across petal). Repeat for 12 petals.
Round 8 :
Fasten off and weave in ends. Repeat to make 5 large daisies for the runner. Leave long tails on centers for sewing to petal bases then sew entire flower to doily later.
Info :
Ensure that petals are all oriented in the same direction when sewing to the doily — toward the runner center or outward — to match your preferred layout. Pin flowers in place before sewing.
— Small Flower (Make 8–10) :
Round 3 :
1 sc in each st (12)
Round 4 :
*Ch 5, sc into next st of center; rep from * around to make 6 loops (6 petals)
Round 5 :
Into each ch-5 loop: (sc, hdc, 3 dc, hdc, sc) to create small petals. Fasten off and leave tail for sewing. Make 8–10 small flowers and 4–6 tiny rosette centers by repeating Round 1–3 in yellow only (3 rounds) for little yellow hubs.
Info :
Small flowers are perfect to nestle among the large daisies to create a clustered look. Place small yellow rosettes either sewn into their centers or stitched separately onto the doily.
— Leaves (Make 12–16) :
Round 1 :
Ch 11. In 2nd ch from hook: sc, hdc, 2 dc, tr, 2 dc, hdc, sc (worked along the chain). This produces a pointed leaf shape. Sl st into the last chain to secure tip. (leaf base formed)
Round 2 :
Turn and work on the opposite side of foundation ch: sc, hdc, 2 dc, tr, 2 dc, hdc, sc. Sl st into starting st and fasten off. Exact stitch count across both sides equals 16–18 stitches per leaf depending on ch count.
Round 3 :
Optionally, work an edging row in BLO: 1 sc in each st BLO to create a raised central vein. Fasten off leaving a 15cm tail for sewing.
Info :
For slightly larger leaves, use ch 13 initial chain and add one extra dc on each side. Work leaves in olive green and block gently to shape. Leaves are left flat with a central ridge for a realistic look.
— Joining Doilies and Initial Lavender Border (Join method and rounds) :
Info :
Lay doilies in the layout shown (overlapping circles with alternate overlap). Use pins to hold positions then join with a slip-stitch seam working lavender yarn into the BLO ridge on each adjacent doily so the seam sits neatly between the cream circles.
Round 1 :
With lavender, attach yarn to the outermost ridge of the first doily. Ch 1, sc evenly around outer edge of doily spacing 1 sc per top stitch; when you reach an edge that meets the adjacent doily, sc into both motifs together (through both outer ridges) to join them. Continue around entire runner so adjacent edges are joined at several joining points. Fasten off and weave tails. (st count varies; keep an even sc spacing)
Round 2 :
With lavender, 1 sc in each sc around the entire runner edge to tidy join and even up the edge (counts follow previous round). Place marker at start of round.
Round 3 :
(3 sc, ch 3, sk 2) around to create scallop foundations. Where two doilies meet, work the ch-3 arch across the seam for a decorative bridging arch.
Info :
When you create arches across seams, keep tension relaxed so scallops lie flat. If arches pull, add one extra ch to the arch to reduce tension.
Round 4 :
Into each ch-3 arch: (sc, 5 dc, sc) to form scallops. At curve points where two doilies are close, work (sc, 7 dc, sc) for a larger scallop to emphasize the runner’s scalloped outline. Fasten off and weave in ends.
Round 5 :
Optional decorative picot row: attach lavender, sc in next st, (ch 3, sl st into first ch forming picot, sc in next 3 sts) repeat around scallop tips to create a subtle picot dotted edge. Fasten off and weave ends.
Info :
If you prefer a bolder edge, add a final row of reverse sc (crab stitch) worked left-handed around the outermost edge to create a rope-like finish.
— Attaching Flowers, Centers, Small Flowers and Leaves :
Round 1 :
Arrange the large daisies on top of the cream doilies as shown in the photo: one large daisy per primary circle, shifted slightly to create overlap and space for small flowers. Use pins to mark placement. You will place small flowers and leaves in the gaps between large flowers and along seams to create clusters.
Round 2 :
Sew yellow center to the middle of each large petal assembly using the long tail left on the yellow center (use whip stitch or ladder stitch, catching the base of petals). Ensure the center is centered and sits slightly raised.
Round 3 :
Sew the large flower to the doily: from behind, stitch through the yellow center tail into the doily base, then take several small stitches around the petal bases to secure. Sew through 6-8 points around the flower for stability, invisible from the top if stitched sparsely in the center and tighter at the petal bases.
Info :
Use small, neat stitches and avoid stitching through the top of petals. Catch the base of each petal to keep the surface unmarked. If the center circumference overlaps the doily openings, sew the center into the doily’s lacy holes for extra anchoring.
Round 4 :
Sew small flowers into clusters by stacking a small yellow rosette into the middle of the small lavender flower if desired. Stitch the resulting small flower group into gaps between the large daisies and along seams, spacing them to create a natural cluster.
Round 5 :
Arrange leaves around large and small flowers and tack them in place with short stitches at leaf bases only. Use 2–3 stitches per leaf to hold them in position and hide tails behind petals or under large center discs.
Info :
Pin everything first. I recommend sewing the largest pieces first then layering medium and small pieces on top. Always check both sides of the runner to ensure there are no long tails showing through lacy holes.
— Final Decorative Touches and Edging Refinement :
Round 1 :
With lavender, work a final neat edging: attach yarn at a low point on the runner’s edge, *sc on outer loop, ch 2, sk one sc*, repeat across the entire outer edge. This produces a shallow scallop that ties motifs together visually.
Round 2 :
In scallop tips work 1 picot (ch 3, sl st in 1st ch) for a decorative dotted finish. Fasten off and weave in all ends neatly along the back.
Info :
At the end, re-block the entire runner gently, pinning it to final shape and steaming or wet-blocking to set the scallops and petals. Once dry, the runner will lie perfectly flat and the petals will retain their sculpted look.
— Optional: Reinforced Centers (if you prefer stiffer centers) :
Round 1 :
Before sewing the yellow centers closed, cut two discs of lightweight felt matching the center diameter and sandwich between two crocheted center rounds for rigidity. Sew around the edge to close and hide the felt disc entirely inside.
Info :
This creates a firmer center which helps petals hold shape and prevents sagging over time when the runner is displayed flat.
This lavender daisy runner is a delightful mix of lace and dimensional flowers—each motif adds charm and texture to your table. 🧶 The layered petals, sunny yellow centers and sculpted leaves come together to create an elegant, handmade accent. I hope this pattern inspires a cozy tea-time or a bright spring centerpiece for your home. Happy crocheting and enjoy placing your finished runner in a favorite spot! 🌸✨