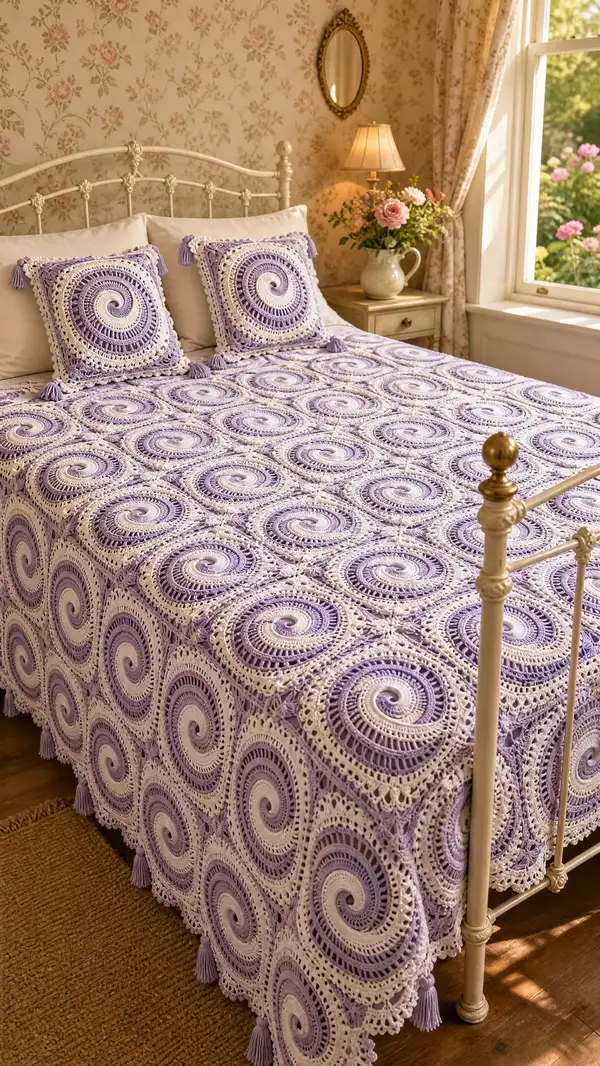
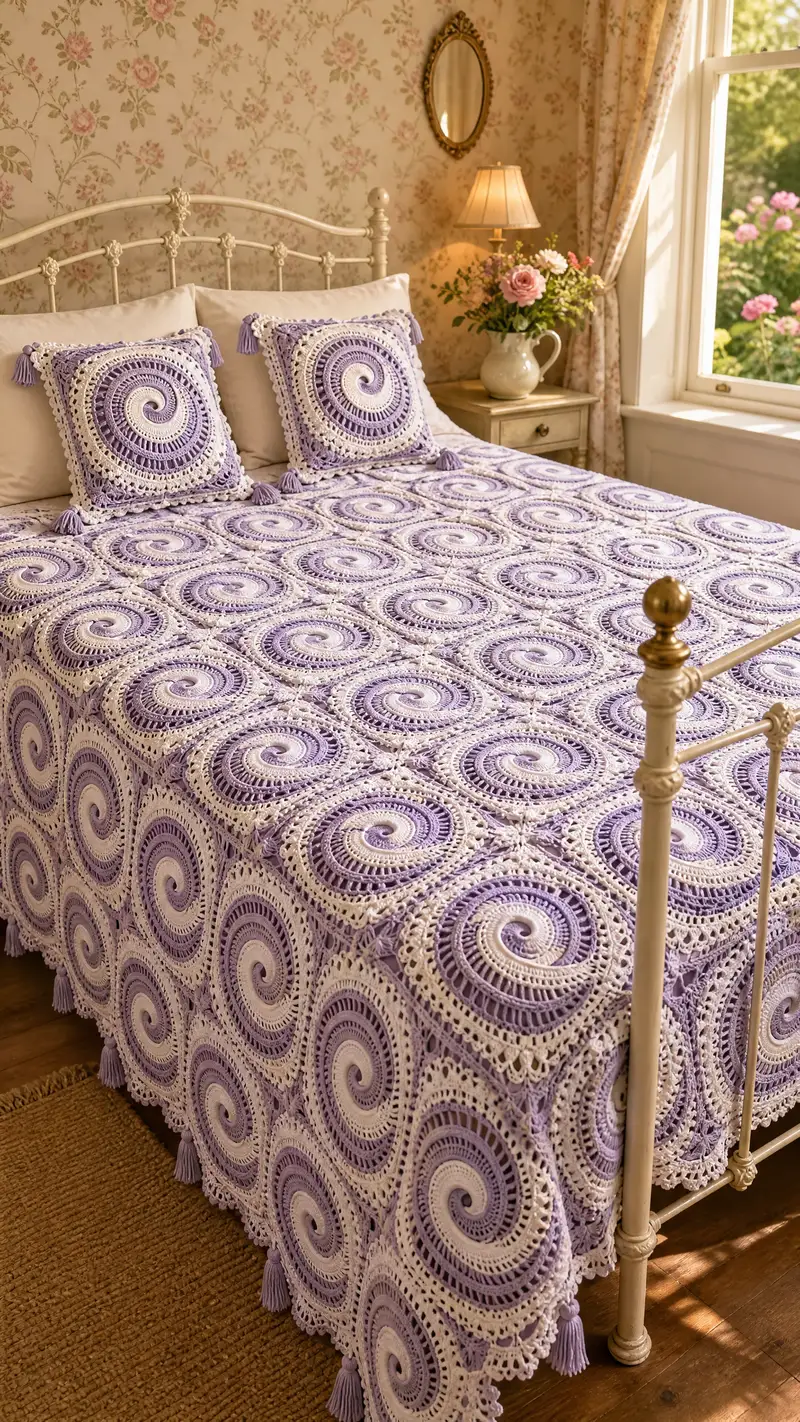
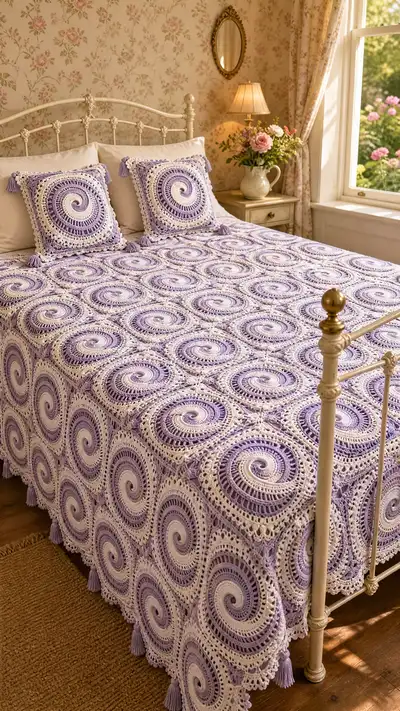
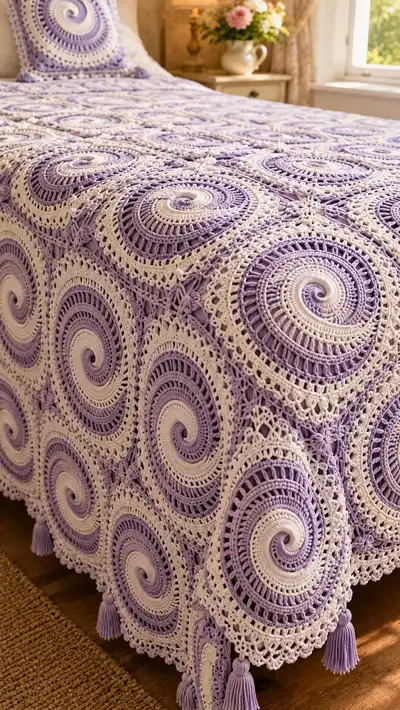
A dreamy vintage-inspired bedspread made from spiral granny square motifs in soft lavender and cream. This full-sized coverlet features elevated texture with post stitches, openwork joins and a scalloped lace border finished with matching tassels. The pattern includes motif construction, join-as-you-go options, pillow cover instructions and a rich decorative edging for a romantic bedroom statement.
Progress Tracker
0% Complete
— Overview :
Info :
This pattern builds modular spiral granny squares, joins them into a bedspread approximately 90-100 inches square when arranged 6 by 6 and edged with a three-part lace border and tassels. Use worsted weight cotton for drape and crisp stitch definition. Adjust motif count to resize (5x5 = lap/throw, 6x6 = full/queen pictured, 7x7 = large king depending on motif size).
— Gauge & Motif Size :
Info :
Each completed motif (before blocking) measures approximately 12.5cm / 5" square; blocked, each motif measures approximately 16cm / 6.25" square. For the pictured bedspread we used 36 motifs arranged 6 by 6 yielding a bedspread approx 96" x 96" after blocking and border. Adjust hook or yarn to match gauge.
— Construction Notes :
Info :
All motifs are worked in joined rounds starting from a small center and progressing outward. Color changes are used to create the spiral contrast (lavender and cream). Wherever possible the contrast color is fastened off and woven in to keep the spiral crisp. Join-as-you-go instructions are provided for efficiency and a clean finish; a sew-join alternative is also included.
— Motif : (Make 36 motifs or desired number) :
Round 1 :
With Lavender. 6 sc in magic ring (6)
Round 2 :
Inc in each st around (12)
Round 3 :
(1 sc, inc) x 6 (18)
Round 4 :
(2 sc, inc) x 6 (24)
Round 5 :
(3 sc, inc) x 6 (30)
Info :
Keep rounds tight and counts accurate. These early rounds form the tight spiral center; use a stitch marker to mark the first stitch of each round to maintain consistent orientation.
Round 6 :
(4 sc, inc) x 6 (36)
Round 7 :
Change to Cream. 1 dc in each st around (36)
Info :
Change color by finishing last lavender stitch with the cream loop and pulling through to start new round. Carry the unused lavender loosely on the back if you prefer not to fasten off.
Round 8 :
(4 dc, inc) x 6 (42)
Round 9 :
Change to Lavender. 1 dc in each st around (42)
Round 10 :
(5 dc, inc) x 6 (48)
Round 11 :
Change to Cream. 1 dc in each st around (48)
Info :
These alternating rounds of dc build the raised spiral texture. The visual spiral is enhanced by switching colors every 1-2 rounds; keep color changes consistent (lavender then cream) to maintain the swirl pattern.
Round 12 :
(6 dc, inc) x 6 (54)
Round 13 :
Change to Lavender. 1 dc in each st around (54)
Round 14 :
(7 dc, inc) x 6 (60)
Round 15 :
Change to Cream. 1 dc in each st around (60)
Info :
At this stage the motif is large and still circular. To create the square look you will begin to form quadrants by establishing four corner sections in the next rounds. We will work 4 slightly larger increases at quarter points to square the round.
Round 16 :
With Lavender. Work in pattern to create four corners: *Dc in next 13 sts, (2 dc, ch 2, 2 dc) in next st*; rep from * to * 3 more times; dc in remaining sts to end of round. Final count 64 (60 + 4 extra corner increases) (64)
Round 17 :
Change to Cream. 1 dc in each st and across each corner ch-2 space work (2 dc, ch 2, 2 dc) to preserve corner (64)
Round 18 :
With Lavender. 1 dc in each st (64)
Info :
After round 16 your motif starts squaring. The corners are established by (2 dc, ch2, 2 dc) clusters. Use stitch markers placed at the corner clusters so you can clearly see and count quadrant stitches during subsequent rounds.
Round 19 :
(10 dc, inc at corner cluster) x 4 plus even between corners to total 72 (72)
Round 20 :
Change to Cream. 1 dc in each st across (72)
Round 21 :
With Lavender. 1 dc in each st BL (72)
Info :
Working BLO on a round creates a subtle ridge that mimics the raised spiral shown. Use BLO on a round intended to read as a slightly recessed or textured band.
Round 22 :
(11 dc, increase at corner) x 4 = 80 (80)
Round 23 :
Change to Cream. 1 dc in each st (80)
Round 24 :
With Lavender. For texture row: *ch1, sc around the top of each dc and into each corner ch-2 space work 8 sc; in corner space: (sc, ch3, sc) ; rep from * to * around. Count will vary slightly by chain loops but aim to keep squares even (approx 80-88)
Info :
This round introduces small sc clusters and ch-3 loops in corners to prepare for decorative openwork rounds. The count becomes flexible because of chain loops; the objective is even spacing not a strict flat count. If your motif flares, add one extra sc every quadrant to flatten.
Round 25 :
Change to Cream. 1 hdc in each sc and ch across to create a neat frame around the spiral (approx 88)
Round 26 :
With Lavender. Work openwork lace: *dc in next 4 sts, ch2, skip 2, dc3 in next 3 sts grouping* repeat around; keep corner clusters as (dc, ch 3, dc) (approx 88)
Round 27 :
Change to Cream. Create cross motifs between squares: *ch4, sl st 2 rows below (or into the top of the next dc) to create elongated loop points*, rep around. This chain-lacing will later be used for join-as-you-go connections (approx 88)
Info :
If you prefer not to use join-as-you-go, finish motifs now and block them. When blocking, stretch each motif gently into a square using pins and damp blocking to coax out lacework. Blocking is critical for a consistent layout.
Round 28 :
With Lavender. Shell row: *(5 dc) in ch-2 corner space to accent corner, dc in each st between shells* (counts vary; maintain symmetry) (approx 92)
Round 29 :
Change to Cream. Reverse picot row for delicate edge: *sc across, at picot point: sc, ch3, sl st into sc just made to create picot; continue sc across* (approx 92)
Round 30 :
With Lavender. Final motif finishing: 1 sc evenly around, working 3 sc in each corner ch-3 space to keep square shape (approx 100)
Info :
Fasten off and weave ends if you plan to sew-join motifs. If using join-as-you-go method proceed to the Join section when you make your first motif and use the final round to connect.
— Join as You Go (JAYG) Method :
Info :
The following rounds assume you attach each new motif to previously completed motifs on the bedspread edge. You will join on the last decorative rounds (from round 26-30 area) by slip-stitching into corresponding loops on adjacent motifs. Work one motif fully and place it where it will sit in the grid, then work the next motif and join on the final round at joining points.
Round 31 :
When joining to one neighbor: on final round, when you reach the joining side, sc in next st, *ch3, sl st into the corresponding ch3 space on the completed neighbor motif, ch3, sc in next 2 sts* repeat until side is joined. Continue around motif, fasten off. Repeat for all sides as you place motifs (count will follow perimeter spacing) (approx 100)
Info :
When joining at corners align corner clusters; slip-stitch into both corner clusters on adjacent motifs to create a secure corner. Work loosely enough to avoid pucker but firmly enough to secure motifs together.
Round 32 :
If joining to two neighbors (interior motif): On two joining sides work sl st joins into both neighboring motifs as above. For the third and fourth sides, continue working decorative edging where motif remains unjoined. Fasten off and weave in ends (approx 100)
Round 33 :
Sew-join alternative: Block all motifs, place them on layout, whipstitch motifs through back loops only with matching yarn, or mattress/flat stitch through front loops for nearly invisible join. Fasten and weave in tails thoroughly.
Info :
When sewing, use a length of yarn double-stranded for strength if bedspread will be used often. Sew through the back loop only for a neater seam that reads as a raised cross on the right side, matching the grid effect in the photographs.
— Grid Assembly (for 6 x 6 layout pictured) :
Round 34 :
Layout: Arrange motifs 6 across by 6 down (36 motifs). Start joining motifs row by row using your preferred method (JAYG recommended for a neat right-side finish). As you join, check for twist and that spirals all rotate in the same direction for the uniform swirl look (ensure centers align orientation before joining).
Info :
Keep a flat surface large enough to hold the assembled grid while joining. Pin motifs at each corner and along joins before final stitching to prevent distortion.
Round 35 :
After joining all motifs, press flat using light steam or a damp cloth and weigh with flat books overnight if needed to encourage square edges.
Info :
Check the overall measurement. If your grid is slightly smaller, add extra motif rows or widen the border to reach the desired finished dimension.
— Decorative Border Part A : Foundation Lace :
Round 36 :
With Cream and working around entire joined grid edge: Attach yarn with sl st to a corner ch-3 space. Round begins: ch4 (counts as tr), work *tr in each st along edge spaced evenly; in corner ch-3 space work (tr, ch3, tr) to accent corner.* Continue around working tr groups in the center of each edge motif side. Count will depend on number of edge motifs; maintain even spacing so that border scallops fall centered over motif edges. Approximate total tr stitches for 6x6 grid ~ 6 motifs per side x 16 tr per motif side = ~576 tr stitches (approx 576)
Info :
This foundation lace round creates a tall textured band to transition from square grid to final scalloped edging. Keep stitches even and do not pull too tight at the corners.
Round 37 :
With Lavender. Work a decorative cluster row into the tr foundation: *(ch1, sc in base of every tr, ch2 skip 1 tr, shell in next)* Repeat around to begin scallops (approx 576)
Round 38 :
With Cream. In each shell work (5 dc) to enlarge scallop; between shells work dc clusters into edge tr spaces to stabilize (approx 600)
Info :
At each corner chainwork, maintain corner shells: (5 dc, ch3, 5 dc) to maintain square corners. Count will expand by corner shells but keep symmetry over the four corners.
— Decorative Border Part B : Lace Scallop and Openwork :
Round 39 :
With Lavender. *ch3, skip 2, sl st into next shell top, ch3; in shell top work (dc, ch1, dc) ; rep around to create airy arches* (approx 600)
Round 40 :
Change to Cream. Work a picot accent at the top of each arch: *sc, ch4, sl st into base to form a loop, sc into next* (approx 600)
Info :
These airy arches echo the openwork between motifs and give the bedspread the lacy drape seen in the images. Keep stitches loose but consistent to allow the scallops to fall naturally.
Round 41 :
With Lavender. Add a final shell trim: *(3 dc, ch3, 3 dc) in each arch top; between arches work (sc, ch1, sc) to anchor shells* (approx 600)
Round 42 :
With Cream. Edge finishing: 1 sc evenly around entire border; at shell points work 3 sc into peak to keep scallop crisp. Fasten off and weave in ends (approx 620)
Info :
Block the finished bedspread flat; use lightweight steam or spray and pin scallops to shape. Let dry completely before attaching tassels.
— Pillow Cover (Make 2 matching cushions) :
Round 43 :
Make 2 motifs for each pillow front (or make 1 motif per pillow depending on desired look). Work motif rounds 1-30 as for bedspread motif, blocking to square at 16cm/6.25" blocked size. For square pillow size approx 16" x 16" assemble four motifs (or use one big motif depending on final motif size).
Round 44 :
Assemble pillow front: join motifs in a 2 x 2 block with join-as-you-go or sew-join method. Once front is complete add an inner border: 2 rounds of sc in cream to create a sturdy edge for inserting a pillow form.
Round 45 :
Back panel: Work 16" square in 1 color (cream) as a simple solid panel using hdc until the panel matches front dimensions. Optionally add a zipper or overlap closure (envelope style) - create two back panels each 1/3 height overlapping or one panel with zipper.
Info :
Sew front and back together using mattress stitch on three sides leaving one side open to insert pillow form. Attach a small tassel on each corner for the finished look to match the bedspread tassels.
— Tassels & Corner Finishing :
Round 46 :
Make tasseled fringe: For the bedspread pictured we used 4 tassels per motif side placed centered at panel intersections and one at each outer corner — approx 36 motifs x 4 tassels per outer motif row yields ~ 24-28 tassels for outer edge (space tassels evenly). Each tassel is approx 3" finished length.
Round 47 :
Tassel construction: Wind yarn around a 6cm card approximately 30-40 times depending on desired fullness. Tie tightly at top, cut bottom loops and trim ends evenly. Create a small wrapped head by winding a short length of yarn around 1cm below the top knot, secure and trim. Attach with a sturdy knot and sew into border apex points. Repeat for each tassel (0)
Info :
Make tassel heads with the same lavender used in main motifs for unified look. Attach by pulling the tie end through the scallop apex and knot firmly on the back. Weave ends for security.
— Alternate Join & Stabilizing Rows :
Round 48 :
If you notice grid flexibility, add stabilizing rounds: With Cream, sc across the seam lines on the wrong side of the bedspread to create a subtle reinforced lattice under the decorative lace. Use 2 rounds of sc working in very small tension to avoid changing outer dimensions (approx variable)
Info :
Stabilizing rows are optional but recommended if the bedspread will receive daily use. They sit on the wrong side and are not visible from the right side when finished.
— Extra Decorative Row (Optional Raised Spiral Accents) :
Round 49 :
With Lavender. You may add a raised post double crochet spiral across motif faces: *work fpdc in a spiral line across motif center following the original spiral ridge (this is an embroidery-like technique crocheted in): work 10-16 fpdc in a connected arc then secure and fasten off.* Repeat motifs where desired (per motif variable)
Info :
This accent is advanced and requires careful placement. Use photos as a guide and practice on a spare motif to get placement and tension right.
— Final Finishing & Blocking :
Round 50 :
Block entire spread: Lay flat on blocking mats and pin each scallop point and motif corner to create a consistent square edge. Wet-block with warm water and a small amount of mild detergent, then steam or leave to dry fully. Remove pins when completely dry.
Info :
Blocking is crucial for uniform size and clean borders. For cotton yarn, allow ample drying time to prevent shrinking or misshape. If necessary, lightly starch the border to keep scallops crisp.
— Care Instructions :
Round 51 :
Hand wash cold or machine wash gentle in a mesh bag on cold. Reshape and block while damp. Dry flat. Do not tumble dry to preserve tassels and lace detail.
Info :
If you prefer machine wash, remove tassels and pillow covers first or place spread in a very large laundry bag for extra protection.
— Troubleshooting & Tips :
Info :
If a motif becomes slightly larger than its neighbor, add a single plain sc round to the smaller motif before joining to balance dimensions. Conversely, remove a decorative openwork round from larger motifs if necessary to match grid size.
Info :
When attaching tassels, make a simple knot through the stitch behind the scallop and then sew the head down through the wrong side for extra security. Trim tassels evenly with sharp scissors while comparing with a ruler for uniform length.
Info :
For an alternate two-color spiral, shift the color changes so that lavender runs two consecutive rounds before switching to cream to create thicker bands. Adjust rounds 7-15 sequence accordingly.
— Notes on Adjusting Size (Scale Up or Down) :
Info :
To make a smaller throw reduce the motif grid to 4x4 or 5x5. To increase to king size add additional rows and columns of motifs. Remember to add border rounds proportionally to maintain edge balance.
Info :
If you want a denser drape, choose a slightly heavier cotton yarn and reduce hook size by 0.5-1.0mm. For a more flowing drape, choose a lighter weight cotton-blend and increase hook size slightly and add an extra border scallop to add weight.
Completing this Lavender Spiral Granny Bedspread is truly satisfying — every spiral motif adds a little moment of joy as your bed transforms into a cozy, romantic retreat. The tactile post-stitch texture and lacy scalloped border come together into an heirloom-quality piece you’ll be proud to display. Tie on graceful tassels, press everything into tidy form with careful blocking, and step back to admire the finished result. 🧶💜 The process is meditative and the result is a beautifully handmade gift or center-piece for your bedroom. Happy stitching!