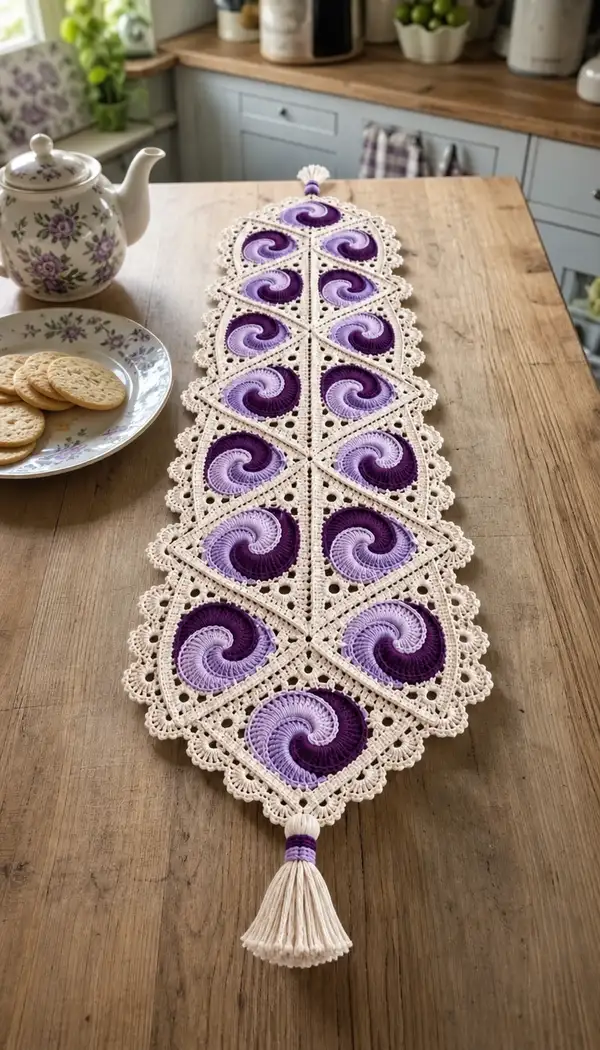
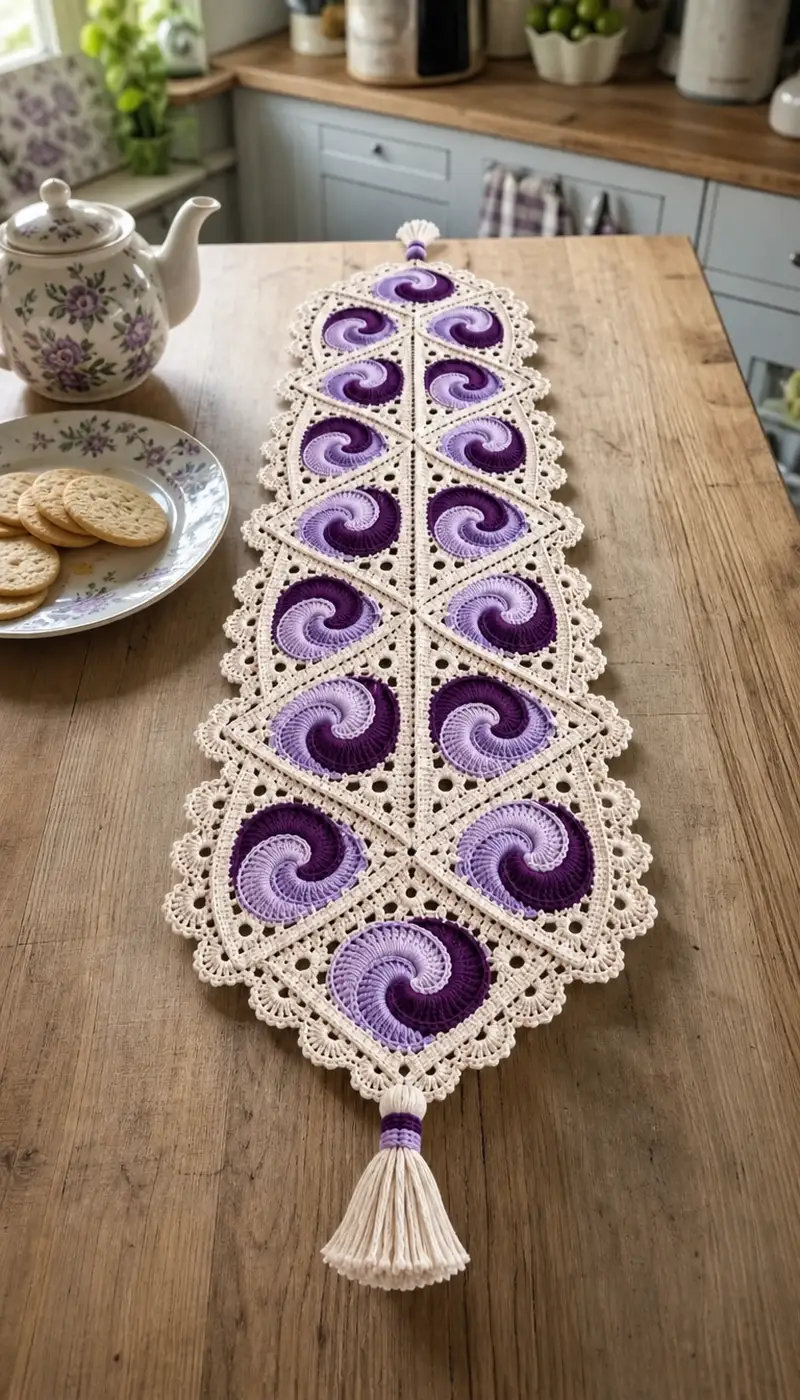
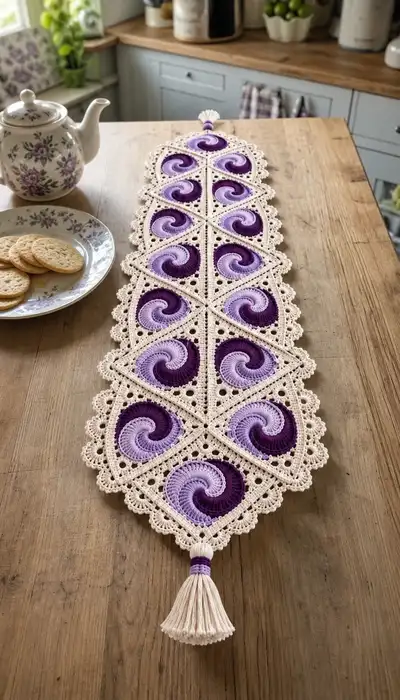
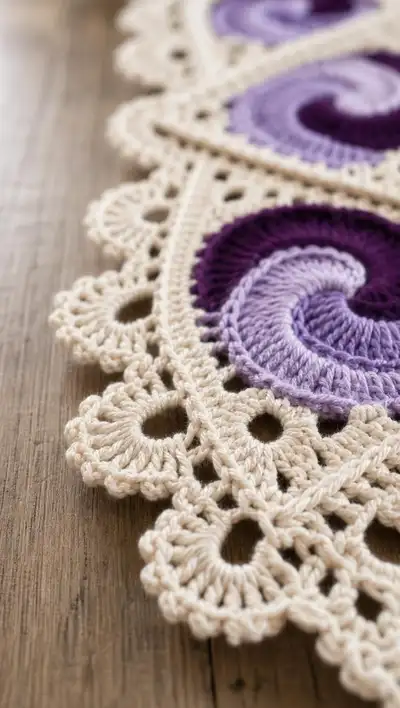
A gorgeous long table runner featuring spiral swirl motifs in three shades of purple, framed with a delicate cream lattice and scalloped edging. The runner is finished with tasseled ends and sits beautifully on a wooden table. This pattern uses modular motifs crocheted and joined to create a classic, elegant centerpiece.
Progress Tracker
0% Complete
— Materials & Gauge :
Info :
Gauge is not critical for this decorative runner but for reference: one finished swirl square measures approximately 12cm (4.75") across when worked in DK/Light worsted cotton with a 3.5mm hook. Adjust hook size if your motifs are larger or smaller. Make a test motif to determine final look before committing to full runner.
— Swirl Module (Make one motif as follows) :
Round 1 :
Make a magic ring. Ch3 (counts as first dc here and throughout unless otherwise noted). Work 7 dc into ring; join with sl st to top of ch3. (8)
Round 2 :
Ch3, dc in same st, 1 dc in next st, *2 dc in next st, 1 dc in next st* rep around; join. (16)
Round 3 :
Ch3, dc in same, dc in next 2 sts, *2 dc in next st, dc in next 2 sts* rep around; join. (24)
Round 4 :
Ch3, dc in same, dc in next 3 sts, *(2 dc in next), dc in next 3* rep around; join. (32)
Info :
Change to dark purple now for the outer spiral shade. Carry previous yarn inside or fasten off and weave in later. Work next rounds in dark purple to create the outer arc of the swirl.
Round 5 :
Ch3, dc in same, dc in next 4 sts, *(2 dc in next), dc in next 4* rep around; join. (40)
Info :
Switch to medium purple at the end of this round to create a visible band. Join color by completing last sl st of this round with new color. This creates a smooth color change without knots at the spiral edge.
Round 6 :
Ch3, dc in same, dc in next 5 sts, *(2 dc in next), dc in next 5* rep around; join. (48)
Round 7 :
Ch3, dc in same, dc in next 6 sts, *(2 dc in next), dc in next 6* rep around; join. (56)
Info :
Change to light lavender for the inner spiral. Make the color change early so the lighter shade forms the inner spiral that contrasts with the darker outer rings.
Round 8 :
Ch3, dc in same, dc in next 7 sts, *(2 dc in next), dc in next 7* rep around; join. (64)
Round 9 :
Ch3, dc in same, dc in next 8 sts, *(2 dc in next), dc in next 8* rep around; join. (72)
Round 10 :
Ch3, dc in same, dc in next 9 sts, *(2 dc in next), dc in next 9* rep around; join. (80)
Round 11 :
Ch3, dc in same, dc in next 10 sts, *(2 dc in next), dc in next 10* rep around; join. (88)
Round 12 :
Ch3, dc in same, dc in next 11 sts, *(2 dc in next), dc in next 11* rep around; join. (96)
Info :
Textured spiral shaping begins. We’ll use a combination of front post double crochets (fpdc) worked selectively to lift sections and create the visible swirl ridge. The stitch count will remain the same; fpdc occupy whole sts instead of dc and give a raised effect.
Round 13 :
Ch2 (does not count), *fpdc around next st, dc in next 3 sts* rep around to create initial lifted ridge; join. (96)
Round 14 :
Ch2, dc in each st around working the dc over the fpdc tops; join. (96)
Round 15 :
Ch2, *fpdc around next 2 sts, dc in next 2 sts* rep around; join. (96)
Round 16 :
Ch2, dc in each st around; join. (96)
Round 17 :
Ch2, *fpdc around next 3 sts, dc in next 1 st* rep around; join. (96)
Round 18 :
Ch2, dc in each st around; join. (96)
Info :
At this stage you have a round disk with raised spiral texture. The raised fpdc rounds create a curving ridge that mimics the photographic spiral. We will now square this disk into a pointed diamond/square motif by adding triangular shaping and corner points.
— Squaring the Swirl to Create Points :
Round 19 :
Ch1, sc in same st and each st around working 96 sc total; join. (96)
Info :
We will create 4 equal corners. There are 96 sts; 96/4=24 – each quadrant will be built over 24 sts. Place removable stitch marker at four points spaced 24 sts apart (these are the future corner centers).
Round 20 :
Ch1, (sc in next 11 sts, 3 sc in next st, sc in next 11 sts, sl st in next st) repeat for 3 more quadrants. Join. Count remains 96 sc but with triple sc corners added to create turn points. (96)
Round 21 :
Ch3, dc in each st around working 1 dc in each sc; when you reach the corner groups, work (dc, ch2, dc) into the center sc of each corner group to reinforce the point; join. (96 dc with 4 ch2 spaces)
Round 22 :
Ch1, sc in each st and into ch-2 spaces (2 sc in each ch-2 space) to firm up corner points; join. (100)
Info :
If you prefer a sharper pointed diamond, work an additional sc increase in the ch2 spaces on the next round: 3 sc in each ch2 space instead of 2 sc. The pattern above uses 2 sc for a gently pointed edge.
Round 23 :
Ch3, dc in each st around (100); join. (100)
Round 24 :
Ch1, sc in each st around (100); join. (100)
Round 25 :
Ch3, dc in each st around; at four corner peaks work (2 dc, ch2, 2 dc) into the same stitch to further define corner triangles; join. (100 with corner clusters)
Round 26 :
Ch1, sc in each st around including corner ch-2 spaces (count 104 sc) — note: the added corner clusters increase stitch groups slightly; you should now have 104 sc in total after working 2 sc into each ch2 corner space. (104)
Round 27 :
Ch3, dc in each st around (104); join. (104)
Round 28 :
Ch1, sc in each st around (104); join. (104)
Info :
We now have a squared motif with four defined points. From here we will add a decorative openwork lattice that creates the delicate cream frame visible in the photos.
— Decorative Lattice Frame (Switch to Cream / Frame Color) :
Info :
Change to cream yarn for the lattice. Join cream with sl st to any stitch at corner peak. We will create alternating openwork rounds and solid rounds to form the frame and small eyelet holes.
Round 29 :
Ch3, dc in same st, *dc in next 4 sts, ch3, skip 3 sts, dc in next 5 sts* rep around; at corner peaks work dc cluster as before. Join. (104 dc with ch3 eyelets spaced evenly)
Round 30 :
Ch1, sc in each dc and 3 sc in each ch3 space (this transforms the ch3 spaces into neat little holes); join. (count will be 104 + 8 sc from ch3 spaces = 112) (112)
Round 31 :
Ch3, dc in each st around (112); join. (112)
Round 32 :
Ch1, *sc in next 6 sts, 5 dc shell in next st* rep around to begin shaping an ornamental frame. Join. (112 with shells counted as worked into same stitch)
Round 33 :
Ch1, sc in each st around and 1 sc into top of each shell (112); join. (112)
Info :
At this point the frame is becoming ornamental; shells create the floral lace that transitions well into the scalloped outer edge. Keep motifs consistent — each motif should be blocked to the same dimensions before joining.
Round 34 :
Ch3, dc in each st around; when you reach shells, work (dc, ch2, dc) into the center st of each shell to reinforce decorative loops; join. (112)
Round 35 :
Ch1, sc in each st around; in the ch2 shell spaces work 2 sc to slightly enlarge those openings; join. (116)
Round 36 :
Ch3, dc around (116); join. (116)
Round 37 :
Ch1, sc in each st around; at four corner peaks, work (sc, ch4, sc) to create points with larger eyelets for joining later; join. (116)
Round 38 :
Ch3, dc in each st around (116); join. (116)
Info :
Final structural round for the single module: make sure corners are reinforced and holes aligned. Block motif flat to the measured width so all motifs match for easy joining.
— Motif Finishing and Blocking :
Info :
Sew in color tails loosely so you can adjust tension while blocking. Pin motif on blocking mat to exact desired diamond shape, gently steam or wet-block cotton and allow to dry completely. Repeat for each motif you will join for the runner.
— Joining Modules Into a Runner :
Info :
Decide how many motifs you need for your table. The photo shows 10 motifs in a single long row with pointed ends; this pattern explains joining two motifs at a time and then chaining them into a long runner by slip-joining the corner eyelets and side spaces.
Round 39 :
Place two blocked motifs wrong sides together aligning corners. Using cream yarn and yarn needle or whip stitch, join through the back loops only of both motifs across one side by sewing evenly through the sc rounds. Sew 1/3 of the side, then stop—final joining will be completed with crochet slip-stitch join for a neater look. (no st count)
Round 40 :
With cream and 3.5mm hook, sl st through the corner ch4 eyelet of motif A and motif B to join corners, then work sc into each available sc of both motifs across to create a neat join: sl st 1, sc in each available side st across. Fasten off when side is completed. Repeat connecting all motifs in sequence. (this is a joining row, stitch count varies by motif size)
Info :
For a stronger join, work an additional row of sc through both layers: join with sc through loops from both motifs and continue around until motifs are securely linked. Align spiral orientation consistently (all swirling clockwise in the photos).
Round 41 :
Along the long joined seam you can optionally add a narrow rib to disguise joins: attach cream with sl st and work 2 rounds of hdc in BLO across the join area only. This makes a subtle raised seam line visible in the center of the runner. (count depends on runner length)
Info :
If you prefer invisible join, use the join-as-you-go method: before completing the last frame round on an unjoined motif, slip-stitch into corresponding ch-4 peak of adjacent motif at four corner points and continue. The pattern above uses a sewn + crochet sl-st join for durability.
— Mid-Runner Reinforcement and Decorative Center Strip :
Round 43 :
Along the center line where motif corners meet, create an ornamental connecting strip. Attach cream, ch1 from the inner corner space and work: (sc, ch3, sc) into each corner ch4 eyelet along the runner length so a decorative chain appears between motifs. When you reach each module mid-side, work sc in connecting sc to maintain even tension. (count varies)
Round 44 :
Ch1, sc into each ch3 loop across the center strip to firm up the decorative chain; join ends with sl st. This central decorative band is visible between diamond points in the photo and gives the runner a lightly lacy spine. (count varies)
Info :
These decorative connecting loops are primarily aesthetic; adjust spacing or omit entirely if you prefer a simpler join. Maintain symmetry across the runner for best visual impact.
— Outer Scalloped Border :
Round 45 :
With cream yarn, work 1 round of sc evenly around the entire assembled runner, placing 2 sc into each noticeable corner ch-4 to maintain points. Keep the runner flat as you work. (st count varies based on number of motifs; maintain even spacing)
Round 46 :
Ch3, *skip 2 sc, 5 dc in next sc (shell), skip 2 sc, sl st in next sc* rep around the entire runner. At corner points, work a 7 dc shell (7 dc in one st) to preserve the peak. This creates the pretty scallop shells along the edge. (shell count corresponds to edge repeats)
Round 47 :
Ch1, sc in each st and work 1 sc into the center of each shell to anchor them; join. (st count varies)
Round 48 :
Ch3, in each anchored shell work (dc, ch2, dc) into the center sc to create little picot-like openings between shells; join. This gives the fine lacy detail that frames each swirl motif in the photographs.
Round 49 :
Ch1, sc around including working 2 sc into each ch2 space; join. This evens out the scallop and makes the edge tidy. (count varies)
Info :
Work two finishing rounds of sc or slip stitches to smooth any irregularities and to ensure the scallop is stable and not too floppy. Blocking again after border is highly recommended to shape scallops perfectly.
Round 50 :
Optional decorative picot round: ch3, sl st in top of same st to form tiny picot every 3-4 stitches along the sc round for an extra delicate finish. This is optional and purely decorative. (count varies)
— Tassel & End Finishes :
Round 51 :
Make two large tassels in cream for each end. Wrap cream yarn around a 6cm wide cardboard or ruler approx 60-80 times depending on desired thickness. Slide off and tie securely at the top with a small piece of cream yarn, then fold and trim ends evenly. Create the tassel shaft by wrapping 3-4 times with a small amount of purple yarn for a decorative band as in the photo.
Round 52 :
Attach tassel to runner by folding top loop into corner ch4 eyelet and whip-stitch tightly through several layers to secure. Tie off and hide ends. Repeat on the opposite end. (no stitch count)
Info :
To make the wrapped tassel band neat, wrap the purple yarn tightly around the cream shaft then secure underside with a few invisible stitches and a drop of fabric glue if desired. Trim tassel ends evenly and comb lightly for a soft finish.
— Final Finishing Rounds & Touches :
Round 53 :
Weave in all ends using a yarn needle. Tug gently on openwork loops and shells to ensure all are symmetrical; add 1-2 rows of sc where reinforcement is needed for durability. (no count)
Round 54 :
Final blocking: pin entire runner flat on a large towel or blocking board, steam lightly or wet thoroughly and allow to dry. Pay attention to scallops and corner points so they sit open and even. This final step transforms the runner into the crisp piece in the photos.
Info :
Store runner flat or gently rolled to avoid creases. If making more than one row of motifs in the future, repeat joining steps aligning corner points carefully to expand width or change layout to a grid instead of a single row.
— Variation Notes & Scaling :
Info :
To make a table runner longer simply add more motifs. To make a table mat, use fewer motifs and work the scallop border closer to the swirl module. You can also swap yarn weights: using a lighter yarn with a correspondingly smaller hook creates a more delicate effect, while thicker cotton gives a bold, substantial runner.
Finishing this runner is such a satisfying moment — watching each spiral come together into a long ribbon of colour and lace feels like creating something timeless. The tassels and scalloped border add a charming final flourish that makes it table-ready. 🧶💜 Display it proudly on a wooden table for instant vintage-modern charm and enjoy the cozy, handcrafted energy it brings to any room. Happy stitching and enjoy every spiral stitch! ✨