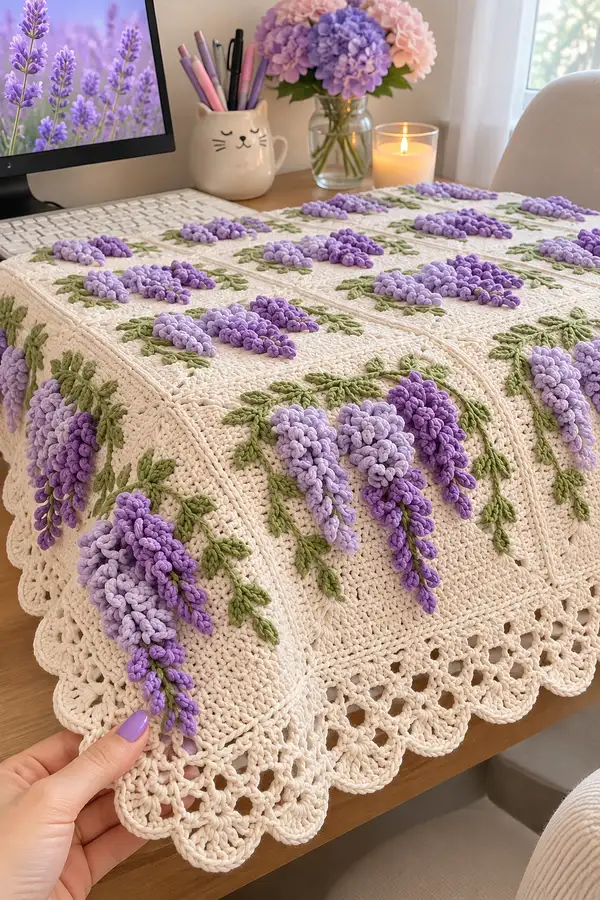
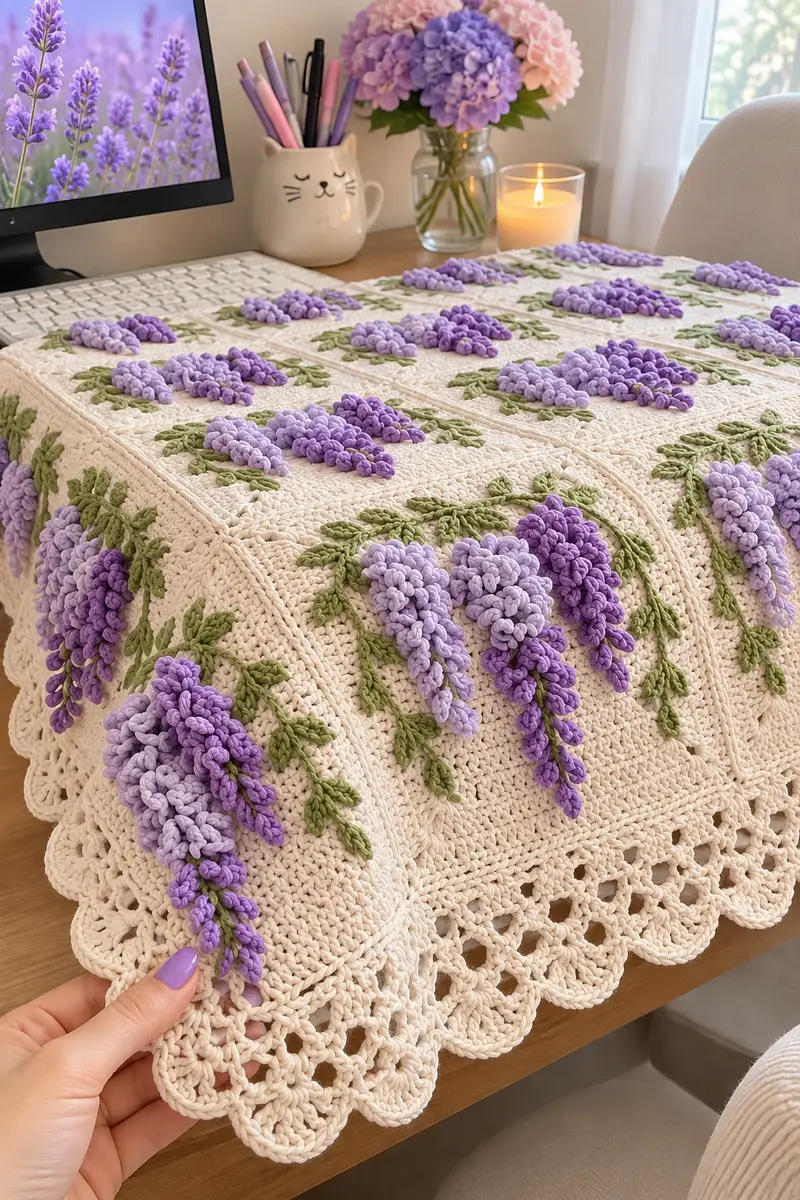
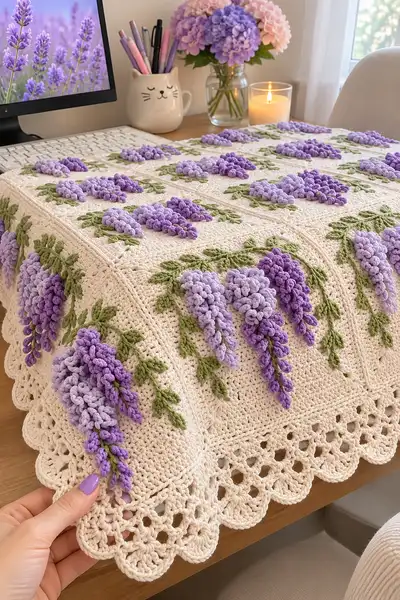
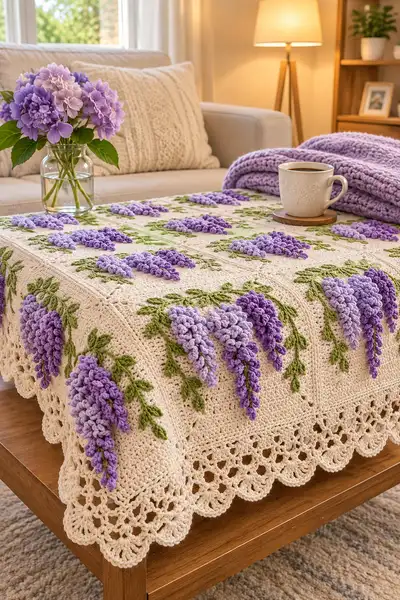
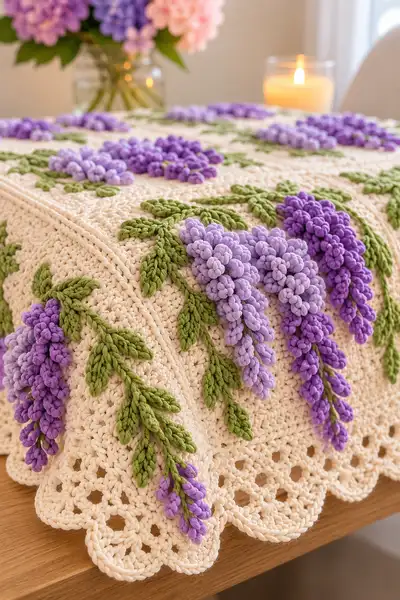
Create a luxurious cream bedspread adorned with sculpted purple wisteria clusters and trailing green leaves. This pattern uses textured loop/puff stitches for lifelike 3D floral sprays set on worked squares, joined and finished with a scalloped edge. Beautiful on a bed, table or sofa, the blanket pairs soft neutrals with tonal lavenders for an elegant, cottage-chic look. Detailed step-by-step instructions guide you through motifs, assembly, and the decorative scalloped border.
Progress Tracker
0% Complete
— Overview :
Info :
This bedspread is built from modular square panels worked in rounds. Each square features a textured cream background that receives attached 3D wisteria sprays and leafy vines made in contrasting colors. Work a gauge swatch to match tension—puff/loop stitches will compress the background so adjust hook sizes as needed. After making required squares, join them with a join-as-you-go method or whipstitch and finish with a scalloped border.
— Abbreviations & Notes :
Info :
All rounds are worked in continuous rounds unless otherwise specified. Use a stitch marker at the first stitch of each round and move marker up as you work. For puff stitches: yarn over, insert hook, yarn over pull up loop 4 times (or 3 for smaller puff), yarn over and draw through all loops, ch1 to secure as recommended. For loop stitches: wrap yarn around finger/hook and draw loop through to create long loop; secure with sc or hdc.
— Square Background (Make 20+ or desired number) :
Round 1 :
Work 4 sc into a magic ring (4)
Round 2 :
(1 sc, inc) x 4 (8)
Round 3 :
(2 sc, inc) x 4 (12)
Round 4 :
(3 sc, inc) x 4 (16)
Info :
You are creating a square by increasing evenly at four corner points. Place a stitch marker at the first st of each round to keep track. Turn ring slightly as you work to form right angles at each corner.
Round 5 :
(4 sc, inc) x 4 (20)
Round 6 :
(5 sc, inc) x 4 (24)
Round 7 :
(6 sc, inc) x 4 (28)
Round 8 :
(7 sc, inc) x 4 (32)
Info :
At this point your square is taking shape. The increases were placed so that there are 4 increase points (corners) per round; counts increase by 4 each round. Check corners visually and pull slightly to maintain right angled corners.
Round 9 :
(8 sc, inc) x 4 (36)
Round 10 :
(9 sc, inc) x 4 (40)
Round 11 :
(10 sc, inc) x 4 (44)
Round 12 :
(11 sc, inc) x 4 (48)
Info :
Round 12 yields 48 sts around—this is a good size for a square center. From here we will work even rounds to give a flat field for attaching motifs. Keep fabric flat; if ruffling occurs, adjust tension or skip an increase.
Round 13-16 :
1 sc in each st around (48)
Round 17 :
Work 1 sc in next 6 sts, ch2 (corner), 1 sc in next 12 sts, ch2 (corner), 1 sc in next 12 sts, ch2 (corner), 1 sc in next 12 sts, ch2 (corner) (48 total, counting ch2 as corner spaces)
Info :
Round 17 introduces ch2 corner spaces to make the next rounds easier to align for square joining and texture. Use the chain spaces as places to align later when joining squares together or adding the scalloped border.
Round 18-20 :
1 sc in each st and in each ch2 corner (48)
Round 21 :
1 sc in next 4 sts, 2 sc in next st, 1 sc in next 10 sts, 2 sc in next st, 1 sc in next 10 sts, 2 sc in next st, 1 sc in next 10 sts, 2 sc in next st (52)
Round 22 :
1 sc in each st around (52)
Info :
If making a large bedspread, repeat square count to make required number; blocking each square will ensure squares are the same size. Use a blocking board and pins to square up edges while damp or lightly steamed.
Round 23-28 :
1 sc in each st around (52)
Info :
Decide cluster placement now. For the pictured design place the main wisteria cluster centered towards one corner of each square, allowing trailing cluster stems to fall toward the square edge. Mark the exact stitch positions with safety pins or stitch markers for later attachment.
— Wisteria Cluster: Cone Spray (Make 1 large spray per square + extras) :
Overview :
Each spray is built by creating a tapered chain with staggered rows of puff or loop stitches worked along the chain to create stacked petals. You will work the base vine in green, then add clusters of puff stitches in lavender shades, gradually tapering the number of puffs per row to form a drooping cone.
Cluster Round 1 :
With green, ch 20 (foundation chain for vine). Turn, sl st in 2nd ch from hook and each ch across to make a narrow chain vine (18 sl st)
Info :
This chain length creates a trailing stem approx 9-12 cm depending on gauge. Adjust length as needed; for shorter sprays use ch12-14. The sl st vine gives a flat base to attach petals.
Cluster Round 2 :
Attach purple shade A at ch near vine base: ch1, sc in same st as sl st end, ch1, then work 7 puff stitches along the next 7 sl st: (yarn over, insert hook, pull up loop, repeat 3 more times, yarn over and pull through all loops to form puff, ch1 to secure) x7 across; finish with sl st in vine chain to anchor (7 puffs)
Cluster Round 3 :
Flip work slightly and move 2 sts toward tip: join same purple or shade B, ch1, sc in vine st, work 6 puff stitches (6 puffs) forming row 2 of petals. Fasten off and weave tail through the base of puffs to secure
Info :
Alternate purple shades to create tonal depth. For each puff keep the same number of loops (4 pulls) for full, round petals. Space rows by skipping 1 vine st between rows to stagger the petals for a fuller look.
Cluster Round 4 :
Move 1 vine st toward tip: join shade B, ch1, sc, work 5 puff stitches across (5 puffs)
Cluster Round 5 :
Move 1 vine st: join shade A, ch1, sc, work 4 puff stitches (4 puffs)
Info :
Continue tapering the puff rows to make a cone: 7,6,5,4,3,2,1 puff rows typically. The pictured clusters show 6–8 rows with the largest rows near the base. Keep the puffs close together to create a dense cluster. Alternate colors by row or by single pulses to mimic natural variegation.
Cluster Round 6 :
Join deep purple, ch1, sc, work 3 puff stitches (3 puffs)
Cluster Round 7 :
Change to light lavender, ch1, sc, work 2 puff stitches (2 puffs)
Cluster Round 8 :
Final tip: join pale lavender, ch1, sc, work 1 puff stitch, sl st to vine tip. Fasten off and leave long tail for sewing. (1 puff)
Info :
For each puff row, always secure with a ch1 after completing the puff to lock it in place; weave the tails through the back of puffs and chain base for extra secure finish. Make 3–4 small sprays per square if you want clusters of varying sizes like the photos.
Cluster Round 9 :
Optional: To create very full clusters, insert a short extra row at base: join deep purple along rounds base and make 4 additional puffs offset between original puffs to fill gaps. Fasten off and weave ends.
— Narrow Hanging Petal (Make multiple for a tapered tail) :
Round 1 :
Ch 8 with purple shade; sl st to make a short chain stem (7 sl st)
Round 2 :
Along chain, make 6 loop/puff stitches spaced by skipping every other sl st: (puff or loop in st, skip 1) x6; secure at end with sl st; fasten off leaving tail for sewing (6 small petals)
Info :
These narrow tails are sewn to the bottom of the cone to extend the droop. Use darker purples near tips and lighter purples at the base for a natural gradient. Make 1-3 tails per spray depending on desired fullness.
— Leaf & Vine Elements (Make 3–6 per square) :
Leaf Round 1 :
With green, ch8. Row 1: sc in 2nd ch from hook, hdc in next, dc in next, tr in next 2 sts, dc in next, hdc in next, sc in last st. Fasten off and block to shape (8 sts leaf)
Leaf Round 2 :
For a thicker leaf, rejoin in leaf center and work sc around leaf edge: (sc evenly around leaf perimeter) creating a neat outline. Fasten off, weave ends.
Info :
Alternate leaf sizes by starting with ch6 for small leaves and ch10 for large leaves. Shape leaves gently with fingers and lightly steam-block to hold curve. Stagger leaves along vine chain and secure with a few stitches so they point naturally away from the flower.
Vine Stem :
To create vine stems use green: ch a length equal to the spray placement, work sl st back along chain to create a flat stem. Sew vine to square using small whipstitches along the sl st base before attaching petals, or attach after petals are sewn for more accurate placement.
— Placement & Attachment (Per Square) :
Info :
Mark the stitch positions on each prepared square where the vine and cluster will be positioned. Typically the cluster base sits about 8–12 sts in from one corner and about 8–10 rounds down from the outer edge for the draping look in photos. Use a row/column map for consistency across squares.
Attach Vine :
Place the vine sl st chain onto square aligning base to marker. Using matching green yarn and tapestry needle, sew vine along its length into the background with small, invisible stitches—secure base firmly where cone will sit.
Attach Cluster :
Position the cone spray above the vine base and sew through the chain foundation and the back tails of each puff to anchor; use small stitches through the chain base and through the ch1 securing loops of the puffs. For durability use 6–10 small backstitches around the base depending on cluster size.
Attach Hanging Tails :
Sew the narrow hanging petals to the bottom center of the cone with a few secure stitches. Tuck ends under the vine and weave securely for neatness.
Info :
Sew slowly and check placement often; pin clusters with optional safety pins while sewing so you can adjust the drape. Trim or tuck any excess tails and weave them into the square fabric for a tidy finish.
— Joining Squares (Join-As-You-Go or Seam) :
Option A - Join-As-You-Go (JAYG) :
Work the final round of each square in cream up to the corner. On final round, when reaching joining side, replace each sc with sc through both square edges: insert hook into loop of new square and corresponding loop of adjacent finished square and complete sc through both layers. Join edges stitch by stitch until square is attached. Repeat for all sides.
Option B - Whipstitch Seam :
Block all squares to identical size. Lay squares right sides up and whipstitch with cream yarn along adjoining edges with invisible ladder stitch so seams are flat. Use mattress stitch for a neat join.
Info :
For the pictured bedspread, JAYG produces a cleaner continuous surface. If you prefer the seam line less visible, use mattress stitch with tails on back side and a small decorative join to echo motif seams.
— Scalloped Border (Work around entire joined spread) :
Round 1 :
With cream, work 1 sc evenly around the whole blanket, placing (3 sc) in each corner chain space to maintain shape. Keep stitch count even and stop when you reach starting point. Fasten off and rejoin for next round. (This is a tidy foundation round.)
Round 2 :
Join cream, ch3 (counts as dc), *skip 1 st, dc in next st, ch2, dc in same st, skip 1 st, dc in next st, ch3, sl st in base of ch3 to form small shell*; rep around. This creates a small openwork net to start scallops.
Info :
Adjust spacing to keep scallops even. If blanket edge has many corners due to square joins, readjust ch spacing to ensure scallops fall evenly across edges rather than bunched up at seams.
Round 3 :
Work larger scallops: *in each shell base work (5 dc, ch2, 5 dc), sl st to next shell base*; rep around. This forms the rounded scallops similar to photos.
Round 4 :
Edge finishing: In each scallop work sc around the shell perimeter to smooth edges, then sl st in valley between scallops. Fasten off and weave ends neatly. Block scallops into shape with pins for a crisp finish.
Info :
For deep scallops like in photos, repeat Round 3 once more for a double-row scallop, then finish. Blocking is important—pin each scallop at equal intervals and lightly steam or wet block to set shape.
— Optional Embellishments :
Info :
To add extra texture, embroider tiny French knots or small picot flowers between sprays using leftover lavender yarn. You can also add tiny crocheted buds (3-4 ch closed into a ring) to densify clusters.
— Finishing Touches :
Info :
Weave in all ends, trim tails, and press lightly. For washable finish use a gentle hand wash and reshape while damp. If the yarn label allows, low temperature machine wash inside a laundry bag; otherwise hand wash and dry flat.
— Yardage and Repeat Guide :
Info :
For a throw/bench cover using 20 squares (4 x 5), estimate: cream 800–900g, purples combined 200–250g, green 150–200g. For a full bedspread increase square count accordingly; make a sample square to measure finished size and multiply to fill desired dimensions. Keep extra yarn of main colors to avoid dye lot variations.
— Pattern Troubleshooting & Tips :
Info :
If clusters look sparse, add an extra row of puffs near the base (increase by 1–2 puffs) to densify. If petals are too long, reduce loop pulls from 4 to 3. For tighter fabric switch to 3.75mm hook for background and 4.0mm for puffs opposite if you need more body.
Your finished lavender wisteria bedspread will feel like a little garden draped over your furniture — soft cream background with sculpted purple clusters that catch the light and invite touch. Each modular square is an opportunity to practice sculptural puff stitches and precise assembly that together create a stunning, heirloom-quality piece. I hope this project fills your home with cozy, floral charm and gives you many relaxing hours of crochet joy. 🧶💜🌿