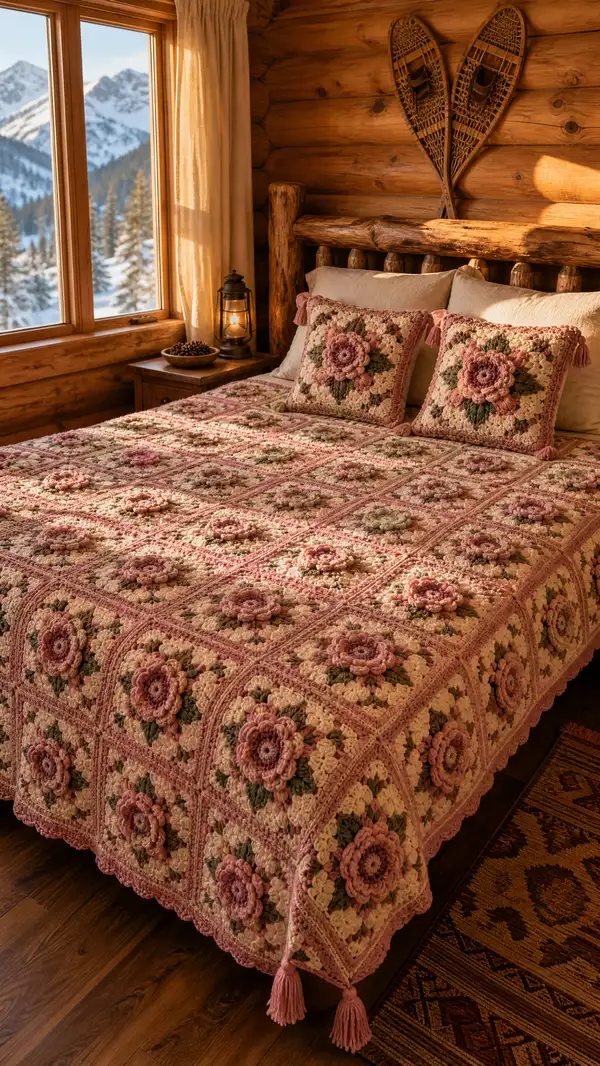
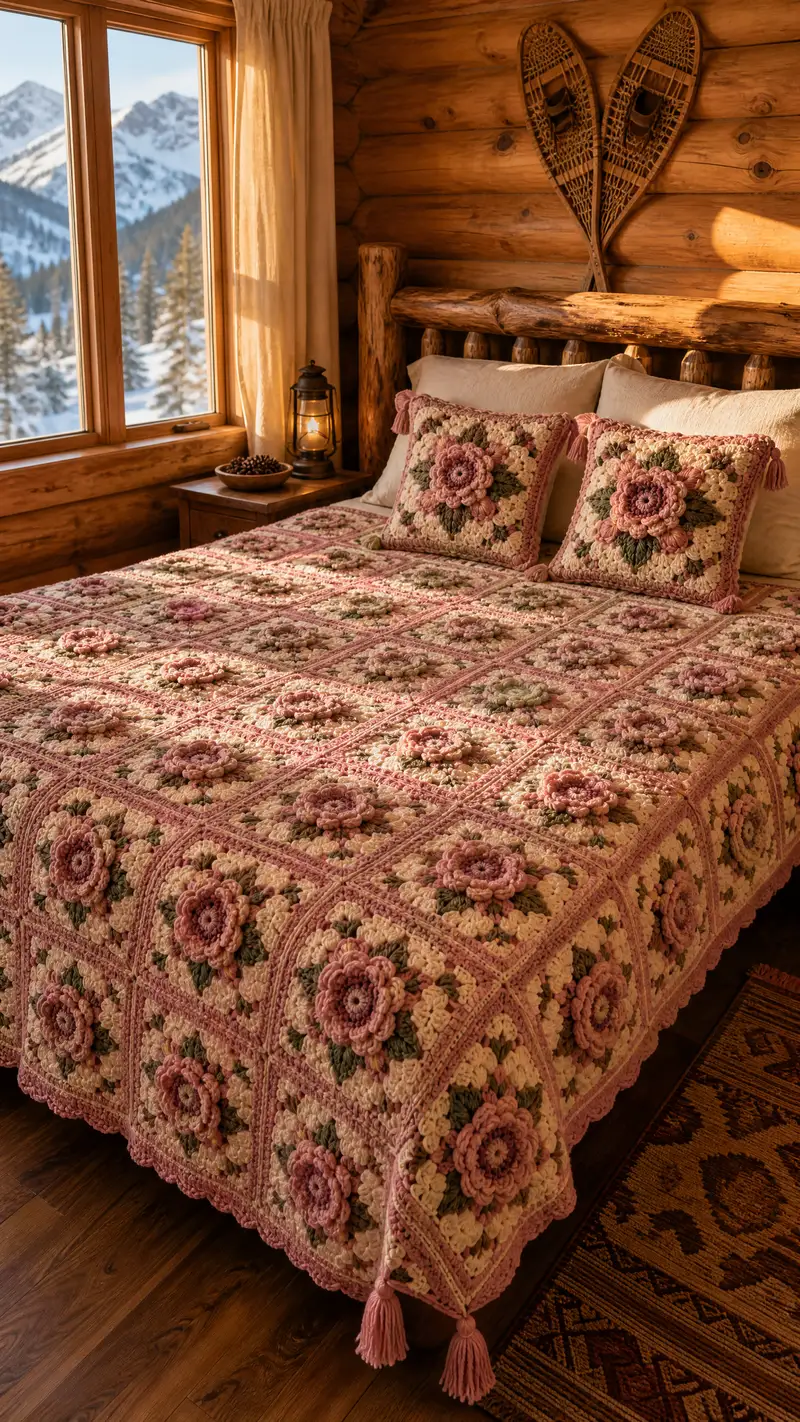
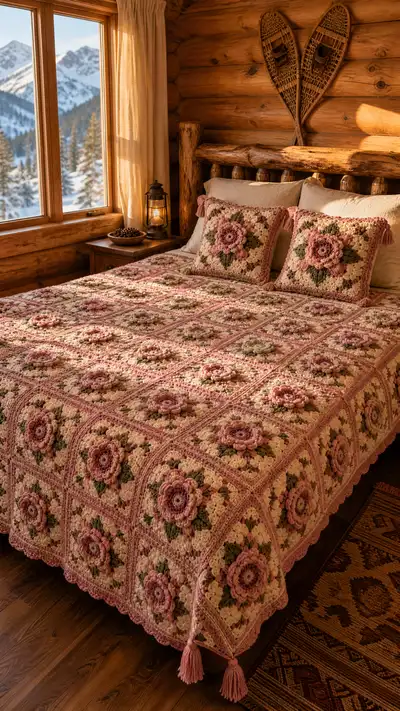
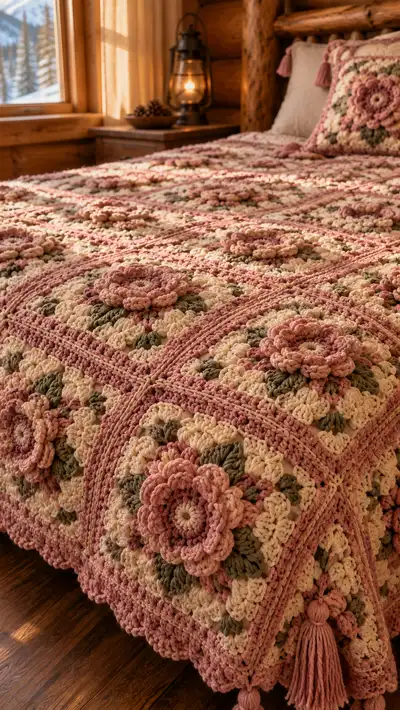
A warm dusty-rose granny square bedspread featuring raised 3D floral motifs, soft cream backgrounds and sage-green leaf accents. Each square has a puff-petal flower that pops off the surface, joined into a cozy queen-sized spread with a scalloped border and tassel corners. This pattern uses bulky, textured stitches for a plush hand and vintage-inspired vibe—perfect for a rustic bedroom or as an heirloom gift.
Progress Tracker
0% Complete
— Notes & Gauge :
Info :
Gauge is not critical for a bedspread but affects final size. Sample one square: 16 rounds (flower + square) should measure approximately 10.5" (27 cm) across when using bulky yarn and 6.5mm hook. Adjust hook size if needed. Make a gauge square, wash and block to match texture.
Info :
Special stitch - Puff: Yarn over, insert hook, yarn over and pull up loop (repeat 4 times to have 9 loops on hook total), yarn over and pull through all loops, ch1 to close puff. This pattern uses 5-loop puff variation throughout; instructions will specify when to work puff.
— Floral Center Motif :
Round 1 :
Make a magic ring, ch3 (counts as first dc), work 11 dc into ring, sl st to top of ch3 to join (12)
Round 2 :
(1 dc, 1 inc) x6 using increases evenly spaced (ch0 between as needed) (18)
Round 3 :
(2 dc, 1 inc) x6 (24)
Round 4 :
(3 dc, 1 inc) x6 (30)
Round 5 :
(4 dc, 1 inc) x6 (36)
Round 6 :
(5 dc, 1 inc) x6 (42)
Round 7 :
(6 dc, 1 inc) x6 (48)
Info :
By Round 7 the center is a flat disc of 48 dc. Place stitch markers every 12 stitches to mark 12 equal segments — these will be your petal locations. Use the same main dusty rose color for the flower centers.
Round 8 :
*Skip next 3 dc, puff in next dc, ch1, sl st in next dc* repeat around into the 12 marked segment centers to create 12 evenly spaced puff anchors (48 anchor points but 12 puff placements)
Round 9 :
Working into each puff anchor from Round 8: ch2, (puff, ch1) x3 in same anchor to build layered petal base — each petal uses 4 puff loops separated by ch1 s, create 12 petals (visual count: 12 petals)
Info :
Maintain consistent tension on puff stitches so petals sit evenly. After finishing Round 9, gently tug and shape petals outward so they read clearly against the center disc.
Round 10 :
Sl st to base of first petal, ch1, sc in same st, *ch3, sc in base between next two petals* repeat around to form small picot-like connectors (12 ch-3 loops)
Round 11 :
Change to dusty rose darker shade (Info: Change to darker dusty rose yarn now; fasten in with sl st). Work into ch-3 loops: (puff, ch1, puff) in each ch-3 loop to form a second layer of petals (12 larger petals)
Round 12 :
Sl st to join, ch1, sc in each stitch around the outer edge of petals to tidy and form a circular petal base (approx 48 sc depending on placement) (48)
Info :
Weave in tails lightly but leave long tail from Round 12 if you will be sewing the flower layer onto the square base. This decorative flower is worked as part of the square assembly in this pattern; you can also make it separately and sew on later.
— Square Base Rounds (turning the circle into a square) :
Round 1 :
Change to cream/ivory yarn. Attach with sl st into a stitch just outside any petal edge. ch3 (counts as dc), 2 dc in same st, *skip 2 st, 3 dc in next 3 st clusters*, repeat to form a soft circular granny beginning; adjust spacing to create 4 corner points by planning increases every 12 sts (approx 48-60 dc total depending on placement)
Info :
:
We will now create square corners over several rounds. To keep math consistent, use the 12-segment markers from the petal round. Identify four segments opposite each other for corners and work corners as (3 dc, ch2, 3 dc).
Round 2 :
Work in established pattern to arrive at an even round of dc. At each marked corner segment work (3 dc, ch2, 3 dc) in the same space. Between corners work groups of 3 dc separated by ch1 spaces so you have 4 corners and evenly spaced 3-dc groups. Result: stitch count expands to roughly 72 dc including corners (72)
Round 3 :
Switch to cluster/granny style: ch3 (counts as first dc), *skip next st, 3 dc cluster in next sp (cluster over same base stitch), ch1* repeat between corners; in corner spaces work (3 dc, ch2, 3 dc). Maintain four corners so square becomes more defined (approx 84 clusters/spaces)
Round 4 :
Change to sage green for leaf cluster accents (Info: Carry cream inside or fasten off and join sage green where indicated). In each ch1 space on sides work small leaf clusters: (hdc, puff, hdc) into the same space alternating to create a subtle leaf texture; do not alter corner structure (stitch count remains similar)
Round 5 :
Return to cream yarn. Work 1 sc in each stitch and 3 sc, ch2, 3 sc in corner spaces to further square-up shape (sc count approx 120 depending on your previous counts) (approx 120)
Info :
At this stage the base is approximately 9-10" across. If you prefer a larger square, add extra rounds of granny-style clusters before moving to the final decorative edge. Make sure each square is identical in stitch count if you plan to join squares by crochet join methods.
Round 6 :
Work an even round in BLO: 1 sc in each st BLO to create a slight ridge that will show once squares are joined (approx 120)
Round 7 :
Change to dusty rose sash color. Work 1 rnd sc along edges placing (sc, ch1, sc) into corners to keep square shape. This thin sash will become the visible join ridge later (approx 120)
Round 8 :
Work 1 rnd hdc across each side to bulk up sash and create a surface to join squares (approx 120)
Round 9 :
Switch to cream again. Work 1 rnd sc in each st to smooth junction between sash and body of square; fasten off leaving 12-15" tail for joining if preferred (approx 120)
Info :
Final size per square with these rounds should be approximately 10.5"–11" (27–28 cm). The puff flower sits centered on the square. Make 56 squares for a 7 x 8 layout (queen-sized bedspread). You can adjust number to fit smaller or larger beds.
— Flower Overlay Finishing (optional separate flower version) :
Round 1 :
If you made the flower separately: with darker dusty rose, ch4, join to form a ring, ch3, work 12 dc into ring (12)
Round 2 :
(1 dc, inc) x6 (18)
Round 3 :
(2 dc, inc) x6 (24)
Round 4 :
Form 12 puff petal anchors spaced evenly by working *ch3, sl st* to hold position. Join
Round 5 :
Work 5-loop puff in each ch3 loop, ch1 between petals (12 petals)
Round 6 :
Edging round: switch to lighter dusty rose and sc around the base of petals to tidy (approx 48 sc)
Info :
Sew the separate flower over the square's center using the long tail left earlier. Place the flower so petals rest directly on the cream field and stitch through the base round 12 area to secure without flattening petals.
— Assembly & Joining Squares :
Info :
Layout plan: arrange squares into a 7 columns x 8 rows grid (56 squares). Work left to right, top to bottom. You can join-as-you-go (JAYG) or sew squares with mattress stitch. JAYG gives a neater crochet seam and is recommended for this style with visible sash ridges.
Join Round 1 :
With dusty rose sash color and hook used in sash, align first square with second square right sides together. Join by inserting hook through corresponding stitch on square A and square B, sl st to join through both, continue across seam working sl st through both loops of both squares to create a flat seam. Repeat for horizontal rows (number of sl st equals number of sts on side; keep consistent).
Info :
When joining vertically, join the whole row of joined squares to the row below using the same method. Keep tension slightly loose to avoid warping; pin seams to maintain a flat join.
Join Round 2 :
To create visible sash ridges across joins, work 1 rnd sc along both sides of each seam in dusty rose, placing 1 sc in each stitch of the seam through both layers. This gives a raised sash line that frames each square (approx stitches will equal seam length).
Info :
If using mattress stitch: use the long tail from square sash round to whip or mattress stitch underneath the sash to form an invisible seam. Block joined panels flat before adding border.
Join Round 3 :
Once all squares are joined, work 1 rnd sc around the entire outer edge in cream to even the perimeter and prepare for outer border (count will equal perimeter stitch count; approximate 7 squares x 11" = 77" per side—stitch counts will vary).
Info :
Double-check your outer dimensions now. If your spread is too small/tight, add an extra band of granny clusters around the whole panel to increase size before the scalloped border.
— Center Panel Stabilizing Rounds :
Round 1 :
Working in the round with cream, ch1, sc evenly around entire bedspread perimeter, placing 3 sc in each corner if needed to keep shape (approx full-perimeter sc count)
Round 2 :
Work 1 rnd hdc in each st to give a slightly raised frame (perimeter hdc count)
Info :
These stabilizing rounds prevent edges from stretching and provide a base for the scalloped border. Carry or fasten off yarn as needed.
— Main Decorative Border (Scalloped & Textured) :
Round 1 :
Attach dusty rose along edge: ch3 (counts as dc), *skip 2 st, 5 dc cluster in next st (shell), skip 2 st, dc in next* repeat around, placing shells centered on each square seam for visual rhythm. Corners: work 3 dc, ch2, 3 dc (shell corner) (approx shell count variable)
Round 2 :
Work 1 rnd sc in each dc and shell stitch to tidy, placing 3 sc in each corner ch-2 space (stitch count approx perimeter)
Round 3 :
Switch to cream for contrast: in each shell space work (ch3, puff, ch3) anchored in shell center to create raised scallop points; sl st to join (no change in base stitch count)
Info :
Work carefully at corners—add an extra ch1 or ch2 in scallop placement if shells cluster and cause pulling. Blocking will help smooth shell shapes.
Round 4 :
Change to dusty rose and work 1 rnd dc across entire border to unify color (perimeter dc count)
Round 5 :
Work a decorative scallop: *skip 1 st, 7 dc in next st, skip 1 st, sl st in next* repeat around to form a deep scalloped edge (approx scallop count variable)
Info :
Check the way the scallops fall every few repeats. If scallops shorten near corner, add or remove a dc in that scallop to make edges even visually. Keep symmetry across sides.
Round 6 :
Work 1 rnd sc in BLO to create a defined inner ridge above scallops and tidy the border base (perimeter sc count)
Round 7 :
Optional texture: with sage green, work small leaf picots between scallops by working *(sc, ch3, sl st in base)* between scallop centers to add a subtle accent (no change in structural stitch count)
Info :
Repeat the scalloped round until you achieve desired drop and fullness — for this bedspread the designer used three scallop rounds alternating dusty rose and cream for a deep textured edge.
— Additional Outer Edging Rounds :
Round 1 :
Attach dusty rose. Work 1 rnd sc around to stabilize scallops after blocking (perimeter sc count)
Round 2 :
Work 1 rnd picot: *sc in next 3 sts, ch3, sl st into last sc* repeat around for small decorative points (perimeter)
Round 3 :
Work 1 rnd reverse single crochet (crab stitch) in dusty rose for finished rolled edge (perimeter)
Info :
For extra weight and a more drapey border, work an additional round of 1 dc in each st using a larger hook (5.5mm) then re-block. This creates a denser border that falls beautifully on a bed.
— Tassels & Corner Finishing :
Info :
Make four tassels using combined dusty rose strands of approx 6-8" long looped strands. Each tassel uses roughly 40 strands folded and tied. Attach tassels to each corner by sewing through the corner ch-2 space with a strong yarn tail and knot securely. Braid or wrap head with a small scrap and sew down tightly.
Round 1 :
Optional: to make tassels heavier, add a small wrapped yarn core inside tassel head before wrapping outer strands. Attach with sturdy yarn and hide ends in the border.
Info :
Distance from bed corner to tassel tie can be adjusted for a different look — longer tassels accent fuller scallop edges, shorter tassels give a tidy finish.
— Blocking & Finishing :
Info :
Block entire bedspread flat after joining and before final border. Use blocking mats and T-pins to open out scallops gently and even out square edges. Light steam or spray block if using acrylic-blend bulky yarn; avoid overheating natural fibers like wool.
Info :
Weave in all ends by running your needle through the reverse side of the sash to hide tails. Secure tassels and give a final gentle steam to set shape. Trim any long stray fibers for a neat appearance.
Info :
Optional finishing touch: sew a thin cotton or flannel backing to the underside of the spread to protect delicate puff petals and reduce friction on bedding sheets.
This Dusty Rose Floral Granny Bedspread is a labor of love that rewards patience with a heirloom-quality result. Each square and petal is a small piece of art; when assembled the whole spread becomes a warm, textured statement for any bedroom. The layered petals catch the light beautifully and the scalloped border finishes it with a vintage flourish. Enjoy the process, take your time, and you’ll have a cozy piece to treasure and pass along. 🧶🌸✨