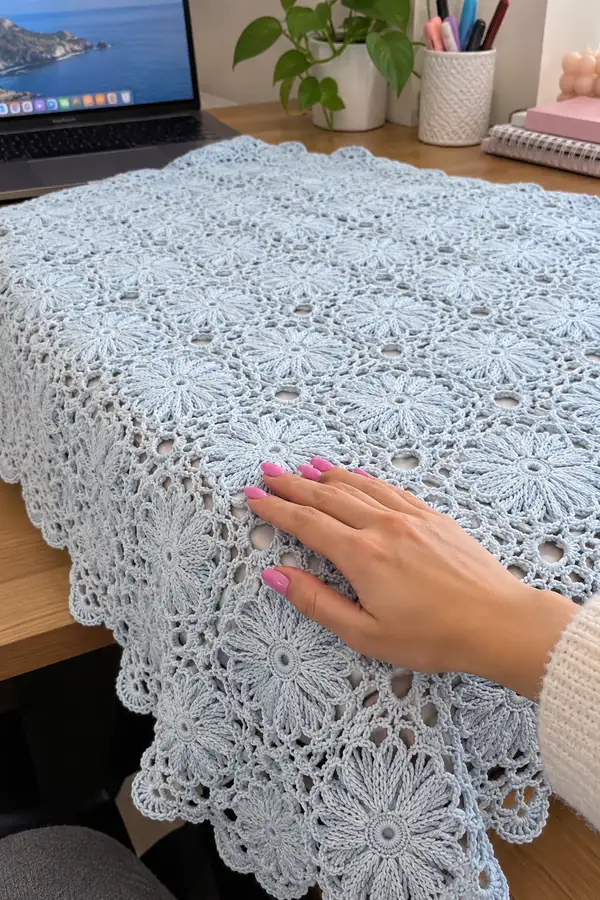
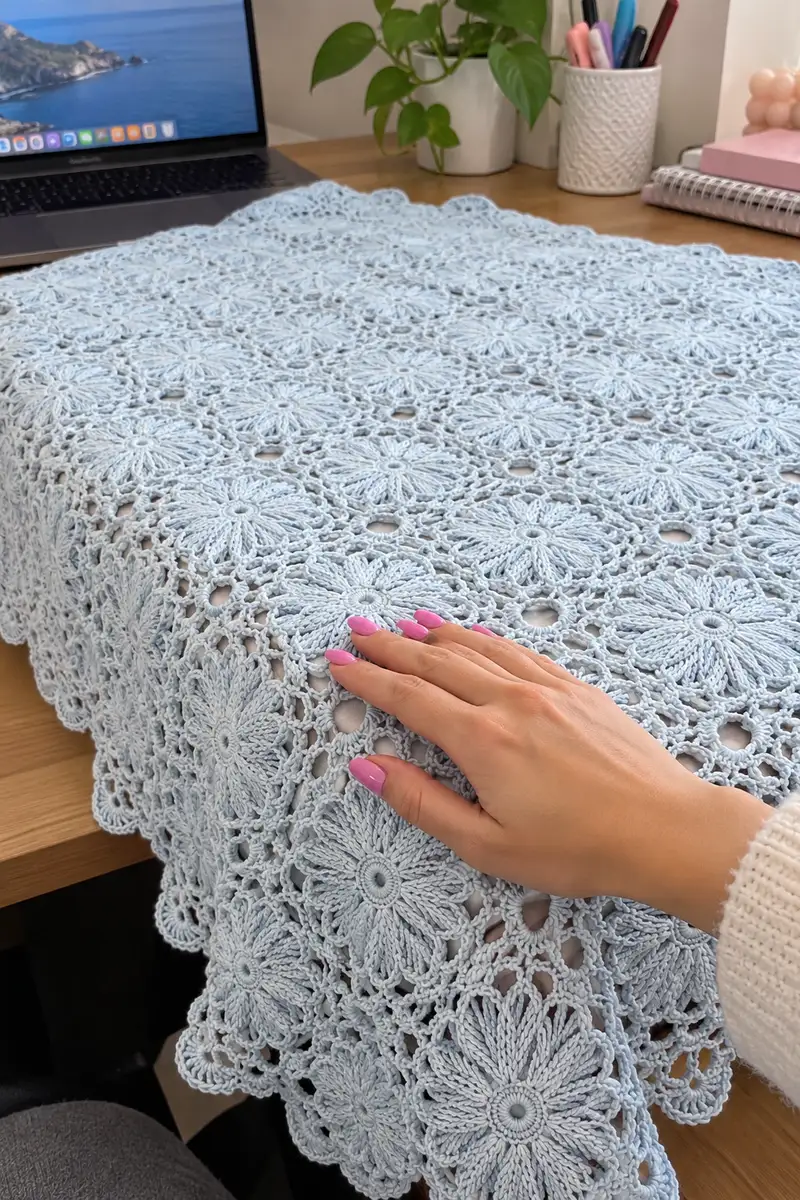
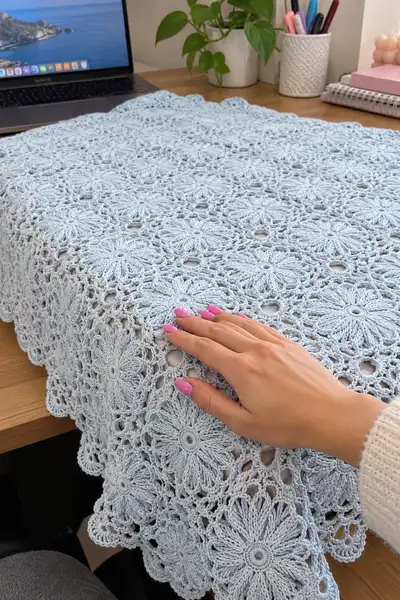
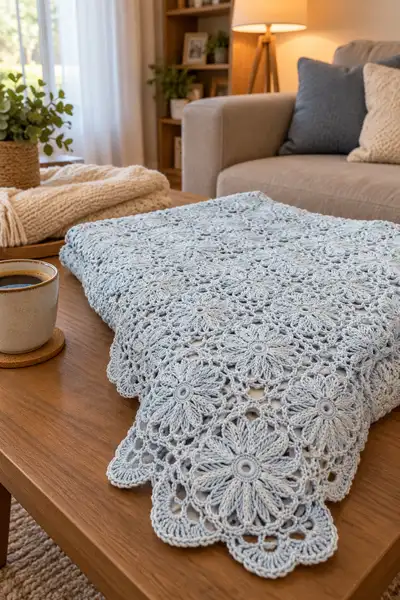
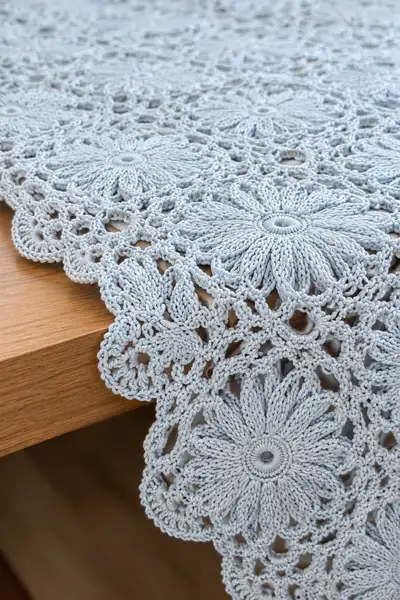
Create a delicate powder-blue bedspread built from linked daisy motifs. This textured lace-like cover uses elongated petal clusters and a scalloped border to produce a soft, airy drape. The pattern includes motif construction, join-as-you-go instructions and a full scalloped edging so you can scale from a table runner to a full bedspread.
Progress Tracker
0% Complete
— Notes & Gauge :
Info :
Gauge and motif size will determine final measurements. With DK/light-worsted cotton and a 3.5mm hook each completed daisy motif (after blocking) measures approximately 12-13 cm (4.7-5.1 in) across the petal points. Work a swatch motif, block it, and measure to set the motif count for your desired finished size.
Info :
Terminology: when we say 'work into loop' we mean the long chain loop created on the previous round. When joining-as-you-go, you will attach motifs by slip-stitching into adjacent motifs' chain spaces following the instructions provided later.
— Daisy Motif (Make many — core repeating unit) :
Round 1 :
Make a magic ring (mr). Ch1, 12 sc in mr. Join with sl st to first sc. (12)
Round 2 :
Ch1. *Sc in next st, ch7; rep from * around for a total of 12 ch-7 loops, working sc into each next st. Join with sl st to first sc. (12 sc + 12 ch-7 loops)
Info :
These ch-7 loops will form the base of each petal. Keep the chain height loose but even so the petals sit upright. Use a stitch marker at the beginning of the round to keep track of the first loop.
Round 3 :
Petal round: Into each ch-7 loop work: (ch2, 10 dc, ch2, sl st to the base point). Work around: (12 dc in ch-7 loop) x 12 (144 dc). Join with sl st to base point.
Info :
Each petal in round 3 is tall to give the sculpted look. The ch2 at each end gives a gentle curvature. Keep the dc tall and consistent — if your dc are short, try yarn-over twice (tr) in the center of the petal for a more pronounced peak.
Round 4 :
Working behind the tips of petals, sl st along the outer edge of the first petal to reach the space between petals. *Ch3, skip to next petal between-petal space, sl st into that space; rep from * to form 12 small ch-3 arches. Join with sl st. (12 arches)
Round 5 :
Into each ch-3 arch: (sc, ch6, sc) — this creates twelve ch-6 loops sitting between petals. Join with sl st. (12 sc + 12 ch-6 loops)
Info :
The ch-6 arches help create the lace network between motifs. Maintain even tension — these loops will later be used for joining and to pick up stitches for the motif border.
Round 6 :
In each ch-6 loop work: sc, ch1, puff5, ch1, sc. Puff5 = yarn over, insert hook into loop, pull up yarn, repeat 4 times more (5 loops on hook), yarn over and pull through all 5 loops, ch1 to close. (12 puff-petals) Join with sl st.
Info :
Puff5 creates the textured lower petal fill you see in the motif. Work puff stitches gently — do not pull too tight when finishing the puff or the loop will flatten. If you prefer, work 7 shorter puff loops (puff7) for a fuller look; keep counts consistent per motif.
Round 7 :
Turn motif and work a round of sc around the whole motif inserting 1 sc into each petal base and 1 sc into each puff space: (work into base of petal: sc, into puff ch1 space: sc) repeat around. Expect roughly 24 sc evenly spaced — this round standardizes the edge for the join round. Join with sl st. (~24 sc)
Round 8 :
Join-round with connector loops. *Ch4, skip 2 sc along edge, sc into next sc; rep from * around to form 12 ch-4 connector arches. Join with sl st. (12 ch-4 spaces)
Info :
If you plan to sew motifs together later rather than join-as-you-go, fasten off here and leave a long tail for sewing. Blocking the motif now helps keep the ch-4 connector spaces uniform for neat joining.
Round 9 :
Edging base: Into each ch-4 connector space work: (sc, ch5, sc). This forms the small open arches around the motif. Join with sl st. (12 sc + 12 ch-5 loops)
Round 10 :
Decorative scallop foundation: Into each ch-5 loop work: (sc, hdc, 7 dc, hdc, sc) — this forms a scalloped petal edging. Repeat for all 12 loops. Join with sl st. (12 scallops, each 11 stitches across approx.)
Info :
These scallops define the outer silhouette of each flower motif and ultimately become the scalloped outer edge of the entire bedspread when motifs are joined. Keep stitch counts consistent per scallop.
Round 11 :
Finishing row: Sl st evenly around scallop tips to tidy edge, finishing with sl st into starting st. Fasten off leaving a 30-40 cm tail if you will sew motifs together later, or carry yarn for join-as-you-go instructions below. (Fasten off)
Info :
One motif is now complete. Block motif lightly by pinning it to shape on a flat surface and misting or steam-block carefully. Repeat to make the number of motifs required for your project. Save a small sample of 4 motifs joined to confirm motif-to-motif gauge before making all motifs.
— Join-As-You-Go (JAYG) Method — Join while working the final motif round :
Info :
Join-as-you-go is recommended for seamless finish and to maintain even tension. Join motifs in rows: place a finished motif (motif A) with right side up and align a new motif (motif B) so that the scallops match. You will join on Round 10 (scallop round) or on Round 8 if you prefer a simpler join. The example below joins on Round 10 during the scallop formation.
Round 12 (JAYG join step) :
Work motif until you reach the scallop you want to join. For the scallop that touches an already-made motif: work sc, hdc, then when you have completed the 3rd dc of the 7 dc scallop, insert hook into the corresponding scallop top of adjacent motif and sl st to join, then continue remaining dc of the scallop on the working motif. This creates a seamless scallop-to-scallop join. Repeat for each adjacent scallop connection—typically 2 or 3 joins per motif in a blanket grid. Finish scallop and continue to next scallop. Complete motif and fasten off as usual.
Info :
When joining a motif into the body, you will usually make 2–4 slip-stitch joins depending on how many neighbors are already in place (edge motifs join fewer neighbors). Keep the tension of sl sts identical to surrounding stitches to avoid pulling.
Round 13 :
Corner and edge considerations: for motifs placed at the beginning of a row (first motif) you will junction only on one side; for motifs that are interior you will join to motifs on left, top, and possibly top-left diagonal. The pattern for a square grid uses 12 joins per interior motif pattern: ensure you follow the diagram you plan for layout.
Info :
Work joined motifs into strips across (rows). A recommended workflow: make 5–6 starter motifs and join them into a horizontal strip. Block the strip and measure width. This lets you calculate how many motif columns are needed to reach your bed width.
— Layout & Motif Count Guidelines :
Info :
Estimate motif count using blocked motif diameter (example: 12.5 cm per motif). For a throw 130 cm x 150 cm you will need approx 11 x 12 motifs = 132 motifs. For a queen bedspread 230 cm x 230 cm you will need approx 18 x 18 = 324 motifs. Always make 10–20% extra motifs in case of errors or replacements.
Info :
Example sizes by motif count: table runner (4 x 8 motifs) ~ 13 x 40 cm; lap throw (8 x 10) ~ 100 x 125 cm; twin bedspread (14 x 16) ~ 175 x 200 cm. Adjust counts to your blocked motif size.
— Joining Rows Into Panels :
Round 14 :
Make a starter strip of 6 joined motifs (or desired width). To add a second strip, join the second strip to the first by aligning scallops and working a row of sc and sl st across both edges: with right sides together, insert hook into outer chain spaces on both strips and work sl st through both loops to seam. Continue across the length of the strips to create a stable seam. Repeat until your desired length is reached.
Info :
Seaming two completed strips is faster but slightly less seamless than join-as-you-go. For a perfectly continuous look, always prefer joining motifs into the growing blanket during Round 10 as described above.
Round 15 :
Diagonal joins (optional): where motifs touch only at corners you can join with 3 sl sts into the small chain spaces between scallops, creating a small decorative nodal join. This helps fill small open holes in the lattice if you prefer a more closed fabric.
Info :
Keep a consistent scheme: choose either JAYG on scallop round or seam-as-you-go using sc into paired chain spaces. Mixing methods is fine but tension differences may become visible.
— Main Blanket Border (worked after all motifs are joined into the full panel) :
Round 16 :
With right side facing and using a 3.25–3.5mm hook, work 1 rnd sc evenly around the entire assembled panel, placing 3 sc in each motif scallop valley (small trough created between scallops) and 1 sc on each scallop peak to create regular points. Work evenly so corners do not pucker; at corner points add extra sc to maintain flatness. (variable stitch count depending on project size)
Info :
This round evens the perimeter and builds a neat foundation for the decorative border. Keep stitch density uniform by spacing sc evenly; use pins to shape the panel on your table if needed while you crochet.
Round 17 :
Foundation for scallop border: *Ch5, skip 2 sc, sc in next sc; rep around. This creates consistent ch-5 loops to form the scalloped shells. Join with sl st. (one ch-5 per scallop peak)
Round 18 :
Into each ch-5 loop work: sc, hdc, 9 dc, hdc, sc. This forms a larger scallop over each motif peak and blends into adjacent scallops for a continuous curved border. Join and fasten off. (one big scallop per motif scallop)
Info :
If the blanket edge is too long or too short, adjust number of dc in each scallop accordingly: fewer dc for tighter scallops, more for more dramatic curves. Keep counts consistent along the edge.
Round 19 :
Optional shell reinforcement: On the reverse side, work a row of sc into the back loops of the scallop bases to stabilize the border. 1 sc in each st FLO or BLO evenly. Fasten off. (variable)
Info :
This reinforcement reduces stretching from use and laundering and keeps the scallops standing neatly.
— Decorative Picot Edge & Final Finishing Rounds :
Round 20 :
Picot round: With matching yarn, join at any scallop valley and *sc across to the tip of a scallop, (ch3, sl st in 3rd ch to make a small picot), sc across to next valley; rep around. This produces a curated picot trim on each scallop tip. Fasten off. (variable)
Info :
Picots are optional. If you prefer a soft drape, skip picot round and instead finish with a simple sc round. Picots create a neat finished look and add a subtle vintage feel.
Round 21 :
Edge tidy: Weave in all ends using a yarn needle. For a cleaner edge, weave tails into the back of shell bodies over 2–3 passes per tail. Trim ends. (Finishing)
Info :
Weave ends while the piece is pinned on blocking mat to make sure they do not show on the surface. Tie silently if needed but avoid bulky knots.
— Blocking Instructions :
Round 22 :
Lightly wet-block or steam-block the completed panel. Pin each scallop tip to shape along the edge. For large bedspreads block in sections on large towels or blocking mats. Allow to dry fully before removing pins. (Blocking)
Info :
Proper blocking evens motif size, flattens joins and opens the lace. Cotton benefits from a hot steam followed by a cool dry; but do not iron directly on high heat.
— Alternative Join & Fill Options (Closing gaps or adding density) :
Round 23 :
If you prefer a denser lattice, add a connecting mesh round between motifs: with right side up, work ch3, skip small arch and sl st into next motif ch-space to create a mesh of ch-3 sl st links across the entire blanket. Continue until desired openness/density is achieved. (variable)
Info :
Mesh rounds can be used selectively along edges to reduce transparency if you plan to use the bedspread as a cover rather than a full bedcover. Choose 1–2 mesh rounds only; too many will hide the floral look.
— Reinforcing & Lining (Optional) :
Round 24 :
Optional lining: If you want the bedspread to be less see-through, consider sewing a lightweight cotton or satin lining to the reverse after blocking. Use small stitches and a matching thread color. Pin lining to the reverse and hand sew through the back loops only to preserve the crisp scallops.
Info :
Lining should be cut slightly smaller than the crocheted panel to allow scalloped edges to remain prominent. Lining also reduces wear on the crocheted joins from regular use.
— Troubleshooting & Tips (scattered Info rounds) :
Info :
If your motifs vary slightly in diameter after first blocking, stack them by size and use the larger ones along edges where more drape is desired. Replace problem motifs early rather than forcing them into the panel—small differences magnify in large projects.
Info :
Keep a printed plan of motif layout and mark each motif with a scrap yarn tail matching its row/column to avoid losing track during assembly. This helps when replacing or unpicking a join.
Info :
For a softer petal appearance use BLO on Round 3 (work petals slightly into BLO) to create a ridge behind petals which visually lifts them. Experiment on a single motif first.
Info :
When storing, fold the bedspread loosely and avoid pressure on scallops to maintain their shape. Consider rolling with acid-free tissue if storing long-term to prevent creasing.
Info :
Wash carefully: handwash or gentle machine cycle in cool water with mild detergent, reshape and block while damp. Cotton can shrink or relax so always preshrink any lining fabrics before attaching.
Info :
Label completed motifs as you produce them (A, B, C etc.) so you can identify where each sits in your layout—especially important when using slight color variations or hand-dyed skeins that vary across lots.
Finishing this powder-blue daisy bedspread is such a rewarding experience. Each motif builds into a sea of sculpted petals and delicate arches that feel like a handcrafted heirloom. The scalloped edge gives the final piece a polished, romantic finish. Wrap it up as a thoughtful gift or drape it over your bed for a peaceful, cottage-chic look. 🧶💙