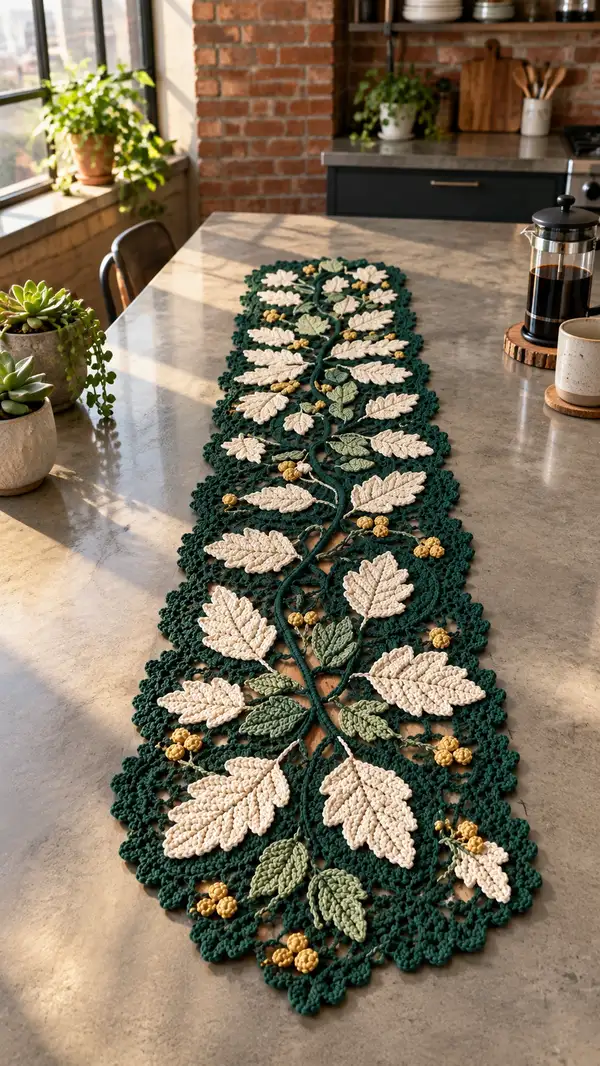
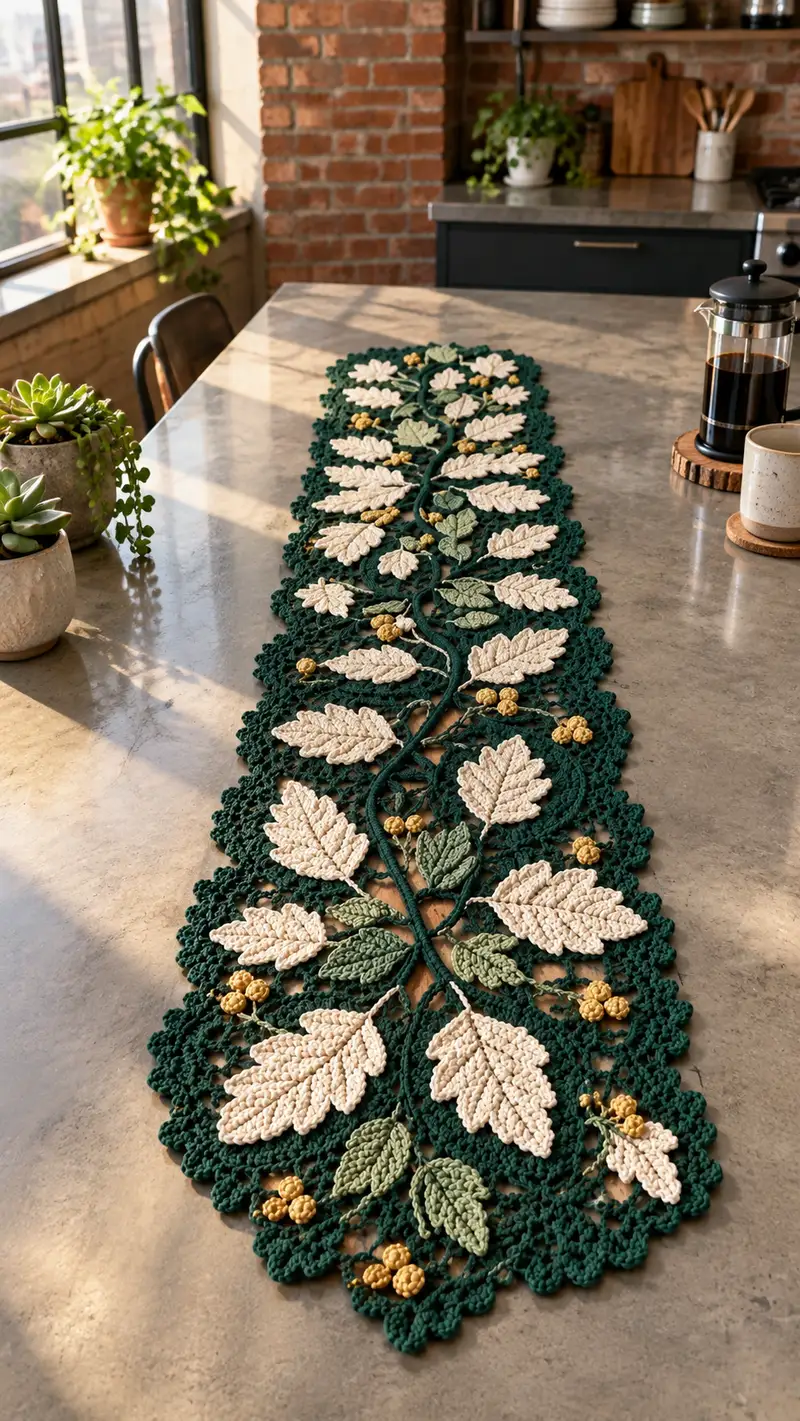
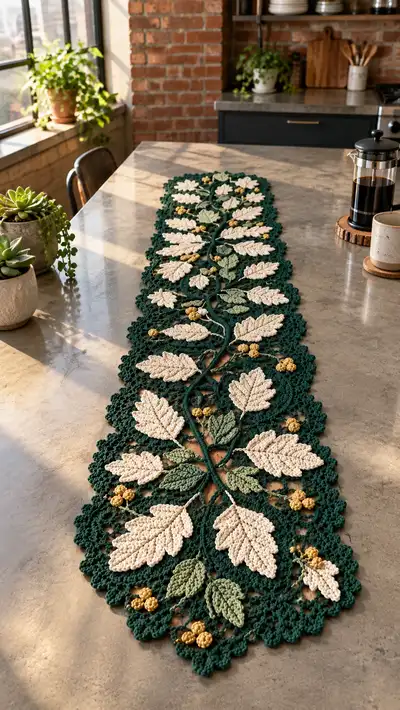
This elegant table runner features a deep forest-green openwork background, layered with sculpted cream and sage leaves and tiny mustard berry clusters. The runner is built from individual motifs — large sculpted leaves, smaller leaves, berry clusters and a braided vine — all joined and edged with a decorative scalloped border. The design creates a botanical, heirloom look that lays flat with a beautiful textured surface.
Progress Tracker
0% Complete
— Overview & Gauge :
Info :
This runner is assembled from repeated botanical motif modules: large sculpted leaf motifs (cream), small sculpted leaves (sage), bedding berry clusters (mustard), a braided cord vine (forest green) and a lacy mesh background with scalloped border. Finished runner in the photo measures approximately 12 x 60 inches (30 x 152 cm) using worsted cotton and a 4.0mm hook; adjust by adding motif repeats.
Info :
Gauge (approximate): leaf motif width ~4.5 inches (11.5 cm) across at widest point; vine cord diameter ~0.25 inches (6 mm). Because this is motif based, gauge affects final length only — keep consistent tension across motifs.
— Materials & Preparation :
Info :
Prepare yarn bobbins for each color and label them to avoid confusion. Use stitch markers to mark motif joins and the center of each leaf where the cord will pass. Light blocking of leaf motifs before assembly will help keep edges flat and uniform.
Info :
Set up: Make 8 large cream leaves, 16 small sage leaves, 24 berry clusters, and a single long braided cord vine approximately the full runner length plus 8 inches for weaving and securing. Also prepare the lacy mesh panels that form the background (6 panels in the sample length) and a scalloped border to finish both long edges.
— Large Sculpted Leaf (Make 8) :
Info :
These leaves are crocheted in continuous rounds around a foundation chain to create a raised, sculpted look. Work with cream yarn. Use 4.0mm hook or 3.5mm for tighter texture if desired.
Round 1 :
Ch 12, 1 sc in 2nd ch from hook and across to last ch, 3 sc in last ch (turn to work along other side of foundation chain), 1 sc in each ch back across except join to first sc - total (12 + 2) = 14 sc around chain base (14)
Round 2 :
1 sc in first 2 sts, inc, 1 sc in next 2 sts, inc, 1 sc in next 2 sts, inc, 1 sc in next 2 sts, inc, 1 sc in next 2 sts, inc, 1 sc in next 2 sts, inc, 1 sc in remaining sts (20)
Round 3 :
(1 sc, inc) x 6, 1 sc in remaining sts (26)
Round 4 :
1 sc in each st around (26)
Round 5 :
(2 sc, inc) x 6, 2 sc in remaining sts (32)
Info :
The rounds above create a base oval. From here we form the central rib and lobes by working slightly different stitches on each side of the chain base to emulate leaf veins. Keep a marker at the starting stitch to track round start in continuous rounds.
Round 6 :
Working FLO on the next round to create a ridge: 1 sc FLO in next 4 sts, (1 hdc, 1 dc, 1 hdc) in next st to create a small raised lobe, 1 sc FLO in next 6 sts, (1 hdc, 1 dc, 1 hdc) in next st, 1 sc FLO in remaining sts (32)
Round 7 :
1 sc in each st (32)
Round 8 :
(3 sc, inc) x 6, 2 sc in remaining sts (38)
Round 9 :
1 sc in each st (38)
Round 10 :
BLO 1 sc in next 6 sts, (1 sc, 1 inc) in next st, BLO 1 sc in next 12 sts, (1 sc, 1 inc) in next st, BLO 1 sc in remaining sts (40)
Info :
At this stage we will form the leaf serration. The serrated edges are made by alternating small picots and clusters along the outer edge; maintain stitch count carefully. Consider switching to 3.5mm hook if you want sharper ridges.
Round 11 :
1 sc in each st (40)
Round 12 :
(4 sc, inc) x 6, 4 sc in remaining sts (46)
Round 13 :
1 sc in each st (46)
Round 14 :
Work edge serration: *1 sc, ch 3, sl st into base to make a small picot, sk 1 st, 1 sc* repeat around to create scalloped serrations. Maintain approximate spacing: total counts remain ~46 but allow minor adjustments; if necessary, add one sc before a picot every other repeat to keep shape even (46)
Info :
If you prefer a denser leaf, replace picot repeats with (1 hdc, 1 dc, 1 hdc) clusters in each serration. Block each leaf gently after this round to open up texture and shape the lobes.
Round 15 :
Working surface ribbing: Attach yarn at base center, ch 1, work 1 sc in each of next 6 sts along midline toward tip, 1 hdc in each of next 4 sts at tip to broaden, then 1 sc in remaining 6 sts back to base; this creates a subtle raised midrib, total (16 sc/hc combined counted as shaping)
Round 16 :
1 sc in each st around entire leaf to even out surface (46)
Round 17 :
Work subtle decreases on leaf base to taper: (6 sc, dec) x 6 (40)
Info :
Lightly stuff the leaf center very minimally with a thin layer of fiberfill if you want a slightly 3D look. Flatten and shape with blocking pins; do not overstuff or your leaf will look puffy instead of sculpted.
Round 18 :
(5 sc, dec) x 6 (34)
Round 19 :
(4 sc, dec) x 6 (28)
Round 20 :
(3 sc, dec) x 6 (22)
Round 21 :
(2 sc, dec) x 6 (16)
Round 22 :
(1 sc, dec) x 6 (10)
Round 23 :
5 dec (5) - shape tip tightly and fasten off, leaving a long tail for sewing. Weave tail inside leaf to hide and secure. (5)
Info :
Block and press leaf to shape serrations and lobes. Use blocking spray or a mist of water and pin the edges flat on a blocking board. Leave pinned until dry.
— Small Sculpted Leaf (Make 16) :
Info :
Small leaves are scaled down versions worked with the same technique but fewer rounds. Use sage yarn. These sit along the vine between large leaves.
Round 1 :
Ch 8, 1 sc in 2nd ch from hook across to last ch, 2 sc in last ch, 1 sc down other side of chain to starting point (10)
Round 2 :
1 sc in next 2 sts, inc, 1 sc in next 2 sts, inc, 1 sc in remaining sts (14)
Round 3 :
(1 sc, inc) x 4, 2 sc in remaining sts (18)
Round 4 :
1 sc in each st (18)
Round 5 :
(2 sc, inc) x 4, 2 sc in remaining sts (22)
Round 6 :
1 sc in each st (22)
Info :
At round 6 start forming the small serrations with picots - these are tighter than the large leaf and require less blocking to open up.
Round 7 :
*1 sc, ch 2, sl st into base (small picot), sk 1 st* rep around to create serrated edge (22)
Round 8 :
1 sc in each st around to even edges (22)
Round 9 :
(3 sc, dec) x 5 (15)
Round 10 :
(2 sc, dec) x 5 (10)
Round 11 :
(1 sc, dec) x 5 (5)
Round 12 :
dec x 2, sl st in remaining to fasten off leaving long tail for sewing (3)
Info :
Block these small leaves to flatten; they should curve slightly when sewn onto the vine so position them with their center midrib aligned with the cord when attaching.
— Berry Cluster (Make 24) :
Info :
Berries are small clustered popcorns made with mustard yarn. Work tightly on a 3.5mm hook for compact clusters.
Round 1 :
mr, 6 sc into mr, pull tight (6)
Round 2 :
*(2 sc, ch 1, 2 sc) in next st (popcorn cluster creation around) rep 3 times to form a triple-lobed berry cluster*, join with sl st to first sc of rnd (18 in 3 small clusters but worked as one compact unit)
Round 3 :
Fasten off leaving long tail; use tail to stitch cluster together on its back side so it forms a compact ball about 0.4 inch diameter. Weave tail through center and secure tightly.
Info :
Optionally, instead of working separate clusters, you can crochet 3 single popcorns onto a short length of ch-3 stem before fastening off, producing a tied cluster that can be sewn to the vine easily.
— Braided Cord Vine (Make 1 long) :
Info :
The vine is a three-strand crocheted cord or i-cord worked in forest green. It runs the length of the runner and is the structural spine to which leaves and berries are sewn.
Round 1 :
Make three separate crocheted chains each approximately the final runner length + 8 inches for joins (in the sample: make three chains each ~68 inches / 173 cm). Use 4.0mm hook.
Round 2 :
Braid the three chains into a tight braid and stitch at intervals with matching yarn to keep braid flat. Alternatively work an i-cord: ch 4, sc in 2nd ch from hook and across, with subsequent rounds worked in continuous sc around last stitch to form a tight cord until desired length; fasten off.
Info :
If using braided chains, periodically run a row of slip stitches along the braid to compress it and create a tube-like vine for a neater join. Mark join points where each leaf will be attached (refer to assembly section for spacing).
Round 3 :
To create branches: at marked points, leave a 1-2 inch loop of chain to create small offshoots; these loops will be used to anchor small leaves and berry clusters.
Info :
Ensure vine has a slight, organic curve when laid out. Pre-shape by placing on blocking board or steam-shaping lightly to remove unwanted twists. Secure stems of leaves by stitching through the braid rather than just around to avoid slippage.
— Lacy Mesh Background Panel (Make 6) :
Info :
The background panels are rectangular openwork mesh pieces worked in forest green; they are joined to create the body of the runner. Each panel interleaves with the vine and motifs.
Round 1 :
Ch 30, join with sl st to form a loop, ch 3 (counts as dc), dc in each ch around to form a base ring (30 dc)
Round 2 :
Ch 3, dc in next st, *ch 2, sk 2 sts, dc in next 2 sts* rep around to create an openwork mesh (maintain 30 dc foundation spacing)
Round 3 :
Sl st into next ch-2 space, ch 3, 2 dc in ch-2 space, ch 2, 3 dc in next ch-2 space; repeat around to create clusters separated by 2-chain spaces. This forms a diamond-lattice look (cluster pairs x 15)
Round 4-8 :
Repeat Round 3 for 5 rounds more to build panel height; keep mesh even. End with a sl st and fasten off leaving tails for joining to vine and border.
Info :
Adjust number of foundation chains and rounds to make panels narrower or wider. Block panels on a flat surface to square edges and open mesh before assembly.
— Joining Motifs to Vine (Assembly Pre-steps) :
Info :
Lay the vine cord along the center of the first mesh panel. Place large leaves at the primary positions spaced evenly; in the sample, leaves are spaced roughly 6 inches (15 cm) center-to-center. Alternate small leaves and berry clusters along vine branches. Use pins to place before sewing.
Round 1 :
Using long tail from each leaf, whip stitch leaf base to braid: insert needle through vine and midrib of leaf, bring thread back through leaf base and vine, pull snug but not tight to allow slight lift; make 6 evenly spaced sewing passes per leaf for secure hold.
Round 2 :
Sew small sage leaves in pairs between large leaves, angling them so that their serrated edges peek outward. Secure each small leaf with 3-5 stitches at the midrib area depending on leaf size.
Info :
Sew each berry cluster last, tacking them to vine junctions and leaf bases. Use an extra anchor stitch to secure the berry stems to the braid so they do not dangle loose.
— Scalloped Border & Edge Lace :
Info :
The scalloped border is worked directly onto the outer edges of the background panels after motifs are attached. Work with forest green and 4.0mm hook for a consistent look.
Round 1 :
With right side facing, join forest green with sl st at an outer corner. Ch 1, 1 sc evenly along edge, placing 1 sc every 6-8 stitches around perimeter to maintain tension and shape. Continue along full perimeter to return to corner (approx counts vary with panel size)
Round 2 :
*Ch 3, 5 dc in next st (shell), ch 3, sl st in same st to anchor shell, sk 3 sts, 1 sc in next st* repeat around edge creating shells. Adjust spacing so shells sit evenly; typical repeat is shell every 5-7 foundation stitches.
Round 3 :
Work a second scallop row: in each 5-dc shell, sl st into center dc, ch 1, 7 sc into shell in FLO to produce textured border; sl st to next shell center and repeat. This creates a raised scalloped frame (shell count will match number of repeats around edge).
Info :
When working the scallops along curved ends, adjust by changing shell stitch count to 3 dc instead of 5 dc to avoid crowding. Block entire runner edge after completing scallops to unify shape.
— Final Join & Weaving (Finishing Rounds) :
Round 1 :
With all motifs pinned in place, use a matching green yarn and yarn needle to whip stitch mesh panels to the braided vine beneath each leaf base. Make sure stitch tension ties the mesh and braid together without pulling the mesh into puckers.
Round 2 :
Where panels meet each other, join with whip stitch or single crochet seam: line panels edges together and sl st through both loops at once to create a decorative seam. Maintain even seam spacing; for the sample length there are 5 seam joins across panels.
Info :
Weave in all ends by feeding them under multiple stitches on the back side of the runner. Use small, hidden anchor stitches at motif bases for added durability. If desired, block the entire runner to final dimensions using steam or wet-blocking techniques.
Round 3 :
Secure berries by stitching through their backing into the underlying mesh at 2-3 points each. Use a small dab of fabric glue under each berry base if additional security is needed.
Round 4 :
Final touch: gently steam block entire runner on low steam to relax fibers and even scallops. Lay flat to dry before trimming any stray threads.
Info :
Edge stiffening (optional): mix a 50/50 solution of water and white glue; lightly brush onto border scallops and allow to dry for a crisper border that lays flat on the table.
— Alternative Color & Size Options :
Info :
To scale runner longer, add additional mesh panels and repeat leaf sequences. For a shorter table centerpiece, make fewer repeats and proportionally reduce the vine length. Try autumn shades (burnt orange leaves, deep olive vine, bronze berries) for seasonal variations.
Info :
For a softer drape, switch to a DK weight cotton and a 3.5mm hook; for a sturdier, more sculptural runner use a heavier aran cotton and 4.5mm hook. Remember to maintain consistent yarn weight for all motifs to keep joins neat.
Completing this Leaf Vine Table Runner is a satisfying blend of texture and botanical charm. Each stitch builds a little piece of foliage that, when assembled, becomes a statement centerpiece full of handmade character. The modular construction lets you customize length and color for every season. Enjoy the meditative process and the beautiful result that will brighten any table! 🧶🌿