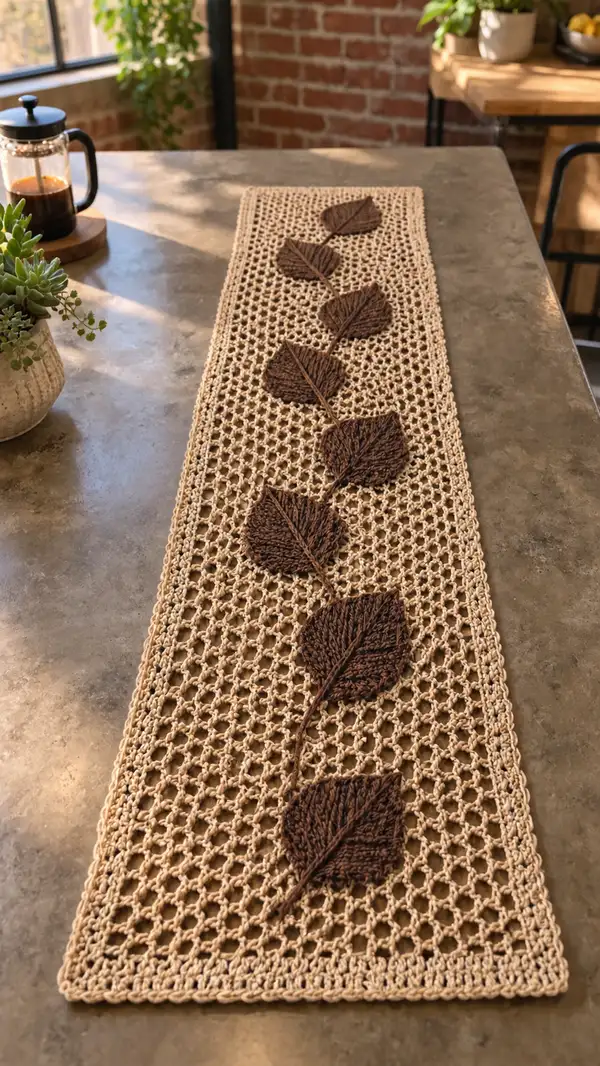
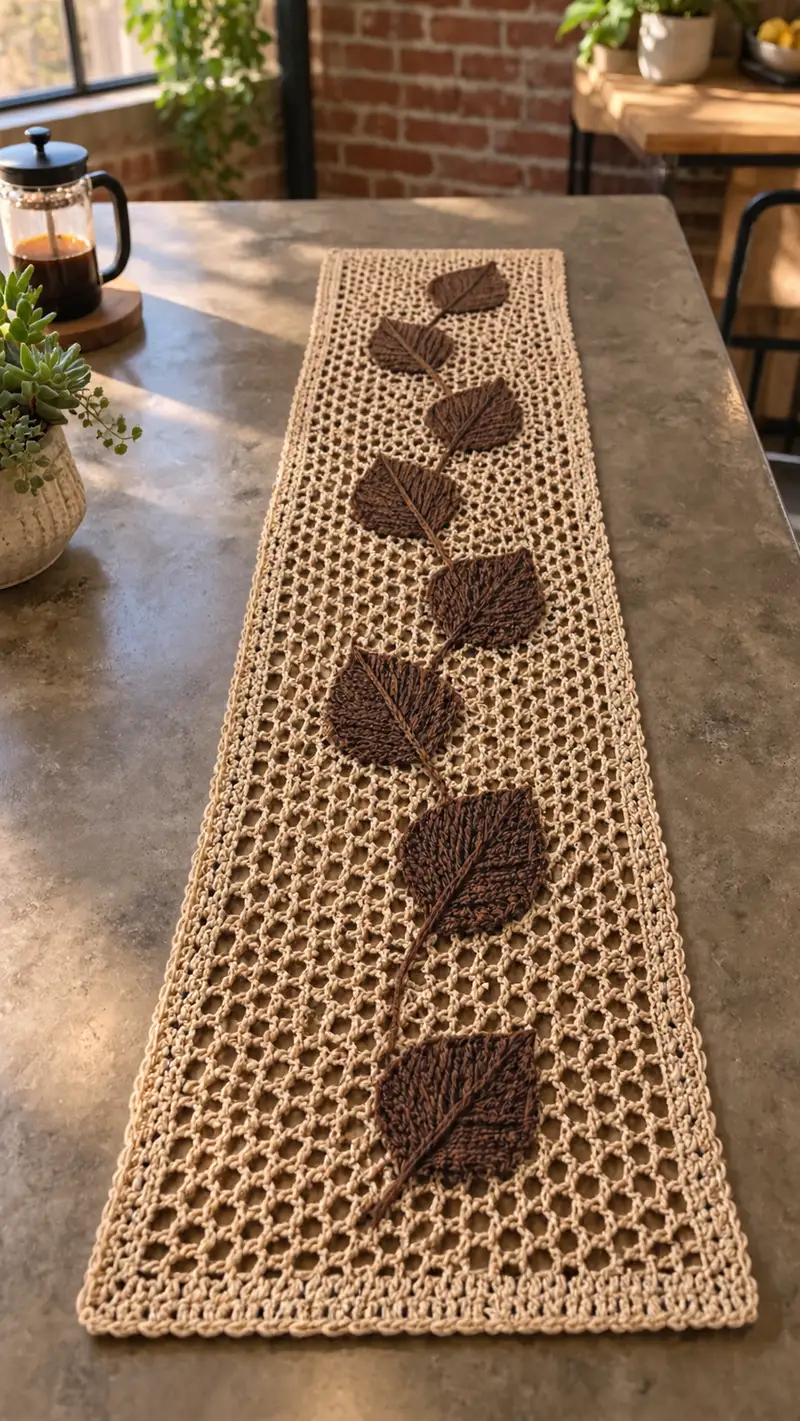
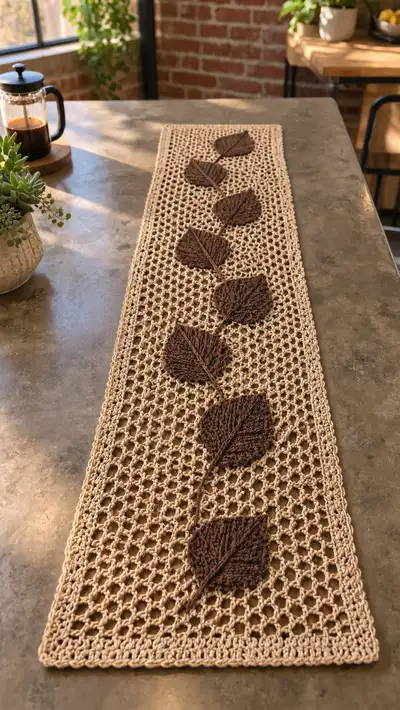
A warm, farmhouse-inspired table runner featuring an airy open mesh background with a cascading vine of textured brown leaves down the center. Worked in sturdy cotton-blend yarn, this runner lays flat, drapes beautifully, and adds natural charm to dining tables or sideboards. The neutral tan background with rich chocolate leaves makes it perfect for autumn or year-round rustic decor. Detailed step-by-step rounds and assembly notes help you recreate the exact look even if you are new to mesh crochet techniques.
Progress Tracker
0% Complete
— Notes & Gauge :
Info :
This pattern is worked flat. I describe the mesh as 'rounds' to keep terminology consistent with the rest of the pattern, but these are straight rows worked back and forth. Gauge: 18 sc = 4 inches in single crochet when using 4.5mm hook and worsted cotton-blend yarn. Final runner pictured measures approximately 12" wide by 48" long. To alter length, add or subtract mesh repeats (see Info sections for how to calculate).
— Materials Prep :
Info :
Choose a sturdy cotton or cotton-blend worsted weight yarn for a flat drape and durability. To match the photo, the main color is a warm tan and the leaf color is a deep chocolate brown. Wind yarn into manageable center-pull balls so color changes are tidy during assembly.
— Foundation Chain & Edge Setup :
Round 1 :
Foundation chain: ch 122 (this is the long foundation that determines width; multiple of 6 + 2 for mesh pattern) (122)
Round 2 :
1 sc in 2nd ch from hook and in each ch across. Turn. (121 sc)
Info :
We begin with a solid row of single crochet to create a sturdy anchor for the open mesh. This also removes curl. Count to ensure 121 sc after the initial skipped chain; keep a marker at the final stitch of the row for a tidy edge.
— Mesh Panel (Main Field) :
Round 3 :
Ch 3 (counts as dc), *skip next 2 sc, dc in next sc, ch 2, dc in same sc*; repeat from * across ending with dc in last sc. Turn. (This forms the first mesh row with 60 ch-2 spaces approx.)
Round 4 :
Ch 1, sc in first dc, *ch 2, sk next dc, sc in next ch-2 sp*; repeat from * across finishing with sc in last dc. Turn. (Creates stable row for next mesh repeat)
Info :
Work these two rows as the mesh foundation repeat. Each pair of rows creates an even open net that resembles the photo's small honeycomb-like openings. Count ch-2 spaces after Row 4 and mark every 10 repeats to help with leaf placement later.
Round 5-64 :
Repeat Rounds 3-4 twenty times (that is Row 3 then Row 4 counts as 2 rows; repeat total of 40 rows) to build the length of the runner body. After completing 40 mesh repeats you will have approximately 48" length (adjust repeats to desired length). Keep the final count even so border rounds align. (Mesh repeat continues with approximate 60 ch-2 spaces across)
Info :
Every 8-10 mesh repeats stop and flatten the panel on a table to check for undulation. If edges are wavy, adjust tension — try working the first stitch of a row a little tighter. Use blocking pins on a flat mat once the full mesh panel is complete to achieve a perfect rectangle before adding border.
— Mesh Row Detailed Notes (counts & shaping) :
Info :
Each mesh pair (Row A: dc/ch2 pattern and Row B: sc with ch-2 spaces) preserves the overall stitch count across the width. If you lose or gain stitches at an edge, remove and rework the last 2-3 rows to correct. Place stitch markers at the first and last sc of every row while building the panel to help maintain straight sides.
— End Mesh Row and Preparation for Border :
Round 65 :
After your final mesh row, work one row of sc across the entire width: ch 1, sc in each st across. Turn. (121 sc)
Round 66 :
Ch 2, hdc in same st, hdc in each st across, ending with 2 hdc in last stitch. This adds a slightly raised band to anchor the border. (Count 121 hdc approx, adjust by one if corner increases cause an extra st)
Info :
If your final sc row numbers don't exactly match 121 due to tension, the hdc row smooths edges and hides a small count variance. Ensure both short ends are identical before proceeding to the border rounds.
— Border (worked around the entire runner) :
Round 67 :
Rotate work 90 degrees to work along the short side: ch 1, sc evenly across the short end edge for 10 sc (approx equal to the height of the foundation row), then continue sc along the long side across the top edge placing 2 sc in the turning corners to keep edge flat. Continue around the whole rectangle with even sc; place 2 sc in each corner. Join with sl st to first sc. (Edge sc counts will vary slightly by your blocking; maintain even tension)
Round 68 :
Ch 2, hdc in each sc around, placing 2 hdc in each corner stitch to maintain square corners. Join with sl st to top of ch-2.
Round 69 :
Ch 1, sc in each hdc around; for a decorative slightly raised rim work 1 sc, ch 1 in every 6th stitch around to create a small picot ventilation effect if desired. Join with sl st. Fasten off and weave in ends or leave long tail for final finishing. (This completes the framed mesh panel)
Info :
Blocking now is highly recommended: pin the runner to the finished measurements and lightly mist with water then let dry. A blocked mesh panel makes leaf placement predictable and prevents ripples during applique sewing.
— Leaf Motif (Make 7) :
Info :
Each leaf is worked flat from tip to base in chocolate-brown yarn. The structure is a symmetric increase to the center then mirrored decreases. The leaf shown in the photo is a relatively large applique (about 6" tall and 4.5" wide). The stitch counts below reflect a balanced leaf that will sit nicely on the mesh. Make 7 leaves for the long runner.
Round 1 :
With chocolate yarn ch 7. In 2nd ch from hook: 1 sc, sc in next 3 ch, 3 sc in last ch (turn to work on opposite side of foundation chain), sc in next 3 ch, 1 sc in final ch (total 11 sc). (11)
Round 2 :
Ch 1, 1 sc in first st, inc, sc in next 3, (inc, sc) in center top st (the 3-sc cluster from foundation), sc in next 3, inc, sc in last st. (Increase layout yields 15 sc total) (15)
Round 3 :
Ch 1, 1 sc in first 2 sts, inc, sc in next 3, (inc, sc, inc) across center where the 3-sc cluster is, sc in next 3, inc, 1 sc in last 2 sts. (This row shapes the leaf tip and begins width expansion) (21)
Round 4 :
Ch 1, sc across placing increases symmetrically: (2 sc, inc) at both sides and (sc, inc, sc) across the center cluster to make top full. Count 27 sc. (27)
Info :
At this stage the leaf is widening. Keep the increases perfectly symmetrical to ensure the two halves mirror each other. Place stitch markers at the central top stitch to help when you mirror the decrease side later.
Round 5 :
Ch 1, sc across (27). (Even row; builds height. Keep even tension.)
Round 6 :
Ch 1, (sc, dec) across the outer sections to begin tapering the base: sc in first 2 sts, dec, sc in next 7, (dec, sc) across center, sc in next 7, dec, sc last 2. (Count will reduce to 23) (23)
Round 7 :
Ch 1, sc across (23). (Maintain shape and create flat surface for surface slip stitch veins later.)
Round 8 :
Ch 1, sc 2, dec, sc 7, dec, sc 7, dec, sc 2. (Reduces to 19) (19)
Round 9 :
Ch 1, sc across (19). (This creates the leaf base area. Fasten off leaving long tail for sewing to the mesh; weave in beginning tail or keep for attachment.)
Info :
Optional: If you prefer a slightly pointier leaf, after Round 4 you can work two additional increase rows before mirroring decreases. That will make the leaf larger and fuller. Keep increments symmetrical to avoid twisting.
Round 10 :
Using same yarn and a tapestry needle, create a surface stem line: from the leaf base, insert needle and pull yarn along center of leaf to tip creating a raised ridge; secure at both ends. You can accent with surface sl sts to form veins: from base, surface sl st diagonally to edges in an even fan on both sides (about 4 veins each side), secure and weave ends. (Surface slip stitch veins applied)
Info :
Placement Tip :
Make all 7 leaves identically so they align nicely along the runner's center; mirror any slight irregularities by lightly blocking each leaf to flatten before sewing.
— Stem (Create continuous vine) :
Round 11 :
Chain-long stem: Using chocolate yarn, ch 90 (this will form the long vine that connects the leaves; length can be adjusted to fit your runner length). Fasten off leaving long tail for embroidery anchoring. (90)
Round 12 :
Using tapestry needle and the long tail, lay the ch-90 vine along the center of the mesh panel, weaving it through every 6th ch-2 space to keep it anchored and naturally curved. Weave ends into mesh rows at each short end and secure with small whip stitches. (Stem laid and partially sewn)
Info :
If you prefer a thicker vine, work a chain-3 cord or a small i-cord with 3 loops of yarn instead of a single ch chain. For durability, you can use hdc-i-cord for a raised look; simply crochet a narrow tube of hdc stitches and attach like the ch chain described.
— Leaf Placement & Attachment :
Round 13 :
Measure and mark the runner centerline and divide the full length into six equal spacing points between the short ends to position 7 leaves symmetrically: one near each end (approx 3" from end), and five spaced evenly between. Pin each leaf lightly on top of mesh to check alignment. (Placement marks made)
Round 14 :
Attach first leaf (base leaf at one short end): Thread long tail from leaf base into tapestry needle and, from the underside of mesh, pull up through a ch-2 opening located at marked attachment point. Sew leaf base to mesh using hidden whip stitches around base edge and a few stitches along leaf perimeter. Repeat stitching along sides using small even stitches placed into the mesh ch-spaces to avoid distorting mesh. (First leaf attached)
Info :
When sewing leaves, take tiny bites of mesh only — don't pull too tightly or you will pucker the background. Leave a small gap under the top of the leaf if you want the leaf to lift slightly off the mesh for a natural shadowed look.
Round 15 :
Lay the vine over the sewn base leaf to connect it by sewing the vine onto the leaf base with 4-6 secure stitches. Continue pinning each leaf in sequence, sewing the base first then small passes along sides and tip to secure. When you reach the middle leaves, check symmetry carefully — a small left-right difference compound over 7 leaves can skew the appearance. (Attach leaves 2-7)
Round 16 :
After all leaves are attached, add a second pass of very small sl stitches along the leaf centers and where vine meets leaf for extra security. Weave remaining yarn tails inside the mesh and snip close. (Leaves fully secured)
Info :
Use a brown embroidery yarn or a slightly darker weight yarn for veins if you want more contrast. Work veins directly onto each leaf before attaching if easier. Be mindful of the surface texture of the mesh underneath — surface stitches will show faintly through the open spaces.
— Decorative Edge Finish :
Round 17 :
If desired, work a final decorative edge: join tan yarn where chosen and ch 1, sc in each st around; for a subtle scallop, instead of plain sc every 6th stitch work (sc, ch 2, sc) into that stitch. Join and fasten off. This gives a small decorative fingered border echoing the mesh trellis. (Edge complete)
Info :
Alternatively, if you prefer a simpler look, maintain the single sc border used earlier. The scallop is optional and best used if your runner will be used only for decorative, non-dining table use as the scallop may catch napkins.
— Finishing & Blocking :
Round 18 :
Final blocking: Pin the runner to final dimensions, arrange leaves and vine to sit flat, then spritz lightly with water and allow to fully dry. This helps leaf seams relax into the mesh and smooths any puckering from sewing. Trim and hide any remaining yarn tails. (Blocked and finished)
Info :
If you anticipate machine washing, test a scrap for colorfastness and shrinkage. Hand wash in cool water and lay flat to dry to preserve shape. Cotton-blend yarns are sturdy but will relax slightly with laundering.
— Optional: Alternate Leaf Method (worked in rounds) :
Round 19 :
Make an alternative leaf worked in rounds for a slightly fuller organic shape: Start with magic ring, 6 sc in mr (6). R1 inc all (12). R2 (1 sc, inc) x6 (18). R3 (2 sc, inc) x6 (24). R4-6 sc around (24). R7 (2 sc, dec) x6 (18). R8 (1 sc, dec) x6 (12). R9 dec x6 (6). Fasten off and flatten to form double-thickness leaf. Add surface veins and sew onto mesh. (Round-based leaf option)
Info :
This round-based leaf creates a puffier applique that sits up from the mesh more prominently. It may require additional securing stitches to avoid catching on table linens, but gives nice dimension if that is a design goal.
— Additional Decorative Options :
Info :
- Add small crocheted acorns or tiny flowers between leaves for a seasonal look.- Use a variegated brown for leaves for a mottled autumn effect.- Replace leaf color with green for a spring/summer table runner variant.- For a longer runner, make additional mesh repeats in multiples of two rows to maintain pattern symmetry.
Info :
When extending the runner, always add rows in pairs (Row 3 + Row 4) to preserve the mesh pattern repeat and keep the sides aligned for the border. Measure and re-space leaves after lengthening to keep them centered along the vine.
This leaf-vine table runner brings timeless, natural style to any table — a beautiful blend of airy mesh and tactile, textured leaves. The neutral body and warm brown leaves are perfect for cozy, rustic decor and make a thoughtful handmade gift. Every stitch brings a little more charm to your home, and the detailed instructions ensure your runner will lay flat and look professional. Enjoy the meditative rhythm of the mesh and the satisfying finishing steps as the appliqued vine comes together. 🧶🍂