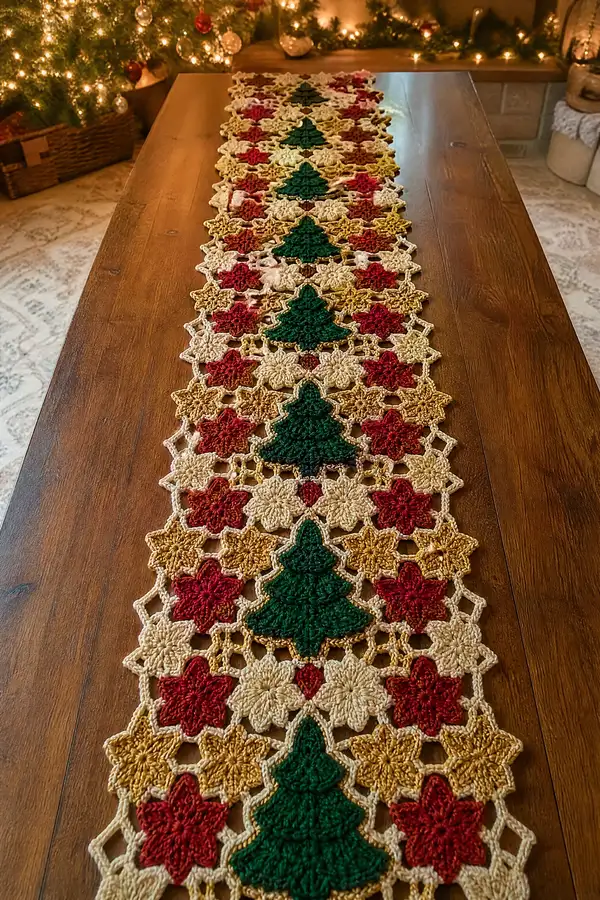
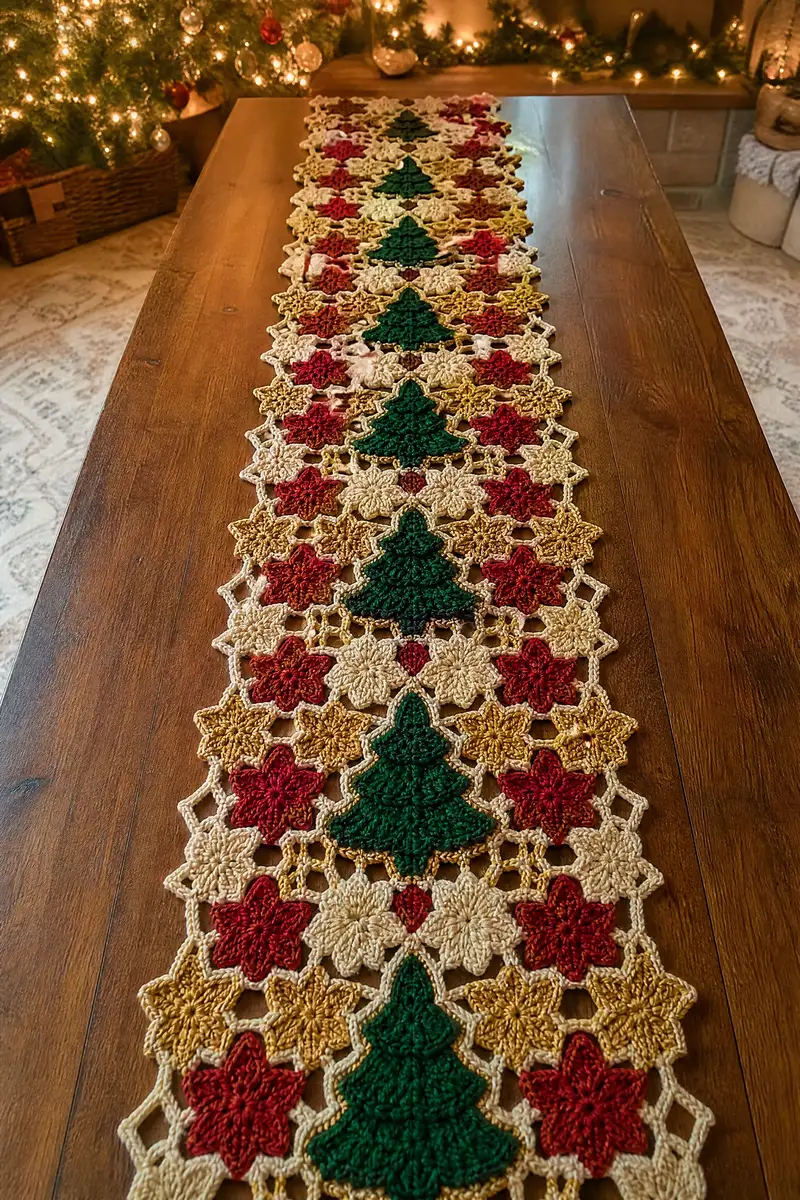
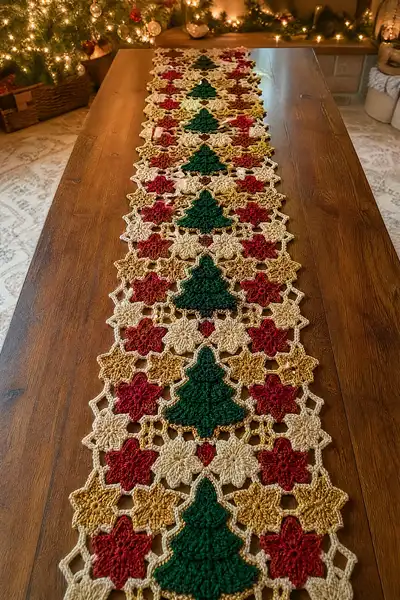
A festive long table runner made from joined floral/star motifs and tall layered Christmas tree motifs. Rich holiday colors — deep forest green trees, warm golds, cream and burgundy stars — form a repeating, lacy pattern perfect for a holiday table. This pattern shows how to crochet each motif, join them with a delicate openwork connector, and finish with a scalloped border for a polished seasonal centerpiece.
Progress Tracker
0% Complete
— Notes & Gauge :
Info :
This pattern is designed as a motif-join table runner. Gauge isn't critical, but tighter stitches will produce neater joins. Sample gauge: 10cm (4in) square = 14 dc x 8 rows when worked in worsted weight with 3.5mm hook. Block motifs flat before assembly.
— Overview of Construction :
Info :
Make three motif types: 8-point Star/Flower motif (motif A), Layered Christmas Tree motif (motif B), and the Small Hexagonal Connector (motif C). Join motifs in columns using join-as-you-go technique; once all columns are complete, add an outer scalloped border in cream. The pattern builds motifs in rounds; each round's stitch counts are provided when applicable.
— Motif A: 8-Point Star/Flower (Make many in alternating colors) :
Round 1 :
Working in chosen star color, mr, ch3 (counts as dc), 15 dc in ring; sl st to top of ch3 to join (16)
Round 2 :
Ch3, dc in same st, *ch2, skip next dc, 2 dc in next dc; rep from * around making 8 groups, sl st to top of ch3 to join. This creates 8 petal bases (32 dc total in grouped fashion)
Round 3 :
Sl st into next dc and into ch2 space, ch1, (sc, ch4, sc) in each ch2 sp around to form loops (8 loops)
Round 4 :
In each ch4 loop: (sc, hdc, 5 dc cluster/puff, hdc, sc) all in same loop; sl st to first sc to join. Each petal now has a raised puff cluster. Maintain 8 petals.
Info :
To make crisp petals work the puff cluster as: yarn over, insert hook into loop, yarn over and pull up loop (repeat 4 times total), yarn over and pull through all loops, ch1 to close puff. Keep tension even for consistent petal height.
Round 5 :
Ch1, sc in same st, *ch5, sc in base between petals (the dc group seam); rep around to create an open lace ring. You will have 8 ch5 loops (count 8)
Round 6 :
In each ch5 loop: (sc, hdc, 3 dc, hdc, sc) to define a larger petal; sl st to join. This gives a fuller 8-point flower; count remains 8 petal clusters
Round 7 :
Ch1, sc in same st, *ch3, skip to next petal center, sc in center base; rep to make 8 ch3 loops between petals; sl st to join (8 loops)
Round 8 :
In each ch3 loop: (sc, 5 dc, sc) to create a small arched point between petals; sl st to join. This refines the star points.
Round 9 :
Switch to cream (if desired as connecting color). Info: Change to cream by finishing last st of previous round with cream. Ch1, sc into same st, *ch1, sc into tip of each petal (8 sc across top points), ch1 to form small openings; rep (16 sc equivalent around)
Round 10 :
*(Ch4, sl st into next sc) repeat around to form the small hex-opening spaces; sl st to join. You will have 8 ch4 loops (count 8)
Round 11 :
In each ch4 loop: sl st, ch3, 2 dc, ch3, sl st (a graceful mini-arch). This produces decorative connectors when joining motifs.
Round 12 :
Finish motif with sc around edge into corresponding sc and top of petals, making sure to keep edges flat (approx 40 sc around depending on petals). Fasten off and weave in ends. Block flat to shape points.
Info :
Make these star motifs in colors: alternating gold, cream, burgundy as in photo. Make a large supply — about 40–50 star motifs for a long runner (adjust to desired length).
— Motif B: Layered Christmas Tree Motif (Make fewer, placed in central column) :
Round 1 :
With deep green, mr, ch2 (counts as hdc), 7 hdc in ring; sl st to top of ch2 to join (8)
Round 2 :
Ch2, hdc in same st, (1 hdc, inc (hdc inc) in next) around to expand base: (hdc, inc) x4 total repeats (12)
Round 3 :
Ch2, *hdc in next 2 sts, inc in next; rep around (16). This begins a slightly triangular base shaping for the tree
Round 4 :
Ch3 (counts as dc), dc in next 3 sts, ch1, skip 1, dc in next 4, ch1, skip 1, dc in remaining sts, sl st to join. (This round creates the base shelf for the first tier rows)
Info :
Tree motif is worked in tiers that progressively narrow. We'll create 5 visible tiers; each tier has 3 rounds: a foundation round, a shaped dc tier, and a decorative point row. Keep stitch count notes for each tier as counts vary.
Round 5 :
Tier 1 foundation: ch2, hdc in each st around (16). Join with sl st. (16)
Round 6 :
Tier 1 shape: ch3, (2 dc in next st, ch1, skip next st) repeat across the tier until last 2 sts, 2 dc, sl st to join. Count: around 24 dc across the tier with ch1 pockets
Round 7 :
Tier 1 points: Into each ch1 pocket: (sl st, ch3, 3 dc, ch3, sl st) forming 8 small peaks across tier. Ensure symmetry.
Round 8 :
Tier 2 foundation: ch2, hdc in next 12 sts (work into central top portion) leaving outermost base stitches unworked to create narrowing (12)
Round 9 :
Tier 2 shape: ch3, dc in next 4 sts, ch1, skip 1, dc in next 4, sl st to join. Count: 8 dc with ch1 spaces (approx)
Round 10 :
Tier 2 points: Into each ch1 pocket: (sl st, ch3, 3 dc, ch3, sl st) to create 4 peaks across tier.
Info :
Keep tree centered by working foundation rounds into central group of sts. If counts differ slightly, adjust by shifting where you create ch1 pockets but maintain visual symmetry.
Round 11 :
Tier 3 foundation: ch2, hdc in next 8 sts (8)
Round 12 :
Tier 3 shape: ch3, dc in next 2 sts, ch1, dc in next 2 sts, sl st to join (6 dc around)
Round 13 :
Tier 3 points: Into ch1 pocket: (sl st, ch3, 3 dc, ch3, sl st) to create 2 peaks centered
Round 14 :
Tier 4 foundation: ch2, 4 hdc across top segment (4)
Round 15 :
Tier 4 shape: ch3, dc in next 2 sts, sl st to join creating a small triangulated top (3 dc across)
Round 16 :
Tier 4 point: (sl st, ch3, 3 dc, ch3, sl st) in center pocket to make the topmost tree peak
Round 17 :
Trunk foundation: Switch to brown (Info: change to brown for trunk). Ch1, sc in next 6 sts along bottom center space to create trunk rectangle; turn and sc back across 6 sc for 4 rows total (a little 4-row mini rectangle). Fasten off and weave in ends.
Info :
Alternate method: Work trunk as a small vertical tab attached to back of tree and seamed down later. Block tree with clothespins to keep tier peaks crisp. Make fewer tree motifs (approx 6–8) depending on runner length.
Round 18 :
Edge finishing for tree: Reattach cream at the base around the lower circumference: ch1, sc evenly around bottom and tip edges to create a defined border (approx 48 sc total around depending on tier shaping). Fasten off and weave ends.
Info :
Tree motifs are deliberately slightly raised due to layered tiers. Work evenly so the tree sits flat when blocked; keep puff closures neat inside the tier peaks for a clean surface when joining.
— Motif C: Small Hexagonal Connector / Open Hub (Make many) :
Round 1 :
In cream, mr, ch3, 11 dc in ring, sl st to join (12)
Round 2 :
Ch1, sc in same st, *ch3, skip next dc, sc in next dc; rep around to create 6 ch3 loops (6)
Round 3 :
In each ch3 loop: (sl st, ch5, sl st) to enlarge opening; this will make 6 airy connector loops
Round 4 :
Ch1, sc in each loop top and in sc bases to tidy edge; (approx 24 sc around). Fasten off leaving a long tail for join-as-you-go. Block flat.
Info :
These small hubs will be the anchor points where star petals and tree edges meet. When joining-as-you-go, attach these hubs in round 4 by slip-stitching into adjacent motif loops as instructed in joining section.
— Joining as You Go: Method & Round-by-Round Joining Instructions :
Info :
We recommend a join-as-you-go approach to avoid sewing many seams. The joining uses the ch-loops from motifs A and C. For clarity, 'Join Round' refers to the round on the motif where you connect to neighboring motifs. We'll provide stepwise joining instructions to create one long column, then connect columns together.
Join Round 1 :
Work Round 11 of Motif A (the ch4 loops) as usual; when you come to a loop that will meet an adjacent motif, instead of finishing loop with sl st, align adjacent motif's ch-loop and sl st through both loops to join them. Continue around joining where motifs meet. Maintain even tension to avoid pulling motifs together too tightly.
Join Round 2 :
On Tree Motif Round 18 (the cream sc border): plan 6 evenly spaced join points on both sides of the tree. When a star motif sits next to a tree, sc into tree border then into star ch-loop (sc through both layers) to secure the join. Repeat around both sides for symmetrical placement (approx 6-8 joins per tree).
Info :
Always pin motifs together prior to joining. Lay motifs flat in planned formation on a blocking board. Use blocking pins to keep edges aligned and to ensure where loops meet is consistent. Use matching yarn (cream) for the majority of join points so joins blend visually.
Join Round 3 :
When joining hex connectors (Motif C) to star petals and tree edge: work sl st through ch5 loop from connector and into the ch1 or ch3 loop on a star motif; join three pieces into a triangular meeting point (two stars plus a connector) by sl stitching through all three loops evenly. This creates an open hex lattice between motifs.
Info :
Keep counts consistent: each hex connector will typically attach to 6 surrounding motif loops. Check that you are connecting to the correct loop positions on star and tree motifs; adjust by shifting on the blocking board if necessary.
Join Round 4 :
As you complete each column of motifs (one central column of trees flanked by star columns), join columns together by slip-stitching through the outer ch loops of one column and the inner ch loops of the adjacent column motifs to form a seamless runner mesh. Work across entire length repeating slip-stitch join sequence identically for each motif row (repeats as many times as there are rows).
— Edge & Scalloped Border (Worked after full runner assembly) :
Round 1 :
With cream yarn, join at any outer ch-loop on runner edge, ch1, sc evenly around the entire perimeter into edges and join spots creating a tidy foundation edge (count will depend on runner size, expected approx 220–260 sc total around). Sl st to join.
Info :
When counting foundation sc, keep counts in groups that align with motif points to make scallops fall centered over motifs. Use stitch markers to map every 10th sc so you can check for even spacing.
Round 2 :
Ch3 (counts as dc), *skip 2 sc, 5 dc in next sc (scallop shell), skip 2 sc, dc in next sc; rep around to make even scallops; sl st to join.
Round 3 :
Into each 5-dc shell: (sl st, ch3, 7 dc, ch3, sl st) to make a fuller scallop if desired; sl st to join. This creates raised scallops for an elegant border.
Round 4 :
Optional: Add picot edge around each scallop by working (sc, ch3, sl st into first ch) across tips for vintage lace effect. Fasten off and weave in ends invisibly on back using tapestry needle.
Info :
If runner design looks slightly short on one end, add an extra row of small star motifs or a half-tree motif and join in; the symmetry matters, so adjust both ends to balance length for table placement.
— Blocking & Finishing :
Info :
Wet block the entire runner: pin to shape on blocking mat, stretching gently so motif points line up in columns. Allow to dry completely. Press lightly with a steam iron if needed, using a cloth between iron and yarn to protect fibers. After blocking, do final weave-in of any short tails and trim excess.
Round 1 :
Final reinforcement: Using cream yarn and tapestry needle, run a hidden overcast stitch inside the foundation sc around the runner to stabilize joins if the runner will be used heavily. This is optional for decorative-only use but recommended for table placement where plates may be moved across the surface.
Info :
Store runner flat or rolled (not folded) to avoid creasing. Spot clean gently or hand wash in cool water with mild detergent and re-block after washing to restore shape.
— Quantities and Assembly Planning (Rounds of Work Per Motif for Full Runner Example) :
Info :
Example runner in photo: 6 tree motifs in central column, flanked by 2 columns of star motifs on each side, with rows of connectors between. For that example you would need approx: 6 tree motifs (Motif B), 36 star motifs (Motif A), 48 small hex connectors (Motif C). Calculate assembly joins so that each tree row is bordered by star rows above and below per photo for classic repeating pattern.
Round 1 :
Repeat counts for a single motif set: Motif A = 12 rounds, Motif B = 18 rounds, Motif C = 4 rounds. For the entire runner multiply rounds by quantity when estimating time and materials.
Info :
When planning color repeats, lay out colored motifs before joining so you are happy with placement. Photograph layout before seaming for reference if assembly is done over several days.
— Variations and Optional Embellishments (Extra Rounds) :
Round 1 :
Gold Metallic Thread Accent: Carry a fine metallic thread along the final sc edge and surface-slip-stitch around tree motifs to add a shimmering outline. Work slowly to avoid tangles.
Round 2 :
Beaded Edge: In Round 2 of the scalloped border, add a small glass bead onto the hook before completing certain dc of each shell to create subtle sparkle. This increases weight slightly, so only add if runner will be decorative.
Info :
Create a shorter runner by making fewer motif rows, or a runner of any length by making additional star/tree pairs and joining identically as described. The join-as-you-go method scales very easily.
— Full Count Example and Round Totals (Illustrative) :
Info :
For the entire runner pictured: 6 tree motifs (B) x 18 rounds = 108 rounds; 36 star motifs (A) x 12 rounds = 432 rounds; 48 connectors (C) x 4 rounds = 192 rounds. Those per-motif rounds are individual motif rounds; actual crocheting alternates motifs; total labor will be high but many rounds are similar repeats. Plan project across multiple sessions.
Round 1 :
To keep track: label motif batches and use sticky notes to mark completed joins. Keep an index of motif counts written down as you complete each motif type to avoid making too many of one color.
Completing this runner brings such a satisfying mix of lace and dimensional texture—those green layered trees really pull the whole design together! The join-as-you-go technique keeps the look seamless, and the scalloped edge gives the perfect finishing touch. This runner will raise the festive spirit of any table and makes a beautiful handmade heirloom. 🎄🧶✨