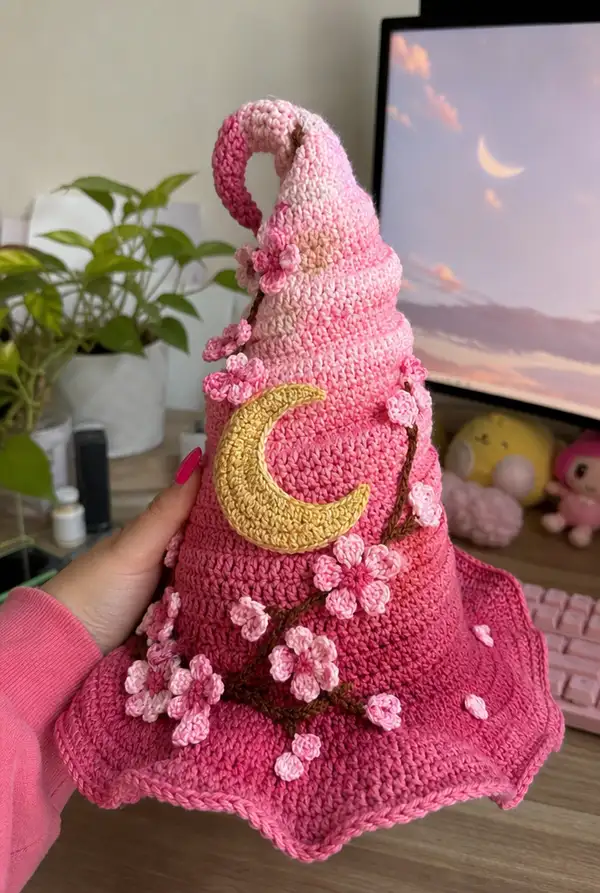
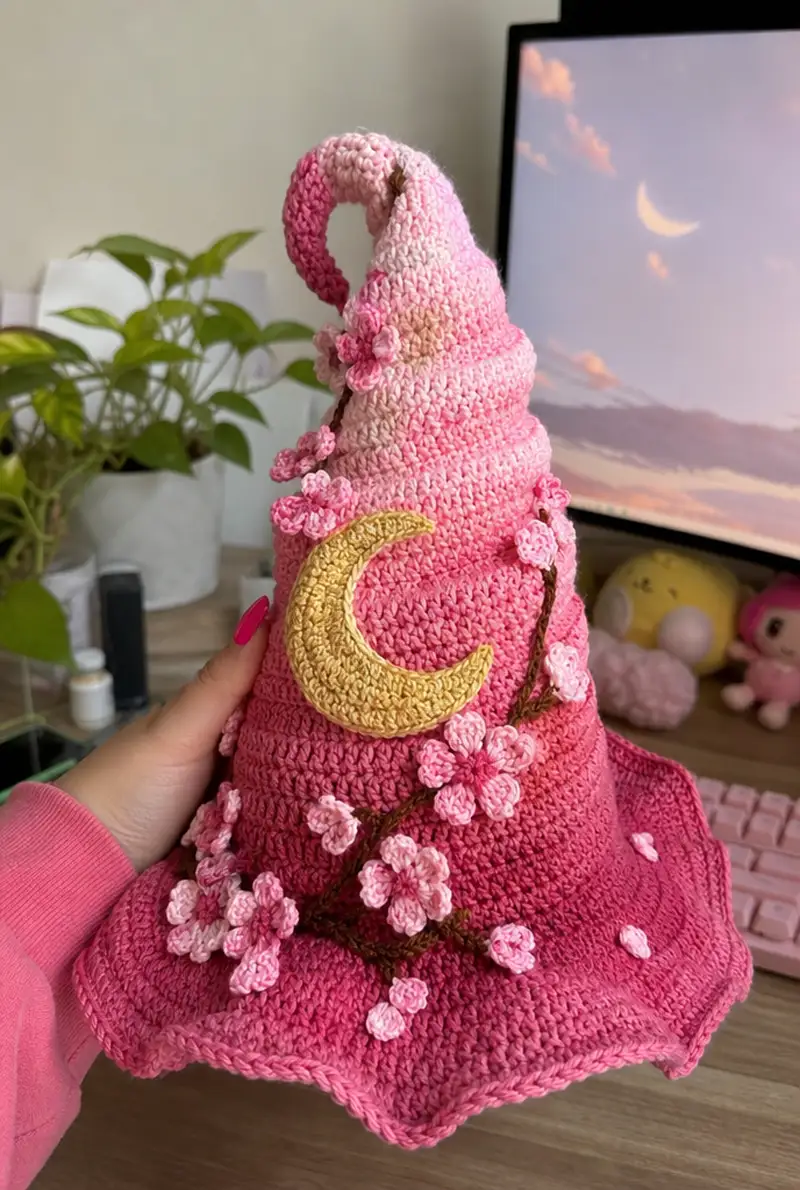
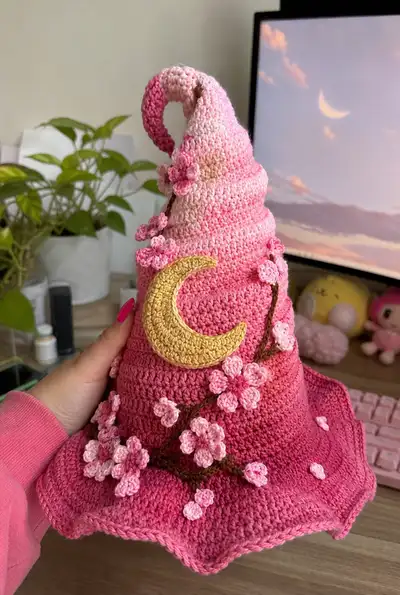
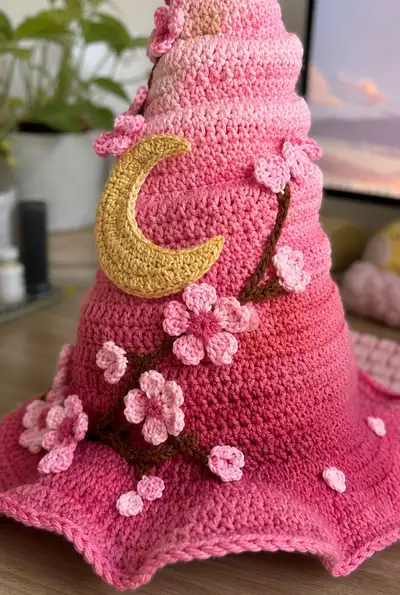
Create a magical oversized witch hat with a dreamy pink ombre gradient, a curled spiral tip, hand-stitched cherry blossom branches, and a golden crescent moon applique. This pattern uses simple stitches with thoughtful shaping to produce a dramatic slouchy cone and a wide scalloped brim. Perfect as a display piece, cosplay accent, or whimsical home decor — full step-by-step guidance included for every section and embellishment.
Progress Tracker
0% Complete
— Materials & Gauge :
Info :
Gauge is not critical for this decorative accessory, but to achieve a similar finished size and drape use DK weight yarn and a 3.5mm hook. Approximate finished height: 11-13 inches (28-33 cm) from brim to tip before curling; brim diameter approx 11-13 inches (28-33 cm). If you crochet tighter your hat will be slightly smaller; looser will be larger. I used a gradient cake that changes color roughly every 6-10 rounds to create the ombre.
— Notes Before You Begin :
Info :
This hat is worked top-down in continuous rounds. Use a stitch marker to mark the first stitch of each round. When a round says 'even' it means 1 sc (or specified stitch) in each stitch around. For the main cone and brim we use single crochet (sc) for a taut fabric that keeps shape. Where extra height is desired (decorative ridges), I include rows of hdc or dc. Make the blossoms separately and sew them on after positioning. You can insert a thin wire into the spiral tip for a permanent curl - see the 'Tip Wire' Info sections.
— Cone / Crown (Rounds 1-60) :
Round 1 :
6 sc in magic ring (6)
Round 3 :
(1 sc, 1 inc) x 6 (18)
Round 4 :
(2 sc, 1 inc) x 6 (24)
Round 5 :
(3 sc, 1 inc) x 6 (30)
Round 6 :
(4 sc, 1 inc) x 6 (36)
Round 7 :
(5 sc, 1 inc) x 6 (42)
Round 8 :
(6 sc, 1 inc) x 6 (48)
Info :
By round 8 you have established the cone base to continue elongating the point. If your gradient changes between these rounds it will give a pointed tonal shift; otherwise you can change color later. Maintain a tight tension for a smooth surface.
Round 9-28 :
1 sc in each st (48)
Info :
Work rounds 9-28 (20 rounds) even to elongate the pointed top into a long cone. This creates the tapered part before the cone expands. If your gradient yarn transitions here, the ombre will be visible along the cone. If using a solid yarn, switch to a lighter/darker shade at Round 20 for a gradual ombre effect.
Round 29 :
(1 sc, 1 inc) x 24 (72)
Info :
This round increases from 48 to 72 sts to begin the fuller cone body that will go toward the brim. The increase pattern is evenly distributed (one sc then an inc) around the round to maintain smooth expansion.
Round 30-44 :
1 sc in each st (72)
Info :
Work 15 rounds even at 72 sts to create the main body of the hat. This section is where most of the ombre gradient will be visible. Change colors in one round transition by joining the new color in the last pull-through of a sc if you want a cleaner join. Carry unused yarn inside or fasten off and weave tails.
Round 45 :
(5 sc, 1 inc) x 12 (84)
Round 46 :
(6 sc, 1 inc) x 12 (96)
Round 47 :
(7 sc, 1 inc) x 12 (108)
Info :
These three increasing rounds flare the cone toward the brim to create a wide base for the brim to attach to. Spread increases evenly as shown; the counts are checked so each round increases by 12 sts as indicated.
Round 48-52 :
1 sc in each st (108)
Info :
Five even rounds at 108 sts create a comfortable height before the brim shaping. If you want a slightly taller hat body, add extra even rounds here; if shorter, remove 1-3 even rounds.
Round 53 :
(8 sc, 1 inc) x 12 (120)
Round 54 :
1 sc in each st (120)
Info :
Round 53 creates a larger circumference to provide enough stitches for a scalloped brim. If your brim becomes too large relative to your body, omit Round 53 and work the brim with 108 sts instead — adjust subsequent shell stitch spacing accordingly.
Round 55 :
1 sc in each st BLO (120)
Info :
Working one round in the BLO creates a slight inward ridge that visually separates the cone from the brim and gives a nice base for the scallops to sit on. Place a marker at the start of this round to align scallops evenly.
— Brim & Scalloped Edge (Rounds 56-92) :
Round 56 :
1 sc in each st (120)
Round 57 :
(5 sc, sk 1, 5 sc) in next st as base for first scallop, *sk 2, sl st to next st, (5 sc, sk 1, 5 sc) in next st; rep from * around to create scallop anchors (12 scallops total) (120)
Info :
:
You will create 12 even scallops around the brim — count your anchors and pin them flat before working the shell rows. If you are using 108 sts (if you omitted Round 53) divide your scallop repeats to 11 or 12 as comfortable and adjust spacing slightly; keep anchors evenly spaced.
Round 58 :
*In anchor ch space: (sc, hdc, 3 dc, hdc, sc) for shell; sl st to next anchor; rep from * around (12 shells) — join to first shell with sl st ( )
Info :
Work shells into the anchor spaces created in Round 57. This round is the main scalloped edge that gives the wavy brim. Keep shell tension even so the brim lies flat without ripples; if shells curl upward, try one additional anchor round with increased spacing.
Round 59 :
Ch 1, sc in each stitch of shell and between shells around to tidy and even out edge (estimate 180 sts around after shells) — join with sl st (180)
Round 60 :
Reverse single crochet (crab stitch) around edge for a neat finished edge, working evenly and tighten tension slightly to create a crisp rim (180)
Info :
If you prefer a soft wavy edge instead of a crisp one, work a round of sc in normal direction instead of reverse single crochet. Blocking the brim lightly after finishing will open the scallops and even the shape.
Round 61-66 :
Optional decorative rows: alternate 1 row hdc then 1 row sc around the cone (work even around) to add textured bands if desired (work 6 rounds total) (180)
Info :
These decorative rows add height detail in the ombre transitions and mirror gentle ridges seen on the photographed hat. Use hdc for raised bands and sc for flat bands. If you used gradient yarn, try to place these where color shifts occur to emphasize the transition.
— Spiral Tip Shaping & Optional Wire (Rounds 67-78) :
Round 67 :
At the very top inside the cone (the original tip area near Rounds 9-12 region) you can fasten a short tail of yarn to gather and create a denser tip: sc decrease around 6 sts where the cone started, (work small gathering stitches) (use long tail)
Info :
:
To create the curled spiral you have two options: Option A - insert a length of thin craft wire (approx 6-8" long) into a narrow tube crocheted at the tip or slid between stitches; Option B - fold the tip back on itself and sew a tubular seam to hold the spiral. Wire gives a sculptable permanent curl; sewing is simpler and still holds shape if the yarn is stiff.
Round 68 :
If using wire: create a small crochet i-cord or narrow tube 3-4 rounds long by chaining 6 and sl st in back loops to form tube, sl st to base of tip and insert wire. If not using wire: continue shaping by decreasing 1 round of (5 sc, 1 dec) x ? to begin tapering and fold.
Round 69 :
After inserting wire or creating the tube, test curl by gently bending the wire or folding the tip. If sewing fold: align the folded edge and stitch through both layers using mattress stitch to secure curl. If wire: slip stitch a few times around the base to hold wire in place.
Info :
If using wire, make sure the ends are wrapped around a small bit of yarn or folded back to avoid sharp tips. Push the wrapped end at least 1/2" inside the tube so it's not exposed. For sewn curl, add 4-6 internal stuffing pieces to the tip to keep a smooth rounded curl rather than a collapsed fold.
Round 70-78 :
Make 9 small rounds of sc around the folded/curled tip area to tidy and secure the seam (work through both layers if folded) (stitch count varies according to how you folded; maintain even tension)
Info :
Trim and weave in any accessible wires or tails before closing. Adjust curl from the outside and stitch any visible seams carefully to match the hat's surface texture.
— Cherry Blossom Petal (Make many) (Rounds 79-92) :
Info :
There are two sizes of blossoms visible: small 3D buds and larger layered 5-petal flowers. Both are worked in light and medium pink yarn using a small hook (3.25mm) for definition. Make a selection of 10-15 small buds and 6-9 larger blossoms to decorate the hat as pictured.
Flower - Round 1 :
6 sc in magic ring; do NOT join, work in continuous rounds (6)
Flower - Round 2 :
(1 sc, inc) x 3 (9)
Flower - Round 3 :
*Chain 3, sl st into next st to form a petal base; rep from * around to make 3 chain loops (3 loops) — fasten off but leave tail for sewing
Flower - Round 4 (Petal detail) :
Into each chain-3 loop: (sc, hdc, 2 dc, hdc, sc) — rep for 3 petals; join and finish (creates small 3-petal blossom)
Info :
Make many of these little 3-petal blossoms in light pink for smaller clusters. For larger 5-petal flowers use the following 5-petal variant below. Stiffen petals slightly with a tiny bit of diluted fabric glue if you want them puckered.
Large Flower - Round 1 :
6 sc in magic ring (6)
Large Flower - Round 2 :
(1 sc, inc) x 3 (9)
Large Flower - Round 3 :
*Ch 4, sl st into next st to make 3 loops for five petals (work into 5 different stitches around) — leave center open*
Large Flower - Round 4 :
Into each ch-4 loop: (sc, hdc, 3 dc, hdc, sc) — rep 5 times for five petals; finish off and leave a long tail for sewing
Large Flower - Round 5 (Layering) :
Optional: Make a second smaller 3-petal blossom and sew it centered onto the larger flower to create a layered look as pictured (use long tail to sew through center and secure tightly)
Info :
Alternate the color of the petals (light pink center, medium pink outer) for natural depth. For the tiny buds, roll a single elongated sc tube and gather one end to mimic a bud shape (chain 5, sc back, sl st, gather and sew).
— Buds & Tiny Petals (Rounds 93-98) :
Bud - Round 1 :
Ch 3, 4 sc in 2nd ch from hook (4), sl st to close; pull tail to gather slightly and fasten off leaving sewing tail
Bud - Round 2 :
Or for another option: make a 3-sc tube (mr with 3 sc) and pull closed for tiny rosebud; sew to hat with tail for depth
Info :
Create roughly 12-20 buds depending on how full you want the branch clusters to appear. Place more toward one side of the hat and along the brim for a natural falling effect.
— Embroidered Branch / Vine (Rounds 99-104) :
Info :
Use dark brown yarn to embroider the branch. You can either chain-stitch by hand with yarn and a blunt needle or use a thin crochet chain sewn on. Measure and mark the curve you want with pins. The branch in the photo spirals from the brim up across the cone to the tip area in a gentle diagonal sweep.
Branch - Method A (Crocheted Chain) :
Ch 80 (or length required to reach from brim to tip); sl st back along chain to create a dense crochet cord; sew onto hat following your pinned curve using matching thread and small whip stitches every 4-6 mm.
Branch - Method B (Embroidered)
Thread yarn into tapestry needle and use a long chain-style embroidered stitch along the pinned curve; add small side branches by stitching short slanted chains and anchoring with tiny knots or a stitch of yarn for twig junctions.
Info :
Secure both ends thoroughly; weave ends into the inside of the hat and hide under the brim so they are not visible. If the branch needs volume, use two strands held together or slightly twist one strand of fingering weight yarn with another for thickness.
— Golden Crescent Moon Applique (Rounds 105-116) :
Info :
Work the crescent with golden yellow yarn and a 3.25mm hook for crisp texture. The moon is worked flat in joined rounds and shaped by strategic increases and decreases to make a crescent arc.
Round 105 :
Make a foundation of 12 sc (ch 13, sc in 2nd ch from hook across) — do NOT join; turn to work into ends for two-sided piece
Round 106 :
Work evenly around foundation (inc at each end to round the ends): 2 sc in first st, sc across, 2 sc in last st; then sc along opposite side to join to first st (approx 26)
Round 107 :
(1 sc, inc) around ends and increase slightly along the curve where you want the crescent to bulge; keep the inner arc narrower and outer arc fuller (estimate 34 sts)
Round 108-110 :
Work 3 rounds even (sc) around to give thickness (34 sts)
Round 111 :
Begin shaping the inner edge by working (3 sc, dec) across inner arc portion to hollow slightly (reduces inner arc by a few sts) (approx 30)
Round 112 :
One round even sc to tidy (approx 30)
Round 113 :
Optional: Surface crochet a second thinner crescent by chain-stitching across the center and sewing it down to give the crescent a layered, hand-detailed look (use 1-2mm difference in thickness)
Round 114-116 :
Weave in ends and slightly stuff the crescent with tiny amount of fiberfill for subtle dimension before flat-sewing to hat (no more than a thin layer of stuffing to avoid bulkiness)
Info :
Sew the crescent onto the cone with long tail left for sewing. Position the moon at the mid-to-upper cone on the side that will be your front. Sew through outermost stitches so the moon sits flat and secure — add small blind stitches around inner arc to keep it tidy.
— Finishing Touches & Positioning (Rounds 117-140) :
Round 117-118 :
Arrange the branch and blossoms: lay the largest bloom near the center of the branch path (around cone round approx 36-44 on the cone body — adjust visually), cluster medium blooms in groups of two or three along branch nodes, and scatter buds near the brim and on the folded spiral tip.
Info :
Pin every blossom and bud before sewing. Take photographs from left and right to ensure your placement matches both sides symmetrically as desired. The photographed hat has a dominant branch wrapping from lower brim up to the side and finishing near the crescent moon.
Round 119 :
Sew flowers and buds by threading long tail through tapestry needle, anchoring tight through the center and catching a few stitches of the hat fabric. For layered flowers sew through both layers using a few tight stitches and knot securely on inner side of hat.
Round 120 :
Secure embroidered branch ends under the brim and at the top near the moon using hidden whip stitches. Weave in all yarn ends at least 4 inches into the inside of the hat and trim close.
Round 121 :
Add small scattered single petals or tiny 3-petal clusters around brim by sewing tiny flower motifs (the bud or 3-petal) flat to the brim to mimic falling blossoms; sew with small back stitches.
Round 122 :
Final blocking: steam-block lightly or pin hat into shape on a flat surface with tissue under the brim to preserve scallops. If using wire in the tip, shape wire gently after blocking rather than before.
Info :
For maximum stability display the hat on a foam head or place a small ring of cardboard inside the brim to keep shape long-term. If you plan to wear the hat, stitch a lightweight cotton lining inside the brim to keep hair and skin protected from dyes.
Round 123-140 :
Optional embellishments: add bead centers with tiny seed beads, metallic embroidery along outer edges, or a thin braid of ribbon sewn around the brim seam for extra decoration. Each embellishment should be sewn securely with small back stitches to avoid catching on clothes.
Info :
Enjoy adjusting and personalizing — the hat responds well to small changes in placement. If making multiple hats, create a template of blossom placement on paper for faster repeats.
This big pink ombre witch hat is a celebration of whimsical design and patient craft. Every scallop, blossom, and the tiny golden moon come together to create a piece that looks like it stepped out of a fairy tale. Working this pattern taught me to savor slow shaping and tiny details — each blossom sewn in place brings the hat closer to its story. Display it, gift it, or wear it proudly; every stitch is a little bit of joy. 🌸✨🎀