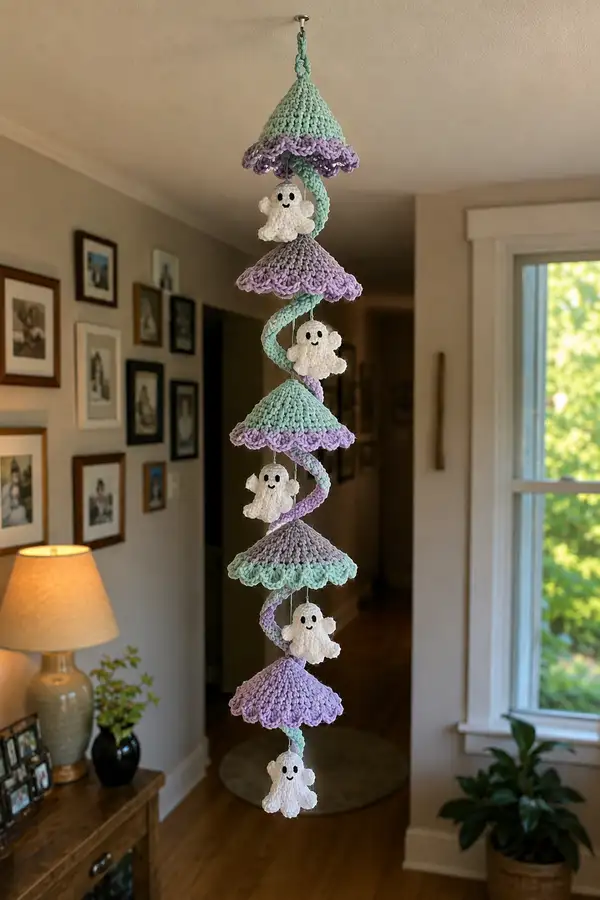
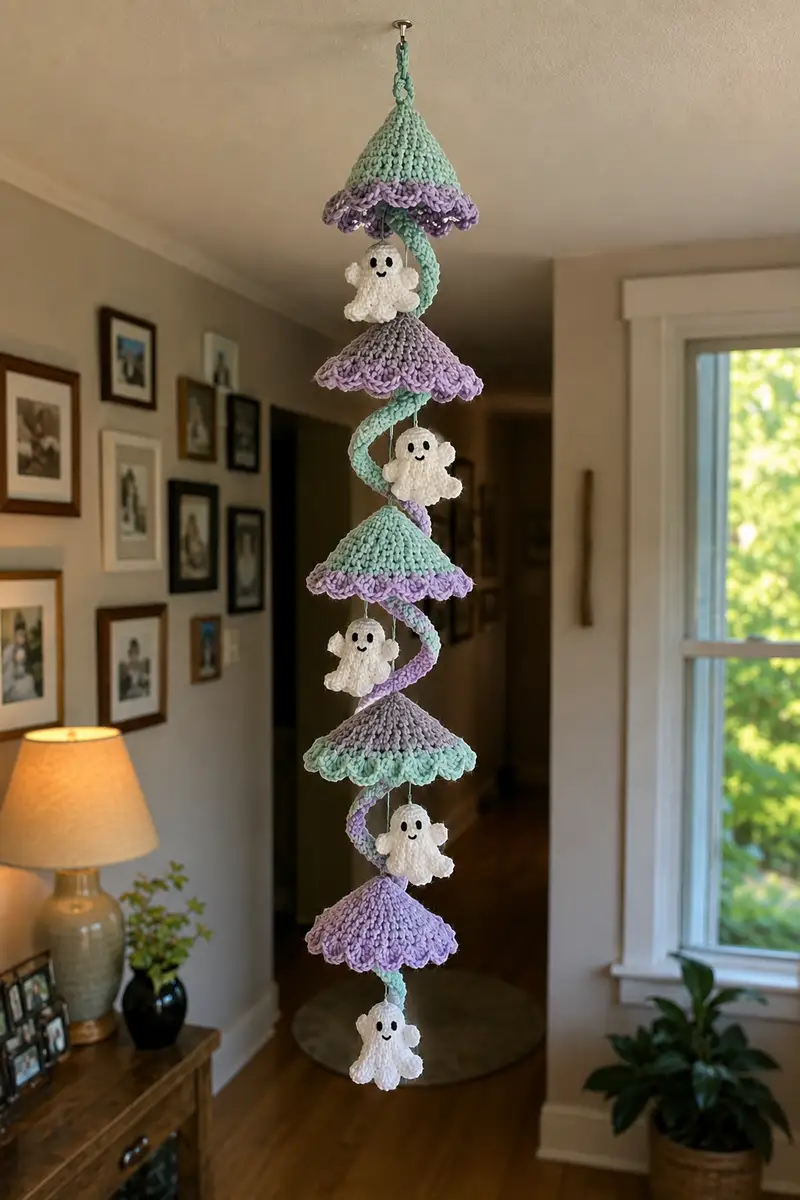
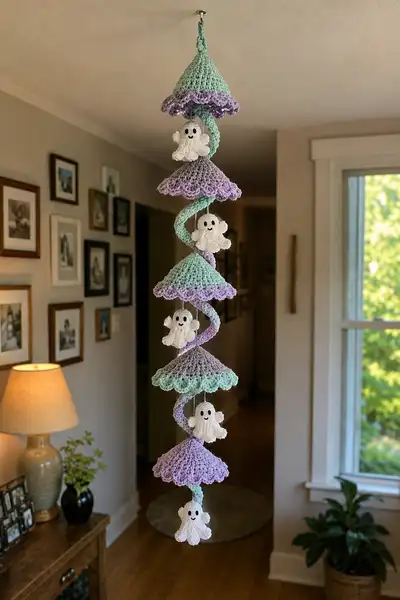
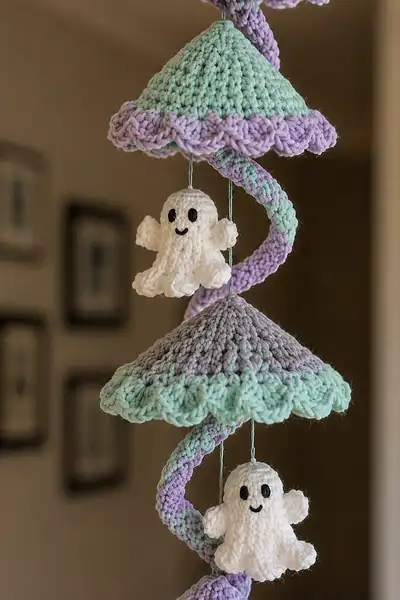
Create a whimsical hanging garland featuring scalloped mint and lilac umbrella roofs spiraled around a soft twisted stem with tiny smiling ghost amigurumi peeking from beneath each tier. This pattern includes detailed instructions for the spiral stem, six scalloped cone roofs, five cuddly ghosts and hanging assembly. Perfect for seasonal decor, a nursery accent, or a playful mobile — the pastel palette and friendly faces give this garland lots of charm.
Progress Tracker
0% Complete
— Overview :
Info :
This pattern covers making the spiral stem, six scalloped umbrella/roof cones, five tiny smiling ghost amigurumi, and the assembly of the hanging garland. Work in continuous rounds unless instructed otherwise. Use stitch markers to mark the start of each round and to mark eye placement. All stitch counts shown are total stitches at the end of the round and are checked for mathematical consistency. Gauge is not critical for overall look but affects final size — with bulky yarn and 6.0mm hook the cones measure approximately 9-10cm diameter, ghosts roughly 6-7cm tall, and the full garland hangs about 90-110cm depending on spacing.
— Materials & Prep :
Info :
Prepare all yarn colors and a long tail from the top of the spiral for mounting. Cut five lengths (approx 18-22cm) of thin cotton thread or yarn for hanging ghosts; you can adjust length for spacing. If you prefer safety eyes you can use 6mm/8mm eyes for ghosts, but embroidered faces are recommended for a soft, kid-friendly result. Work ghosts in continuous rounds and finish with a scallop for the skirt. Cones are worked in rounds with increases to shape a shallow cone and finished with a shell edge.
— Ghost (Make 5) :
Info :
Each ghost is worked in chunky white yarn with a slightly smaller hook if you prefer a firmer fabric (5.5mm). The ghost is essentially a round head that transitions into a scalloped body base. Work tightly so stuffing does not show through. Make five identical ghosts by repeating Rounds 1-32 for each.
Round 1 :
6 sc in magic ring (6)
Round 3 :
(1 sc, inc) x 6 (18)
Round 4 :
(2 sc, inc) x 6 (24)
Round 5 :
(3 sc, inc) x 6 (30)
Info :
Eyes will be placed between rounds 8-9 for a balanced expression. Use stitch markers to mark the space for each eye (approx 8-10 sts apart center-to-center depending on desired face width).
Round 6 :
(4 sc, inc) x 6 (36)
Round 7 :
1 sc in each st (36)
Round 8 :
1 sc in each st (36)
Info :
Place eyes: embroider two oval eyes using black yarn or embroidery floss, positioned between Rnd 7-8 about 8-10 stitches apart. Alternatively, insert 6mm safety eyes between Rnd 7 and Rnd 8, placing them roughly 9 stitches apart (center-to-center). Lock eyes before proceeding and then slightly stuff head after eye placement.
Round 9 :
1 sc in each st (36)
Round 10 :
(5 sc, inc) x 6 (42)
Round 11 :
1 sc in each st (42)
Round 12 :
1 sc in each st (42)
Info :
Begin light stuffing at Rnd 11-Rnd 12: add small amounts of fiberfill and shape the head to be gently rounded. Do not overfill — the ghost should remain soft and slightly malleable to create a sweet, floppy look.
Round 13 :
(6 sc, inc) x 6 (48)
Round 14-16 :
1 sc in each st (48)
Info :
Start transitioning from head to body at Rnd 17 by working slightly smaller increases or even rounds to give the chest a tiny flare before scalloped skirt. Check symmetry and adjust stuffing as you go — you want a full head and a slightly narrower upper body area.
Round 17 :
(6 sc, dec) x 6 (42)
Round 18 :
(5 sc, dec) x 6 (36)
Round 19 :
1 sc in each st (36)
Round 20 :
1 sc in each st (36)
Info :
Continue stuffing lightly through Rnd 20. The stuffing should fill the head and upper body but leave enough flexibility for the scalloped skirt to sit freely. If using safety eyes, ensure they are secure before final stuffing.
Round 21 :
(4 sc, dec) x 6 (30)
Round 22 :
(3 sc, dec) x 6 (24)
Round 23 :
(2 sc, dec) x 6 (18)
Round 24 :
(1 sc, dec) x 6 (12)
Info :
Stop decreasing and re-open for skirt shaping: we will widen again into a ruffled scallop using shells. Fasten off if you prefer to rejoin later, but for smooth transition continue working without fastening to keep a neat join.
Round 25 :
Inc around: 12 inc evenly spaced (24)
Round 26 :
(1 sc, inc) x 12 (36)
Round 27 :
1 sc in each st (36)
Round 28 :
Work scallop row: *skip 1 st, 5 dc in next st, skip 1 st, sl st in next st; rep around* (12 shells, approximate coverage)
Info :
The scallop (shells) form the wavy bottom of the ghost. Adjust shell sizes if you want a deeper ruffle: 5-dc shells create a pronounced ruffle; 3-dc shells are subtler. Ensure shells are evenly spaced around so the ghost sits flat when hung.
Round 29 :
Sl st into base of each shell and single crochet between shells to tidy edge if desired (36)
Round 30 :
Fasten off leaving a 20-22cm tail for hanging. Use a yarn needle to thread the tail through the center back top of the ghost and knot, creating a loop for the hanging cord. Weave in ends securely (no less than 5-6 passes) (36)
Round 31 :
Embroider mouth: using black yarn, stitch a small smile between Rnd 8-9 centered between eyes. Secure ends neatly on the inside.
Round 32 :
Optional little arms: attach at rounds 13-15 on either side by sewing small oval pieces (make tiny 6-sc ovals: ch 4, sc in 2nd ch from hook, sc, sc = 3 sc, then work 2 rnds around to make a 6-sc mini limb) and sew on; stuff lightly before closing. Fasten off and weave ends.
— Cone Roof / Scalloped Umbrella (Make 6, alternating colors) :
Info :
Each cone is worked in bulky yarn with a 6.0mm hook to create a shallow dome that resembles a scalloped umbrella. Make 6 cones total; work color changes for an alternating mint-lilac-gray pattern as shown: top cone mint with lilac scallop, next cone lilac with lavender-gray scallop, continue alternating. The cones attach by threading the central hanging cord through the cone apex. For stability, cones are worked to a diameter of approximately 9-10cm but can be scaled by yarn/hook choice.
Round 1 :
6 sc in magic ring (6)
Round 3 :
(1 sc, inc) x 6 (18)
Round 4 :
(2 sc, inc) x 6 (24)
Round 5 :
(3 sc, inc) x 6 (30)
Round 6 :
(4 sc, inc) x 6 (36)
Round 7 :
(5 sc, inc) x 6 (42)
Round 8 :
(6 sc, inc) x 6 (48)
Info :
These increases make a shallow cone rather than a flat circle; as you increase the number of rounds you will develop a dome. If you want a steeper cone, decrease the number of increase rounds or increase the frequency of increases.
Round 9-12 :
1 sc in each st (48)
Round 13 :
(6 sc, inc) x 6 (54)
Round 14-16 :
1 sc in each st (54)
Info :
At Rnd 16 check the cone diameter — if you want a larger cone add one more increase round of (7 sc, inc) x 6 to reach 60 sts. The cones pictured measure about 9-10cm across; gauge is achieved with bulky yarn plus 6.0mm hook.
Round 17 :
(7 sc, inc) x 6 (60) — optional to enlarge
Round 18-20 :
1 sc in each st (60)
Round 21 :
Begin scallop border: *sl st in next stitch, (skip 1 st, 5 dc in next st) repeat around* so that shells sit evenly along edge (number of shells will depend on final round stitch count: at 60 sts you'll have ~20 shells)
Round 22 :
Sl st in base of each shell and single crochet through the center between shells to tidy edge; if changing scallop color, finish Rnd 20 with fasten off and rejoin with new color at base of shells before working shells (see Info)
Info :
Color changes: for two-tone edges, work the cone body in the main color and fasten off. Rejoin contrasting color at the last round (Rnd 21 base) using a sl st and then work shells in the contrast color. Carrying yarn inside is optional but can help reduce weaving ends.
Round 23 :
Optional second scallop row for deeper ruffle: work shells into the spaces between the first row's shells: *ch 1, (3 dc in space between shells), ch 1, sl st in top of next shell* rep around. Fasten off and weave ends.
Round 24 :
To make a shallow brim fold: fold the last round slightly outward and block if necessary to hold shape. Weave and secure the inner yarn tail to the top center leaving a long tail to thread through the hanging cord.
— Spiral Stem (Twisted Rope) :
Info :
The spiral stem is worked as a long crocheted tube in two colors (mint and lilac) that are joined and twisted as you attach cones and ghosts. There are two options: (A) Crochet a long tube in one color and then attach crochet i-cord spirals around it in the alternate color; (B) Crochet a long circular tube worked in rounds alternating color sections and then twist. Option B (single continuous tube with color changes) is used here for a neat appearance. The tube is approx 110-120cm long when finished and should be sturdy but flexible.
Round 1 :
6 sc in magic ring with mint (6)
Round 3 :
(1 sc, inc) x 6 (18)
Round 4 :
(2 sc, inc) x 6 (24)
Round 5 :
(3 sc, inc) x 6 (30)
Round 6-8 :
1 sc in each st (30)
Info :
At this point you have a small tube with 30 sts per round. Working in continuous rounds, you'll grow the tube to the desired length by repeating even rounds in mint for about 12-18cm then change to lilac for 12-18cm, continuing alternating color blocks. This creates the mint/lilac spiral when the tube is twisted during assembly.
Round 9-90 :
Working in continuous spiral rounds, 1 sc in each st (30) for approx 82 rounds total to reach approximately 110-120cm long depending on your tension. Change color after every 8-12 rounds to create alternating mint and lilac bands. Maintain 30 sts each round.
Info :
Color change technique: to change color, finish the last round with the old color, and in the final pull-through of the last sc place your new color, continuing without fastening off. Carry the unused color inside the tube if desired, or fasten off and weave in ends at the end and at each change. Tip: leave long tails at each color change and weave them into the inner tube for secure joins and less bulk outside.
Round 91 :
Decrease to taper end for top loop if desired: (3 sc, dec) x 6 (24)
Round 92 :
(2 sc, dec) x 6 (18)
Round 93 :
(1 sc, dec) x 6 (12)
Round 95 :
Fasten off leaving a long tail. Use the long tail to create and secure a hanging loop at the very top through the small aperture, reinforcing with whip stitch and weaving in ends.
Info :
After making the long tube, lightly stuff it to provide body so it holds a gentle curve when hung. Stuff evenly but not rigid — the tube should be flexible so you can twist it into the spiral shape when assembling the cones and ghosts.
— Top Hanging Loop & Small Finishings :
Round 1 :
At very top leave a 12-15cm tail from the tube; fold tail to create a loop and secure by sewing through the tube apex with several stitches (approx 8-10 passes) to ensure loop is secure. Knot and weave tail into inside of tube.
Info :
Attach a metal ring or keyring to the loop for easy hanging from a ceiling hook. If the garland will be hung outdoors, consider using a small fabric glue dab on the knot inside for extra security.
— Small Cone Insert & Stabilizer (Optional) :
Info :
If you want the cones to hold a perfect dome, insert a small circle of plastic canvas or thin cardboard inside the brim before sewing up the center. Cut to fit just inside the scalloped edge and slip it in before closing the top. For extra stability you can stitch around the top center to create a tiny pocket for the insert.
— Assembly Instructions (detailed steps) :
Info :
Assembly is done from top to bottom. Thread a long length of strong matching yarn or embroidery floss through the center apex of each cone before closing so it can slide freely on the stem. Position cones at intervals, twist the long tube to create the spiral and then pin cones in place before final sewing so that shells face outward uniformly.
Step 1 :
Thread each cone onto the spiral tube using the long tail left at the apex; alternate cones in your chosen color sequence. Start with top cone at approx 3-4cm from top loop then space subsequent cones 12-16cm apart depending on desired look.
Step 2 :
Twist the tube gently to create a spiral. Hold the top and use one hand to rotate the tube while the other hand places the cone so it sits snugly on the twist. Pin in place temporarily with sewing pins if needed.
Step 3 :
Attach hanging cords to each ghost: thread a 18-22cm piece of thin cotton thread through the top loop of each ghost and knot securely inside. Trim tails short or hide them inside the ghost. Position each ghost beneath a cone so the scallop of the ghost slightly peeks out underneath the cone edge.
Step 4 :
Sew the ghost hanging cord to the inside apex of the cone: push the cord through the cone apex and tie a small knot inside to secure. If the cone has an insert, pass the cord through a small hole near the apex to secure the ghost in place. Repeat for each ghost and cone pairing.
Step 5 :
Secure cones to the spiral: using matching yarn and a yarn needle, sew the inner top of each cone to the spiral tube with ladder stitch, catching several rounds of the tube to keep the cone stable and aligned with the spiral curve. Sew at three anchor points around the apex for each cone to prevent rotation.
Step 6 :
Tidy all ends: weave in all tails thoroughly into the inside of cones, ghosts, and the spiral. Trim any visible tails and check that each ghost hangs centered beneath its cone; adjust knot height on hanging cords if needed.
Info :
Balance check: hold the garland by the top loop and ensure it hangs straight. Make small adjustments by moving ghost cords up or down or by shifting cone anchor stitches to achieve a pleasing spiral flow. If you want a tighter spiral, twist tube more before anchoring cones.
— Optional Decorative Details :
Info :
Add small embroidered blush dots on ghosts with pastel pink yarn or fabric-safe pastel chalk applied lightly. You can also add tiny crocheted buttons or beads to the cone brims for extra sparkle — sew them on securely so they are child-safe if used around kids.
— Final Finishing Touches :
Info :
Once assembled, press the cones gently into shape and block scalloped edges with pins and a light mist of water if desired. Let dry thoroughly. Check that all hanging points are secure. Hang your garland in a sheltered spot away from direct weather if used outside.
— Troubleshooting & Tips :
Info :
If cones gape or scallops lie flat, slightly wet and block the scalloped edge by pinning it outward to set a curve. If ghosts tilt, shorten or lengthen their hanging cords to balance. If the spiral twists unevenly, unpin and retwist from the top, re-anchor cones.
This mint-and-lilac spiral garland is a delightful mix of texture and whimsy that brings a playful, handmade touch to any room. Each scalloped cone and smiling ghost is a small celebration of crochet charm, and the delicate spiral stem ties the whole design together beautifully. With steady rounds and careful assembly, you'll end up with a mobile that's both sturdy and sweet — ideal for gift-giving or seasonal décor. 🧶👻 I hope you enjoy making every ruffled edge and friendly face — happy stitching! 🎨