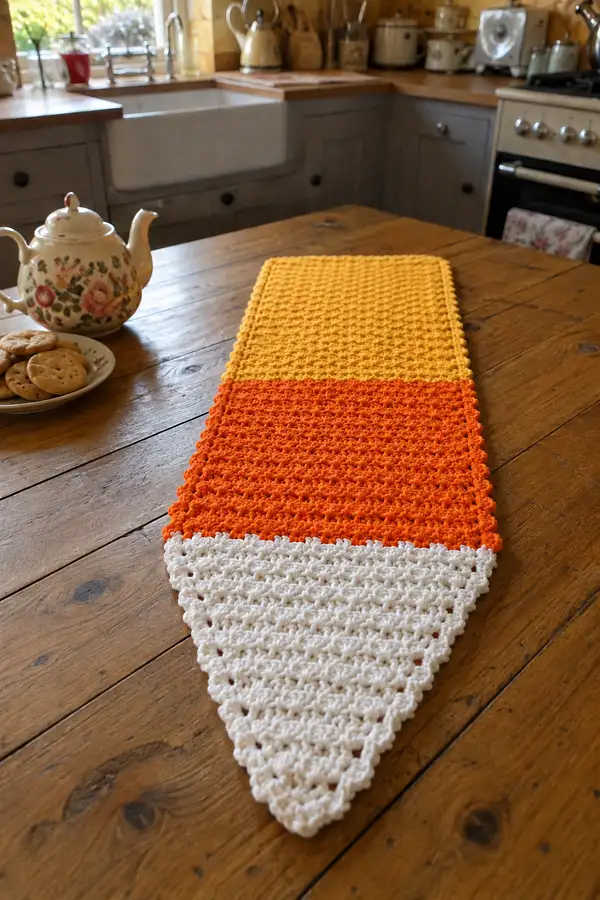
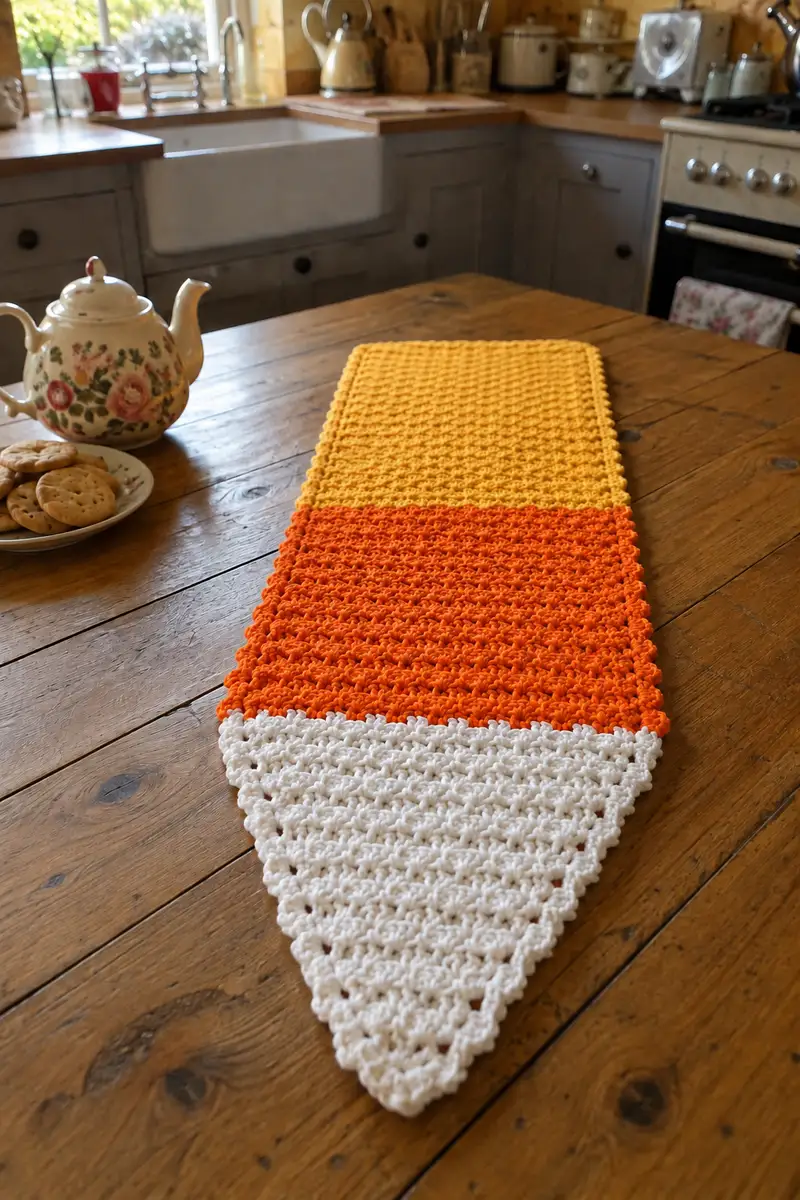
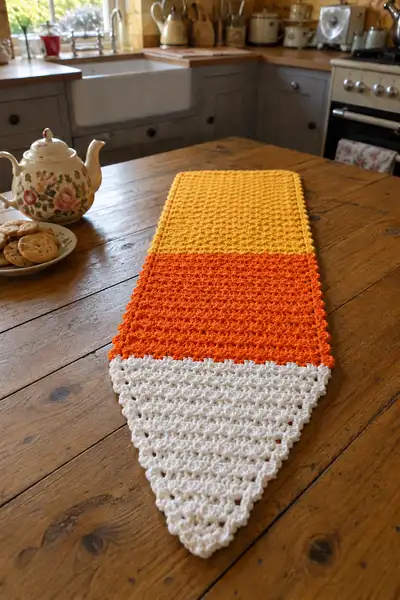
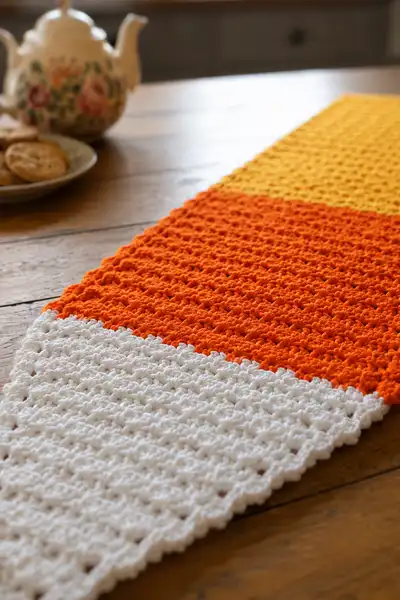
Create a festive candy corn table runner in classic white, orange and yellow bands. This textured runner features a pointed white tip that mimics candy corn, a warm orange center band and a sunny yellow top, worked in a dense, cluster-style stitch for a squishy, tactile finish. The pattern is designed for worsted-weight cotton yarn and makes a striking seasonal accent for a dining table, sideboard or entry tray.
Progress Tracker
0% Complete
— Notes & Stitch Guide :
Info :
This runner is worked flat from the pointed white tip up to the rectangular yellow end. The pattern uses a repeating textured '3-dc cluster with ch1' motif (referred to as cl below) worked across the row. Each cl counts as one repeat unit for stitch counts. You will build the triangle by increasing the number of clusters each row, then maintain an even width for the orange and yellow bands.
Stitch - 3-dc cluster (cl) :
Yo, insert hook in indicated stitch, yo, pull up loop, yo, draw through two loops (two loops left), repeat 2 more times into the same stitch (you will have 4 loops on hook), yo, draw through all loops on hook to complete cluster. Ch 1 after each cluster to separate clusters unless instructed otherwise.
Gauge :
One cluster (cl) plus ch1 measures approximately 1/2 inch across when worked with 5.0 mm hook and worsted cotton. Gauge is not critical; changing hook size will change final width and length proportionally.
Finished size (approx) :
Approximately 40 inches (102 cm) long from point to straight end and 10.5 inches (27 cm) wide at the widest section (these are approximate; adjust final repeat counts to customize).
— Abbreviations & Conventions Used in Row Counts :
Info :
Throughout the pattern each 'Round' corresponds to one worked row across the width of the runner. The notation '(n)' indicates total cluster repeats (cl) at the end of that row. All counts reflect number of clusters (cl) across the row. When a row says '1 cl in each cl' it means make one 3-dc cluster into each cluster stitch below.
— White Tip Triangle (Point) :
Round 1 :
Make a slip knot, ch 3 (this counts as turning chain), into first ch work 1 cl to form the first point (1)
Round 2 :
Turn, ch 3 (counts as beginning height), work 1 cl into the base of the previous cl, ch 1, then work 1 cl into the last stitch at far edge to make an increase at the opposite edge — total (3)
Round 3 :
Turn, ch 3, work 1 cl in first st, ch 1, work 1 cl into each cl across, adding an extra cl at the far edge to increase by 2 (5)
Round 4 :
Turn, ch 3, 1 cl in first st, ch 1, 1 cl in each cl across, increase at last stitch to expand both edges (7)
Round 5 :
Turn, ch 3, continue increasing one cluster at each end, work 1 cl + ch1 in each cl across (9)
Info :
For triangle increases: at the beginning of each RS row, use ch3 as your turning chain and work a 3-dc cluster into the base of this chain to create the first increase. At the end of the row work an additional cluster into the turning chain or last stitch to create the second increase. This adds two clusters per row and keeps the point symmetrical.
Round 6 :
Turn, ch 3, 1 cl in first st, 1 cl in each cl across (11)
Round 7 :
Turn, ch 3, 1 cl first, 1 cl in each cl across, increase at end (13)
Round 8 :
Turn, ch 3, 1 cl in each cl across (15)
Round 9 :
Turn, ch 3, 1 cl in first st, 1 cl in each cl across, increase at end (17)
Info :
Place a stitch marker at the first cl of each row if you need to visually confirm increases at the near edge. Count clusters periodically to ensure your increases are symmetrical; the sequence should yield odd-numbered cluster counts (1,3,5,7...).
Round 10 :
Turn, ch 3, 1 cl in each cl across (19)
Round 11 :
Turn, ch 3, 1 cl in first 1 cl, 1 cl in each cl across, increase at end (21)
Round 12 :
Turn, ch 3, 1 cl in each cl across (23)
Round 13 :
Turn, ch 3, 1 cl in each cl across, increase at end (25)
Round 14 :
Turn, ch 3, 1 cl in each cl across (27)
Round 15 :
Turn, ch 3, 1 cl in each cl across, increase at end (29)
Info :
If you prefer a narrower or wider runner, stop increasing earlier or continue increasing until you reach your desired width. The sample photo reaches 31 clusters wide; the pattern below increases to 31 clusters.
Round 16 :
Turn, ch 3, 1 cl in each cl across, increase at end (31) — end of triangle increases
Info :
Fasten off white. Weave in the white tail or leave a tidy 6-inch tail for hiding later. Change to orange yarn with a standing cluster in the last stitch of Round 16 or attach orange with a sl st in the top of the last cluster and ch 3 to begin the orange section.
— Orange Middle Band (Working even across 31 clusters) :
Info :
Join orange yarn at the top of the last white row. The orange section in the photo is worked evenly across 31 clusters for a set number of rows (sample uses 24 rows). Maintain the cluster + ch1 repeat across the row. Each row will remain 31 clusters (31).
Round 17 :
With orange, join and ch 3, work 1 cl in each cl across to end (31)
Round 18 :
Turn, ch 3, 1 cl in each cl across (31)
Round 19 :
Turn, ch 3, 1 cl in each cl across (31)
Round 20 :
Turn, ch 3, 1 cl in each cl across (31)
Info :
When working long even sections keep your tension the same across color changes. If you notice the edges drifting in or out, adjust tension slightly or block lightly after finishing to square the piece.
Round 21 :
Turn, ch 3, 1 cl in each cl across (31)
Round 22 :
Turn, ch 3, 1 cl in each cl across (31)
Round 23 :
Turn, ch 3, 1 cl in each cl across (31)
Round 24 :
Turn, ch 3, 1 cl in each cl across (31)
Round 25 :
Turn, ch 3, 1 cl in each cl across (31)
Info :
Sample photo uses 24 rows of orange beginning with Round 17 through Round 40. Adjust number of orange rows to create thicker or thinner orange band to your liking. Color changes are best done by completing final yo of the last cluster with the new color and pulling through to create a tidy join.
Round 26 :
Turn, ch 3, 1 cl in each cl across (31)
Round 27 :
Turn, ch 3, 1 cl in each cl across (31)
Round 28 :
Turn, ch 3, 1 cl in each cl across (31)
Round 29 :
Turn, ch 3, 1 cl in each cl across (31)
Round 30 :
Turn, ch 3, 1 cl in each cl across (31)
Round 31 :
Turn, ch 3, 1 cl in each cl across (31)
Round 32 :
Turn, ch 3, 1 cl in each cl across (31)
Round 33 :
Turn, ch 3, 1 cl in each cl across (31)
Round 34 :
Turn, ch 3, 1 cl in each cl across (31)
Info :
At the end of the orange section, fasten off orange and join yellow with a standing cluster or sl st and ch 3 to maintain an unbroken texture line. Weave the orange tails into the backside if possible to maintain a clean front appearance.
— Yellow Top Rectangular Band (Even 31 clusters) :
Round 35 :
With yellow, attach and ch 3, work 1 cl in each cl across (31)
Round 36 :
Turn, ch 3, 1 cl in each cl across (31)
Round 37 :
Turn, ch 3, 1 cl in each cl across (31)
Round 38 :
Turn, ch 3, 1 cl in each cl across (31)
Round 39 :
Turn, ch 3, 1 cl in each cl across (31)
Info :
The photo shows a long yellow band worked straight across for approximately 48 rows in the sample. Work 40-60 rows in yellow depending on desired overall runner length. The pattern below lists 48 rows total for the yellow band (Rounds 35-82) to reach the sample length.
Round 40 :
Turn, ch 3, 1 cl in each cl across (31)
Round 41 :
Turn, ch 3, 1 cl in each cl across (31)
Round 42 :
Turn, ch 3, 1 cl in each cl across (31)
Round 43 :
Turn, ch 3, 1 cl in each cl across (31)
Round 44 :
Turn, ch 3, 1 cl in each cl across (31)
Round 45 :
Turn, ch 3, 1 cl in each cl across (31)
Round 46 :
Turn, ch 3, 1 cl in each cl across (31)
Round 47 :
Turn, ch 3, 1 cl in each cl across (31)
Round 48 :
Turn, ch 3, 1 cl in each cl across (31)
Info :
Keep the same cluster pattern across the entire yellow section. If you prefer a less textured look for the yellow section, you could substitute one or more rows of sc across to create a smoother band, but this changes the overall look.
Round 49 :
Turn, ch 3, 1 cl in each cl across (31)
Round 50 :
Turn, ch 3, 1 cl in each cl across (31)
Round 51 :
Turn, ch 3, 1 cl in each cl across (31)
Round 52 :
Turn, ch 3, 1 cl in each cl across (31)
Round 53 :
Turn, ch 3, 1 cl in each cl across (31)
Round 54 :
Turn, ch 3, 1 cl in each cl across (31)
Round 55 :
Turn, ch 3, 1 cl in each cl across (31)
Round 56 :
Turn, ch 3, 1 cl in each cl across (31)
Round 57 :
Turn, ch 3, 1 cl in each cl across (31)
Info :
Use a second stitch marker at the opposite edge every 10 rows to ensure the width remains consistent across the long yellow section; this helps prevent edge waviness that may occur with cluster stitches.
Round 58 :
Turn, ch 3, 1 cl in each cl across (31)
Round 59 :
Turn, ch 3, 1 cl in each cl across (31)
Round 60 :
Turn, ch 3, 1 cl in each cl across (31)
Round 61 :
Turn, ch 3, 1 cl in each cl across (31)
Round 62 :
Turn, ch 3, 1 cl in each cl across (31)
Round 63 :
Turn, ch 3, 1 cl in each cl across (31)
Round 64 :
Turn, ch 3, 1 cl in each cl across (31)
Round 65 :
Turn, ch 3, 1 cl in each cl across (31)
Round 66 :
Turn, ch 3, 1 cl in each cl across (31)
Info :
If you want to lengthen the runner, add sets of 8-12 additional even rows in the yellow band. You can also make the orange section wider by working more orange rows and reducing yellow rows proportionally.
Round 67 :
Turn, ch 3, 1 cl in each cl across (31)
Round 68 :
Turn, ch 3, 1 cl in each cl across (31)
Round 69 :
Turn, ch 3, 1 cl in each cl across (31)
Round 70 :
Turn, ch 3, 1 cl in each cl across (31)
Round 71 :
Turn, ch 3, 1 cl in each cl across (31)
Round 72 :
Turn, ch 3, 1 cl in each cl across (31)
Round 73 :
Turn, ch 3, 1 cl in each cl across (31)
Round 74 :
Turn, ch 3, 1 cl in each cl across (31)
Round 75 :
Turn, ch 3, 1 cl in each cl across (31)
Info :
Work the yellow band until your desired runner length is reached. The sample ends the yellow band on Round 82; if your table is longer add extra even rounds in multiples of 2 to keep symmetry when you add the border.
Round 76 :
Turn, ch 3, 1 cl in each cl across (31)
Round 77 :
Turn, ch 3, 1 cl in each cl across (31)
Round 78 :
Turn, ch 3, 1 cl in each cl across (31)
Round 79 :
Turn, ch 3, 1 cl in each cl across (31)
Round 80 :
Turn, ch 3, 1 cl in each cl across (31)
Round 81 :
Turn, ch 3, 1 cl in each cl across (31)
Round 82 :
Turn, ch 3, 1 cl in each cl across (31) — last yellow row in sample
Info :
Fasten off yellow and weave in ends. At this point the runner is a single piece with a pointed white tip and a straight top edge. We will add a neat single-crochet border around the entire piece to tidy edges and create a uniform finish.
— Edging & Border (single crochet around) :
Info :
Join border color (yellow or a contrast color) at the straight top edge center with a sl st. Work even single crochet stitches evenly around the perimeter. On the pointed tip work 3 sc into the end stitch to round the point slightly and create a stable corner; on straight edges work 1 sc per cl across, working 2 sc into the first and last cl of each straight side to keep length consistent.
Round 83 :
Attach border yarn at top center with sl st, ch 1, sc in same place, sc evenly across top edge working approximately 2 sc in the first and last cl across to match width (31 sc across top)
Round 84 :
Continue down right side edge: turn corner, sc evenly in side loops (one sc in the side of each row; add 2 sc into the turning chains every 10 rows if needed to avoid pulling) all the way to the pointed tip
Round 85 :
At the pointed end work 3 sc into the tip point to create a firm rounded point, then begin sc up the opposite side evenly back to the top. Work 1 sc into the top of each cl and 2 sc into end stitches as needed to maintain even border tension
Round 86 :
Work a second sc round if you prefer a firmer edge. For a decorative finish you can work a crab stitch (reverse sc) around in the contrasting color for a twisted rope edge.
Info :
Weave in all tails on the wrong side using a yarn needle. Block the finished runner: pin flat to measurements, dampen lightly and allow to dry to flatten and square edges. This will help the border sit flat and give the runner a polished look.
— Customization Notes & Alternate Stitches :
Info :
If you prefer a tighter fabric, switch to a 4.5 mm hook. For a softer drape substitute a cotton/acrylic blend. To change texture try a v-stitch (dc, ch1, dc) instead of clusters and keep the same cluster counts but expect a slightly more open fabric. For a denser look substitute sc in each cl for one or two rows in each section.
Info :
To make both ends pointed: repeat the triangle increase sequence at the top end in reverse (decrease rows) if you would like to mirror the white point at the opposite end. To do this, after the yellow band decrease two clusters per row symmetrically until you reach single cluster and finish with Round 1 method in reverse.
Finishing :
Weave in ends, lightly block the runner to size, and trim stray fibers. Optionally add small non-slip pads under the runner for secure placement. Your candy-corn table runner is ready to decorate your autumn table!
This candy corn runner is such a joyful seasonal accent — bold in color and cozy in texture. The single-piece construction means it’s quick to assemble but looks carefully crafted. I love how the pointed white tip catches the eye and the chunky cluster texture reads beautifully against a wooden table. Make one for a Halloween centerpiece or as a bright autumn accent for any table. 🧶🍂🎃