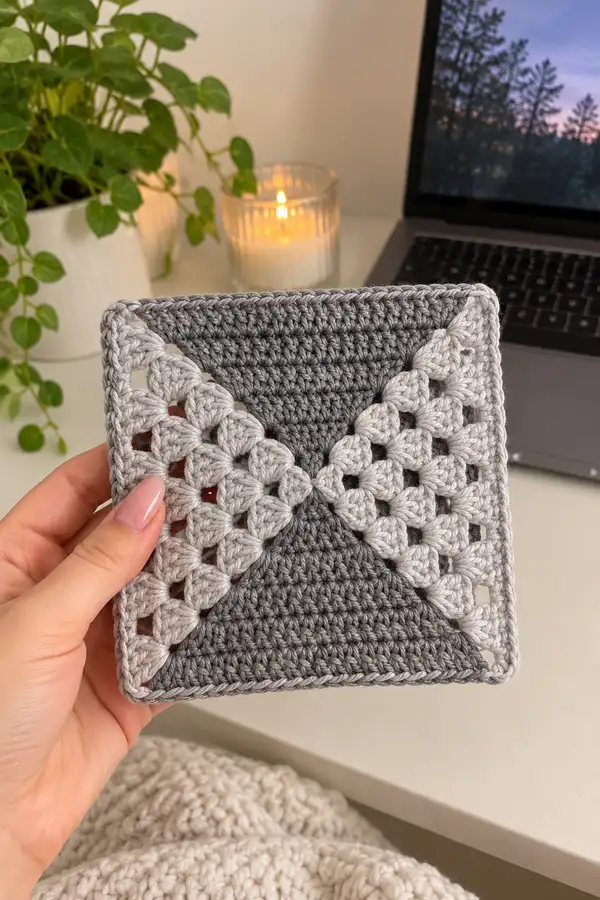
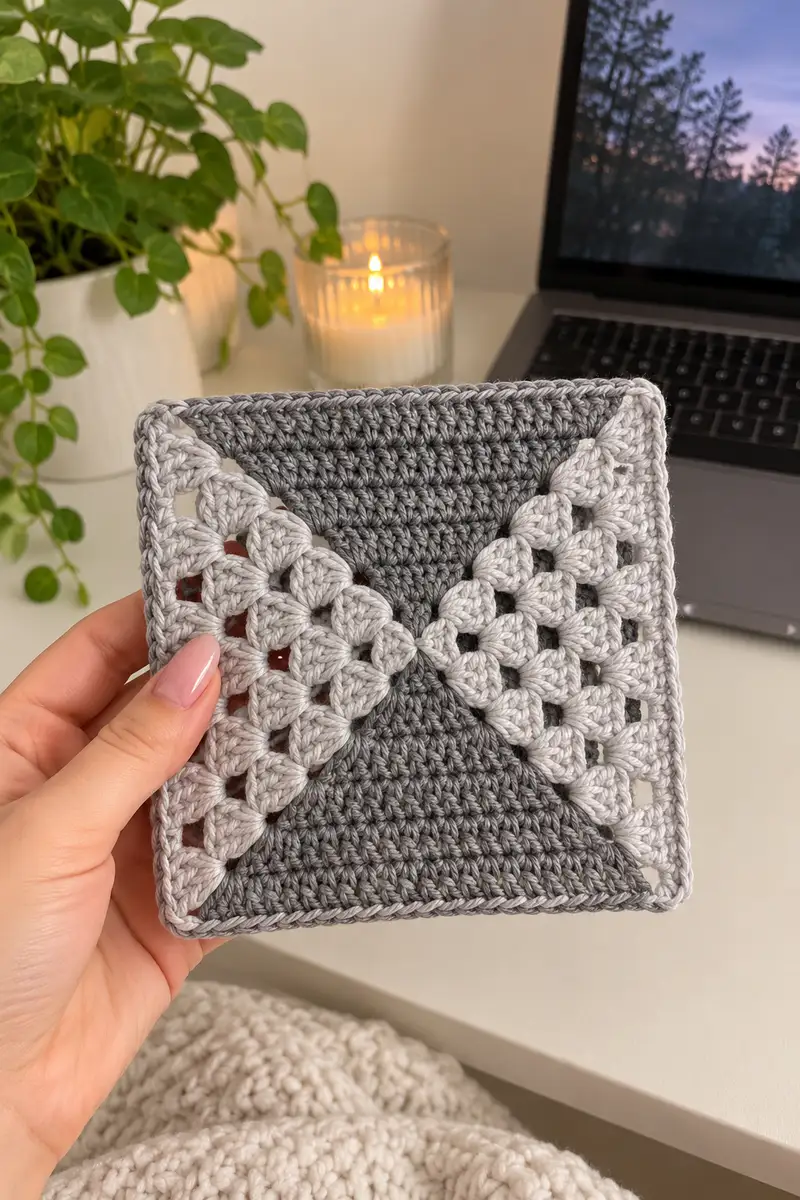
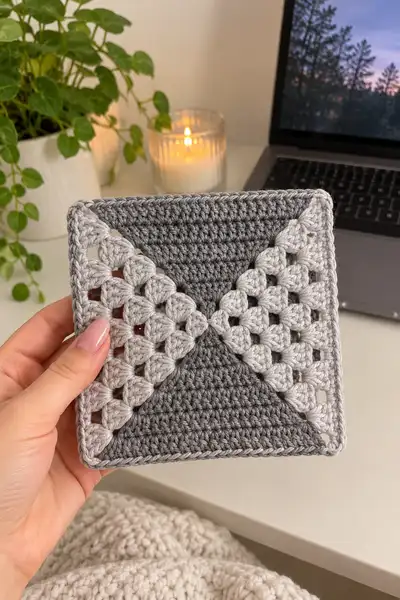
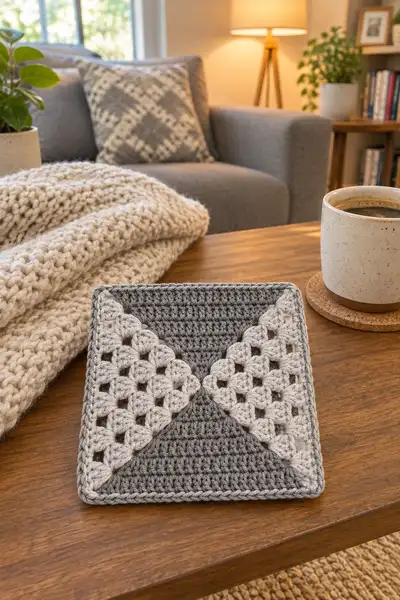
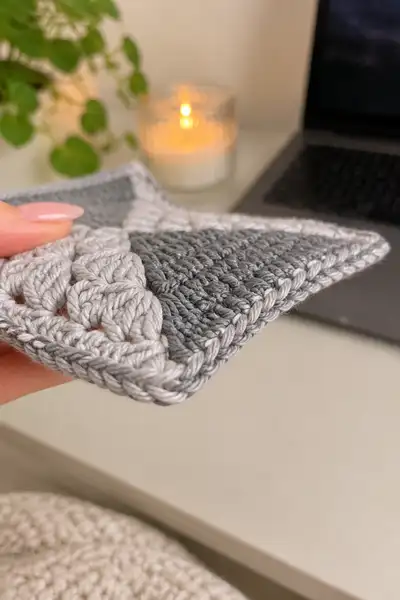
Create a contemporary, geometric bedspread made from striking two-tone granny squares. Each square features two solid textured triangles and two airy granny-cluster triangles that meet in a crisp central X. The finished squares join together for a modern bedspread with a neat piped edge — perfect for neutral, minimalist bedrooms.
Progress Tracker
0% Complete
— Overview :
Info :
This pattern creates one modular square motif composed of four isosceles right triangles. Two opposite triangles are worked solid in rows of double crochet (dark grey). Two opposite triangles are worked with classic granny clusters (light grey). After making all four triangles you will join them into a square, work a framed border and then repeat motifs to make your bedspread using join-as-you-go or whip stitch seams. Numbers below are given for a motif that finishes at approximately 5.5" (14 cm) square using worsted weight and 4.0 mm hook; make gauge adjustments and repeat accordingly for larger blanket sizes.
Info :
Abbreviations used: ch, dc, sc, sl st, cl = 3 dc cluster (worked as: 3 dc into space or stitch separated by ch-1), inc = 2 stitches in same stitch. I clarify cluster-equivalent stitch counts for granny rows as 'clusters (total dc equivalent)'.
— Solid Triangle (Make 2, Dark Grey) :
Row 1 :
Make a magic ring. Work 3 dc into the ring. (3)
Row 2 :
Turn, work 2 dc in first stitch, dc in each remaining stitch across, 2 dc in last stitch (increase at both ends). (5)
Row 3 :
Turn, 2 dc in first st, dc in next 3 sts, 2 dc in last st. (7)
Row 4 :
Turn, 2 dc in first st, dc in next 5 sts, 2 dc in last st. (9)
Info :
Each row increases by 2 stitches because you work an extra dc at each end (2 dc in first stitch and 2 dc in last stitch). This produces a perfect right triangle shape. Place a stitch marker in the first stitch of the row if you find turning points confusing.
Row 5 :
Turn, 2 dc in first st, dc in next 7 sts, 2 dc in last st. (11)
Row 6 :
Turn, 2 dc in first st, dc in next 9 sts, 2 dc in last st. (13)
Row 7 :
Turn, 2 dc in first st, dc in next 11 sts, 2 dc in last st. (15)
Row 8 :
Turn, 2 dc in first st, dc in next 13 sts, 2 dc in last st. (17)
Info :
Keep edges tidy by inserting the hook under both loops of the turning chain-2 when you work the first stitch of the row. This will remove visible holes at the turning edge.
Row 9 :
Turn, 2 dc in first st, dc in next 15 sts, 2 dc in last st. (19)
Row 10 :
Turn, 2 dc in first st, dc in next 17 sts, 2 dc in last st. (21)
Row 11 :
Turn, 2 dc in first st, dc in next 19 sts, 2 dc in last st. (23)
Row 12 :
Turn, 2 dc in first st, dc in next 21 sts, 2 dc in last st. (25)
Info :
If making a full bedspread it is helpful to keep identical tension and hook sizes for all solid triangles so that rows match granny triangle base widths precisely.
Row 13 :
Turn, 2 dc in first st, dc in next 23 sts, 2 dc in last st. (27)
Row 14 :
Turn, 2 dc in first st, dc in next 25 sts, 2 dc in last st. (29)
Row 15 :
Turn, 2 dc in first st, dc in next 27 sts, 2 dc in last st. (31)
Row 16 :
Turn, 2 dc in first st, dc in next 29 sts, 2 dc in last st. (33)
Info :
Check that your last stitch count equals the planned base width. For this sample triangle the counts follow the pattern: Row n = 2n + 1 stitches. Row 16 = 33 stitches. The full triangle will reach Row 21 for a 43 stitch base width. Adjust number of rows for a larger or smaller motif.
Row 17 :
Turn, 2 dc in first st, dc in next 31 sts, 2 dc in last st. (35)
Row 18 :
Turn, 2 dc in first st, dc in next 33 sts, 2 dc in last st. (37)
Row 19 :
Turn, 2 dc in first st, dc in next 35 sts, 2 dc in last st. (39)
Row 20 :
Turn, 2 dc in first st, dc in next 37 sts, 2 dc in last st. (41)
Info :
At this point, lay your triangle flat and measure along the base to make sure it matches the base of your granny triangle to be worked in the other color. If you prefer a slightly larger motif make additional rows in pairs (increase by 2 each row) so the shape stays isosceles right.
Row 21 :
Turn, 2 dc in first st, dc in next 39 sts, 2 dc in last st. (43)
Info :
Fasten off leaving a long tail (approx 20-24" / 50-60 cm) for joining later. Make two identical solid triangles following rows 1-21.
— Granny Triangle (Make 2, Light Grey) :
Row 1 :
Make a magic ring. Work 3 dc cluster (cl = 3 dc all into ring) - counts as first cluster (clusters:1 / dc equiv:3). (clusters:1 / dc equiv:3)
Row 2 :
Turn, ch3 (counts as first dc of cluster if you prefer), into the base edge work a cluster, ch1, cluster, ch1, cluster — creating 3 clusters across the short edge (clusters:3 / dc equiv:9).
Row 3 :
Turn, increase: at each row end add a cluster in the first available space and the last available space so clusters per row increase by 2. Work clusters separated by ch1 between clusters across the row. (clusters:5 / dc equiv:15)
Row 4 :
Turn, add cluster at start, cluster, ch1 between clusters across, add cluster at end. (clusters:7 / dc equiv:21)
Info :
Granny cluster rows increase by 2 clusters per row (1 cluster added to each outer edge). The cluster count for row n is (2n - 1). To match the solid triangle base width of 43 stitches (dc equivalent) we need 21 rows: row 21 clusters = 41 clusters which equals 41 x 3 = 123 dc equivalent across the base, but note clusters are arranged with ch-1 spaces which change visual width. For this motif we scale cluster rows so the final granny triangle visually matches the solid triangle base — follow exact counts below for 21 rows.
Row 5 :
Turn, clusters across with ch1 between clusters, add clusters at both edges. (clusters:9 / dc equiv:27)
Row 6 :
Turn, clusters: 11 (clusters:11 / dc equiv:33)
Row 7 :
Turn, clusters: 13 (clusters:13 / dc equiv:39)
Row 8 :
Turn, clusters: 15 (clusters:15 / dc equiv:45)
Info :
Keep your tension slightly looser for granny triangles than for solid triangles so the visual width of the ch-1 gaps balances the solid triangle width. If your cluster row appears narrow compared to the solid triangle, reduce hook size for solid triangles or add an extra ch between clusters (adjust consistently).
Row 9 :
Turn, clusters: 17 (clusters:17 / dc equiv:51)
Row 10 :
Turn, clusters: 19 (clusters:19 / dc equiv:57)
Row 11 :
Turn, clusters: 21 (clusters:21 / dc equiv:63)
Row 12 :
Turn, clusters: 23 (clusters:23 / dc equiv:69)
Info :
At the outer edges of granny triangle rows you will work a cluster into the first ch-1 space of the previous row so the sides step out evenly. Maintain clean corners by ensuring the first and last stitches are always clusters (no extra chains at outer edges).
Row 13 :
Turn, clusters: 25 (clusters:25 / dc equiv:75)
Row 14 :
Turn, clusters: 27 (clusters:27 / dc equiv:81)
Row 15 :
Turn, clusters: 29 (clusters:29 / dc equiv:87)
Row 16 :
Turn, clusters: 31 (clusters:31 / dc equiv:93)
Info :
Work the ch-1 spaces consistently between clusters. If you wish to change the look, you can work ch-2 spaces for an airier texture, but you will need to adjust counts to maintain matching width when joining triangles.
Row 17 :
Turn, clusters: 33 (clusters:33 / dc equiv:99)
Row 18 :
Turn, clusters: 35 (clusters:35 / dc equiv:105)
Row 19 :
Turn, clusters: 37 (clusters:37 / dc equiv:111)
Row 20 :
Turn, clusters: 39 (clusters:39 / dc equiv:117)
Info :
For this motif we will finish granny triangles on Row 21 which will provide a visual match to solid triangles when blocked. After Row 20 lay triangles together and compare. Blocking will flatten and align edges for joining.
Row 21 :
Turn, clusters: 41 (clusters:41 / dc equiv:123). Fasten off leaving long tail for joining (approx 20-24" / 50-60 cm).
Info :
Make two identical granny triangles. You should now have 4 triangles: 2 solid dark triangles and 2 light granny triangles. Block each triangle to square shape: pin edges on a blocking mat and mist lightly; allow to dry flat to even out tension differences between stitch types.
— Assembling the Square (Join 4 Triangles) :
Info :
Arrange your four triangles with right angles at the 4 corners so the 2 dark, solid triangles sit opposite each other and the 2 light granny triangles sit opposite, forming a crisp X at the center where points meet. The center where all four tips meet should be tight — use the long tails to stitch these points firmly together first.
Step 1 :
With tapestry needle and one long tail, position two adjacent triangles (one solid + one granny) with right sides up. Align the edges so the long base rows match. Using a mattress stitch or whip stitch, sew along the long seam matching stitches; sew every other stitch through both layers for an invisible join. Continue until seam is complete.
Step 2 :
Repeat to join the other two edges so you form a half-square made of two triangles. Join the two half-squares together at the center seam: you can sew from the center outwards on each side for a secure, flat join. Use small, even stitches and avoid pulling too tight as the join will pucker.
Info :
Alternative: Work join-as-you-go (JAYG) by joining the triangles by slip stitch or single crochet while you complete the final rows of each triangle — this gives a very flat seam. The method above (sewing after blocking) provides more control and is recommended for beginners.
Step 3 :
Once all four triangles are sewn together, weave in all tails into the seam, then press lightly or re-block the completed square to align edges. The finished square should present a neat diagonal X centered in the square.
— Border Around One Square :
Info :
The border gives a clean, framed look and slightly stiffens the edge for easier joining. We recommend 6 rounds for the sample motif plus an optional crab-stitch round for a twisted rope effect. Use main color for first rounds and a contrasting lighter color for the outer two rounds if desired.
Round 1 :
Attach yarn at any corner point. Round 1: sc evenly around the square working 1 sc for each stitch across the base of triangles. At each corner (right angle), work 3 sc into the corner stitch to preserve squareness. Estimated round stitch count: for a square with 43-st base per side: 4 x 43 = 172 sc + (corners extra) 8 sc = 180 sc total. (approx 180 sc)
Info :
To keep corners crisp, place 3 sc in the single corner stitch (works as corner increase). If you feel the corner is not large enough, make 3 sc, ch1, 3 sc in corner.
Round 2 :
1 sc in each st around, placing 3 sc into each corner sc from previous round. (approx 180 sc)
Round 3 :
1 hdc in each st around, placing (2 hdc, ch1, 2 hdc) in each corner to create a softened corner (optional). (approx 180 hdc)
Info :
If you want a raised piped ridge similar to the photos, work Round 4 in BLO (back loop only) sc to create a ridge where the front loop from previous round shows.
Round 4 :
Change to contrasting color (optional). 1 sc in each st BLO around. (approx 180 sc)
Round 5 :
1 sc in each st around (both loops). (approx 180 sc)
Round 6 :
Finish edge with crab stitch (reverse sc) worked from left to right to create a twisted edge: insert hook in next stitch from left to right, sc (reverse) across. This will produce a neat, slightly ropey border. (approx 180 crab sts)
Info :
Fasten off and weave ends. The framed edge will hold motif dimensions and make joining easier for bedspread assembly.
— Joining Motifs into a Bedspread (Repeat & Join) :
Info :
Decide the number of motifs needed for your bed size. Example counts (approx): Twin: 6 x 8 motifs; Full/Double: 8 x 9; Queen: 9 x 12; King: 10 x 14. This depends on motif size — adjust counts to match your gauge and desired finished size.
Step 1 :
Lay out motifs in the desired arrangement on a flat surface. Block all motifs flat if you haven’t yet. Plan color placement so X shapes create a repeating geometric pattern across the bedspread.
Step 2 :
Join motifs using your preferred method: whip stitch for invisible seams, mattress stitch for flat joins, or join-as-you-go (JAYG) with slip stitch or single crochet. For a clean look, I recommend whip stitch with matching yarn to each motif’s border color. Work seams along the framed borders rather than along raw triangle edges for a neat finish.
Info :
To join two motifs with whip stitch: place motifs right sides together, align border stitches and work whip stitch through the outermost border rounds only, stitching approximately every 2-3 stitches for a sturdy seam without bunching.
Step 3 :
When joining a row of motifs, join each motif to its neighbor sequentially. For joining rows together, sew along the motifs' long edge using slip stitch or whip stitch to maintain an even seam. When you reach the bedspread edge, finish with a continuity border (see next section). Fasten off and weave ends securely after every joined motif for stability.
— Final Bedspread Border & Finishing :
Round 1 :
With motifs joined and laid flat, pick up yarn along outer edge. Work 1 sc in each border stitch around, placing 3 sc in each corner. This evens the outer edge and prepares for final rounds. (stitch count depends on number of motifs; measure total length in stitches and multiply by sc per inch if needed)
Round 2 :
1 hdc in each st around for a slightly taller outer frame. (same stitch count)
Round 3 :
Optional: Work a scalloped edge by repeating (5 dc all in one stitch, skip 2 sts, sl st) around, adjusting at corners to maintain shape. Alternatively, repeat a crab-stitch round for a neat rope finish.
Info :
Weigh your finished blanket on a flat surface? (Just kidding.) But seriously, block the entire blanket to even out joins and to set the border. Use a large blocking area or work in sections.
— Sizing & Gauge Notes :
Info :
Sample motif (as pictured) using worsted weight yarn and 4.0 mm hook: finished motif approx 5.5" (14 cm) square. Gauge: 14 dc x 7 rows = 4" in solid triangle fabric (worked flat). If you change yarn weight or hook size, your motif size will change accordingly — plan motif count for bed size before committing to full project.
— Tips, Tricks & Troubleshooting :
Info :
1) Keep tension consistent between granny and solid triangles — blocking helps but aim for similar gauge while crocheting. 2) Use stitch markers on triangle bases to ensure base stitch counts match for joining. 3) If you prefer a seamless look, use join-as-you-go while working final rounds of each motif. 4) Store motifs stacked with a sheet of tissue paper between them to avoid stretching while not joined.
Info :
5) For a larger throw, make fewer rounds per triangle (for a corner-to-corner square) or larger by continuing increases beyond the sample Row 21. If making larger motifs simply continue increasing rows in pairs to maintain triangle proportions.
Info :
6) To create a reversible blanket: ensure that the border join style and seam placement are symmetrical or use the same finishing rounds on both sides to look good from either side.
Info :
7) When weaving ends at joins, weave into the border stitches rather than into the body of the triangle to keep the triangle fabric clean and tidy.
Finishing your geometric granny square motif is such a satisfying moment — the crisp X and the contrasting textures make every square feel purposeful. I love watching the pattern grow as motifs are joined into a throw or bedspread, and the framed border gives the final piece that polished, modern look. Enjoy the rhythm of repeating these motifs and the calm that comes from creating something beautiful and practical. 🧶✨