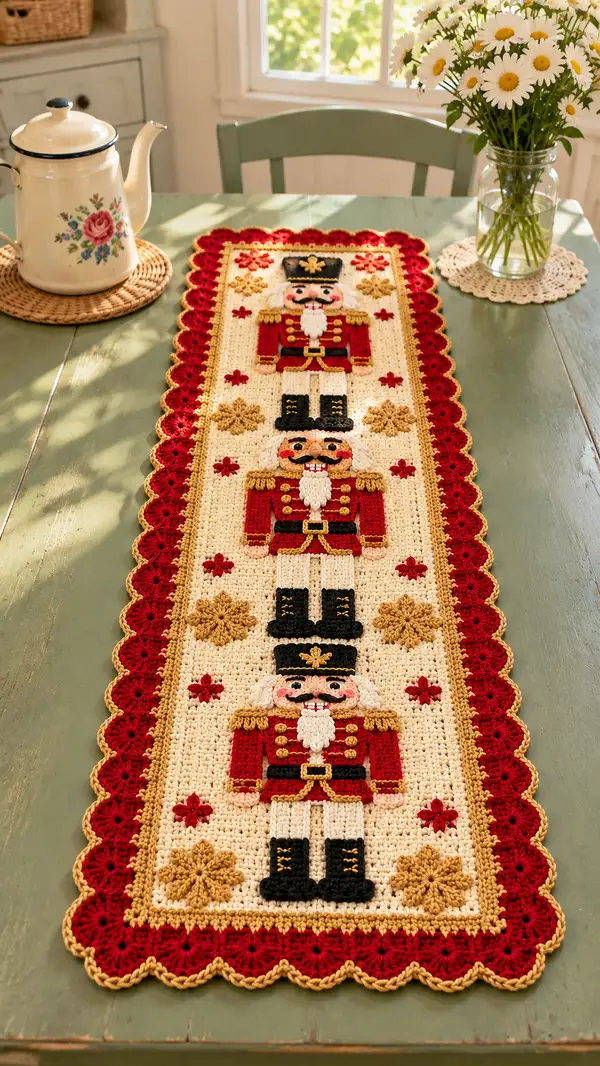
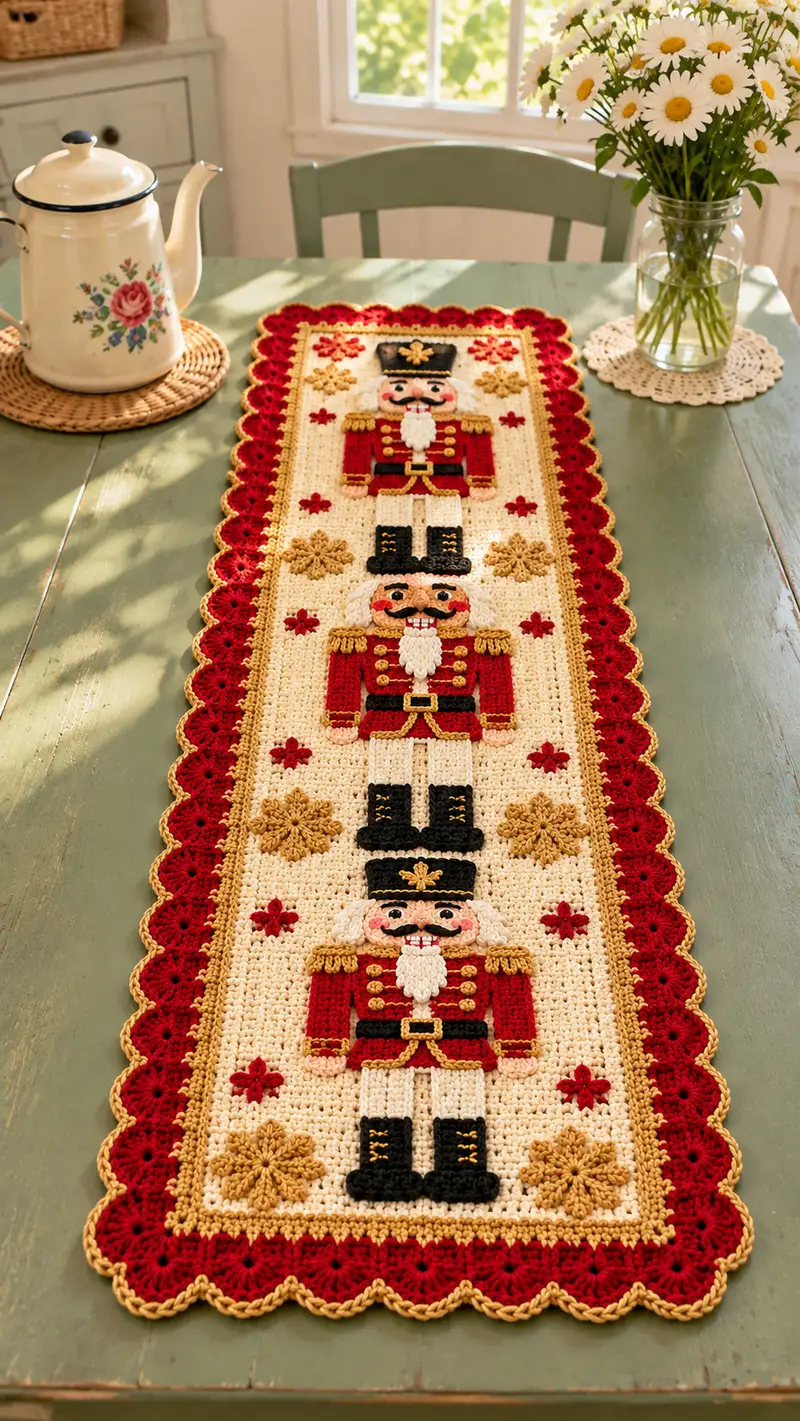
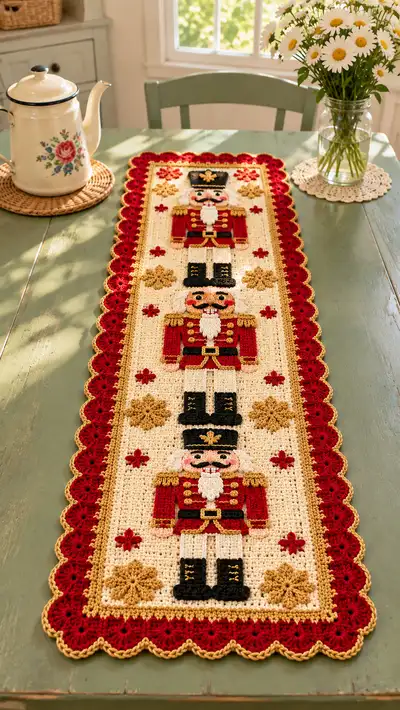
Capture classic holiday charm with this long, decorative Nutcracker Parade table runner. The design features three detailed nutcracker appliques arranged along a warm cream background, framed by a scalloped red and gold border. Textured snowflake and star motifs in gold and red add festive detail between figures. This pattern combines flat panels, appliqued shapes, and layered trims for a heirloom-quality centerpiece.
Progress Tracker
0% Complete
— Main Panel :
Round 1 :
Foundation chain 69 (this will make a runner approximately 12-14 inches wide depending on your tension)
Round 2 :
1 hdc in 3rd ch from hook and in each ch across. Turn. (67 hdc)
Info :
Work the panel in rows (back-and-forth) to create a flat rectangle. The foundation chain of 69 creates 67 working hdc stitches across; adjust chain in multiples of 3 to widen or narrow while preserving motif spacing.
Round 3-8 :
1 hdc in each st across. Turn. (67 hdc)
Info :
These first even rounds form a stable base. Keep tension even and use a stitch marker in the first stitch of each row to ensure straight sides. If your rows cup, try a slightly larger or smaller hook until the fabric lies flat.
Round 9-14 :
1 hdc in each st across. Turn. (67 hdc)
Info :
Mark approximate positions for the three nutcracker centers: measure and mark the panel where the center of each nutcracker will be placed. Typical spacing for 3 nutcrackers on this width: first center at row 10 from one end, next center at row 30, final center at row 50 (adjust for your total rows).
Round 15-20 :
1 hdc in each st across. Turn. (67 hdc)
Info :
If you plan color motifs that are worked in tapestry or surface crochet, mark the rows for those motifs now so you can plan color changes ahead. Carry unused yarn behind the work if you intend to tapestry the small star motifs.
Round 21-26 :
1 hdc in each st across. Turn. (67 hdc)
Info :
Begin the central section where appliques will be sewn. Stop every few rows to pin and place the appliques you make so you can confirm spacing before continuing further rows.
Round 27-32 :
1 hdc in each st across. Turn. (67 hdc)
Round 33-38 :
1 hdc in each st across. Turn. (67 hdc)
Info :
At this stage the panel is nearly the full height. Use blocking to flatten the panel if it begins to ripple—pin to a blocking board while damp and allow to dry before attaching appliques.
Round 39-44 :
1 hdc in each st across. Turn. (67 hdc)
Round 45-50 :
1 hdc in each st across. Turn. (67 hdc)
Info :
If you prefer to work the nutcracker faces into the panel rather than appliqued, mark the pixel grid now and consider using tapestry crochet. This pattern relies on appliques for depth and texture, so we will continue with panels + sewn details.
Round 51-56 :
1 hdc in each st across. Turn. (67 hdc)
Round 57-60 :
1 hdc in each st across. Turn. (67 hdc)
Info :
Fasten off cream yarn leaving a long tail for blocking and final weaving; the panel should measure approximately the length required for three appliques with even spacing (about 46-52 inches depending on gauge). Block panel flat before assembly.
— Nutcracker Head (Make 3) :
Round 1 :
6 sc in magic ring (6)
Round 3 :
(1 sc, 1 inc) x 6 (18)
Round 4 :
(2 sc, 1 inc) x 6 (24)
Round 5 :
(3 sc, 1 inc) x 6 (30)
Info :
Switch to flesh-tone yarn for face color on Round 6 if using contrasting headgear. Keep rounds small and neat; the head will be slightly raised when sewn to the panel.
Round 6 :
(4 sc, 1 inc) x 6 (36)
Round 7 :
(5 sc, 1 inc) x 6 (42)
Round 8 :
(6 sc, 1 inc) x 6 (48)
Round 9-14 :
1 sc in each st around (48)
Info :
Place small pink blush ovals or embroider cheeks on rounds 10-11; leave space for eye placement on round 11-12. For a flat applique look, you will sew facial features on top later rather than inserting safety eyes.
Round 15 :
(6 sc, 1 dec) x 6 (42)
Round 16 :
(5 sc, 1 dec) x 6 (36)
Info :
Lightly stuff the head center if you prefer a tiny bump. For this panel, keep stuffing minimal—we want appliques relatively flat so they attach smoothly to the panel.
Round 17 :
(4 sc, 1 dec) x 6 (30)
Round 18 :
(3 sc, 1 dec) x 6 (24)
Round 19 :
(2 sc, 1 dec) x 6 (18)
Round 20 :
(1 sc, 1 dec) x 6 (12)
Info :
Fasten off leaving a long tail for sewing. Weave tail through remaining sts, pull closed slightly to flatten the back of the head for secure sewing to the panel.
— Nutcracker Hat (Make 3) :
Round 1 :
6 sc in magic ring with black yarn (6)
Round 3 :
(1 sc, 1 inc) x 6 (18)
Round 4 :
1 sc in each st around (18)
Round 5 :
1 sc in each st BLO (18) to create a small brim ridge
Round 6 :
Switch to gold yarn. 1 sc in each st around (18)
Round 7 :
(3 sc, 1 inc) x 4 + 2 sc at end to shape top (22)
Round 8 :
1 sc in each st around (22)
Info :
Embroider or sew a gold star or button onto the front of the hat. Fasten off leaving tail for sewing the hat to the top of the head.
— Nutcracker Face Details :
Round 1 :
Using small crochet pieces or embroidery: Make two small black discs for eyes: 6 sc in magic ring, 2 inc (12), 1 sc around (12). Fasten off. (Make 6 pieces, two per head)
Info :
Alternatively, embroider eyes with black yarn or use embroidered French knots for a flatter face. Sew eyes to head on rounds 10-12 of the head piece for correct spacing.
Round 2 :
Make two small oval cheeks in blush/pink: ch 4, sc across, 3 sc in last st, turn to other side of chain and sc down, sl st to join. Fasten off. (Make 6 pairs)
Round 3 :
Make a small moustache piece using black: ch 6, sc across, turn and sl st to create a short flat strip; fold slightly and sew under nose location. (Make 3)
Info :
Sew facial details with invisible mattress or ladder stitch and secure tightly; small safety eyes are not recommended for sewn applique pieces since they sit flat against the panel and may protrude.
— Nutcracker Beard (Make 3) :
Round 1 :
6 sc in magic ring with white yarn (6)
Round 3 :
(1 sc, 1 inc) x 6 (18)
Round 4 :
1 sc in each st around (18)
Round 5 :
Switch to texture: 1 sc in each st FLO around to create a ridged beard edge (18)
Round 6 :
Fasten off leaving long tail for sewing. Create small loops or picot fringe along bottom edge: *ch2, sl st in next st* repeat to end for fringe effect.
Info :
Alternatively attach short 3-5 strand fringe pieces of white yarn tied and trimmed to create a more fluffy beard look. Sew beard under the mouth area of each head.
— Nutcracker Body Jacket (Make 3) :
Round 1 :
Foundation chain 15 in red. Join to work in the round carefully to avoid twisting. (15)
Round 2 :
1 sc in each st around. (15)
Round 3 :
(1 sc, 1 inc) x 5 (20)
Round 4-6 :
1 sc in each st around (20)
Info :
Work a short rectangular jacket rather than a full tube for a flat applique. After round 6, fold jacket flat and slip stitch together along a small seam to create a flat piece that will be sewn onto the panel.
Round 7 :
Switch to gold for trim. 1 sc in each st around the top edge to create a epaulette line (20)
Round 8-10 :
Switch back to red and work in rows to create the lapels: ch 8, sc across 8, fasten off. Make two lapel strips and sew to the jacket front.
Info :
Sew small gold buttons (made as 6 sc in magic ring then fasten off leaving tail) down the jacket center. For belt use black yarn: ch 12, sc across, fasten and sew across lower jacket edge.
— Epaulettes (Make 3 Pairs) :
Round 1 :
6 sc in magic ring with gold (6)
Round 3 :
1 sc in each st around (12)
Round 4 :
Switch to short fringe: attach small loops by inserting hook in st, ch3, sl st back to same place to form loops. Repeat around edge for a tasseled look. Fasten off leaving tail to sew.
Info :
Sew epaulettes to jacket shoulders aligning with round positions on the head so that the jacket and head proportion look balanced when attached to the panel.
— Nutcracker Arms (Make 6) :
Round 1 :
Magic ring 6 sc with flesh yarn (6) for hand
Round 3-4 :
1 sc in each st around (12)
Round 5 :
Switch to red for sleeve. 1 sc in each st around (12)
Round 6-12 :
1 sc in each st around (12)
Round 13 :
Switch to gold for cuff: 1 sc in each st BLO around (12) to create a ridge (12)
Round 14 :
Fasten off leaving long tail. Lightly stuff the hand end only; arms should lie mostly flat on the panel to be sewn.
Info :
Make two identical arms for each nutcracker; position them sewn to the sides of the jacket. Bend slightly when sewing to create a natural shoulder angle.
— Nutcracker Legs & Boots (Make 6 Legs, 6 Boots) :
Round 1 :
Boot top: 8 sc in magic ring with black (8)
Round 3 :
1 sc in each st around (16)
Round 4 :
Switch to white for leg. 1 sc in each st around (16)
Round 5-12 :
1 sc in each st around (16)
Round 13 :
Switch to black for boot sole shaping: (3 sc, 1 dec) x 4 (12)
Round 14 :
1 sc in each st around (12)
Round 15 :
Fasten off leaving tail for sewing. Sew boot tops overlapping slightly with leg pieces to create neat boot edges when applied to the panel.
Info :
Make two boots and two legs for each nutcracker, press flat and sew the legs to the panel with the boots facing the lower edge of the runner. Add small embroidered gold laces with surface slip stitch.
— Belt & Buckle (Make 3) :
Round 1 :
Make a small rectangle in black: ch 8, 1 sc in each ch across, turn and sc back across for 2 rows. Fasten off. (8x2)
Round 2 :
Make a tiny gold buckle: 6 sc in magic ring, sl st to close, fasten off leaving tail. Cut small hole in belt piece and sew buckle on.
Info :
Sew belt across jacket center aligning with body rounds 3-4 of the jacket piece; buckle should sit centered and sewn in place securely with long tail woven through the belt back to the runner for reinforcement.
— Small Star Motifs and Snowflakes (Make 12-18) :
Round 1 :
Small star: ch 6, sl st to form ring, *(ch 2, 3 dc in ring, sl st) repeat 6 times to make 6 points* Fasten off. (6 points)
Round 2 :
Medium snowflake (gold): ch 6, sl st to form ring; *ch 5, sl st in same sp to make loop, sk to next ch and sl st* repeat 6 times; work little picots or clusters in each loop by 3 hdc cluster. Fasten off.
Round 3 :
Large snowflake: 8 sc in magic ring, 8 inc around (16), slip to create loops and ch-5 petals with 5 dc on each petal, join. Fasten off and block flat.
Info :
Make an assortment of 12-18 motifs (small red stars and gold snowflakes) and block them flat using pins and light spray. These are sewn between the nutcrackers on the background panel to mimic the photo layout.
— Decorative Border Base (Gold Inner Trim) :
Round 1 :
Join gold yarn to one short end center of the panel. Work 1 sc evenly along the short end, continue up the long side with 1 sc in each st, along the opposite short end with 1 sc across, then along the remaining long side to return to the starting point. The stitches will be approximately 67+ end stitches; match counts across to keep the border even.
Round 2 :
1 sc in each st around. Join with sl st to first st. (Stitch count should remain consistent with number of edge sts.)
Round 3 :
1 sc in each st BLO around to create a neat ridge for the next scallop border. Fasten off gold and switch to red.
Info :
This gold inner trim creates a fine decorative line around the entire runner and helps the scalloped red border sit evenly. Keep tension slightly loose on corners so scallops can curve gracefully.
— Scalloped Red Outer Border :
Round 1 :
Join red yarn: *ch 1, sc in same st, skip 2 sts, (5 dc in next st), skip 2 sts, sc in next st* repeat around to form shells. Join with sl st to first sc. (Shells arranged evenly around runner)
Round 2 :
Switch to gold yarn for piped edge. Attach gold at shell peaks: *ch1, sl st into top of shell, ch2, sl st into same peak* repeat across each shell peak to create gold scallop piping. Fasten off and weave ends.
Info :
To make the scallops even, measure and mark shell spacing prior to working. When you arrive at corners, reduce or increase shells by one to maintain a smooth curve. This stitch pattern produces the pictured bold red scalloped edge with a thin gold piping highlight.
— Final Assembly Prep :
Round 1 :
Lay blocked panel flat. Arrange the three nutcracker assemblies along the panel with the head center positions set earlier. Pin each head, jacket, arms, legs and boots in place to check spacing and alignment.
Info :
For best results, place the top nutcracker so its center is 3-4 inches from the end edge, repeat spacing between centers so that the third sits similarly from the opposite end. Visual balance is more important than exact numeric spacing.
Round 2 :
Sew appliques down with matching yarn and a yarn needle using small whip stitches or invisible ladder stitch. Use the long tails left from each piece to firmly anchor appliques into the main panel fabric. Sew through the panel double for extra security in high-traffic table areas.
Round 3 :
Attach small motifs: sew star and snowflake motifs around nutcrackers using gold and red yarn. Ensure motifs lie flat—if any have thickness, flatten before sewing by pressing with fingers while wet-blocking.
Info :
When sewing on small pieces, work from the back of the panel for a neater finish. Weave tails at least 3-5 inches into the panel interior and knot on the back to prevent slippage; weave in tidy tails.
— Edging and Finishing Touches :
Round 1 :
Double-check all sewn seams, reinforce the jackets and boots with a few extra invisible stitches if needed. Trim stray yarn ends and weave them well into the back of the panel.
Round 2 :
Lightly steam or wet-block the entire runner again while pinned to the blocking board to ensure the border scallops set and appliques lie flat. Do not over-wet appliques with stuffing or they may lose shape.
Info :
For extra durability, consider a lightweight fusible interfacing sewn to the reverse side of the runner using a narrow zig-zag stitch on a sewing machine (optional). This prevents stretching over time and keeps appliques from lifting in heavy use.
Round 3 :
Your runner is now complete. Gently press with a cool iron over a cloth if needed to flatten border piping, then display on your table.
This Nutcracker Parade runner is a joyful addition to holiday tables—a classic combination of red, gold and cream made with care. Layered appliques and textures give depth and a handmade heirloom feel. Working through each section is meditative and rewarding, and the finished runner will bring smiles to holiday breakfasts and dinners. 🧶🎄 Add a few tiny custom touches to make it your own—happy stitching and festive decorating! ✨