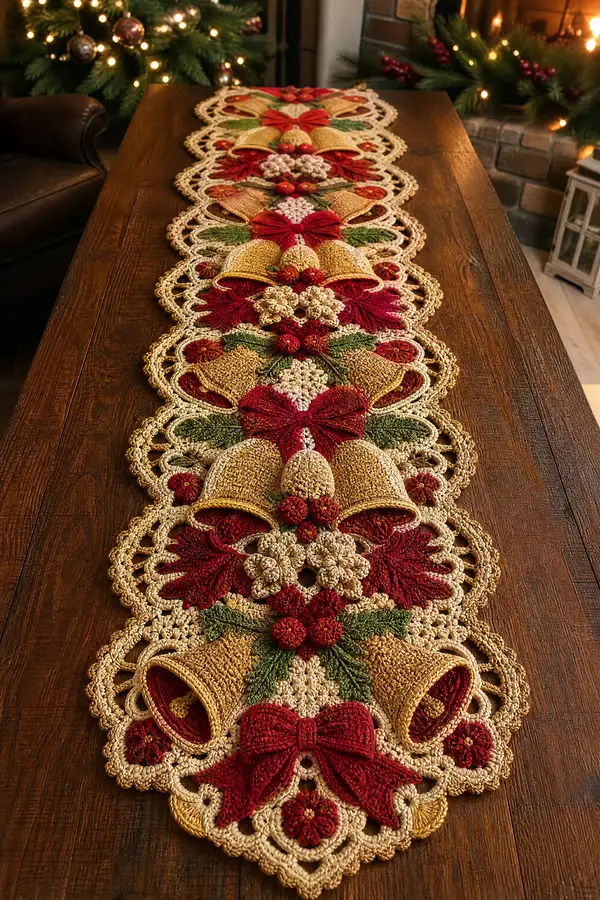
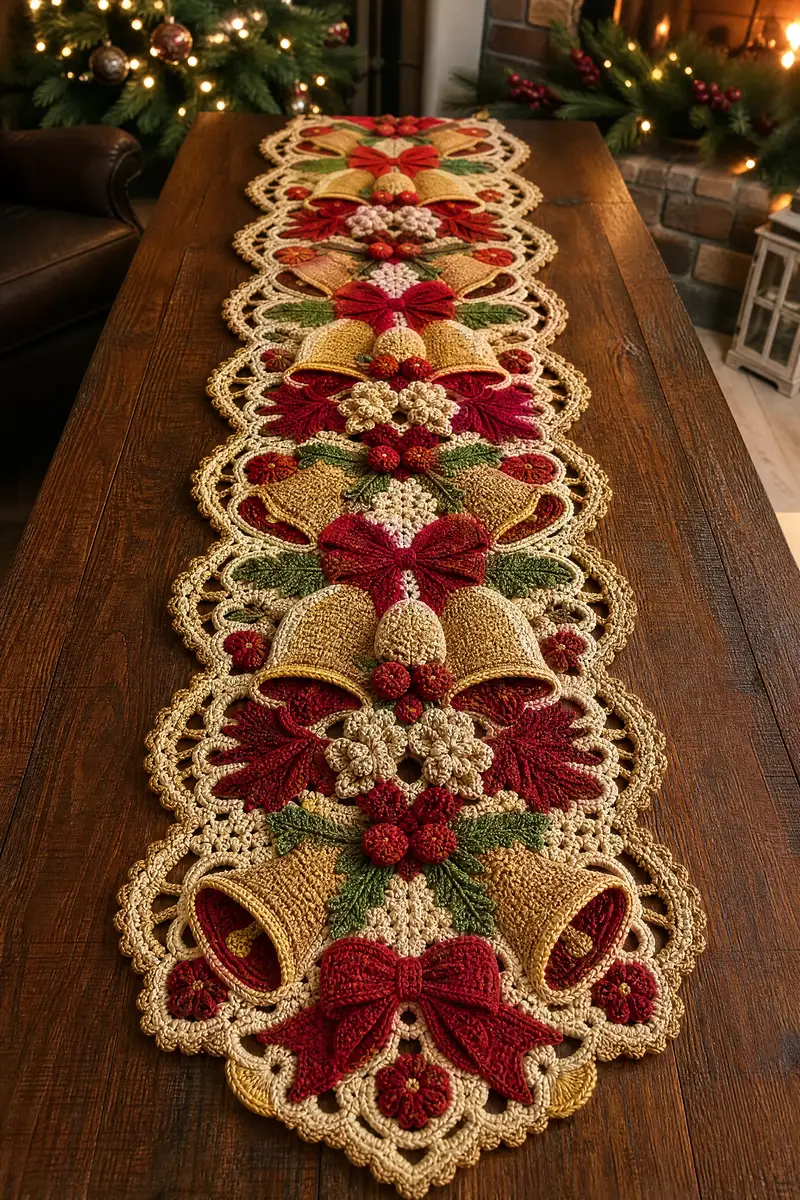
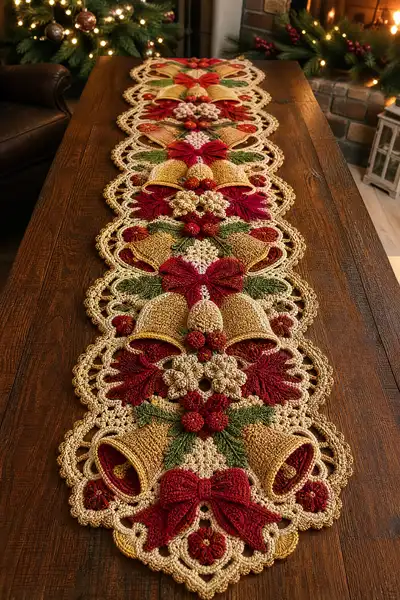
Create a stunning, heirloom-quality Christmas table runner featuring 3D jingle bells, sculpted bows, holly leaves, berries and an elegant lace medallion join. This long runner is worked in separate decorative motifs and assembled into a continuous festive centerpiece with rich gold, red and green highlights.
Progress Tracker
0% Complete
— Notes & Gauge :
Info :
Pattern uses US crochet terms. Work tightly for sculpted motifs so shapes hold. Gauge is approx 5 sc = 1 inch in single crochet when worked tightly using 3.5mm hook; motifs are blocked to final size. Runner pictured measures approximately 14 x 72 inches (35 x 183 cm) as shown with 6 repeats; adjust number of repeats to change length.
Info :
Each runner repeat is composed of: one central medallion base, three bell units (two side bells and one central smaller bell), one sculpted bow (two halves seamed and gathered), three small cluster flowers, 4 holly leaves, 6 small berries and connecting lace arches. Make as many repeats as needed and join with the Lace Joining rounds below.
— Round-by-Round: Medallion Base (Make 6 motifs or more as needed) :
Round 1 :
6 sc in magic ring (6)
Round 3 :
(1 sc, inc) x 6 (18)
Round 4 :
(2 sc, inc) x 6 (24)
Round 5 :
(3 sc, inc) x 6 (30)
Round 6 :
(4 sc, inc) x 6 (36)
Round 7 :
(5 sc, inc) x 6 (42)
Round 8 :
(6 sc, inc) x 6 (48)
Round 9-12 :
1 sc in each st around (48)
Info :
Change to cream/ivory for the medallion background at this point if you want a lighter contrast. Use a 3.0mm hook for tighter, flatter rounds if preferred.
Round 13 :
(5 sc, 1 dc in next st) x 8 around (48) — work evenly placing the dc every sixth st to begin texturing
Round 14 :
(1 sc in each sc, 1 shell (5 dc) around each dc from previous round) resulting in 8 shells separated by sc bands (48 + shell texture)
Round 15 :
1 sc in each st around working 5 sc across each shell top to maintain balance (48)
Round 16 :
(3 sc, ch3, 3 sc) in every 6th stitch to form small raised arches (48 spaces with arches)
Round 17 :
Working into ch3 sps: (sc, hdc, 3 dc, hdc, sc) in each ch3 sp — creates lacy petals around center (48 petal clusters)
Round 18 :
1 sc in each st around to even the surface and prepare for outer scallop (48)
Round 19 :
(*ch3, sk 2 sts, sl st in next st, ch3, 5 dc shell in next st*) repeat around to create looped ring; adjust to fit 8 larger loops (8 large loops)
Round 20 :
In each large loop work: sl st, ch3, (dc, dc, picot, dc, dc), ch3, sl st into loop to create ornate scallops (approx 8 scallops evenly spaced)
Info :
Block the medallion flat before attaching any 3D pieces. Pin each scallop out so shapes are even and consistent. This also makes the lace joining round match evenly with neighboring motifs.
Round 21 :
Join a contrasting edge color (gold/tan) and work 1 sc in each st around (48) to create a defined edge
Round 22 :
(1 sc, ch4, sk 2 sts) x around to form chain-loop border aligning with scallops (12-16 loops depending on spacing)
Round 23 :
Into each ch4 loop work (sc, picot, sc) to create small raised beads around the medallion (final decorative strobe)
Info :
Fasten off and weave ends. Make the number of medallions required for your desired runner length. The sample photo uses 6 medallions joined in a straight row.
— Bell Cup (Make 18 bells total; 3 per medallion) :
Round 1 :
6 sc in magic ring (6)
Round 3 :
(1 sc, inc) x 6 (18)
Round 4 :
(2 sc, inc) x 6 (24)
Round 5 :
(3 sc, inc) x 6 (30)
Info :
Switch to golden/tan yarn for the bell outer skin at Round 5. The inner cup will be worked in red later to create the deep interior.
Round 6 :
1 sc in each st around (30)
Round 7 :
(4 sc, inc) x 6 (36)
Round 8 :
1 sc in each st around (36)
Round 9 :
(5 sc, inc) x 6 (42)
Round 10 :
1 sc in each st around (42)
Round 11 :
(6 sc, inc) x 6 (48)
Round 12-15 :
1 sc in each st around (48) — build height of bell outer shell
Info :
At Round 12 begin to shape the bell rim: optional slip a ring of contrasting yarn inside to create depth. Work tightly to keep the bell retaining a cup shape.
Round 16 :
(1 sc, ch2, sk1) repeat around to form evenly spaced chain loops that will become the bell opening edge (approx 48 chain loops)
Round 17 :
Into each chain loop work (sc, hdc, 3 dc, hdc, sc) to form a scalloped rim and slight flare (final circumference varies ~48 scallops)
Round 18 :
Fasten off outer shell leaving long tail for attaching to medallion. Lightly steam-block into a shallow cup shape.
Info :
Create the inner bell cup (red) by joining yarn to the inside top of the outer shell: work 6 sc in magic ring, increase to 30 over Rounds 2-5, then 3-5 rounds even to create the inner cup depth. Fasten off and sew into the outer shell with slip-stitching or whip-stitching for a nested look.
— Small Inner Bell Cup (Make 18) :
Round 3 :
(1 sc, inc) x 6 (18)
Round 4 :
(2 sc, inc) x 6 (24)
Round 5 :
(3 sc, inc) x 6 (30)
Round 6-7 :
1 sc in each st around (30)
Info :
Fasten off leaving long tail to sew into outer bell. Place this cup inside outer cup and baste at three points before final sewing so it sits deep enough to show the red rim from the outside.
— Bell Rim Detail and Painted Trim (Optional) :
Round 1 :
Join gold/tan yarn at bell rim edge and work (sl st, ch2) around to prepare surface for raised trim
Round 2 :
Work reverse single crochet (crab stitch) around rim for a raised, corded edge (48)
Info :
Use a smaller hook to tighten the rim if you want a crisp rolled edge. Optionally highlight with a metallic embroidery thread or fabric paint once assembled.
— Bow (Make 6 full bows; each bow = two halves) :
Bow Half Round 1 :
Ch 21, sc in 2nd ch from hook and across (20)
Bow Half Round 2 :
Ch1, turn, sc in each st across (20)
Bow Half Round 3 :
Ch1, turn, (sc3tog over first 3 sts to shape tip), sc to last 3 sts, sc3tog over last 3 sts (16)
Bow Half Round 4 :
Ch1, turn, sc in each st across (16)
Bow Half Round 5 :
Ch1, turn, (sc2tog, sc to last 2, sc2tog) (14)
Bow Half Round 6 :
Ch1, turn, sc in each st across (14)
Bow Half Round 7 :
Ch1, turn, (sc in next 2 sts, dec) repeat across to shape arch (approx 10)
Info :
Each half is worked flat and blocked. Join two halves together by matching center rows and slip-stitching across center 4-6 stitches. Pull the center tightly and wrap a short length of yarn to gather and form the knot of the bow. Sew the bow to medallion securing beneath the bells.
Bow Half Round 8 :
Fasten off leaving long tail. Make second half to match. Repeat for each bow required.
— Bow Knot (Center) :
Round 1 :
Ch 6, sl st to join to work in the round, ch1, 8 sc around (8)
Round 2 :
1 sc in each st around (8)
Round 3 :
Fasten off leaving long tail; wrap center to gather bow and stitch through back to secure knot
Info :
To give bows a plush look you can couch a thin strip of interfacing or felt in the middle before wrapping the knot for stability. Use contrasting red for dramatic effect.
— Holly Leaf (Make 24 leaves) :
Leaf Round 1 :
Ch 12, sc in 2nd ch from hook and across (11)
Leaf Round 2 :
Ch1, turn, 2 sc in first st, sc across until last st, 2 sc in last st (13)
Leaf Round 3 :
Ch1, turn, sc across (13)
Leaf Round 4 :
Ch1, turn, (sc2tog, sc to last 2 sts, sc2tog) to shape (11)
Leaf Round 5 :
Ch1, turn, sc across and work 3 dc cluster at tip to create pointed shape (11 + tip cluster)
Leaf Round 6 :
Along one side work picots spaced 2 sts apart to create serrated edge, then sl st across to base to fasten off
Info :
Work leaves in green, steam lightly and shape with blocking pins to give them a natural curve. Add surface veins by backstitching with single crochet in a slightly darker green through the center of leaf if desired.
— Cluster Flower (Make 12 clusters; each cluster = 6 small blossoms) :
Blossom Round 1 :
6 sc in mr (6)
Blossom Round 2 :
(ch2, 3 dc) in each st around, sl st to join to form 6 petals (6 petals)
Blossom Round 3 :
Into each petal work (sl st, ch3, 3 dc, picot, sl st) to puff out the petal; fasten off (6 puffed petals)
Info :
Make 6 small blossoms and sew them into a tight circular cluster. Sew cluster to medallion center above the bells for a raised floral accent. Optionally add a French knot or small bobble in the center using a contrasting color.
— Berry Bobble (Make 36 small berries) :
Round 3 :
1 sc in each st around (12)
Round 4 :
Work 3 rounds of bobble stitch: (yarn over, insert, pull up loop x4 and close) repeat around to get textured berry surface then fasten off leaving tail for sewing
Info :
Stuff lightly with a tiny fluff of fiberfill before closing to keep the berry round. Sew berries in clusters of three between bells and near bow centers as shown.
— Small Accent Flower (Make 12) :
Round 2 :
(ch2, 3 dc) in each st around to make 8 small petals (8 petals)
Round 3 :
Sl st into each petal base and fasten off leaving long tail to sew to medallion
Info :
Sew a tiny bead or French knot to each flower center to mimic pollen and add dimension. Use cream or light gold yarn for contrast on red background.
— Leaf Sprig and Small Decorative Elements :
Sprig Row 1 :
Ch 12, sc in 2nd ch from hook and across (11)
Sprig Row 2 :
Ch1, turn, sc in first 3 sts, hdc, dc, hdc, sc in remaining sts (11)
Info :
Make short sprigs by decreasing length and use them as filler between bells and bows. Use BLO on the base round to create a raised stem line.
— Lace Joining Round (Join medallions into runner) :
Round 1 :
Lay two blocked medallions right sides up and align outer edge scallops. Join with slip-stitch through alternating scallop picots across adjacent motifs to form a continuous seam; aim for even tension so the runner lies flat
Round 2 :
Between joined motifs, work ch5 arches: sl st into join, ch5, skip next join bar, sl st into next join to create a laddered arch (create same number of arches as scallops to keep symmetry)
Round 3 :
Into each ch5 arch work (sc, hdc, 3 dc, hdc, sc) to create a lacy bridge between motifs (arches become decorative loops)
Info :
Work joining on a flat surface with pins every 1-2 inches to maintain alignment. Adjust ch counts for arches if your medallion scallops are tighter or looser depending on blocking.
Round 4 :
Along the long center seam (the inside of the runner) work 1 sc between each bridge and add small ch3 picots every other st for additional decorative texture (keeps runner stable)
— Scalloped Edge (Final Border Around Entire Runner) :
Round 1 :
With gold/tan yarn join at any outside edge point and work 1 sc in each st and 3 sc in each outer shell to create a continuous edge (total st count varies with number of motifs)
Round 2 :
(ch3, sl st in same st, skip 2, sl st in next st) repeat around to form chain loop border for scallopes
Round 3 :
Into each loop work (sc, 5 dc, sc) to form bold scallops around entire runner (scallops equal number of outer loops)
Round 4 :
Finish with reverse single crochet (crab stitch) around outermost edge for a corded finish; fasten off and weave ends
Info :
When edging around seams and junctions, absorb slight irregularities by adding or omitting a slip stitch in inconspicuous places. Block once again after edging to set the scallops and ensure runner lays flat.
— Assembly Order & Attachment Points :
Info :
For each medallion: position three bells across lower half of medallion — two side bells slightly angled outward and one smaller bell centered above or between them. Place the bow above the central bell, with the bow knot centered on the medallion axis. Arrange leaves and berries symmetrically around the bells and bow. Use tapestry needle to sew each 3D component to the medallion through the base stitches and into the medallion body so attachments remain secure.
Info :
Sew clusters of berries (three each) between bell collars and bow knot. Sew small accent flowers into negative spaces to fill gaps. Use small, even stitches and tie knots on the underside of the medallion so no loose ends show on the decorative surface.
— Optional Surface Embroidery & Metallic Highlights :
Info :
For a festive finish, use a thin metallic thread or embroidery floss to couch a highlight around bell rims and bow folds. Use small bar stitches or a running stitch to catch the metallic thread into fabric; this adds a subtle shimmer without weighing down the runner.
Info :
For delicate veins on leaves use a darker green embroidery thread and backstitch the center line, then add tiny lateral stitches for veinlets. These small details elevate the overall realism and make decorations pop under warm lighting.
— Final Finishing :
Info :
After all motifs are joined and components sewn, give the runner a final blocking: dampen lightly, pin into exact final shape, and allow to dry completely. Weave in any remaining tails and lightly steam to flatten and set. Optionally add a thin fabric backing or lightweight interfacing to protect table surfaces from yarn dyes or abrasion.
Info :
Store runner flat or gently rolled to avoid creasing. Spot clean with a damp cloth and avoid machine washing to preserve 3D shapes.
This jingle bell and ribbon runner transforms simple yarn into a festive, dimensional centerpiece perfect for holiday tables. Each medallion and bell is a small bit of holiday magic that comes together to form a luxurious runner you'll be proud to display. The textured bows, clustered berries and scalloped edge are wonderfully tactile and irresistible to touch. Enjoy every stitch of this seasonal project — it makes a beautiful gift or a treasured family heirloom. 🎄✨