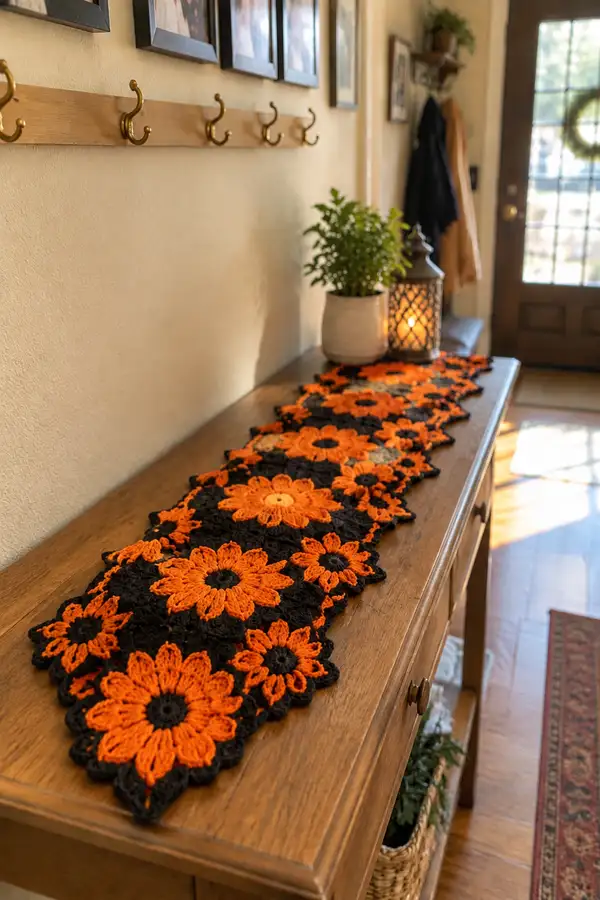
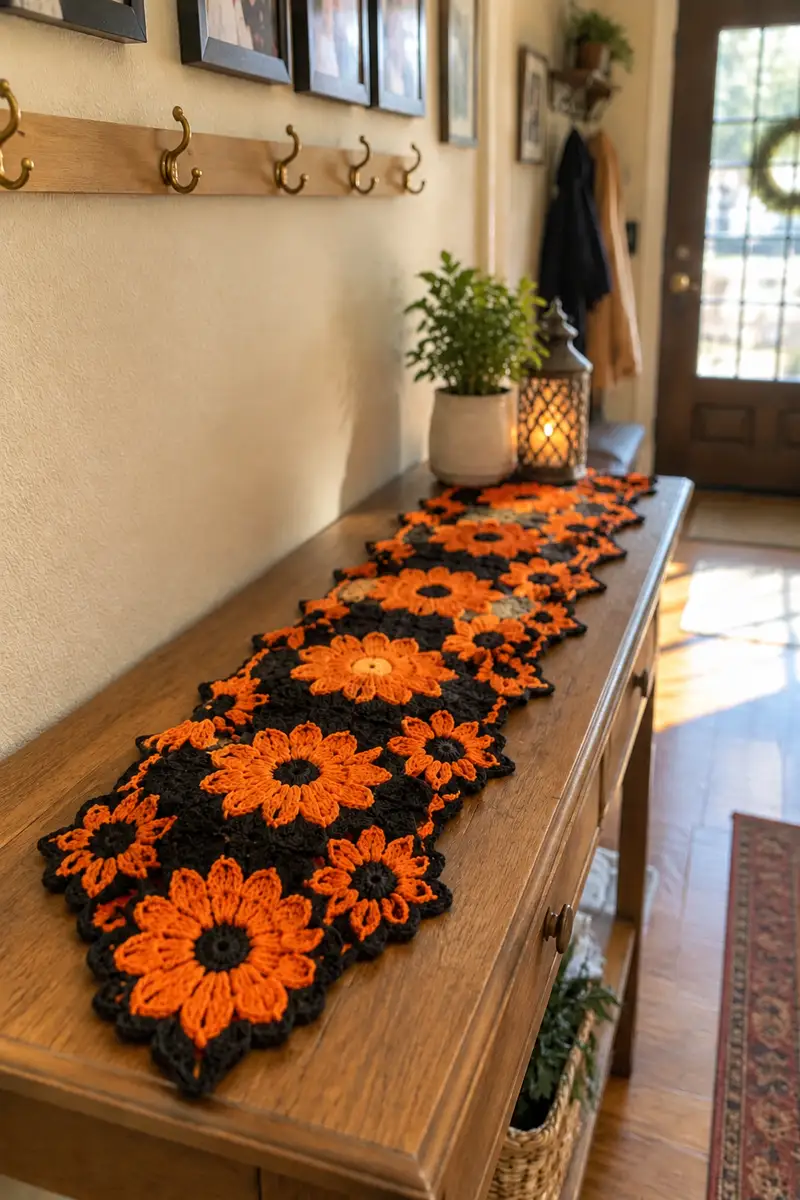
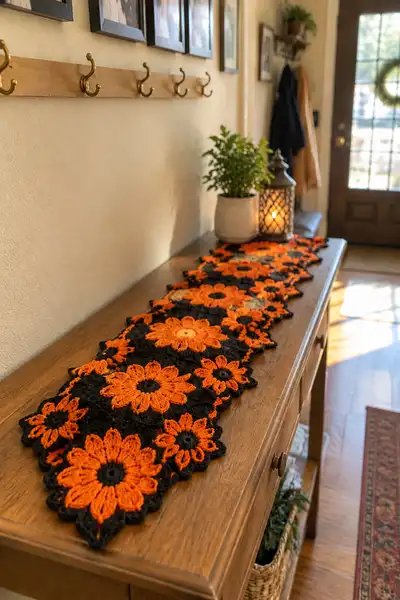
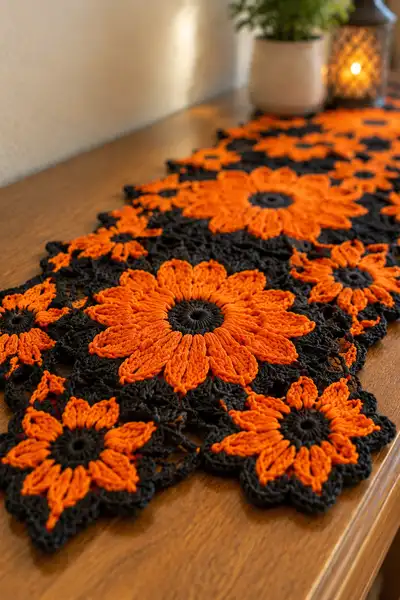
This elegant Halloween table runner is made from detachable floral motifs in bold orange and deep black. The runner features large, medium and small blooms linked by a delicate lacy mesh to create a flowing, staggered garden effect. Finished with a soft scalloped border, it sits beautifully across a console or dining table for seasonal flair.
Progress Tracker
0% Complete
— Materials & Prep :
Info :
Read through the entire pattern before you begin. Decide on your layout and whether you'll join motifs as-you-go or sew them after blocking. Use stitch markers to mark the first stitch of each round; this pattern has many repeat rounds that are easier with markers.
Info :
Tension and blocking: Using cotton yarn will give a crisp texture and hold the flat lacy mesh well. Block each motif flat before joining to ensure consistent size and even joins.
— Large Bloom Motif (make 6-8 depending on runner length) :
Round 3 :
(1 sc, 1 inc) x 6 (18)
Round 4 :
(2 sc, 1 inc) x 6 (24)
Round 5 :
(3 sc, 1 inc) x 6 (30)
Info :
Maintain a flat circle. If the center begins to ruffle, skip an increase in the next round; if it cups, add an extra increase evenly spaced.
Round 6 :
(4 sc, 1 inc) x 6 (36)
Round 7 :
(5 sc, 1 inc) x 6 (42)
Round 8 :
(6 sc, 1 inc) x 6 (48)
Round 9 :
1 sc in each st around (48)
Info :
Change to bright orange yarn now. Leave a tail to weave in. The 48-st round sets 12 petal anchor points (48 divided by 12 = 4 stitches per petal area).
Round 10 :
(3 sc, ch 3, sl st into next sc) x 12 (48 anchors; 12 ch-3 loops)
Info :
Each ch-3 loop will become the foundation for an elongated petal. Place a stitch marker at the first ch-3 loop to mark round start for the next round.
Round 11 :
In each ch-3 loop: ch1, (dc3, puff stitch 5 loops, dc3), sl st into next sc to anchor petal - repeat around (12 petals anchored, counts vary by cluster but 12 petal anchors)
Round 12 :
Work 1 sc evenly across the top of each petal and into the anchoring sc between petals to create a tidy petal base (48 sc anchors total)
Round 13 :
(1 sc in next 2 sts, sc2tog across petal top to shape) x 12 (36)
Info :
Shaping petals: Round 13 narrows the base slightly and gives petals a defined edge. Keep tension gentle when pulling up puff loops to keep petals open and full.
Round 14 :
1 sc in each st around (36)
Round 15 :
(2 sc, 1 inc) x 9 (45)
Round 16 :
1 sc in each st around (45)
Round 17 :
BLO: 1 sc in each st BLO (45)
Info :
Working in BLO here creates a subtle ridge under the petals and helps the bloom sit flat when layered on the runner.
Round 18 :
Switch to black yarn. Working in the back of the petal-base stitches, (sc 2, ch 3, sl st into the space between next two petals) x 12 (48 anchors)
Round 19 :
In each ch-3 sp: (sc, ch4, sc) to create a lacy scallop around the bloom (12 scallops)
Round 20 :
Working between scallops: join with sl st into adjacent motif join point (if joining now) otherwise 1 sc in each st (48)
Info :
If joining as-you-go, slip stitch into the corresponding ch-4 loop of an adjacent motif at this round to create the first link. Otherwise fasten off and weave in ends after blocking.
Round 21 :
Optional decorative picot round: (sc 3, picot [ch3, sl st to top of last sc]) x 12 (48)
Round 22 :
1 sc in each st (48)
Round 23 :
Edge tidy: sl st into next 12 places around to round off petal base (count remains visual)
Round 24 :
Fasten off leaving 12-15cm tail for weaving if you will sew motifs together; otherwise finish off and weave ends. (Motif complete)
Info :
Block the motif flat, pinning each petal outward to ensure consistent size. Repeat to make required number of large blooms (recommend 6-8 for the runner photo length).
— Medium Bloom Motif (make 8-10) :
Round 3 :
(1 sc, 1 inc) x 6 (18)
Round 4 :
(2 sc, 1 inc) x 6 (24)
Round 5 :
1 sc in each st (24)
Info :
Change to orange yarn here for petals. This motif is slightly smaller and uses 8 petals rather than 12, so anchor spacing will be 24/8 = 3 stitches per petal area.
Round 6 :
(2 sc, ch3, sl st into next sc) x 8 (24 anchors)
Round 7 :
In each ch-3 loop: ch1, (dc2, puff 4 loops, dc2), sl st into next sc - repeat x 8 (8 petals)
Round 8 :
1 sc evenly around petals and anchors (24)
Round 9 :
(1 sc, sc2tog) x 8 (16)
Round 10 :
1 sc around (16)
Info :
Switch to black yarn to form a small lacy base and join points. This creates a strong contrast center and a neat edge for connecting motifs.
Round 11 :
Attach black yarn behind petals: (sc 1, ch4, sl st into base between petals) x 8 (32 anchor points including chains)
Round 12 :
In each ch-4 sp: sc, ch3, sc to form mini scallops (8 scallops)
Round 13 :
Optional join round: sl st to adjacent motif here if connecting as-you-go. Otherwise 1 sc in each st for a tidy edge (24)
Round 14 :
Fasten off leaving tail for joining or sew after blocking (motif complete)
Info :
Block these medium blooms slightly smaller than the large ones for a pleasing staggered visual; use pins to set petal spread before joining.
— Small Bloom Motif (make 10-14) :
Round 3 :
1 sc in each st (12)
Info :
Change to orange for tiny petals. This motif will produce 6 small petals; anchor spacing will be 12/6 = 2 stitches per petal area.
Round 4 :
(1 sc, ch2, sl st into next sc) x 6 (12 anchors)
Round 5 :
In each ch-2 loop: (dc3, sl st to anchor) to form petite petals (6 petals)
Round 6 :
Switch to black yarn. Work 1 sc around to tidy, then (ch3, sl st) between petals to create tiny loops for joining (12)
Round 7 :
Optional decorative outer sc round: 1 sc in each st around (12)
Round 8 :
Fasten off, weave ends, block flat (motif complete)
Info :
These small motifs act as connectors in the lace mesh and fill gaps between larger blooms. Make several so you can play with staggered placement.
— Lacy Connector Mesh Motif (make multiple to fill gaps) :
Round 1 :
With black yarn, ch 6, join with sl st to form a small ring (6-ch ring)
Round 2 :
Ch1, 12 sc into ring (12)
Round 3 :
(sc 1, ch4, sc into next st) x 6 creating 6 ch-4 loops around (12 anchors)
Round 4 :
In each ch-4 loop: (sc, ch3, sc) to create mini lacy petals (6 scallops)
Round 5 :
1 sc in each st around to tidy (12)
Info :
These connectors are useful to join multiple blooms without making the runner stiff. Work several and lay them between blooms to create a lace flow.
Round 6 :
Optional extended mesh: (sc, ch5, sc) into each previous sc to stretch lace for larger gaps (12)
Round 7 :
Fasten off and weave tails (connector complete)
— Layout & Joining Strategy :
Info :
Decide if you want an alternating large/medium/small stagger (as in photo) or a symmetric pattern. The runner pictured alternates large and medium blooms with small motifs tucked at the edges and connectors filling the negative space.
Info :
Blocking: Before joining, wet-block or steam-block every motif to the desired size. Pin to a flat surface and allow to dry completely. Consistent blocking makes joining accurate and neat.
Round 1 :
Start joining at the outer lacy round of a bloom (Round 19-20 of large motif or Round 11-13 of mediums). With black yarn and a long tail, line up two motifs overlapping at their lacy scallop edges.
Round 2 :
Sew or sl st connecting: Option A - Whip stitch through both motif edges using tapestry needle and tail for invisible join. Option B - Using hook, sl st through matching ch-3/ch-4 loops to create a decorative chain join. Repeat to attach each adjacent motif following your layout.
Info :
When joining, keep your tension slightly looser than single-motif stitches so the runner remains flexible and sits flat. Pin motifs together on blocking board to ensure alignment before permanent joining.
Round 3 :
For motifs with small connectors: place connector motifs in the spaces between three adjacent larger motifs and secure by slip-stitching into each corresponding loop (creates a three-point join)
Round 4 :
Continue joining across the length of the runner, working outwards from a central motif to keep overall shape even. Fasten off each join tail and weave ends neatly into the back of the lace.
— Border & Final Edging :
Info :
Once all motifs are joined and the runner is a single piece, work 1 round of black single crochet around the entire outside edge to even irregular edges. Keep tension even and work one sc in each sc and 2 sc in corner picots or larger gaps.
Round 1 :
With black yarn, join anywhere to the outer edge: 1 sc evenly around, placing 2 sc in larger gaps to keep the border flat (stitch count varies with finished layout)
Round 2 :
Work a decorative scallop round: (skip 2, 5 dc in next st, skip 2, sl st in next sc) around to make rounded scallops evenly spaced over petals and connectors
Round 3 :
Optional picot detail: (sc 3, picot [ch3, sl st to top of last sc]) across scallop tops to add fine points along the edge
Round 4 :
Final tidy round: 1 sc in each st around to clean up picot joins and ensure a stable edge. Fasten off and weave in all ends thoroughly.
Info :
Press lightly with steam if using cotton to remove any wrinkles. Do not press directly on puff stitches; use a pressing cloth and low steam if needed to avoid crushing petal texture.
— Finishing Touches :
Round 1 :
Double-check all joins, secure any loose spots with additional stitches from the back side. Trim and weave all tails neatly into motif backs so they won't show through the lacy mesh.
Round 2 :
Optional: Add a few accent centers in golden-yellow yarn by embroidering small French knots or making tiny 6-sc discs and sewing them to the center of selected blooms for visual interest.
Info :
Allow the runner to dry completely after blocking and after any steam pressing. Store flat or loosely rolled to avoid creasing the petals.
This orange-and-black blossom table runner is a joyful way to welcome the season to your home! Each detachable bloom is a tiny celebration of texture, contrast and clever joining. Working it gives many satisfying little projects that add up to a dramatic, finished centerpiece. 🎃🧶 Display it on a console, dining table, or mantle — it’s perfect for seasonal style and makes a gorgeous handmade gift. Happy stitching and enjoy arranging your blooms!