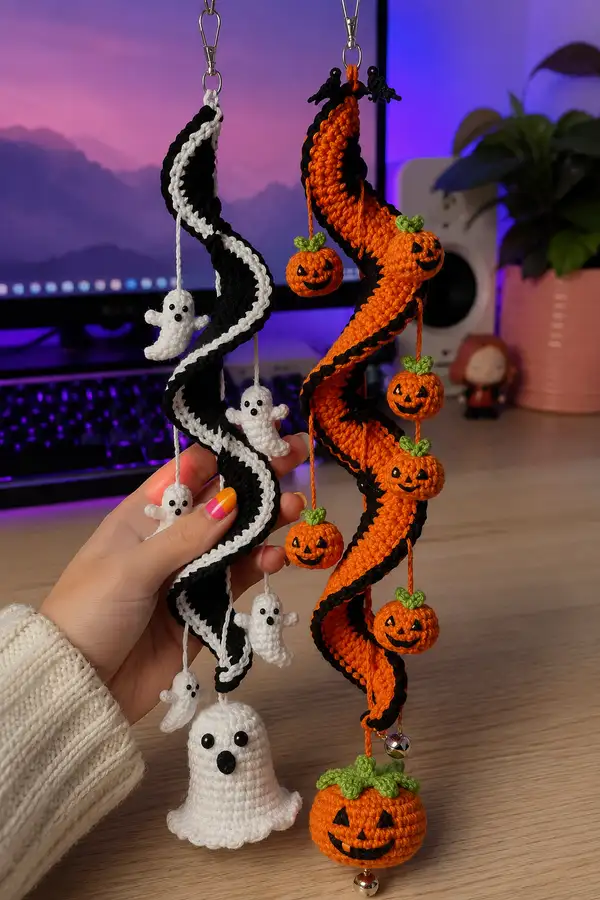
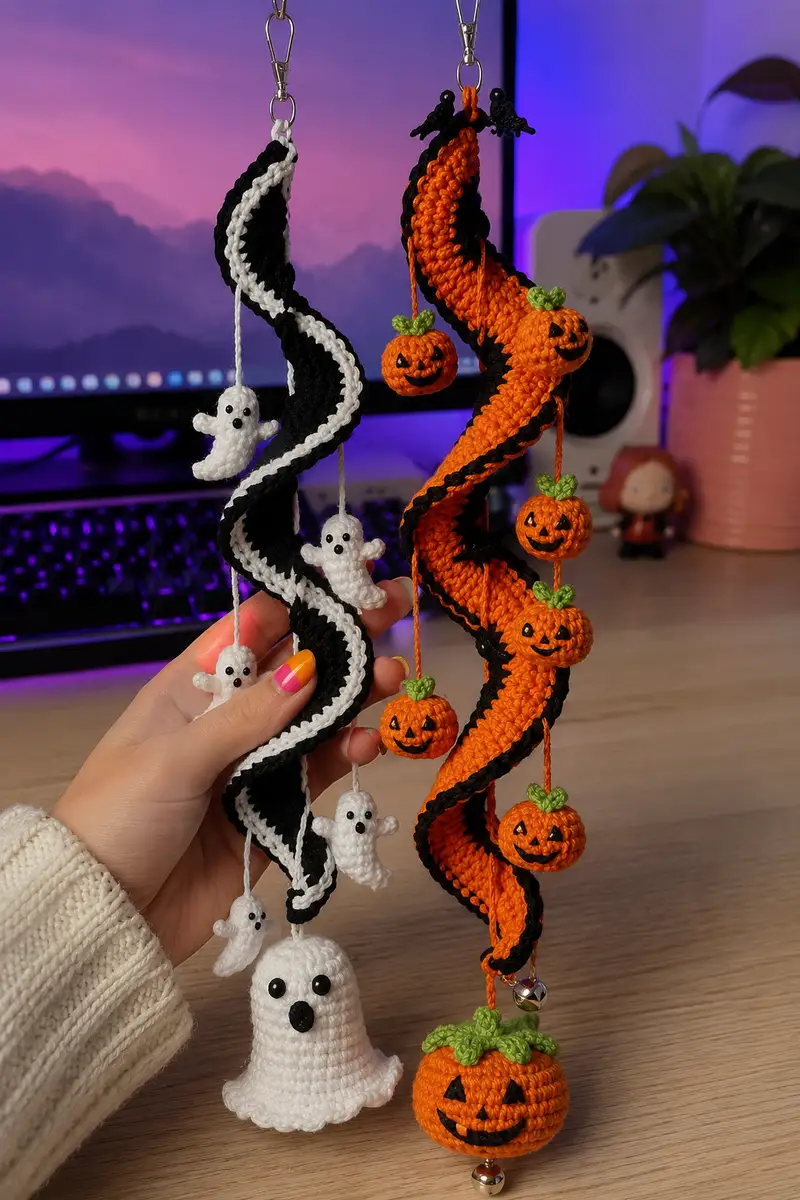
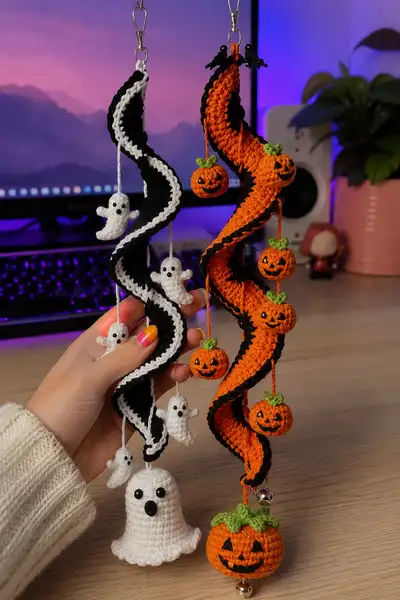
Create dangling spiral Halloween charms with tiny jack-o-lanterns and ghosts. This pattern teaches a twisted spiral strip with scalloped edging, mini pumpkin amigurumi, and plump ghost charms. Includes detailed stitch counts, color change tips, and assembly instructions for two complementary spooky spirals — one in orange & black with pumpkins, and one in black & white with ghosts.
Progress Tracker
0% Complete
— Materials & Notes :
Info :
Use worsted weight yarn and the hook recommended to obtain a firm amigurumi fabric. Work in continuous rounds (spiral rounds) unless otherwise stated. Count stitches at the end of each round and mark the first stitch with a removable marker. Finish tails neatly and weave in securely. All stitch counts shown in parentheses.
— Spiral Strip (Make 2: Orange/Black and White/Black) :
Info :
Each spiral strip is worked as a long tubular strip in the round, starting from a small tube and increasing to full width. The strip is worked primarily in the main color (orange or white) with a contrasting edge (black). The spiral effect is produced by alternating rounds worked in BLO and FLO and by adding a narrow border that creates a scalloped ridge.
Round 3 :
(1 sc, inc) x 6 (18)
Round 4 :
(2 sc, inc) x 6 (24)
Round 5 :
(3 sc, inc) x 6 (30)
Round 6 :
(4 sc, inc) x 6 (36)
Round 7 :
(5 sc, inc) x 6 (42)
Round 8 :
(6 sc, inc) x 6 (48)
Info :
At this point the tube has reached a working width of 48 sts. For the spiraled ribbon effect we will work many even rounds and alternate BLO/FLO rounds every 4 rows to encourage curvature. Keep the tension slightly firmer than normal to retain shape.
Round 9-16 :
1 sc in each st (48) (work rounds 9-12 in main color, then round 13 change to contrasting color for narrow edge, rounds 14-16 main color again)
Info :
Change to contrast color (black) on round 13 by finishing the last sc of round 12 with the black yarn and continue. Carry the unused yarn loosely along the inside of the tube to avoid long floats. Use a stitch marker to note round 13 first stitch.
Round 17-24 :
1 sc in each st (48) (alternate two rounds BLO, two rounds FLO across these eight rounds to create subtle curve: rounds 17-18 BLO, 19-20 FLO, 21-22 BLO, 23-24 FLO)
Info :
Working in BLO will pull one side slightly and working in FLO the other; alternating every couple rounds causes the tube to bias and begin to twist gently. Keep the carried contrast yarn inside when not in use to be caught by later stitches.
Round 25-48 :
1 sc in each st (48) (continue alternation pattern: every 4 rounds repeat BLO/BLO/FLO/FLO to build length — repeat this group 6 times to create approximately 24 additional rounds)
Info :
These rounds are the body of the spiral — work evenly and keep stitch counts exact. The number of rounds determines the final length: adjust by working more rounds for a longer spiral. The pictured spirals are roughly 55-65 rounds long before tapering.
Round 49-56 :
1 sc in each st (48) (reduce or extend by repeating the alternation pattern to achieve desired length)
Info :
Begin shaping ends now: the spiral tapers slightly at top and bottom. We'll decrease gradually over the next rounds to form a neat closure for attaching keyring hardware at one end and the charm cluster at the other.
Round 57 :
(6 sc, dec) x 6 (42)
Round 58 :
(5 sc, dec) x 6 (36)
Round 59 :
(4 sc, dec) x 6 (30)
Info :
Stuff the tube very lightly at narrow ends only if desired to keep shape; main spiral should remain hollow and flexible so it can curl. Do not overstuff as the spiral's movement depends on flexibility.
Round 60 :
(3 sc, dec) x 6 (24)
Round 61 :
(2 sc, dec) x 6 (18)
Round 62 :
(1 sc, dec) x 6 (12)
Info :
Fasten off leaving a long tail for sewing to keyring hardware. Repeat whole Spiral Strip instructions to make the second spiral (swap orange for white main color as needed). If you prefer a flat spiral, do not taper as aggressively and instead finish with even rounds.
Round 64-70 (Edging & Scallop) :
Join contrast color along outermost edge of spiral: *sc around edge along each round, (sc, ch1, sl st) in every 4th st to create small scallops* Repeat across outer edge to create decorative ridge. Work carefully to follow the twist shape so the edging sits evenly.
Info :
For the black-and-white spiral you will use black for the outer scallop and white inner stripe. For the orange spiral use black scallop edging for high contrast. The scallops are small decorative points that give the braided twist a finished look.
— Mini Pumpkin (Make 3 small pumpkins for orange spiral + 1 larger pumpkin bell) :
Info :
Mini pumpkins are small round amigurumi shapes about 3-4 cm diameter for small ones and 4.5-5 cm for the larger bottom pumpkin. Work in continuous rounds; adjust hook to slightly smaller for tighter fabric. Each pumpkin is worked in orange yarn with a small green leaf/top and embroidered face in black. Sew a short hanging cord (ch-20 or desired length) securely into the top.
Round 3 :
(1 sc, inc) x 6 (18)
Round 4 :
(2 sc, inc) x 6 (24)
Round 5 :
(3 sc, inc) x 6 (30)
Info :
For the larger pumpkin (bottom) continue one additional increase round to reach 36 sts: Round 6: (4 sc, inc) x6 (36). For small pumpkins, stop at 30 sts and work even rounds for height.
Round 6-9 (Small pumpkins) :
1 sc in each st (30) for rounds 6-9 to build height (work 4 rounds even)
Round 6-11 (Large pumpkin) :
1 sc in each st (36) for rounds 7-11 (work 5 rounds even for fuller body)
Info :
Begin stuffing at the end of these even rounds. Use small amounts of fiberfill and press evenly in to produce a round pumpkin shape. Add more stuffing as the form gathers.
Round 10 (small) / Round 12 (large) :
(3 sc, dec) x 6 (24) [small] or (4 sc, dec) x 6 (30) [large]
Round 11 (small) / Round 13 (large) :
(2 sc, dec) x 6 (18) [small] or (3 sc, dec) x 6 (24) [large]
Round 12 (small) / Round 14 (large) :
(1 sc, dec) x 6 (12) [small] or (2 sc, dec) x 6 (18) [large]
Round 13 (small) / Round 15 (large) :
6 dec (6) [small] or (1 sc, dec) x 6 (12) [large]
Info :
For the small pumpkins fasten off leaving a long tail for closing. For the large pumpkin continue shaping to create a small opening to insert a bell and eye pin if desired: Round 14 (large): 6 dec (6). Fasten off and leave tail for sewing.
Finishing Pumpkin :
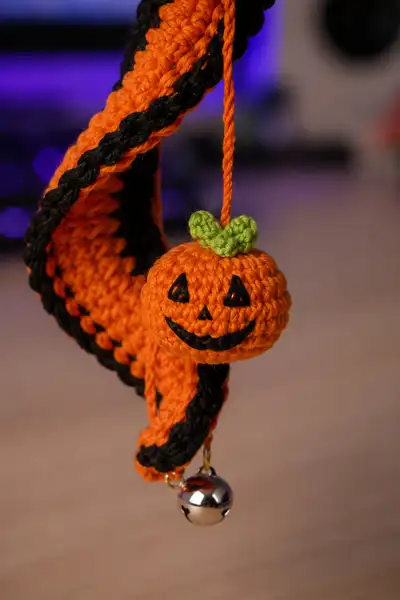
Sew the opening closed using the long tail and a yarn needle. Pull tension evenly to create an indented top if desired—this helps form the pumpkin lobes. Attach a short cord (ch 12-20) of orange yarn to the top center by sewing in securely, then attach a small green leaf/top as described below. Embroider face with black yarn or sewing thread using satin stitches/straight stitches to create triangular eyes and smiling mouth. Secure threads inside and weave ends.
— Pumpkin Leaf / Top (Make 4) :
Round 1 :
ch4, starting in second ch from hook: sc, hdc, sc (3) then sl st to first ch to form small leaf
Round 2 :
ch1, turn, sc in each (3), ch3, sl st across to create leaf stem loop
Info :
Alternatively work a tiny crocheted leaf: mr, ch1, 6 sc in mr, pull tight and sl st to close leaving tail. Flatten and add a small straight stitch vein in center. Sew the leaf to the top of each pumpkin and hide tails under a few stitches.
— Mini Ghost (Make 3 small ghosts) :
Info :
Small ghosts are a compact bell-like shape with two tiny side arms. Use white yarn and 3.0-3.5mm hook for a tight fabric. Add tiny black safety eyes or French knot eyes in round 3-4. Leave a hanging cord at the top (ch 18-24) sewn into the crown.
Round 3 :
(1 sc, inc) x 6 (18)
Round 4 :
1 sc in each st (18)
Info :
Place small safety eyes between rounds 3 and 4, spaced 4-6 stitches apart for the tiny ghosts. If embroidering, use 2-3 tiny French knots or black thread sewn from the back for a flat finish.
Round 5 :
(2 sc, dec) x 6 (12)
Round 6 :
1 sc in each st (12) — begin forming bell flare
Round 7 :
(1 sc, inc) x 6 (18) [this creates a small ruffle at base]
Round 8-9 :
1 sc in each st (18)
Round 10 :
*sc in next st, ch2, skip next st* repeat around to create little scallops (approx 12 ch-2 loops)
Round 11 :
In each ch-2 loop: (sc, hdc, sc) to form little ruffled edge (12 ruffles)
Info :
Sew a length of white yarn into the top to form the hanging cord (ch 18-24). Stuff the body lightly so the ghost flares smoothly. Add two tiny arms by sewing in small 6-st bumps at side positions: make small 6-sc tubes (mr,6 sc) and flatten and sew.
Round 12 :
Fasten off leaving a long tail for sewing and attachment (if creating hanging loop separately, attach here)
— Large Bell Ghost (Make 1 large ghost/bell at bottom of black strip) :
Info :
The large bell ghost at the bottom of the black & white spiral is larger and flared with a smooth dome top and full ruffled base and a bell metal clapper inserted. Use chime bell with eye pin or sew a small bell into the bottom cavity.
Round 3 :
(1 sc, inc) x 6 (18)
Round 4 :
(2 sc, inc) x 6 (24)
Round 5 :
(3 sc, inc) x 6 (30)
Round 6-10 :
1 sc in each st (30) — build dome
Info :
Place larger safety eyes between rounds 6-7 spaced about 8-10 stitches apart for a friendly larger face. If embedding a bell, leave the bottom open until after stitching the first portion of the ruffled edge.
Round 11 :
(3 sc, dec) x 6 (24)
Round 12 :
(2 sc, dec) x 6 (18)
Round 13 :
Start ruffle base: (1 sc, inc) x 6 (24)
Round 14 :
(2 sc, inc) x 6 (30)
Round 15 :
*sc in next 2 sts, ch2, sl st in next st* repeat around to create loops for a decorative edge (approx 10-12 loops)
Round 16 :
In each ch-2 loop: (sc, hdc, sc) to form fuller ruffle, finish stuffing belly firmly, leaving a small opening for bell insertion
Info :
Insert a small bell and eye pin secured into place with a few stitches and a dab of fabric glue if desired. Close remaining opening and hide ends. The bell should hang freely so the ghost chime rings gently.
Round 17 :
Fasten off leaving long tail for sewing to the spiral base. Attach hanging cord as with small ghosts but use a stronger cord or short chain to support weight of bell.
— Hanging Cord & Keyring Loop :
Info :
Create a secure loop for hanging: either crochet a short chain (ch 20-30) and fold to double and whip stitch together, or attach a metal keyring with sewn crocheted cap. Reinforce attachment points with extra yarn and several passes of stitching.
Step :
For the top of each spiral, sew a small round cap: make a tube of 6 sc rounds 3-4 rounds long, slide keyring inside, and secure by sewing the top closed. Alternatively use a split ring and whip stitch around it with strong yarn.
— Small Decorative Details & Faces :
Info :
Embroider jack-o-lantern faces using black yarn: satin stitch triangles for eyes and small straight stitches for noses, and a curved satin stitch for the smile. For ghosts use small French knots or tiny black beads for eyes. When embroidering on round shapes, always stitch from the back and anchor ends securely to avoid loosening.
— Assembly & Spacing of Charms :
Info :
Plan charm placement along the spiral before sewing: pin small pumpkins and ghosts along the inner curve of the orange spiral and tiny ghosts and a large bell ghost on the white/black spiral. Spacing shown: three small charms spaced evenly along the middle third of the spiral, with the largest charm at the bottom end.
Step :
Attach short cords to each small pumpkin/ghost (ch 12-18). Fold cord in half and sew the loop securely into the top center of the small amigurumi. Knot cord hidden inside and reinforce with a few stitches. Use length adjustments to ensure pumpkins hang at slightly staggered heights.
Step :
For the orange spiral, attach three pumpkin cords down the length of the spiral spaced 1/3 length apart. For the black & white spiral, attach small ghosts similarly and the large bell ghost as the final bottom charm. Add small jingle bells to the very tip of spirals if desired using eye pins through the bottom stitch and closing the loop.
Info :
When sewing charms to the spiral, use small tidy stitches through the spiral rounds and the hanging cord loop to reduce visible threads. Pin and check balance by holding the spiral from the top keyring and adjusting lengths before permanent sewing.
— Final Finishing :
Info :
Weave in all ends by threading tails into tapestry needle and running through several interior stitches. Trim close to work. If desired, add a tiny dab of clear fabric glue to secure embroidery ends. Lightly steam-block spirals on low setting if you want to slightly shape them (avoid contact with metal bells).
Round Summary :
This full pattern set includes: Spiral Strip (approx 70 rounds per spiral including edging), 3 Mini Pumpkins (approx 13 rounds each), 1 Large Pumpkin (approx 15 rounds), 3 Mini Ghosts (approx 12 rounds each), 1 Large Bell Ghost (approx 17 rounds), assorted leaf tops and scallops — totaling well over 150 rounds across all parts to give you a richly detailed seasonal hanging mobile.
Info :
Adjust stitch counts and rounds to scale the project up or down. For a micro version, use fingering yarn with a smaller hook and fewer rounds; for a larger mobile use bulky yarn and a larger hook with more rounds for the spiral body.
Completing this spooky spiral decoration feels like assembling a tiny Halloween parade — pumpkins grin and ghosties sway with every breeze! The contrast edging and scalloped ridge give the spirals bold definition, while the miniature amigurumi charms add personality. Hang them singly or in a pair for a playful seasonal accent. 🧡👻 Happy stitching — I can’t wait to see how yours turns out! 🎃