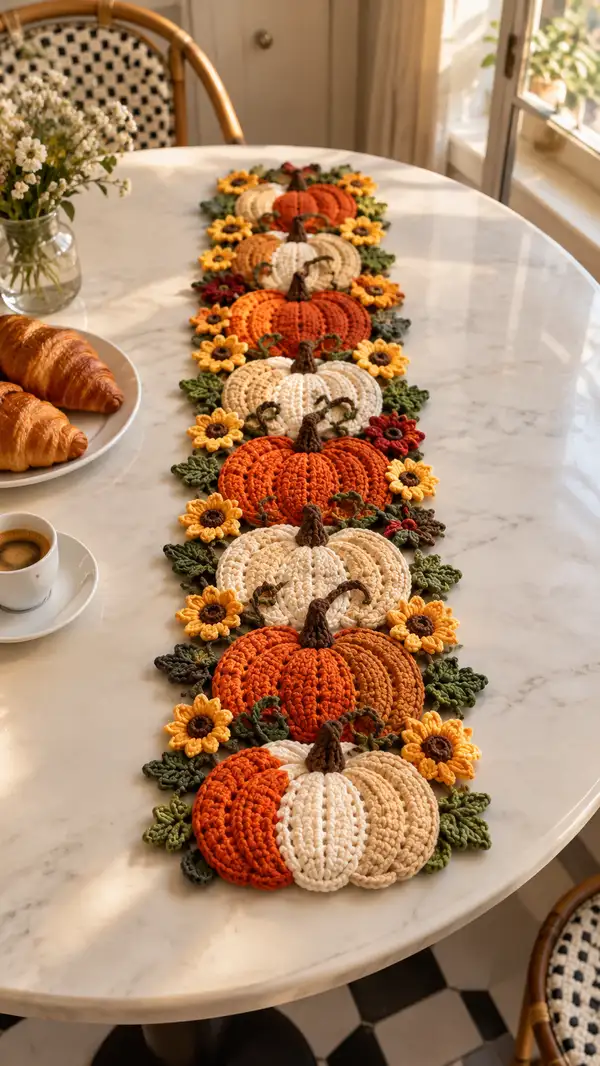
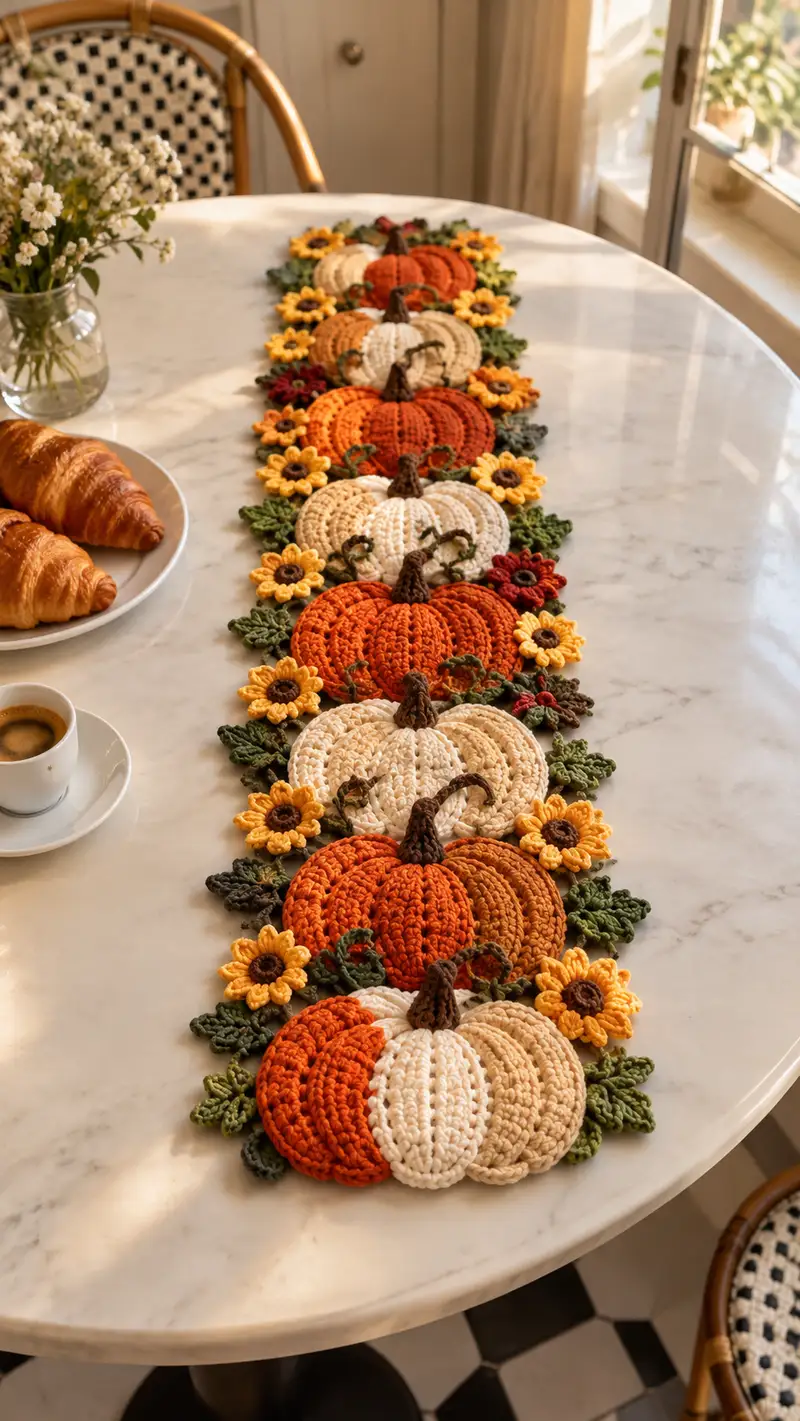
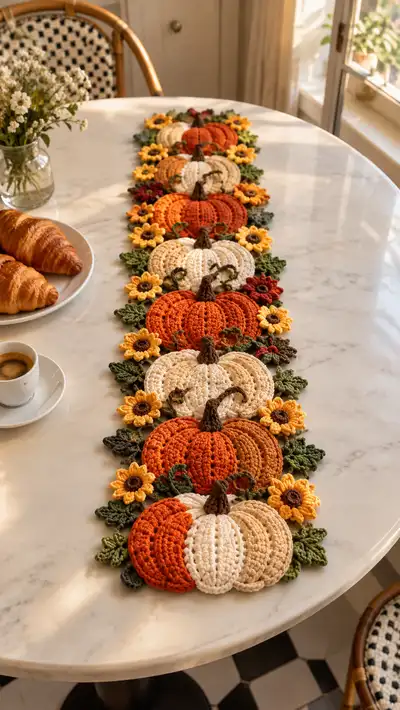
Create a warm, autumn table runner composed of textured crochet pumpkins, cheery sunflowers, leafy vines and stitched stems. This pattern uses layered motifs—pumpkin ribs, sunflower centers and petals, and decorative leaves—joined to form a long runner perfect for a dining table. The rich palette of orange, cream, rust and sunflower yellow brings cozy harvest charm to any setting. Detailed instructions guide you through each motif, assembly and finishing touches.
Progress Tracker
0% Complete
— Overview & Gauge :
Info :
Gauge is not critical for motif-based table runner, but aim for firm, dense fabric. Using worsted weight yarn and 4.5mm hook the pumpkin wedge motif should measure approximately 3.0" wide by 2.25" tall when blocked. Each full pumpkin (6 wedges) measures roughly 6" - 6.5" across and 3" tall. Make a swatch to match your desired density.
Info :
All motifs are worked in rounds unless specified. Use stitch markers to mark beginning of rounds. We will make: Pumpkin Wedges (6 per pumpkin), Pumpkin Centers/Backing, Pumpkin Stems, Sunflower Centers, Sunflower Petals (double layered), Leaves, Small filler flowers and Vines. Join motifs with whipstitch or invisible seam and finish with a decorative leaf border.
— Pumpkin Wedge (make 6 per pumpkin) :
Round 1 :
6 sc in magic ring (6)
Round 3 :
(1 sc, inc) x 6 (18)
Round 4 :
(2 sc, inc) x 6 (24)
Round 5 :
(3 sc, inc) x 6 (30)
Info :
These first five rounds build a small, dense base for each wedge. Keep tension firm so stuffing and join will sit nicely. Change color here if making multi-toned wedges; otherwise continue in main pumpkin color.
Round 6 :
1 sc in each st (30)
Round 7 :
1 sc in each st BLO (30)
Round 8 :
1 hdc in each st (30)
Round 9 :
(3 hdc, inc) x 6 (36)
Info :
Use hdc for the next rounds to create slightly taller stitches and a visible texture which will form the rib when wedges are gathered. Working one round in BLO on Round 7 creates a small ridge at the base for stability.
Round 10 :
1 hdc in each st (36)
Round 11 :
1 hdc in next 2 sts, fpdc around next st, (1 hdc in next 2 sts, fpdc around next st) x 9 (36)
Round 12 :
1 hdc in each st (36)
Round 13 :
*(1 sc, 1 sc in next st, dec over next 2 sts) - used to shape the wedge tip* Repeat across to finish wedge shaping (36 -> 30)
Round 14 :
(2 hdc, dec) x 6 (24)
Info :
At this point the wedge should have a slightly flattened, elongated teardrop shape. If making wedge in a lighter or darker stripe intentionally stop and change color on the last st of Round 14. We will now create a small edging that mimics the seam when wedges are gathered.
Round 15 :
1 sc in each st around working evenly (24)
Round 16 :
Slip stitch around the first 6 sts to form a small lip, then 1 sc in remaining sts (24)
Round 17 :
Fasten off leaving a long tail for sewing and gathering. Weave tail through the outer round and cinch slightly to create the wedge curvature. Repeat to make 6 wedges per pumpkin.
Info :
Make 6 identical wedges per pumpkin, blocking them flat first if your tension varies. The wedges will be gathered and sewn together to form a slightly domed pumpkin. If you prefer a flatter pumpkin, reduce height by omitting Round 9 or Round 11.
— Pumpkin Backing & Assembly (make 1 per pumpkin) :
Round 1 :
6 sc in magic ring (6)
Round 3 :
(1 sc, inc) x 6 (18)
Round 4 :
(2 sc, inc) x 6 (24)
Round 5 :
1 sc in each st (24)
Round 6 :
1 sc in each st BLO (24)
Info :
This backing disc creates a small stable center to attach wedge inner edges. It will be mostly hidden by the stem and sunflower cluster. If you want a flatter pumpkin, work Round 6 in FLO instead to create a visible ridge.
Round 7 :
Fasten off leaving a long tail for sewing. Position wedges around this backing disc with wedges’ inner edges touching. Using long tails from wedges and backing, whipstitch wedges to the backing: sew each wedge inner seam to the backing disc working from center outwards.
Round 8 :
Once all wedges are joined, run a gathering thread through outermost edge of wedges and gently pull to form the pumpkin dome. Adjust evenly then tack the outer edges together with small whipstitches to secure. Do not over tighten; the dome should be soft and slightly stuffed.
Info :
Lightly stuff the pumpkin through the gap left at the top before finalizing the gather. Use small amounts of fiberfill and press evenly with a stuffing tool. The pumpkin should hold its shape but remain squishy enough to lie flat on the table runner.
Round 9 :
After stuffing and closing inner gap with whipstitch, weave in ends securely. Each completed pumpkin should measure roughly 6" across when wedges are eased together tightly, or 5.5" for a tighter gather.
— Pumpkin Stem (make 1 per pumpkin) :
Info :
Stems are short tapered cones worked in brown using front post stitches for texture. They are sewn to the pumpkin center and optionally twisted with a small vine tail.
Round 1 :
In brown, 6 sc in magic ring (6)
Round 3 :
(1 sc, inc) x 6 (18)
Round 4 :
1 sc in each st (18)
Round 5 :
(2 sc, dec) x 4 then 2 sc (14)
Round 6 :
1 sc in each st (14)
Round 7 :
(1 sc, dec) x 4 then 2 sc (10)
Round 8 :
1 sc in each st (10)
Round 9 :
Finish with a round of reverse sc (sl st or crab stitch) around the base to flare slightly. Fasten off leaving long tail for sewing.
Info :
Optionally, before finishing Round 9, insert a small bit of stuffing or a short piece of folded wire into the stem to help it stay upright. When sewn to the pumpkin, tack the base down with a few stitches to secure.
— Pumpkin Tendril / Vine (make multiple per pumpkin) :
Round 1 :
Using dark green, ch 30 (or desired length), sl st into 2nd ch from hook then sl st along chain to create a twisted cord (30)
Round 2 :
Wind tendril around your finger to create a curl; tack to base of stem with tiny whipstitches every 4-6 sl sts
Info :
Vine length is flexible—vary lengths between pumpkins for a natural look. You can also braid 3 short chains together for thicker tendrils or add small leaflets along the vine by crocheting tiny leaves and sewing them in place.
— Sunflower Center (make 1 per sunflower) :
Round 1 :
6 sc in magic ring (6)
Round 3 :
(1 sc, inc) x 6 (18)
Round 4 :
1 sc in each st BLO (18)
Round 5 :
Switch to brown center: 1 sc in each st (18)
Round 6 :
*Working in FLO on this round to make a raised rim: 1 sc in each st FLO (18)
Info :
This center will anchor two layers of petals; the raised rim (Round 6) helps the petals sit neatly. Use a darker brown for the very center to contrast with petal base color.
— Sunflower Petal Layer A (inner small petals, make 12) :
Round 1 :
Attach sunflower yellow to a back loop of the center, ch 6, sl st in 2nd ch from hook, sc in next, hdc in next, dc in last ch. Sl st into next center loop to secure petal. Repeat 12 times (12 petals)
Round 2 :
Fasten off inner layer after securing all 12. Weave in ends on WS
Info :
Inner petals are shorter and tucked under the outer layer. Keep petals evenly spaced by using stitch markers every 2 stitches around the center to guide placement.
— Sunflower Petal Layer B (outer large petals, make 12) :
Round 1 :
Attach brighter yellow in between each inner petal, ch 8, (sl st, sc, hdc, dc, hdc) across the chain, sl st to center to secure. Repeat 12 times (12 petals)
Round 2 :
Once all outer petals are attached, give the sunflower a gentle blocking to shape petals forward. Fasten off and weave in ends.
Info :
For a fuller flower, add a third petal round with even longer chains or use 18 petals for a denser look. Place sunflowers just offset from pumpkin stems to create layered interest.
— Leaf (Make multiple sizes; standard leaf below) :
Round 1 :
Ch 8, sc in 2nd ch from hook, hdc in next, dc in next 2, hdc in next, sc in last (7 sts)
Round 2 :
Turn, working down other side of chain: sc in first, hdc in next, dc in next 2, hdc in next, sc in last, sl st to join at base. Fasten off (7)
Round 3 :
Using darker green, embroider a center vein with running stitch or work a line of sl sts up center for texture. Weave ends.
Info :
Vary leaf lengths from ch 6 to ch 12 for visual interest. Work leaves in open lace style for a lighter feel or dense for a fuller border. Block leaves flat before assembly for best results.
— Decorative Small Flower (accent) :
Round 1 :
In deep rust, 6 sc in magic ring (6)
Round 2 :
*Ch 4, sl st in next st to form a petal* Repeat around until you have 6 petals. Fasten off (6 petals)
Info :
Make several small filler flowers in rust and yellow to tuck between pumpkins and sunflowers for depth. Sew a small brown French knot style center with a few sl sts of dark brown yarn for contrast.
— Vine Panel (work several short vine segments) :
Round 1 :
Ch 40 (or desired length), sl st into 2nd ch from hook and across to create cord (40 sl st)
Round 2 :
Optionally, sc along cord to thicken: 1 sc in each sl st (40)
Info :
Vines are used to connect motif groups; vary lengths and tack them to the backing/back of the runner in a meandering pattern. Add leaves and small flowers as you sew vines in place.
— Joining Motifs & Layout :
Info :
Layout sample: The pictured runner alternates pumpkins and sunflowers in a single-file line. Typical sequence across runner length: Pumpkin, Sunflower cluster, Pumpkin, Sunflower, Pumpkin etc. Measure your table and create enough pumpkins to match desired runner length. The sample photo shows 7 pumpkins; you can scale up or down.
Round 1 :
Position first pumpkin on flat surface. Lay second pumpkin so wedges edge slightly overlap to mimic picture—approx 6-8 stitches overlap. Use a combination of whipstitch and invisible ladder stitch to join wedge outer edges one to another so seam sits flat (use wedge outer tails).
Round 2 :
Between each joined pumpkin add a sunflower cluster: sew sunflower at the gap between pumpkins offset slightly to the side so petals overlap pumpkin edges by 1/4'' to 1/2'' (about 3-4 stitches). Tack sunflower center down using small stitches through backing disc and cupcake petals.
Round 3 :
Attach vines along the back edge of pumpkins, tacking every 1" with a few tight whipstitches so vines are hidden but secure. Sew leaves and small flowers along vines and edges to hide join seams and create a natural border.
Info :
When sewing multiple pieces, use pins to hold motifs in desired place before sewing. Keep joins flat by stitching only through outer loops of each motif rather than both layers—this reduces bulk. Step back periodically to ensure the runner edges remain straight.
— Decorative Border (edge leaves and scallop) :
Round 1 :
With leaf green, work a continuous border around the entire runner edge: join yarn at any outermost wedge point and ch 1, sc evenly around all exposed edges placing approximately 1 sc for every 3 stitches of motif to even out curves.
Round 2 :
Work a scallop row: *(skip 1 sc, 5 dc in next st, skip 1 sc, sl st in next) repeat around to form decorative scallops. At areas where leaves will be added, work fewer scallops to create space for larger leaves.
Round 3 :
Between scallops tack down medium and small leaves using the method in leaf section; mix greens for contrast. Sew some leaves under scallops and some over them for a layered effect.
Info :
Keep border flexible so runner lies flat. If scallops gather, reduce dc cluster size or add spacer sl sts. For a more subtle finish, simply sc around without scallops and attach leaves individually.
— Finishing Touches :
Round 1 :
Weave in all ends on WS using tapestry needle. Clip tails close after weaving at least 1.5" under stitches. Inspect joins and reinforce any loose seams with additional whipstitches.
Round 2 :
Gently steam block or wet block the runner to flatten and even out motifs. Pin motifs to correct shape while blocking and allow to dry completely. Remove pins and lightly press if needed.
Round 3 :
Optional: If your table runner will be used on a high-traffic table, you can sew a narrow fabric backing for stability and to prevent slipping. Use a complementary linen or cotton backing cut to runner size and whipstitch to wrong side, leaving small hang loops at ends if desired.
Info :
Check all small attachments (sunflower petals, leaves, tendrils) for security before use. If making a gift, include care notes: hand wash cold, reshape while damp, dry flat.
— Sizing & Repetition Guide :
Info :
Sample motif measurements: single pumpkin approx 6" wide. For a standard 60" table runner, make 9 pumpkins spaced with sunflowers; for narrower tables make 5-7 pumpkins. To lengthen runner simply repeat Pumpkin + Sunflower sequences until desired length is reached. Consider using a consistent rhythm of colors (orange, cream, tan, rust) to create a pleasing gradient.
Round 1 :
If converting to placemats, isolate single pumpkin motif and add a rectangular backing trimmed with leaves and small flowers to create an autumnal set.
This pumpkin and sunflower runner brings the cozy spirit of harvest season to your table—warm hues, layered texture, and charming motifs make every meal feel special. Each pumpkin and blossom is worked and joined with care, creating a one-of-a-kind centerpiece you can proudly display every autumn. Enjoy the meditative process of motif-making and the instant satisfaction of seeing them come together. 🧶🍂🎃