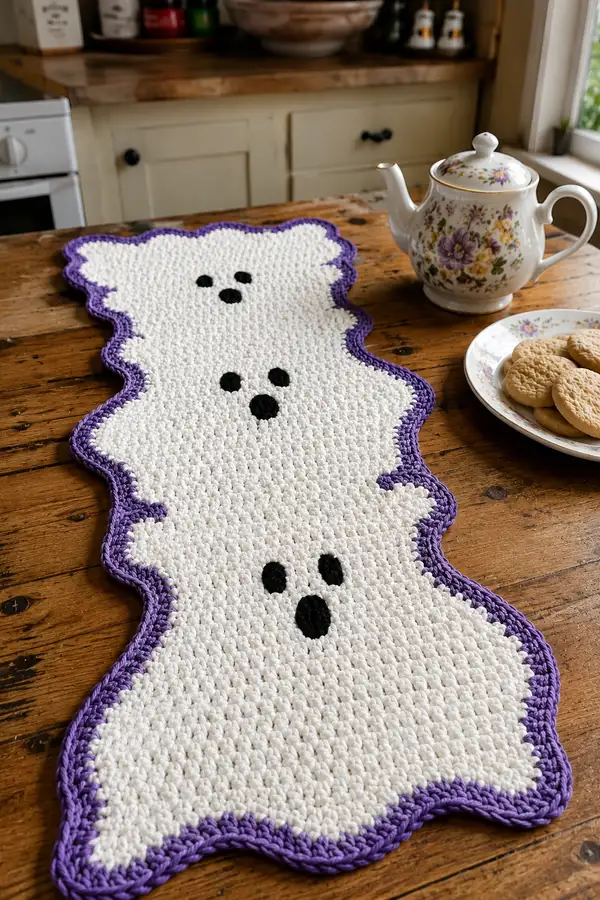
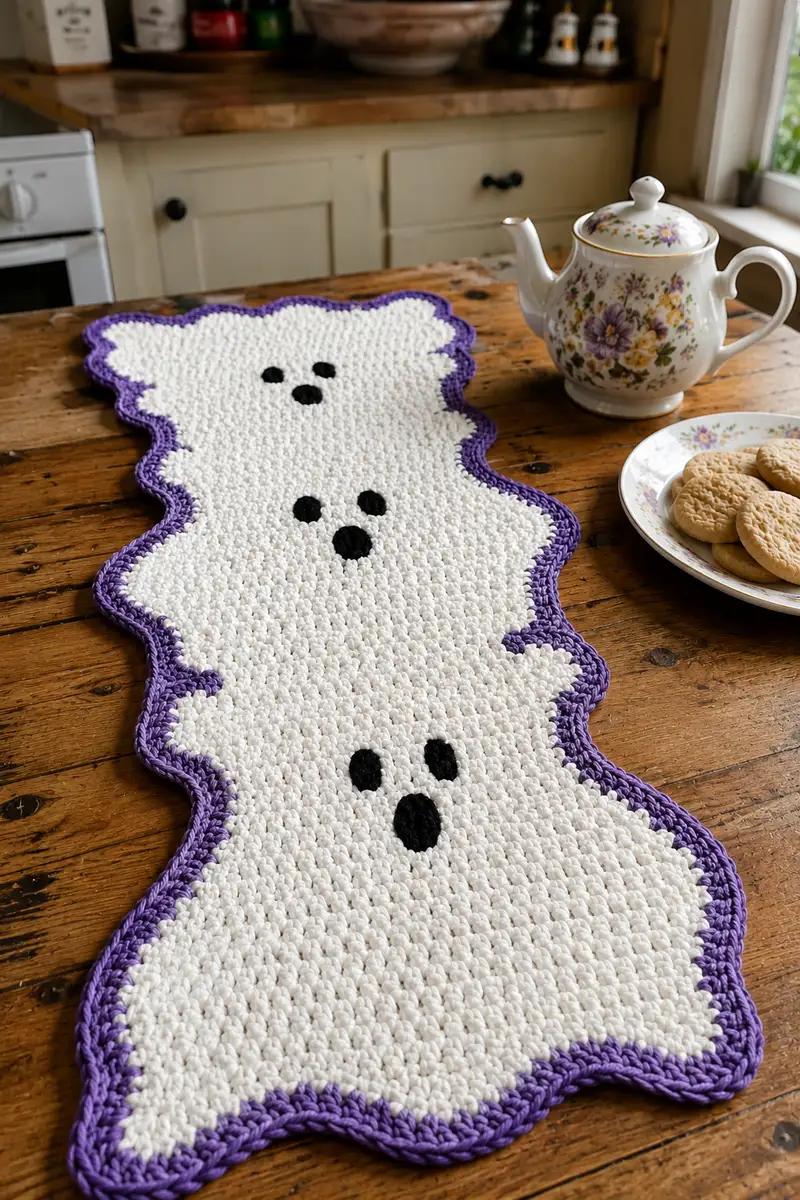
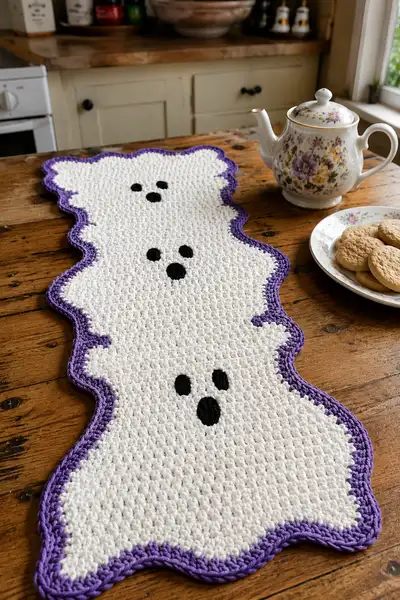
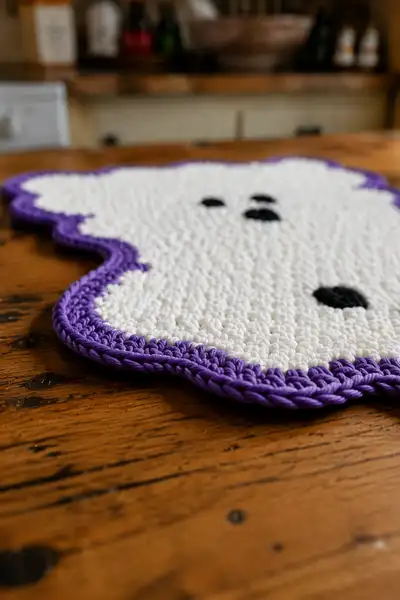
Create a charming Halloween table runner featuring three sleepy white ghosts with a bold wavy purple border. This flat crochet runner is worked as three connected ghost panels with a textured, nubby body stitch and crisp appliqued facial features. The pattern uses simple repeats and a scalloped edging to produce the playful wavy silhouette seen in the photo.
Progress Tracker
0% Complete
— Overview and Gauge :
Info :
This runner is built from three connected ghost panels worked in continuous rounds. Each ghost panel is worked from the center outward using a textured cluster/bobble-like repeat to recreate the nubby look in the photos. Finished runner measures approximately 36" long x 10-12" wide depending on yarn and tension. Gauge for the textured stitch: 12 clusters = 4" across; 8 rounds = 4" tall using 5.0mm hook and worsted cotton.
Info :
We will work 3 identical ghost panels (Ghost A bottom, Ghost B middle, Ghost C top) and join them with a single connecting round before adding the purple scalloped border. The instructions list rounds for one ghost panel then show join and border rounds. Keep stitch markers handy and count often.
— Ghost Panel (Make 3 Identical Panels) :
Round 1 :
Make a magic ring. Ch1, 6 sc into magic ring (6)
Round 2 :
Inc in each st around (2 sc in each) (12)
Round 3 :
(1 sc, inc) x6 (18)
Round 4 :
(2 sc, inc) x6 (24)
Round 5 :
(3 sc, inc) x6 (30)
Round 6 :
(4 sc, inc) x6 (36)
Round 7 :
(5 sc, inc) x6 (42)
Round 8 :
(6 sc, inc) x6 (48)
Info :
Rounds 1-8 form the circular center of each ghost. At this stage the motif is a neat round. From round 9 onward we'll begin the textured cluster stitch and add selective increases to elongate the circle into an organic ghost-like shape.
Round 9 :
Change to textured stitch: *ch1, insert hook, pull up loop, yo, pull through two* OR alternate: one small 3-dc cluster. Here we define our textured repeat as 'Textured Cluster' (see special notes). Work 1 textured cluster in each st around (48 clusters) (48)
Info :
Textured Cluster: Yarn over, insert into stitch, pull up loop, yarn over, insert into same stitch, pull up loop, yarn over, insert into same stitch, pull up loop (you will have 7 loops on hook), yarn over and pull through all loops, chain 1 to secure cluster. Each cluster replaces one sc for texture. Keep clusters snug but not tight to preserve stitch definition.
Round 10 :
1 textured cluster in each st around (48)
Round 11 :
(7 textured clusters, inc) x6 — add 1 increase at approximately the top area and bottom area to begin elongation (54)
Info :
To elongate the circle into an oval/ghost shape, place increases directly opposite each other. On Round 11 add the 6 increases evenly but place two of them slightly closer at opposite 'north-south' points to encourage length rather than perfect roundness.
Round 12 :
1 textured cluster in each st around (54)
Round 13 :
(8 textured clusters, inc) x6 (60)
Round 14 :
1 textured cluster in each st around (60)
Round 15 :
(9 textured clusters, inc) x6 (66)
Round 16 :
1 textured cluster in each st around (66)
Info :
Now we have increased enough to create a generous ghost panel diameter. We will now add shaping rounds that introduce small local decreases to pull in the sides and create the scalloped lobes visible on each long edge of the runner. These decreases are not symmetric circular decreases but local pulls placed every 10-12 clusters to create a wavy side silhouette.
Round 17 :
*(5 textured clusters, dec) in even spots to create indents* (pattern: 5 cl, sc2tog as a decrease across the two clusters) x11 then 1 textured cluster to keep counts accurate — For mathematical clarity do: (5 clusters, dec) x6 = remove 6 sts: (66 - 6 = 60) (60)
Round 18 :
1 textured cluster in each st around (60)
Round 19 :
(6 textured clusters, inc) x6 (66)
Round 20 :
1 textured cluster in each st around (66)
Info :
Rounds 17-20 create subtle scallop rhythm across the long edges. If you pin the piece flat you'll begin to see the wavy silhouette; continue alternating slight increases and decreases to refine shape. Keep your increases where you want fuller lobes and decreases where you want narrow indentations.
Round 21 :
(4 textured clusters, dec) x6 (60)
Round 22 :
1 textured cluster in each st around (60)
Round 23 :
(3 textured clusters, dec) x6 (54)
Round 24 :
1 textured cluster in each st around (54)
Info :
At this stage the panel should be approaching the desired width for one ghost. Use pins to mark locations for the ghost's face (eyes and mouth). Typical placement: for an elongated panel, place eyes about 10-12 clusters down from the top lobe, spaced 6-8 clusters apart depending on look.
Round 25 :
(2 textured clusters, dec) x6 (48)
Round 26 :
1 textured cluster in each st around (48)
Round 27 :
(1 textured cluster, dec) x6 (42)
Round 28 :
1 textured cluster in each st around (42)
Info :
Rounds 25-28 gently pull the midbody in so the ghost silhouette is more organic and not perfectly round. We want slightly narrower bridging between the three ghosts when joined later. Don’t worry if your counts vary by 2 sts; adjust by adding a single sc or cluster in a later round to even it out.
Round 29 :
(6 textured clusters, inc) x6 (48)
Round 30 :
1 textured cluster in each st around (48)
Round 31 :
1 textured cluster in BLO around to create a subtle ridge for joining later (48)
Round 32 :
1 textured cluster around (48)
Info :
Finish this panel with rounds that stabilize the edge so the joining round will sit flat. The last two rounds are slightly looser and worked in BLO for a neat join line. Fasten off, leaving a long tail for sewing if you prefer to sew panels together; alternatively leave tail short and weave in later if you plan to join by slip-stitch next round.
Round 33 :
Fasten off and weave in starting tail, or leave tail for optional whip-stitch joining. Panel size should be approx. 11-13" from top lobe to bottom lobe.
Info :
Make two more identical panels (total 3). For visual consistency place the facial features in similar positions across panels: center the face horizontally on each panel and stagger vertical placement so the runner shows three distinct ghost faces spaced evenly.
— Ghost Face Appliques (Make 9 eyes + 3 mouths) :
Round 1 :
With black yarn, create a magic ring. Ch1, 6 sc into ring. Pull ring tight. (6)
Round 2 :
Inc in each st around (12)
Round 3 :
(1 sc, inc) x6 (18) — for large mouths only; for small eyes stop after Round 2 and fasten off (12)
Info :
Eyes in the photo are small round sewn-on circles. For neatness crochet two small eyes: Rounds 1-2 only (12 sts). For the mouths use a slightly larger oval: work Round 3 then flatten to an oval by working one more round of back-and-forth sc to lengthen if desired. Fasten off leaving long tails for sewing.
Round 4 :
Fasten off with 6-8" tail for sewing. Block lightly flat between fingers to round shape. Make required number of eyes and mouths: per runner: 6 small eyes (two per middle and top ghosts depending on face), 3 mouths (one per ghost) — match photo positions.
— Joining Panels into Runner (Continuous Join Method) :
Round 1 :
Lay three panels in order: Ghost A (bottom), Ghost B (middle), Ghost C (top). With right sides up and using white yarn, start at the outer edge of Ghost A at one of the side lobes. Join by slip-stitching through both panel edges aligning BLO ridge from Round 31 of each panel. Work slip-stitch join through both thicknesses evenly around the seam where panels meet. Join counts: aim for even spacing so that seam does not pull.
Round 2 :
When you reach the join point between Panel A and Panel B, continue slip-stitching across the small connecting bridge using approximately 6-10 slip stitches to create a narrow seam. Repeat when joining Panel B to Panel C. After completing all joins, fasten off and weave tails. The panels should now be connected into one long runner.
Info :
Alternative join: You can instead use a whipstitch with yarn needle for a nearly invisible seam. Pin panels in place, then whipstitch through back loops only on both panels to create a tidy seam. Keep tension consistent so the runner lies flat.
— Stabilizing Round Before Border :
Round 1 :
With white yarn and right side up, join at any point on the outermost edge with a sl st. Work 1 round of single crochet evenly around the entire assembled runner, placing 1 sc in each cluster or space around. Where seams meet, work 1 sc into each panel edge stitch to stabilize. This round evens the edge and acts as base for the scalloped border. (approx. 220-260 sc depending on assembly)
Info :
Count around after this round to determine the number of stitches; you'll use this number for scallop placement so the scallops space evenly. If count is odd, you can adjust the first scallop slightly to distribute fullness evenly along the runner.
— Scalloped Purple Border (Main Decorative Edge) :
Info :
We will work three rounds in purple: a foundation round of sc, then two rounds to produce a deep scallop/wave. The scallops are spaced so that on each long side you get multiple deep lobes mirroring the photo; we will use shells of 7 dc to create each scallop with a sc bridge in between.
Round 1 (Border - Purple) :
Join purple yarn with sl st to the foundation sc. Ch1, sc in same st, *sk 2 sc, (dc7 in next sc) shell, sk 2 sc, sc in next sc* — repeat around to the start. Work shells in corresponding rounded lobes and sc in narrower indents. Adjust spacing so the final repeat ends evenly. (shells count approx. 30-36 depending on circumference)
Round 2 (Border) :
Ch1, turn (if working joined rounds keep orientation), work *sc in each dc of the shell across the top of the shell (7 sc across shell) then 1 sc in the sc bridge between shells* — this reduces shell bulk and defines a neat ridge. (total sc = equal to previous stitch count)
Info :
This round compresses shell peaks and prepares the final outer scallop. You should now see a crisp scalloped silhouette. If the scallops look too tight, you can add an extra round of dc shells in FLO to increase depth.
Round 3 (Outer Scallop Finish) :
Join purple yarn again if needed. *In each group of 7 sc across previous shell, work: (sl st into next st, ch2, 5 dc into next 3rd sc, ch2, sl st into next sc)* — or simpler shell: (sl st into next st, ch3, 7 dc into same st, sl st into next st) to form a pronounced wave. Repeat around. Fasten off and weave ends. This creates the deep wavy purple edge seen in the photos.
Info :
Adjust shell size: For deeper scallops use 9-dc shells; for shallower waves use 5-dc shells. Keep shell count consistent so the waves align around the full runner.
— Facial Placement & Sewing :
Info :
Position the black appliques on each ghost panel while the runner is flat and blocked. Typical placement: for the bottom-most ghost (closest to viewer in photo) position two eyes about 8 clusters apart and a mouth 3-4 clusters below and centered between them. For the middle ghost the same spacing but place faces slightly higher to create varied visual rhythm. Pin in place with T-pins or sewing pins before fastening permanently.
Round 1 :
Sew eyes and mouths using yarn needle with tail left from appliques. Use small whipstitches around the edge of each applique, catching only the edge stitches to avoid puckering. Use extra small stitches to ensure security; tie off and weave tails to the back, hiding them under neighboring clusters.
Info :
On photos the middle ghost has two small eyes and an open oval mouth; the top ghost is smaller with simpler features. If making this for a household with children consider embroidering faces instead of sewing small appliques for safety (no small parts).
— Finishing Touches :
Round 1 :
Weave in all remaining tails using a yarn needle, hiding ends through back loops and underside of clusters. Trim neatly. Lightly steam-block or wet-block the entire runner flat, pinning scallops in shape, and allow to dry fully.
Info :
Blocking helps the scalloped border sit flat and smooths the cluster texture while keeping the runner shape true. Use a medium-hot steam from a distance to avoid flattening textured clusters if using cotton yarn.
Round 2 :
Optional: Add a second thin purple ridge by working 1 sc round further out, then a tiny picot edge (ch3, sl st in 3rd ch) every 4-6 sts for extra definition. Fasten off and weave ends.
Info :
Your runner is now complete. If you'd like a stiffer, non-slip bottom, consider attaching a thin felt backing cut to shape and hand-sewing it to the reverse with small neat stitches, or spray with fabric stiffener if desired.
This playful ghost table runner brings instant Autumn charm to a kitchen or dining table. The textured white body feels homely and handcrafted while the bold purple scalloped edge adds a polished seasonal pop. You’ll love how the three friendly ghosts line up like a cute parade down your table. 🎃🧶 Make one for fall gatherings or as a cheerful seasonal gift — it’s a fun and satisfying weekend crochet project!