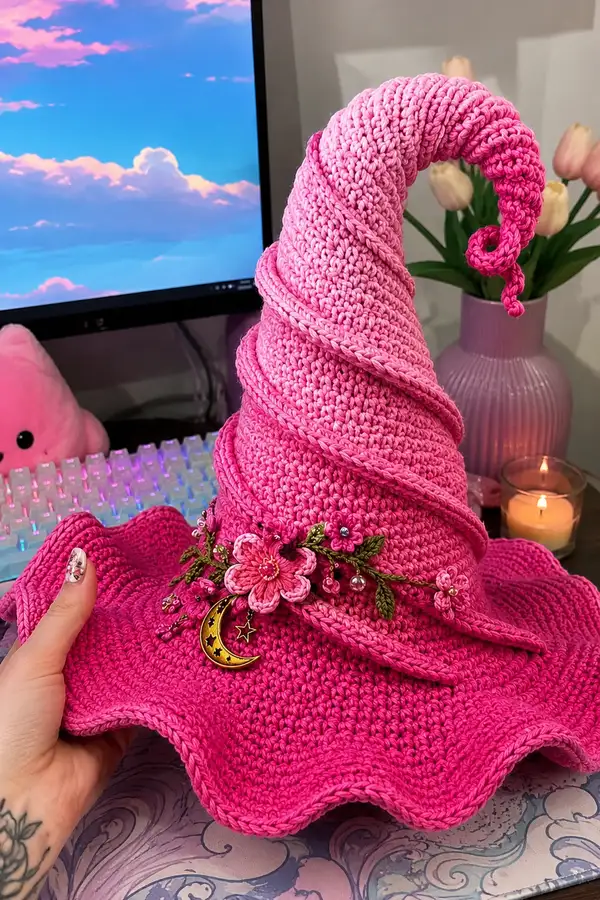
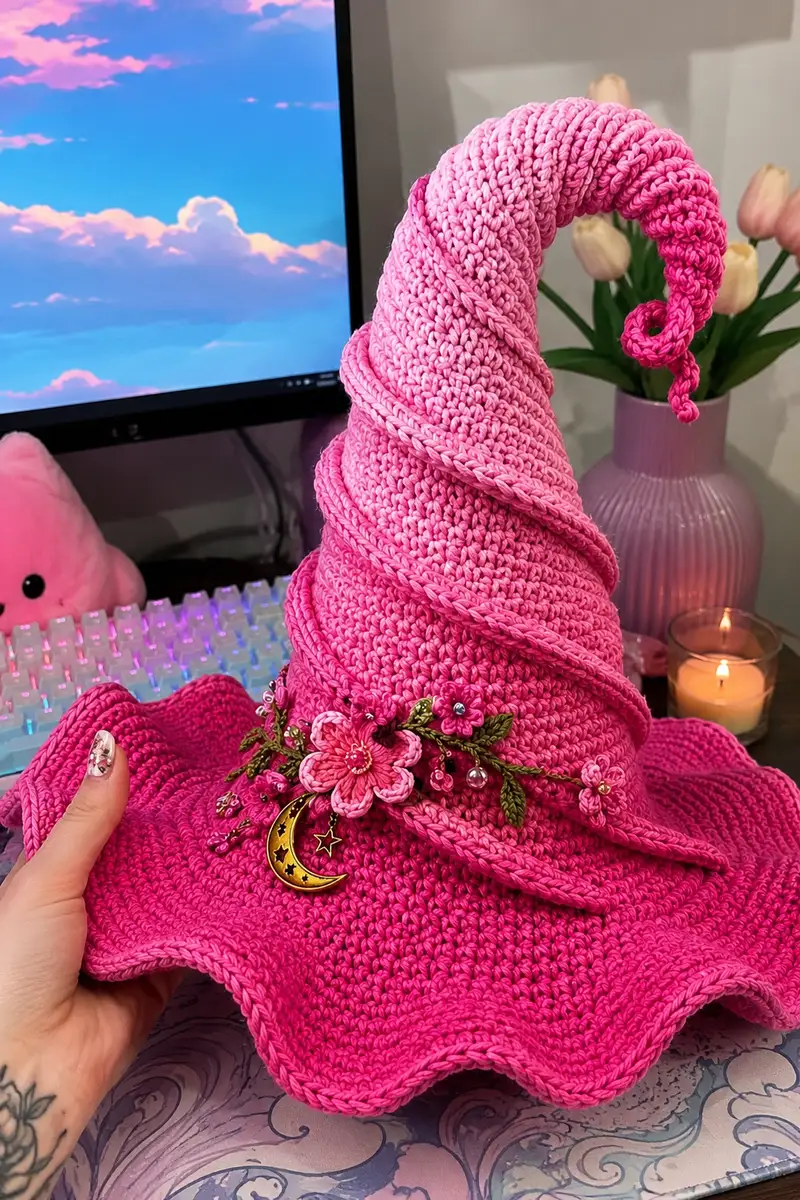
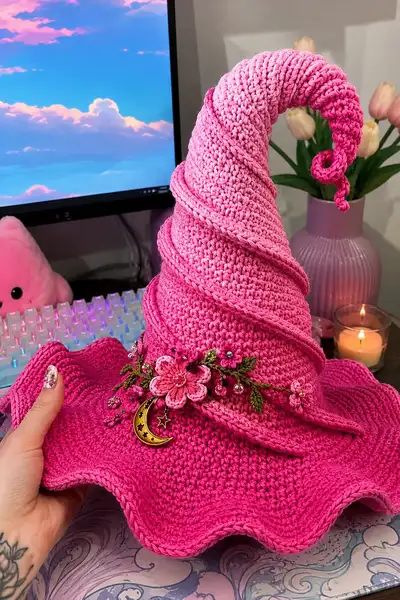
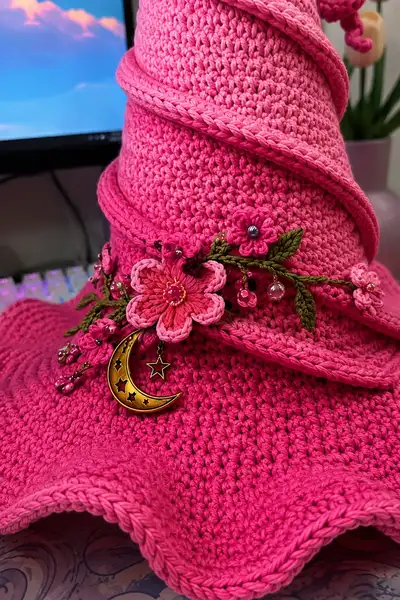
A whimsical, spiral-tipped witch hat worked in bright ombre pinks with a wide wavy brim and braided trim. This decorative hat features a tall tapered cone that curls into a whimsical spiral, a sculpted brim with a scalloped edge, and handcrafted floral and bead embellishments with a moon charm. The pattern includes clear shaping notes, texture tips (BLO ribs for the spiral wrap), and step-by-step assembly guidance to recreate the charming pink witch hat shown.
Progress Tracker
0% Complete
— Crown (hat top, fitted start) :
Round 1 :
6 sc in magic ring (6)
Round 3 :
(1 sc, inc) x 6 (18)
Round 4 :
(2 sc, inc) x 6 (24)
Round 5 :
(3 sc, inc) x 6 (30)
Round 6 :
(4 sc, inc) x 6 (36)
Round 7 :
(5 sc, inc) x 6 (42)
Round 8 :
(6 sc, inc) x 6 (48)
Round 9 :
(7 sc, inc) x 6 (54)
Round 10 :
(8 sc, inc) x 6 (60)
Info :
Check gauge and measure the base of the crown. The 60-stitch round should fit a medium adult head circumference when worked in worsted cotton with a 3.5mm hook. If you need a larger or smaller head, add or subtract increase rounds (add one increase round to grow circumference or stop before Round 10 to reduce).
Round 11-18 :
1 sc in each st (60)
Info :
Work even rounds to build crown height. Place a stitch marker at the start of Round 11 and move it up each round. Do not stuff this section; the crown is unfilled and will gently sit on a head or display form.
Round 19 :
(8 sc, dec) x 6 (54)
Round 20 :
(7 sc, dec) x 6 (48)
Info :
Begin slight shaping toward the cone: decrease evenly to create a gentle taper as you move upward. Continue to check the round counts carefully; keep stitch marker at first stitch.
Round 21 :
(6 sc, dec) x 6 (42)
Round 22 :
(5 sc, dec) x 6 (36)
Round 23 :
(4 sc, dec) x 6 (30)
Round 24 :
(3 sc, dec) x 6 (24)
Info :
At Round 24 you will have formed the transition into the cone portion of the hat. If you prefer a taller cone, stop decreasing one round later. From here, we will create the long tapered cone that will curl into the spiral tip.
Round 25 :
(2 sc, dec) x 6 (18)
Round 26 :
(1 sc, dec) x 6 (12)
Info :
Fasten off leaving a long tail if you wish to close the cone now; however for the spiral construction shown, we will extend the cone into a long tapered tube by continuing rounds that bias the fabric — do not finish off yet unless you plan to attach a separate spiral rope.
— Cone & Spiral Extension (tip and long curl) :
Info :
The cone can be built in two ways: continue decreasing to a small point and then create a separate spiral rope to sew on, OR continue in rounds to make an integrated tapered cone and then form the curl by adding short-row increases on one side or by crocheting a narrow tube and wrapping it. The pictured hat was made by extending the cone into a narrow 6-stitch tube (a continuous spiral tube) that was then coiled and secured. We will show the integrated method here.
Round 1 :
6 sc in magic ring (if starting a separate tube) OR continue from Cone Round 27 by placing marker and working in the 6 sts (6)
Round 2 :
1 sc in each st (6)
Round 3-18 :
1 sc in each st (6) — repeat for 16 rounds total to create a 16-round long narrow tube (6)
Info :
To produce a curl with natural spiral, work the narrow tube longer (16–40 rounds depending on desired curl length). The tube should remain 6 sc around for a tight, consistent spiral. Stuff very lightly as you go if you want a rounded look — the pictured spiral is lightly padded to hold shape.
Round 19 :
(Option A) Continue 1 sc in each st (6). Optionally add a dec every 6–8 rounds to taper tip slightly
Info :
To make the tube taper at the very end, work a decrease round: (1 sc, dec) x 2 (4) then dec to 2 then fasten off. If you want a hollow flexible curl, leave open and attach directly to cone top.
Round 20-40 :
1 sc in each st (6) — continue to desired curl length (6)
Info :
If you want an S-shaped or tapered curl, on some rounds work in FLO or BLO only to create ridges and bias the tube. Working alternating BLO rounds every 4 rounds gives a ribbed look like the photographed spiral wrap.
Round 41 :
(1 sc, inc) x 3 (9) — optional widening near middle of spiral if you want a bulbous curve
Info :
When you are happy with the tube length, coil the tube by hand to test the curl. Use pins to shape it into the desired curl then baste in place with scrap yarn before final sewing. The photographed curl spirals around itself about one and a half turns, ending in a tiny decorative curl at the very tip.
Round 42 :
1 sc in each st (9) if you widened, else 1 sc in each st (6)
Info :
Fasten off leaving 20–30cm tail for sewing to cone top. If you want the curl to be wired for poseable shaping, insert a short double-folded piece of craft wire before stuffing and fold wire ends into the fabric so they are not sharp.
— Decorative Spiral Rope (wrap that winds around the cone) :
Info :
The pictured hat uses a separate thicker braided/tubular rope wrapped around the cone. This rope is made as a two-strand crocheted i-cord/tube or a thick single-strand tube (12–18 sts) worked in the round and twisted to sit proud. We provide a tubular rope recipe and a braided cord option.
Tube Method Round 1 :
6 sc in magic ring (6) — or 8 sc for a slightly thicker rope
Round 2-30 :
1 sc in each st (6) — work to desired length (6)
Info :
For a thicker wrap, make two tubes and twist them together, or make an 8–10 stitch tube. To produce the distinct raised braid on the photographed hat, the maker used a flat rope (hdc in back loops) and then crocheted over it with sc to create a raised cord; either method works. Leave long tails for sewing.
Braid Method :
Make 3 i-cords: ch 50, sc in 2nd ch from hook and across (49 sc), fasten off leaving long tail. Make three and braid, then sew braid ends into a coil.
Info :
Pin the rope around the cone starting at the crown base and work upward in a spiral. Overlap slightly and baste each coil position before sewing permanently to avoid slipping.
— Brim (wide wavy brim with scalloped edge) :
Info :
Attach to lower edge of crown where Round 10 (60 sts) was. We pick up stitches along the last round of the crown to begin the brim. The brim is worked outwards with gradual increases to form a wide wave and finished with scalloped shells. Use a smaller hook (3.0mm) for the final shell edge for crisp waves.
Round 1 :
Attach yarn to base of crown at an evenly-spaced stitch. Ch 1, work 1 sc in each st around the crown for one round to create a base (60)
Round 2 :
(4 sc, inc) x 12 (72)
Round 3 :
(5 sc, inc) x 12 (84)
Round 4 :
(6 sc, inc) x 12 (96)
Info :
These symmetric increases create a flat to slightly sloped brim radius. Check that the brim is laying flat as you go — if it starts buckling, reduce increases; if it ruffles too much, add an extra even round without increases.
Round 5 :
(7 sc, inc) x 12 (108)
Round 6 :
(8 sc, inc) x 12 (120)
Round 7-10 :
1 sc in each st (120)
Info :
For a wavier brim like the pictured piece, add a shaping round to encourage a scallop: alternate smaller and larger increases across the round if desired. The tutorial here keeps symmetrical increases then finishes with a shell edge for pronounced waves.
Round 11 (shell foundation) :
*skip 1 st, 5 dc in next st, skip 1 st, sl st in next st* repeat around (shells spaced) — adjust spacing so shells number evenly around brim (target 20–24 shells depending on preferred wave)
Round 12 (finish) :
Switch to 3.0mm hook. Working into the shells: ch 1, sc around to create a tidy ridge, then *sl st in 2 sts, (sc, hdc, 3 dc, hdc, sc) in next st (shell)* repeat around. Fasten off and weave in ends.
Info :
Block the brim gently with steam or a damp cloth while holding the scallops open to set the waves. Pin scallops in place during blocking if needed and allow to cool/dry before removing pins.
— Hat Edge Rope & Trim (decorative coils at brims) :
Round 1 :
Make a narrow 6–8 stitch tube as earlier (6 sc round) to desired length to circle the brim once or twice. Alternatively create a chain chain-braided cord and whipstitch closed.
Round 2 :
Pin rope along brim where pictured indentations appear (about 1–1.5cm above scalloped edge) and baste in place every 2–3 cm.
Info :
Sew rope using mattress stitch for an invisible join; twist rope slightly as you sew to match the decorative spiral look in the photo. Use matching yarn and small stitches to anchor it firmly.
— Flowers (make 3 medium flowers and 3 small flowers) :
Medium Flower 1 Round 1 :
Magic ring, ch 1, 10 sc in ring (10), sl st to join. (10)
Round 2 :
*ch 2, 3 dc in next st, ch 2, sl st in next st* repeat around to make 5 petals. Fasten off leaving long tail for sewing.
Round 3 (alternate layered petal) :
With contrast color, join in back of flower, *ch 2, (sc, hdc, dc, hdc, sc) in space between petals* repeat for 5 layered petals. Fasten off leaving tail.
Info :
Sew seed beads in center of each medium flower as pictured and tack the flower down onto brim/side of cone cluster. Add a French knot of embroidery thread or sew a tiny bead cluster for extra dimension.
Small Flower Round 1 :
Magic ring, ch 1, 6 sc in ring (6). Sl st to join. (6)
Small Flower Round 2 :
*ch 1, (sc, hdc, sc) in next st, sl st in next st* repeat to create 3 small petals. Fasten off leaving tail. Make 3 small flowers in lighter pinks.
Info :
Layer petals and attach small flowers around the medium flower cluster. Use pale and deep pinks for dimensional ombre effect. Sew flowers to rope wrap or brim area as desired and embellish with beads or metallic thread.
— Leaves and Vines :
Leaf Make 1 Round 1 :
Ch 9, sc in 2nd ch from hook, hdc in next, dc in next 3, hdc in next, sc in next, sl st in next to form a pointed leaf. Fasten off leaving tail to sew. (9)
Round 2 :
For textured leaves: rejoin with green and work *sl st along the center backbone, 1 sc each side to add thickness* or work surface slip stitch to create vein detail. Make 6–8 leaves.
Info :
Sew leaves to the base cluster under flowers and add small bead berries by sewing tiny seed beads into the leaf base with fine thread. Embroider vine tendrils with chain stitch using a needle and yarn through the crochet fabric for secure attachment.
— Bead Dangles & Charm :
Bead Dangle 1 :
Thread 3 small glass beads on a length of fine cord or thin beading wire, knot or crimp at bottom then attach to a small jump ring. Repeat for 4–6 dangles.
Info :
Attach dangles to the flower cluster by sewing the jump rings into place or using tiny safety jumps stitched firmly. Make sure knots or crimps are well hidden inside yarn to avoid catching.
Charm :
Sew the brass crescent moon charm to the center of the flower cluster using the jump ring as the attachment point. Reinforce with embroidery thread knotted inside the rope for security.
Info :
Always double-stitch charms and dangles; if this hat is for a child or travel, consider securing charm with multiple passes and a dab of fabric glue inside to hold knots.
— Assembly & Finishing Touches :
Info :
Block the entire hat lightly to shape the brim and spiral. Pin the cone's spiral into desired curve and baste in position before sewing the decorative rope and flower cluster in place. Use matching yarn and small, tight stitches to secure a professional finish.
Step :
Position the spiral tube and decorative rope by wrapping around cone. Pin at several points, check symmetry from all sides, then sew the rope and tube down through both rope and cone with a mattress stitch—catching the cone stitches into the rope for strength.
Step :
Sew flowers and leaves onto the rope/cone cluster. Use long tails to anchor through multiple layers for a secure hold. Add bead dangles and charm last to ensure they hang cleanly without tangling with petals.
Info :
Weave in all ends by threading through several stitches toward the inside of the hat and clipping close to fabric. Use a small amount of clear-drying fabric glue on critical knots if the hat will be handled frequently.
Step :
Optional: For extra body in the brim, weave in a thin flexible plastic boning or wire in the last round under the scallops and stitch closed; this stabilizes the brim for display.
Info :
Final adjustment: bend the spiral tip into the perfect curl and trim any stray fibers. Add a final press/block and allow to fully dry overnight before wearing or displaying.
This pink spiral witch hat is such a joyful project to make — sculptural, feminine, and a little bit spooky in the sweetest way! The combination of structured crown, whimsical curled tip, and delicate flower cluster make this an eye-catching piece for display or costume use. Follow the detailed rounds, add your own botanical trims, and you'll end up with a hat full of personality. 🧶🌙💖