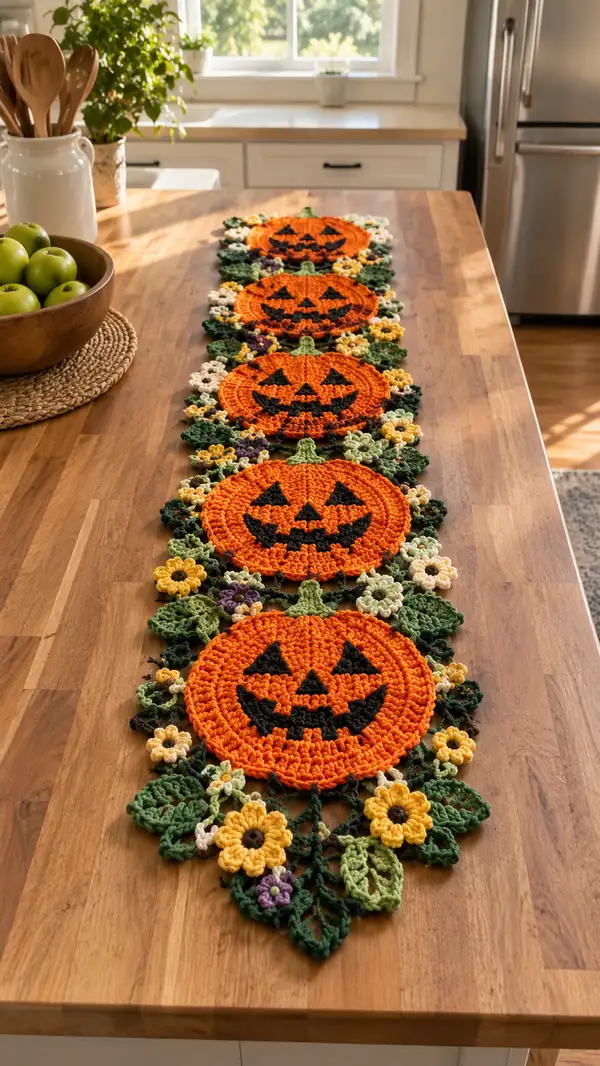
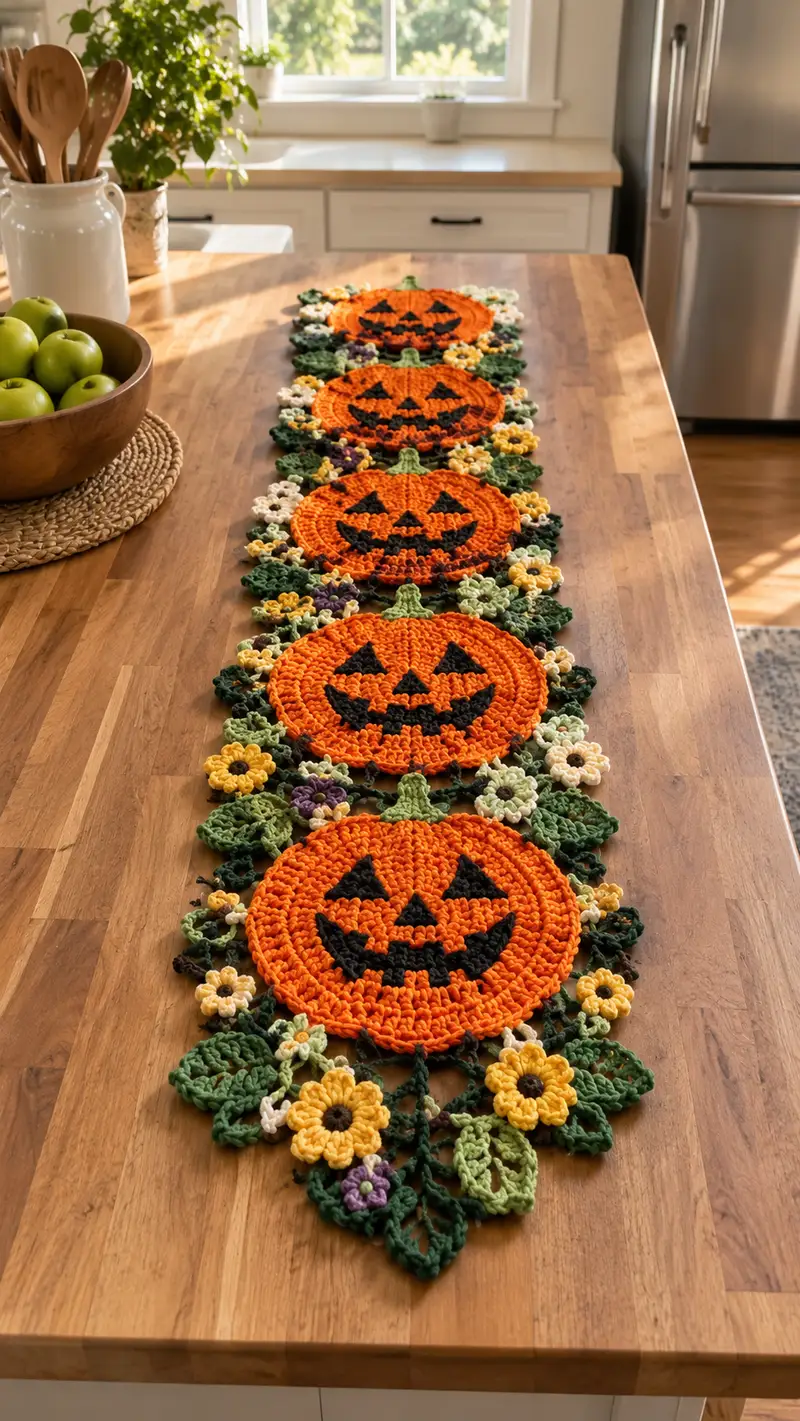
Create a festive Autumn table runner made from linked pumpkin motifs surrounded by leafy vines and cheerful flowers. This pattern features large, textured jack-o'-lantern discs in bright orange with bold black facial appliques, green stems, variegated leaves, and daisy-like flowers in cream, yellow and purple. The runner is constructed motif-by-motif and joined with decorative connecting chains and lace edging for a finished, heirloom look.
Progress Tracker
0% Complete
— Overview and Construction Notes :
Info :
This runner is constructed from repeated Pumpkin Motifs (Make 5) that are embellished with separate Face Appliques, Stems, Leaf Motifs and Flower Motifs, then joined-as-you-go with decorative vine chains. The pattern gives full step-by-step construction for each piece and recommended placement so you can reproduce the layered look shown in the photo. Work tightly when making pumpkins and appliques to keep the motifs flat and prevent stuffing from showing; cotton worsted yarn is recommended for a crisp finish.
Info :
Gauge is not critical for motif count but affects final runner length. Using the specified yarn and 4.0mm hook, each pumpkin round measures approximately 7.5-8 inches (19-20 cm) across after blocking. Adjust hook up or down to match your desired flatness and size.
— Pumpkin Motif (Make 5) :
Round 1 :
6 sc in magic ring (6)
Round 3 :
(1 sc, inc) x 6 (18)
Round 4 :
(2 sc, inc) x 6 (24)
Round 5 :
(3 sc, inc) x 6 (30)
Round 6 :
(4 sc, inc) x 6 (36)
Info :
Switch to working in back loops only (BLO) on the next round to create a subtle ridge that helps the pumpkin look dimensional. Carry the yarn tail inside the work if making multiple color changes later.
Round 7 :
1 sc in each st BLO (36)
Round 8 :
(5 sc, inc) x 6 (42)
Round 9 :
1 sc in each st (42)
Round 10 :
(6 sc, inc) x 6 (48)
Round 11 :
1 sc in each st (48)
Info :
At this point you have the circular base of the pumpkin. We will add more rounds to reach the size in the photo and then form ribbing using FPdc rounds. Mark beginning of round with a stitch marker to keep count.
Round 12 :
(7 sc, inc) x 6 (54)
Round 13 :
1 sc in each st (54)
Round 14 :
(8 sc, inc) x 6 (60)
Round 15 :
1 sc in each st (60)
Info :
If your pumpkin is already a bit larger than you'd like, stop increases sooner. The counts above produce a pumpkin about 7.5-8 inches across with worsted cotton and a 4.0mm hook. After Round 15 we will form 'ribs' for the pumpkin using front-post double crochet ribs worked across the surface.
Round 16 :
Ch2 (does not count as st), *FPdc around next st, dc in next 5 sts; rep from * around (60)
Round 17 :
Ch2, *FPdc around the FPdc from previous round, dc in each of next 5 sts; rep from * around (60)
Round 18 :
Repeat Round 17 to deepen the ribs (60)
Info :
The FPdc ribs create vertical ridges. You can do 6 or 8 ribs depending on spacing; this pattern sets ribs every 6 stitches which gives 10 ribs across the pumpkin. If you prefer 8 ribs, change spacing accordingly (FPdc around one, then dc x7, etc.).
Round 19 :
Ch1, sc in each st (60)
Round 20 :
BLO: sc in each st BLO (60)
Round 21 :
Ch2, *dc2tog over next 2 sts, dc in each of next 4 sts; rep from * around — (50)
Info :
This round begins to slightly cup the pumpkin. Keep stitches even and check that the circle remains flat; adjust tension if it starts to curl. Place two small pins on either side and press flat if needed during blocking.
Round 22 :
Ch2, *dc2tog over next 2 sts, dc in each of next 3 sts; rep from * around — (40)
Round 23 :
Ch1, sc in each st (40)
Round 24 :
Fold the last round under to create a neat edge and sl st around if desired, or leave as sc edge (40)
Info :
Fasten off leaving a long tail for sewing if you plan to add a little stuffing in the center for a subtle dome (about 5-10 grams). For a completely flat pumpkin, do not stuff; instead, block flat with pins.
— Pumpkin Stem (Make 5) :
Info :
Stems are worked in medium green and sewn to the top center of each pumpkin. The stem is a short tapered tube with a decorative slip stitch rib and a base flange for secure attachment.
Round 1 :
With green yarn, ch6, join with sl st to first ch to form small ring (6)
Round 2 :
Ch1, 2 sc in each ch around (12)
Round 3 :
1 sc in each st (12)
Round 4 :
(1 sc, dec) x 4 (8)
Round 5 :
1 sc in each st (8)
Round 6 :
Ch1, sc2tog around to close the top slightly leaving small opening (4)
Info :
Fold base edge flat and sc evenly around base forming a flange — work 8 sc around base to create a slightly wider area for sewing to pumpkin center. Fasten off leaving a long tail for sewing. Optionally stuff lightly to give a rounded stem.
— Face Appliques (Make 5 sets: 2 eyes, 1 nose, 1 mouth per pumpkin) :
Info :
Faces are crocheted in black as small triangular appliques for eyes and nose, and a curved mouth worked as a slightly larger applique. You may also embroider the face directly with yarn needle using tapestry technique, but appliques give crisp edges and a bold silhouette.
Eye/Nose Triangle Round 1 :
mr, 3 sc in ring; pull tight (3)
Eye/Nose Row 2 :
Turn, ch1, inc, sc, inc — (5) — leave last st unfastened and continue.
Eye/Nose Row 3 :
Turn, ch1, inc, sc x3, inc — (7)
Info :
For a small triangular eye, Rows 2-3 give a triangular wedge of 7 stitches at the base. Fasten off leaving long tail for sewing. If you want a slightly larger triangle, continue one more row: ch1, inc, sc x5, inc (9).
Mouth Applique Round 1 :
Ch6, join with sl st to form loop (6)
Mouth Round 2 :
Ch1, hdc in each st around (6)
Mouth Round 3 :
Ch1, *2 hdc in next st, hdc in next 2 sts; rep from * once — (8)
Mouth Round 4 :
Ch1, sc around shaping curve: in the front of your work create small pointed teeth by working (sc2tog, ch1, sc) at desired positions — see face placement diagram below (approx 8–10 sts total)
Info :
The mouth is stylized; you can create teeth by leaving small ch1 gaps or by sewing in triangular black points (small triangle from Eye/Nose pattern). Position the mouth so it spans approximately 12-14 stitches across the pumpkin center. We recommend blocking the pumpkin flat and pinning the face in the center before sewing the appliques to ensure symmetry.
— Leaf Motif (Make 18–24) :
Round 1 :
With medium green, ch6, sc in 2nd ch from hook, hdc, dc, hdc, sc — do not turn; continue into opposite side of foundation ch with sc, hdc, dc, hdc, sc to create symmetrical leaf (10)
Round 2 :
Ch1, sc evenly around leaf working 2 sc at each tip point for fullness (12)
Round 3 :
Ch2, *dc in next 2 sts, tr in next st, dc in next 2 sts; rep from * once to form a more pointed center (12)
Round 4 :
FLO only: sc in next 12 sts to create a slightly curled edge (12)
Round 5 :
Ch1, sl st into tip and make a picot (ch3, sl st into 3rd ch from hook) for a decorative leaf tip. Fasten off leaving tail for sewing.
Info :
Make leaves in medium green and light green for variety. Vary size by increasing foundation chain length (ch7 = slightly larger leaf, ch5 = smaller leaf). These leaves are joined around each pumpkin to create the lush border.
— Flower Motifs (Two Sizes) :
Small Flower (Make 20–24) Round 1 :
With cream yarn, mr, 6 sc in ring (6)
Small Flower Round 2 :
*[ch3, sl st into next st] x 6 to form petals—fasten off leaving tail. For more puffed petals, use 3 dc in the loop instead of ch3 sl st.
Large Flower (Make 8–10) Round 1 :
With yellow yarn, mr, 8 sc in ring (8)
Large Flower Round 2 :
*ch3, 3 dc in same st, sl st in next st; rep from * around to make full petals (8 petals total)
Large Flower Round 3 :
Attach brown or dark center: mr, 6 sc in ring, fasten off leaving long tail to sew into the center of flower as a button-like core.
Info :
Flowers are used to soften the runner look and add color variety. Sew flowers on in clusters of 2–4 near leaf junctions using tapestry needle and pull threads to secure petals flat.
— Small Accent Buds (Make 10–12) :
Round 1 :
With lavender yarn, mr, 5 sc in ring (5)
Round 2 :
*ch2, 3 dc in same st, sl st in next st; rep to create tiny 5-petal bud (5 petals)
Info :
Make accent buds from lavender. They are small and are sewn between leaves and flowers to echo the colors seen in the photo.
— Decorative Vine and Join-As-You-Go Chains :
Info :
Vines are worked in medium green as a chain of loops that both decoratively link pumpkins and provide sewing points for leaves and flowers. You can choose to sew motifs together or use join-as-you-go (JAYG) chain loops to connect the pumpkins in a continuous runner.
Vine Chain Row 1 :
With green, attach at side of pumpkin using sl st, ch12, sl st into second motif approximately 4–6 stitches from its edge; continue ch12 chains and sl st to next pumpkin until all pumpkins are linked. Adjust chain length so motifs sit close but not overlapping (chain length in photo = ch12 loops).
Vine Chain Row 2 :
Work single crochet along the vine chain loops to give them body: sc in each chain across, anchor into pumpkin edges with sl st every 4-6 stitches (this creates a sturdy vine for sewing leaves and flowers)
Info :
If you prefer a fixed join, place the pumpkins in desired order, pin through edges, then whip stitch them together using the long tails we left at each pumpkin's edge. However, the chain vine as used in the photo adds movement and gives better stability for the border pieces to be attached.
— Edge Motif and Lace Border :
Round 1 :
Once all pumpkins are joined by vine chains, work a rounds-of-lace around the entire runner to connect leaves and flowers and tidy edges. Starting at one end, join green yarn and ch1, sc evenly around all edges of motifs encountering gaps where vines run; aim for 1 sc per visible stitch edge (approx 300–400 sc overall depending on total placements)
Round 2 :
*ch5, sl st in 2nd ch from hook to make small arch, sl st into next sc on edge; rep around to create a scalloped arch border. At corners or pointed ends, make ch3 picot clusters for a floral finish.
Round 3 :
Between arches, attach flowers and leaves by sewing their base to the green underside of arches using long tails; secure with invisible stitches and knot ends within back of work.
Info :
When placing leaves and flowers, alternate colors and sizes for visual balance. The picture shows larger yellow flowers spaced evenly, with cream flowers and purple buds filling gaps. Pin pieces first to preview the arrangement before final sewing.
— Blocking and Finishing :
Info :
Block the assembled runner flat using steam or wet-block method. Pin pumpkins and border elements flat on a blocking mat, shaping ribs and petals. Allow to dry thoroughly. Weave in all ends neatly on the back side; secure appliques with additional stitches if necessary for durability.
Info :
If you want a slightly padded pumpkin, insert 5-10 grams of polyfill into center before sewing the stem and closing the pumpkin edge. Keep stuffing minimal so pumpkins remain mostly flat for table use.
Info :
Optional: Add a small piece of felt under the center of each pumpkin when sewing to the vine for extra stability and to protect tabletops (felt glued or stitched in place).
— Alternate Size and Expansion Notes :
Info :
To lengthen the runner, make additional pumpkins and repeat the vine join sequence between them. To make a wider runner that covers more table surface, work two parallel rows of pumpkins joined by extra vine bridges and then connect across with lace border rounds. Adjust flower and leaf counts proportionally.
Info :
For a placemat version, use one pumpkin motif with a denser border of leaves and flowers to create a smaller, rounder mat. For a garland, omit the lace border and use vine chains only to hang across a mantle.
Completing this pumpkin table runner brings so much seasonal charm to the table—each pumpkin and bloom stitched together becomes a lovely story of autumn! I love how the ribbed pumpkins, playful faces, and mixed blooms create a balance of harvest whimsy and cozy style. This project is rewarding to assemble and makes a standout centerpiece for any fall gathering. 🍁🎃🧶