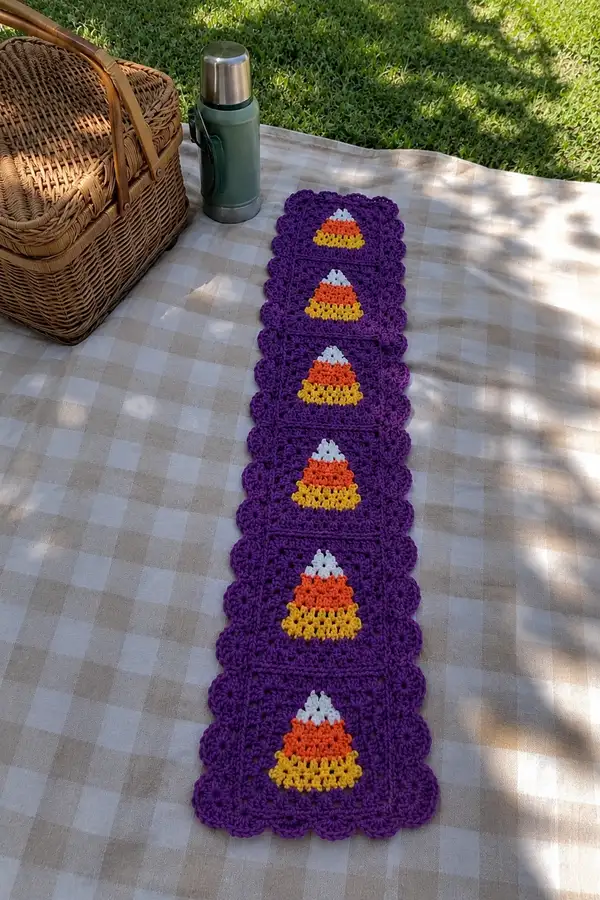
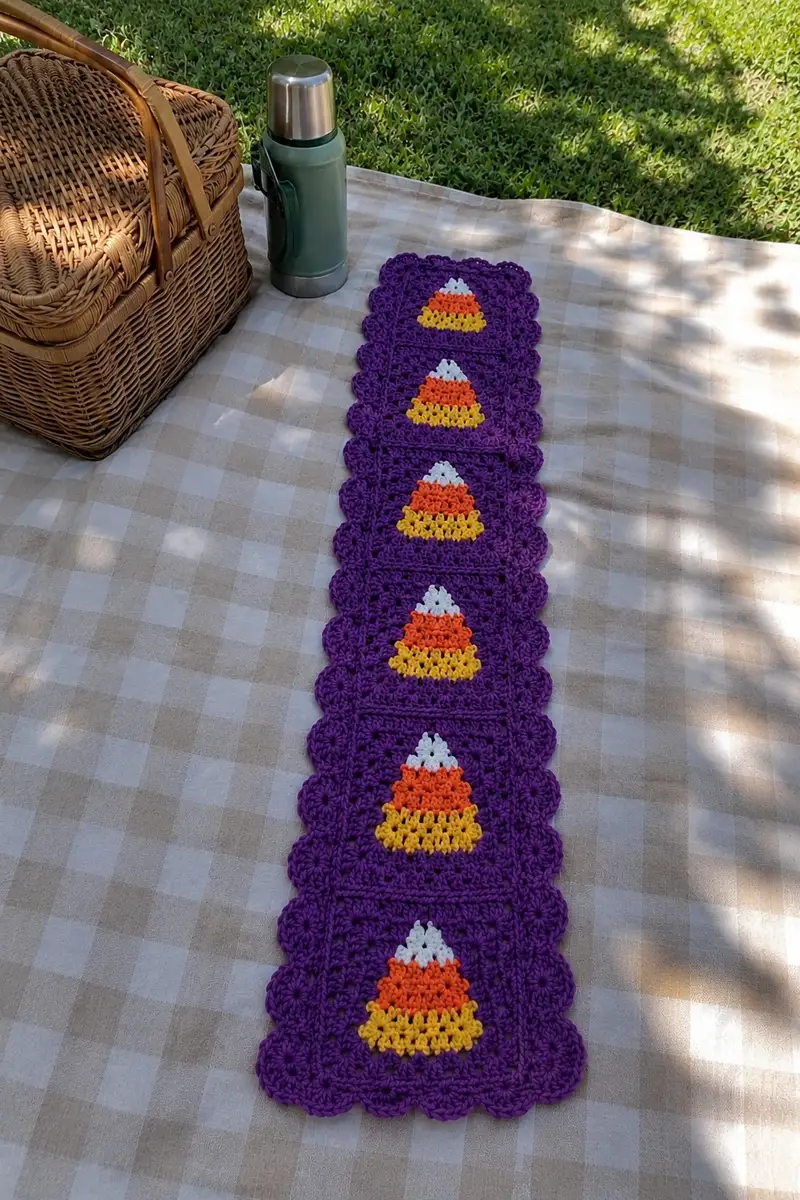
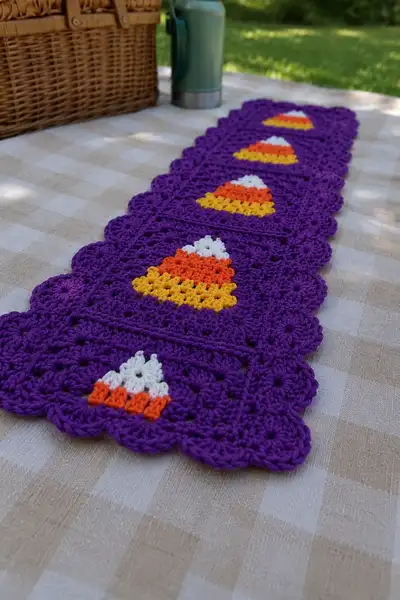
A festive autumn table runner made from a strip of purple granny squares, each featuring a colorful candy-corn motif. The runner in the photo shows six connected squares with scalloped purple edging and bright yellow, orange and white candy-corn centers — perfect for Halloween or autumn decor. This pattern walks you through creating each candy-corn square, joining them into a long strip, and adding the scalloped border for a polished finish.
Progress Tracker
0% Complete
— Gauge & Notes :
Info :
Gauge is not critical for this project but recommended for proportion: 10 dc x 6 rows = 4 inches. Use worsted weight yarn and 4.0mm hook for similar density. Work tightly enough that background stitches look even and the candy-corn motif sits clearly in the center of each square.
Info :
Terminology: I call each granny block a 'square'. You will make six identical squares for the runner pictured. Color changes (yellow -> orange -> white -> purple) are made by fastening off and joining to keep short color floats tidy. You may carry colors if preferred for faster work, but secure floats at back to avoid gaps.
— Candy Corn Square (Make 6) :
Round 1 :
With Yellow, ch 4, join to form a ring OR make a magic circle. Ch 2 (counts as first dc), 11 dc into ring — 12 dc total. Join with sl st to top of ch-2. (12)
Round 2 :
Ch 2, 1 dc in same st, 2 dc in each st around (work even increases to build base band). Join with sl st to top ch-2. (24)
Info :
This forms the yellow base band of the candy corn. Keep stitches even and do not pull color too tight. If you prefer a flatter base, use BLO for this round to create a slight ridge later covered by orange band.
Round 3 :
Switch to Orange. Join with sl st in any st. Ch 2, [dc in next st, 2 dc in next st] around — (1 dc, inc) x 12. Join. (36)
Round 4 :
Ch 2, dc in each st around (36). Join with sl st to top ch-2. (36)
Info :
Rounds 3-4 form the orange band. The intent is to leave a slightly triangular look toward the top by introducing fewer increases on the top segments in later rounds. We'll approximate a cone shape by shaping in subsequent rounds using partial increases and centered white tip.
Round 5 :
Switch to White. Join with sl st. Ch 2, *dc in next 2 sts, 2 dc in next st* rep around — (2 dc, inc) x 12. Join. (48)
Round 6 :
Ch 2, dc in each st around (48). Join. (48)
Info :
These white rounds create the tip. You will now start squaring up the circle to form a granny-square framework around the candy-corn motif so it reads as a centered triangle by contrast to the purple frame.
Round 7 :
Switch to Purple. Join with sl st in any st. Ch 3 (counts as dc), dc in next 2 sts, ch 2, sk 3 sts, dc in next 3 sts, ch 2, sk 3 sts — repeat across to create four groups spaced to represent corners. Work pattern so you have 4 ch-2 corner sps evenly spaced. Slip stitch to top of ch-3 to join. (Establish 4 corner spaces)
Info :
Round 7 converts your circular motif into the beginning of a square. Arrange your corner chain-2 spaces roughly at 90 degree positions; the join positioning will expand in the next rounds to an even square. If your candy corn seems off-center, shift your join point so the triangular motif sits centered between corner spaces.
Round 8 :
Ch 3, 2 dc in same st, dc in next 5 sts, (2 dc, ch 2, 2 dc) in corner ch-2, dc in next 6 sts, (2 dc, ch 2, 2 dc) in next corner ch-2, dc in next 6 sts, (2 dc, ch 2, 2 dc) in next corner, dc in next 6 sts, join to top of ch-3. (This creates extended rounds; count will vary ~ 4 corners with approx 28-36 sts per side depending on spacing)
Round 9 :
Ch 3, dc in each st and in each ch sp around, working (2 dc, ch 2, 2 dc) in each corner ch-2. Join. (Square now approximately 12-14 dc per side)
Info :
If your square is not roughly square-shaped, check that your corner clusters have 4 dc with a ch-2 between (corner = 2 dc, ch2, 2 dc). Add or remove dc between corners to balance sides so the candy corn motif sits centrally in the square.
Round 10 :
Ch 2, hdc in each st around working 3 hdc in each corner (across corner cluster). Join with sl st. (This evens the edge and prepares for classic granny rounds)
Round 11 :
Switch to a granny-style cluster round: *Ch 3, sk 2 sts, 3 dc in next sp* around placing clusters into spaces between dc groups; work 3 clusters into each corner ch-2 space separated by ch 2 as needed. Join. (Clusters around form the traditional granny texture)
Info :
Use this round to ensure your square sides are even. If a side is short, add an extra dc or cluster in that side during this round. Each square should measure roughly 6.5"-7" (16-18cm) from edge to edge after rounds 9-11 using recommended yarn and hook.
Round 12 :
Ch 1, sc evenly around the entire square working 1 sc in each dc and cluster space; work 3 sc in each corner ch-2. Join. (Count depends on your stitch distribution, typically ~ 48-60 sc total)
Round 13 :
Ch 2, dc in next st, *sk 1 st, 5 dc shell in next st, sk 1 st, dc in next 2 sts* across to create a decorative shell band centered on each side. Work shells so they are symmetrical across corners; place a shell adjacent to each corner sc as needed. Join. (Shell counts will equal number of side repeats)
Info :
Round 13 begins shaping the scalloped look that will become the runner's decorative edge. Keep shells evenly spaced by counting base stitches per side; if you have an odd number, adjust by spacing shells slightly nearer corners to maintain symmetry.
Round 14 :
Ch 1, sc in each st around to tidy up shells; in shell sts work 1 sc in each dc of the shell, and 3 sc in shell centers as needed. Join and fasten off. Weave ends neatly into the back of the square. Square complete. (Final square approx 7-7.5" / 18-19cm)
Info :
Repeat Rounds 1-14 to make a total of six identical candy-corn squares. Block each square lightly to square up edges before joining: spray with water, pin to measured square on blocking mat, allow to dry. Blocking makes joining easier and results in flatter final runner.
— Alternative: Flat Candy Corn Insert (Optional) :
Info :
If you prefer to make a small flat candy-corn motif and applique it into a plain granny square, make a triangle worked in rows: Ch 4, Row1 sc across, Row2 ch1 turn dec at edges to shape triangle into 3 rows of yellow, 2 rows orange, 1 row white. Fasten off and sew into the center of a pre-made purple square.
Info :
Applique method allows tighter control of motif placement and may be preferred if you are uncomfortable working color changes in rounds. Sew motif in place with small invisible whip stitches and finish square rounds in purple.
— Joining Squares into a Strip (Six Squares) :
Round 1 :
Lay out squares in desired order, right sides up, lining the candy-corn motifs centered. Position them end to end in a single column as in the photo (six squares long). Decide whether you want the motifs aligned centrally or alternating; this pattern uses centered alignment.
Round 2 :
Join-as-you-go (preferred): On the last round of the second square (Round 14), when working sc around, instead of finishing, align the square to the already completed square and sl st through corresponding sc on the neighboring square every sc to join. Work across the side seam fully to create a flat join. Fasten off and weave ends. Repeat for squares 3-6.
Round 3 :
Alternative slip-stitch join: With Purple, place two squares RS together, insert hook through both loops of corresponding outer edge stitch, sl st to join each stitch across the seam. Work across whole side. Repeat through all squares to make a narrow seam. This creates a tidy but slightly raised join.
Info :
When joining squares, work slowly and match stitch-to-stitch. Use pins or T-pins to hold edges in alignment. If your stitch counts differ slightly between squares, ease extra stitches into corners or use taktful ch-1 gaps so the seam lays flat. The join method you choose affects how the final scalloped border sits.
Round 4 :
After joining, block the entire strip gently to flatten joins. Pin corners and edges to a long rectangular shape that is straight. Let dry fully before adding outer border to prevent puckering.
— Outer Scalloped Border (All Around) :
Round 1 :
With Purple and RS facing, join at a corner with sl st. Ch 1, sc evenly along the short edge (end of square), placing 3 sc in corner to round it. Work sc across each joining seam too. Continue around the entire strip working 3 sc in each outer corner (there will be 2 extreme corners at very ends of runner and gentle curve where squares join). Join with sl st. (Stitch count variable; keep even tension)
Round 2 :
Ch 3 (counts as dc), *sk 2 sc, 5 dc shell in next sc, sk 2 sc, dc in next 2 sc* repeat across each side; in corner sc groups work (2 dc, ch 2, 2 dc) in corner to maintain shape. Join to top ch-3. (This creates scallops along the outer edge)
Info :
Count stitches across a single square side before working shells so you place an equal number of shells per side. Adjust spacing slightly if needed. Take care around seams between squares to maintain shell spacing so scallops look continuous along the runner.
Round 3 :
Ch 1, sc in each dc and in shell centers work 5 sc across to reduce bulk; at corner clusters work 3 sc to hold corner. Join. This tidies the scallop edges.
Round 4 :
Ch 1, *in each shell base work (sl st, ch 3, 4 dc) to create a pointed scallop* repeat around. Work 3 sc in corners. Join and fasten off. Weave ends. Optional: Repeat an additional decorative round of 4 dc shells to make scallops larger.
Info :
For a fuller scallop like the photo, add one more shell round: ch 3, 5 dc in base of previous scallop, ch 1 between shells. This deepens the scallop effect. Adjust to taste.
— Decorative Rows & Embellishments :
Round 1 :
If you wish to add a raised ridge between squares (as visible in the runner image), work an accent ridge round before the outer scallop: join Purple along seams at the center line between squares. Ch 1, sc across center seam spacing 1 sc per previously visible seam stitch; work an additional sc row on both sides of seam to create a subtle frame. Join and fasten off.
Info :
This small ridge makes each square feel framed and highlights the candy corn motif. Use this if you want a more defined grid between squares before adding the scalloped border.
— Finishing Touches :
Round 1 :
Weave in all ends using a yarn needle. Tuck ends into the back of shells and clusters so they are not visible from RS. Trim ends close after weaving back at least 2-3 cm into fabric.
Round 2 :
Lightly steam or wet-block the entire runner, shaping scallops evenly. Lay flat until completely dry. If you prefer a stiffer runner, apply diluted fabric stiffener sparingly to scallops only; test on a scrap first.
Info :
When checking final dimensions, the runner pictured is approximately 6.5" (16.5cm) wide and 36-42" (91-107cm) long with six squares. You may add or subtract squares to change length. The width is determined by the square size; to widen use larger hook or bigger rounds when squaring up.
— Sizing & Adjustments :
Round 1 :
To make the runner longer, make additional candy-corn squares and join them the same way. To make it narrower/wider, adjust the number of dc in the squaring rounds (Rounds 8-9 of square) to achieve your preferred square width. Keep corner clusters consistent so joining and scallops align.
Info :
If using a lighter or heavier yarn, change hook size accordingly. For a tighter, smaller square, drop down one hook size; for a softer, drapier square, increase one hook size. Always block squares to standardized dimensions prior to joining for best outcomes.
— Troubleshooting & Tips :
Info :
If your squares pucker around the candy corn, check tension during color changes — avoid pulling color too taut. If corners flare, reduce increases on squaring rounds or use ch-1 in corners temporarily to ease the fabric. When spacing shells for the scallop border, count stitches per side and divide by number of shells you want to keep even spacing.
Info :
Keep a sample square to test border stitches and spacing before applying to the full runner. This avoids redoing the whole border if you need to adjust shell counts or spacing for even scallops.
This purple granny-square candy-corn runner is a charming seasonal accent that brings a handmade touch to autumn gatherings. Each square combines bright candy-corn colors and classic granny texture for a cheerful, cohesive look. The scalloped border gives the piece a polished finish that looks great on a table or at a picnic. 🌾🧶 Enjoy making each square and watching the runner grow — it’s perfect for gifting or seasonal decorating. Happy stitching! 🎃