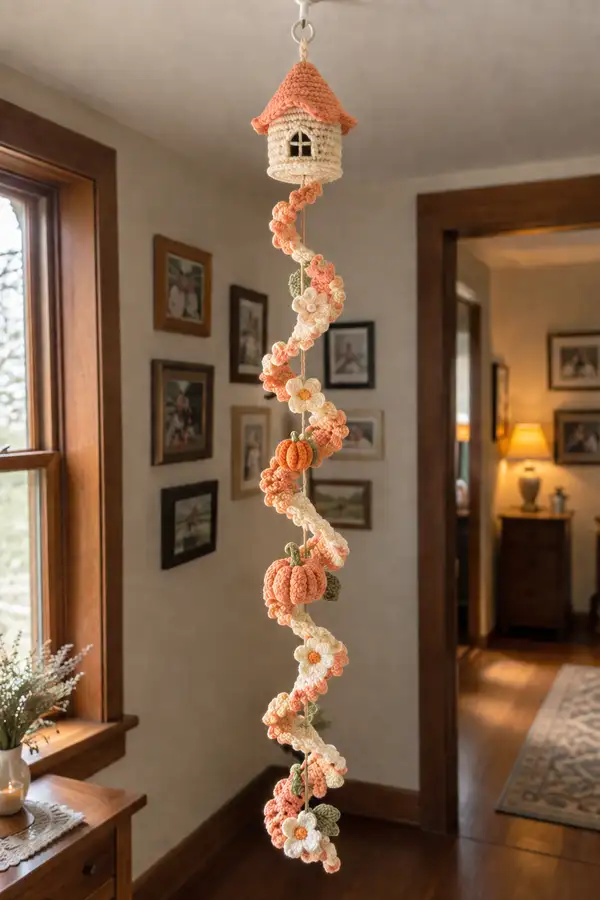
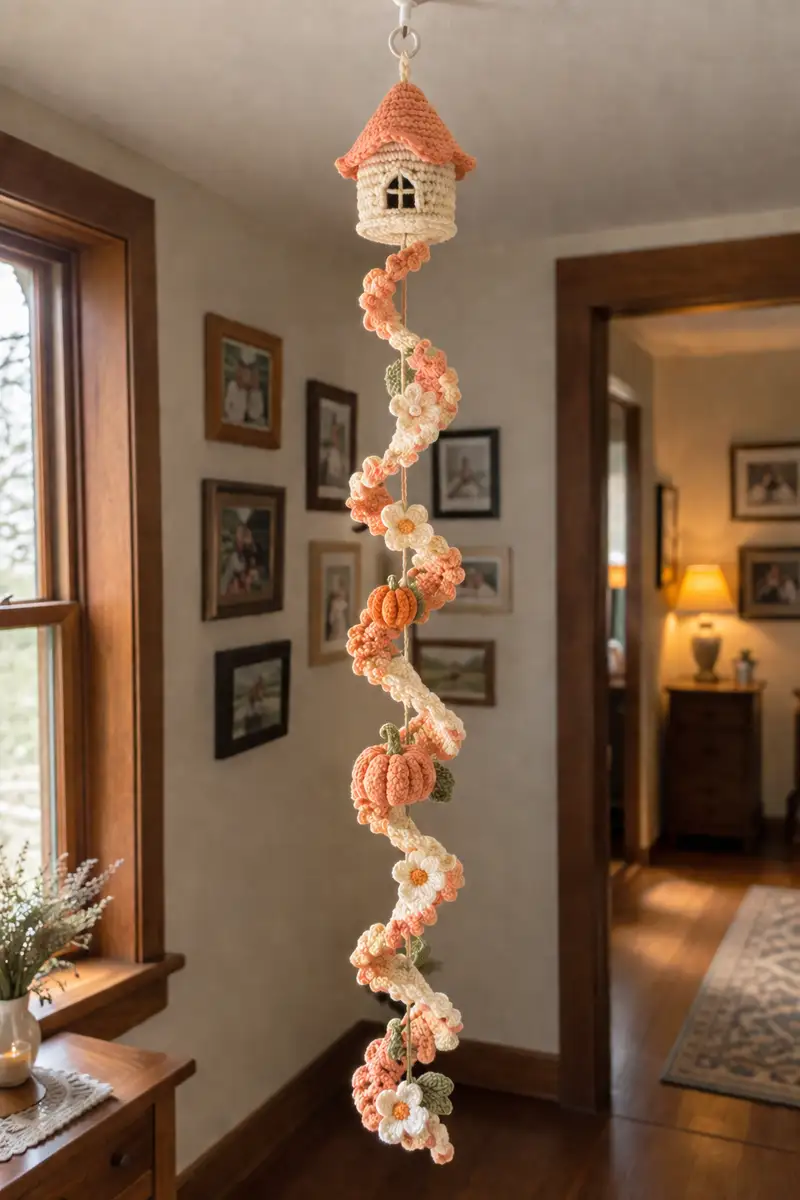
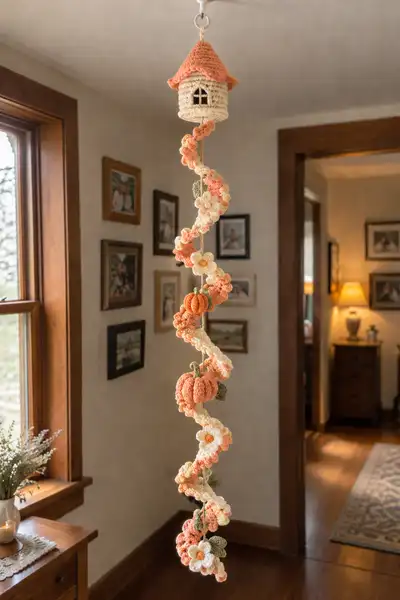
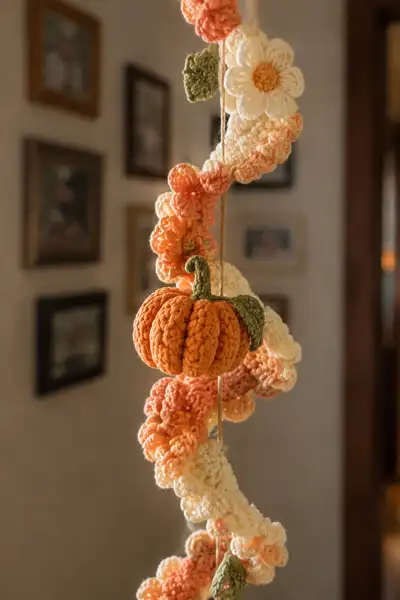
A whimsical hanging spiral garland featuring a tiny cream house with a peachy scalloped roof, cascading spiral ruffles, plush pumpkins, and layered daisies. This decorative mobile is full of textured stitches, gentle color changes in peach and cream, and leafy accents—perfect for autumn decor or a cozy corner. The pieces are worked in worsted-weight yarn with thoughtful stuffing and assembly instructions to make a sturdy, long-lasting display.
Progress Tracker
0% Complete
— Tiny House Top (Roof & Body) :
Overview :
Make 1 tiny house topper that serves as the spiral garland anchor. The house has two parts: a cylindrical cream body and a scalloped peach roof. Work roof in peach, body in cream. I recommend making the roof and body separately and sewing together; add a hanging loop at the crown.
Materials :
Cream yarn for body, peach yarn for roof, 4.0mm hook, stuffing, small scrap black yarn for window cross, tapestry needle.
Roof Round 1 :
6 sc in mr (6)
Roof Round 3 :
(1 sc, 1 inc) x 6 (18)
Roof Round 4 :
(2 sc, 1 inc) x 6 (24)
Roof Round 5 :
(3 sc, 1 inc) x 6 (30)
Info :
Switch to 4.0mm hook if you prefer a slightly looser roof texture. Keep stitches neat—they create the cone shape.
Roof Round 6 :
(4 sc, 1 inc) x 6 (36)
Roof Round 7 :
(5 sc, 1 inc) x 6 (42)
Roof Round 8 :
(6 sc, 1 inc) x 6 (48)
Roof Round 9-14 :
1 sc in each st (48)
Info :
These even rounds build the cone height. Try on a small stuffing insert to test the cone curvature. If you want a pointier roof, stop increases earlier and add more even rounds.
Roof Round 15 :
(6 sc, 1 dec) x 6 (42)
Roof Round 16 :
(5 sc, 1 dec) x 6 (36)
Roof Round 17 :
(4 sc, 1 dec) x 6 (30)
Roof Round 18 :
(3 sc, 1 dec) x 6 (24)
Info :
Lightly stuff the roof crown and leave a long tail for sewing the roof to the body. Fasten off and weave in the initial tail so the triangle stays closed at the top.
Roof Brim Round 1 :
Join peach around cast-off edge. *Ch2, 3 dc in same st, skip 2 sts, sl st in next st; rep from * around to make scallops (approx 12 scallops). Fasten off (variable count depending on scallop spacing).
Info :
Stitch counts for scallops depend on roof final count; aim for evenly spaced scallops around the base to create the wavy brim seen in the photos.
House Body Round 1 :
With cream yarn: 6 sc in mr (6)
House Body Round 2 :
6 inc (12)
House Body Round 3 :
(1 sc, 1 inc) x 6 (18)
House Body Round 4 :
(2 sc, 1 inc) x 6 (24)
House Body Round 5 :
(3 sc, 1 inc) x 6 (30)
House Body Round 6 :
(4 sc, 1 inc) x 6 (36)
House Body Round 7-16 :
1 sc in each st (36)
Info :
Work cylindrical rounds even to build the wall of the house. At rounds 9-10 mark the window position so you can leave a small opening or embroider the window after finishing.
House Body Round 17 :
(4 sc, 1 dec) x 6 (30)
House Body Round 18 :
(3 sc, 1 dec) x 6 (24)
Info :
Do NOT close off the body; leave a 10-12cm opening to insert the roof later and to allow a hanging loop. Fasten off leaving a long tail for sewing. Lightly stuff the house body only at the top so the house keeps its cylinder shape but remains light.
Window Details :
Use black or dark brown scrap yarn to embroider a small cross window across two rounds of the house body—make a small square approx 6-8 sts wide. Stitch the window from inside to keep working edge tidy.
Assembly Info :
Sew roof to body: insert the roof crown inside the body opening and whipstitch around the base. Make a small loop of cream yarn at the crown before closing to create the hanging loop. Reinforce with several passes for durability.
— Spiral Ruffle Strip (Main Body of Garland) :
Overview :
The spiral is a long vertical spiral strip built by working a long foundation chain, joining in the round to form a tube, and then adding repeated ruffle clusters along alternating sides to create a spiral. You can vary the finished length by repeating the spiral motif sequence. Below we provide a 40-round sequence that yields a 30-36" spiral when worked with worsted yarn and a 4.0mm hook.
Spiral Base Round 1 :
Ch 140 (or desired length in chains for full-length spiral). Turn in circle by joining with sl st to first ch to form a large loop. Ensure chain not twisted.
Spiral Base Round 2 :
Ch1, 1 sc in each ch around, join with sl st (140)
Info :
Work loosely enough to bend the loop slightly; this loop will form the core axis. Use stitch marker at the joining point to track the starting place.
Spiral Round 3 :
Ch1, 1 sc in each st BLO around, join (140) — this creates a slightly raised ridge to seat ruffles.
Spiral Round 4 :
Ch2, *5 dc in next st, sk 3, sl st in next st; rep from * around to create spaced scallops. Join. (approx 35 scallops)
Info :
Scallops will be the base for the spiral clusters. If you choose denser ruffles, work 7 dc per scallop and sk 2 sts between.
Spiral Round 5 :
1 sc in each st around (140)
Spiral Round 6 :
Alternate side shells: *ch2, (3 dc, ch2, 3 dc) in next st, sk 4; rep around to create larger petals alternating sides. Join.
Info :
To form the spiral effect, work larger shell clusters on one side for three repeat sections, then switch to the opposite side. The pattern below describes a 40-round repeat where odd-numbered decoration rounds go to the left and even-numbered go to the right.
Spiral Round Sequence 7-46 :
Repeat the following 20-round decoration sequence twice (40 rounds total). Each 2-round block is: (A) Decorative shell cluster round on one side, (B) Even round of sc to secure and offset the clusters. Example: Round A: work 3dc clusters into every 6th stitch on the right side; Round B: 1 sc in each st rounding the row. Alternate side every subsequent A round to create a gradual spiral. Continue until desired length is reached.
Info :
For every 4-5 decoration rounds, switch color gently by changing to peach or a variegated peach-cream to create the multi-tonal effect seen. Carry unused yarn inside the tube if you prefer not to have many ends.
Spiral Last Rounds 47-50 :
Work 1 sc in each st for 4 rounds to finish the strip edge neatly. Fasten off leaving long tail for securing to house bottom and for hanging. Press gently with steam if needed to relax stitches.
Info :
If you prefer a tighter spiral, shorten the foundation chain to 100-120 and repeat decoration sequence fewer times. For a longer spiral, extend the chain and add repeat sequences.
— Pumpkin (Make 3 small/medium pumpkins) :
Overview :
Each pumpkin is a small stuffed ball with deep ridges created by post stitches and segmented with surface embroidery or construction picots. Work in peach/orange. Make 3 pumpkins: 2 medium and 1 small for the spiral composition.
Pumpkin Round 1 :
6 sc in mr (6)
Pumpkin Round 2 :
6 inc (12)
Pumpkin Round 3 :
(1 sc, 1 inc) x 6 (18)
Pumpkin Round 4 :
(2 sc, 1 inc) x 6 (24)
Pumpkin Round 5 :
(3 sc, 1 inc) x 6 (30)
Info :
At the end of Round 5 you have the widest part. The pumpkin will get its ridges using post stitches and later gathering.
Pumpkin Round 6 :
1 sc in each st around (30)
Pumpkin Round 7 :
1 sc in each st BLO (30) — this creates a subtle edge for ridging
Pumpkin Round 8 :
Using fpdc/fpdc stitches: *fpdc around next st, bpdc around next st; rep around to create alternating post ridges (30)
Info :
Alternatively, you can use sc and hdc in the round to vary height of ridges. If doing post stitch method, maintain consistent tension to produce even ribs.
Pumpkin Round 9-12 :
Work 1 sc in each st for 4 rounds (30) to build pumpkin height. Stuff firmly now to create plump body. Add small amounts of fiberfill gradually and press to shape ribs.
Pumpkin Round 13 :
(3 sc, 1 dec) x 6 (24)
Pumpkin Round 14 :
(2 sc, 1 dec) x 6 (18)
Info :
Gently continue stuffing as you decrease. For a defined pumpkin look, leave the stuffing slightly fuller in the middle.
Pumpkin Round 15 :
(1 sc, 1 dec) x 6 (12)
Pumpkin Round 16 :
6 dec (6). Fasten off leaving ~30cm tail for gathering and sewing. Thread yarn through remaining 6 sts and pull closed; secure firmly.
Pumpkin Ridges & Finish :
Use a long length of yarn (same color) and large tapestry needle to create the vertical segment ridges. Push needle from bottom center through pumpkin to top center, pull yarn taut, and return to bottom center; repeat 6-8 times evenly spaced around to create 6-8 deep ribs. Knot off inside. Add a small crocheted stem: Chain 6, sl st back across chain to create a short tube, fasten off and sew to top. Add small leaf as described in leaf section and sew to stem base.
Info :
For varying sizes, adjust number of rounds before decreasing and add fewer or more ribs for visual interest. Slightly flatten the bottom when stuffing so pumpkin sits well along the spiral when attached.
— Daisy Flower (Make 8-10) :
Overview :
Layered daisy with a tight center and five rounded petals. Work centers in mustard/yellow and petals in cream with a peach shading edge if desired.
Daisy Round 1 :
6 sc in mr (6)
Daisy Round 2 :
6 inc (12)
Daisy Round 3 :
1 sc in each st around (12)
Daisy Round 4 :
Switch to petal color. *Ch3, 3 dc in next st, ch3, sl st in same st to form petal base; rep around to form 5 petals (work petals into every other st for 5 large petals). Fasten off, weave ends.
Info :
For fuller petals, use ch4 and 5 dc clusters. Make contrast ring by embroidering a blunt yellow French knot or using small embroidered stitches in center if you prefer no safety beads.
Daisy Layer Round :
Optional: add a second row of smaller petals behind the first by reinserting hook in back loops and working small picot petals to create layered look. Fasten off and leave planting tail for sewing to spiral.
— Leaf (Make 10-12) :
Leaf Round 1 :
Ch 6. Row 1: sc in 2nd ch from hook, sc, hdc, dc, hdc; now work down the opposite side: sc, sc; sl st in last st, fasten off (approx 10 sts). Shape leaf by folding and sewing a central vein.
Info :
For more detail, embroider a central vein with a contrasting green using backstitch or add a small post stitch ridge along the center using a tapestry needle and yarn.
Leaf Alternative (Reverse Side Vein) :
Make 1 sc in each st along both sides for a plumper leaf, slightly increase at the center for a more rounded silhouette. Fasten off leaving tail for sewing.
— Small Puff Clusters & Accent Motifs (Make several) :
Puff Cluster Round 1 :
Ch5, join to form small loop. Ch1, work 8 sc into loop, sl st to join (8)
Puff Cluster Round 2 :
Ch2, *(yarn over, insert, pull up lp) x 3, yoh and draw through all loops to make a 3-loop puff, sl st to secure; rep into each st; fasten off.
Info :
Use puff clusters in two sizes by varying the number of loops per puff to add visual texture to spiral. Save several in peach and cream.
— Stem/Twine & Hanging Loop :
Material :
Natural twine or cotton cord, length equal to final desired hanging length plus 10cm for tying. Tie a small loop at the top to hang on a hook; secure the bottom with a knot to anchor last motif.
Attaching Twine to House :
Before sewing roof to body, thread the twine through the roof crown loop and position loop inside; then sew the roof to the house body securing twine in place. Knot twine inside roof area before finishing to anchor. Alternatively, use a small metal hoop attached to the crown for additional support.
Info :
Use a second inner cord if you plan to add heavier elements or want extra stability. Thread both cords through roof before closing.
— Final Assembly & Spacing (Layout & Sewing) :
Info :
Lay the spiral flat on a table and arrange pumpkins, daisies, leaves and puff clusters in the order you prefer. Take photographs or mark positions with pins to maintain balance when hanging. Aim for the larger pumpkin near the lower-middle of the spiral as an anchor, daisies sprinkled between pumpkin cluster points, and small leaves scattered to echo the peach/green palette.
Assembly Step 1 :
Secure the house topper to the top of the spiral: position house bottom over the top few rounds of spiral strip, fold the spiral end into the interior and whipstitch around the seam so the house sits level and distributes weight evenly.
Assembly Step 2 :
Sew pumpkins to the twine and spiral: for each pumpkin, use long tail to stitch pumpkin to twine at the desired vertical position. Insert a few stitches through the back of the pumpkin into the spiral tube or tie around the twine for security. Reinforce with extra passes if the pumpkin is heavy.
Assembly Step 3 :
Sew daisies and puff clusters to the scalloped edges of the spiral. You can slip small stitches through the base of a scallop and through the flower center to anchor them so they cup the spiral edge like in the photo.
Assembly Step 4 :
Attach leaves in between flower clusters, tucking leaf stems under petals and securing with a few neat whipstitches. Make sure each leaf points outward to catch light and creates a layered look.
Assembly Step 5 :
Add small balancing stitches around the interior of the spiral to keep motifs from twisting. If needed, add a small weight near the bottom-most motif to ensure the garland hangs straight and the spiral remains taut.
Assembly Step 6 :
Weave in all tails carefully, trimming ends close to body but not into the stuffing. Test-hang the garland and make small adjustments to spacing before final secure knot at the bottom of the twine.
Finishing Info :
Spritz lightly and shape the scallops with your fingers. If using a variegated yarn, arrange color repeats so peach clusters appear interspersed with creamy sections for natural ombre. Enjoy hanging your spiral garland in a window or doorway.
This peach-and-cream spiral garland brings a little house-turned-hangout to your decor—soft pumpkins and daisies cascade in a whimsical spiral that charms every passerby. 🧶 Each part is a tiny project in itself, from the scalloped roof to the ribbed pumpkins, making the whole piece incredibly rewarding to assemble. Hang it in a doorway, a nursery nook, or near a window for a gentle seasonal touch. Happy stitching and enjoy the cozy glow this tiny home and its garden of motifs will bring! 🍂🎃